Attestation sign Windows drivers
This article describes how to sign a driver using attestation signing. For detailed information and requirements for attestation signing, see Windows 10 attestation signed drivers.
Important
As of March 1, 2023, attestation signed drivers targeting retail audiences are no longer published on Windows Update. Attestation signed drivers for testing scenarios are still supported when selecting CoDev or Test Registry Key / Surface SSRK options.
Prerequisites
Read and understand the requirements for Windows 10 attestation signed drivers.
Register for the Hardware Developer program. If you're not yet registered, follow the steps in How to register for the Microsoft Windows Hardware Developer Program.
You must have an Extended Validation (EV) code signing certificate. Check whether your organization already has a code signing certificate. If your company already has a certificate, have the certificate available. If your organization doesn't have a certificate, you need to purchase an EV certificate.
Follow the process described in Download kits and tools for Windows 10 to download and install the Windows Driver Kit (WDK).
(Optional) Download the echo driver sample that is used in this article.
Create the CAB file
In this section, we step through the process of creating a CAB files submission. We're using the echo driver sample to illustrate the process.
A typical CAB file submission must contain:
The driver itself, for example Echo.sys
The driver INF file that is used by the dashboard to facilitate the signing process.
The symbol file that is used for debugging information. For example, Echo.pdb. The .pdb file is required for Microsoft's automated crash analysis tools.
Catalog .CAT files are required and used for company verification only. Microsoft regenerates catalog files and replaces any catalog files that were submitted.
Note
Each driver folder in your CAB file must support the same set of architectures. For example, they must support x86, x64, or they all must support both x86 and x64.
Do not use UNC file share paths when referencing your driver locations (\\\server\share). You must use a mapped drive letter for the CAB to be valid.
To create the CAB file:
Gather the binaries to be signed into a single directory. In this example, we use
C:\\Echo.Open a Command Prompt window as Administrator.
Enter
MakeCab /?to view the MakeCab options:C:\Echo> MakeCab /? Cabinet Maker - Lossless Data Compression Tool MAKECAB [/V[n]] [/D var=value ...] [/L dir] source [destination] MAKECAB [/V[n]] [/D var=value ...] /F directive_file [...] source File to compress. destination File name to give compressed file. If omitted, the last character of the source file name is replaced with an underscore (_) and used as the destination. /F directives A file with MakeCAB directives (may be repeated). Refer to Microsoft Cabinet SDK for information on directive_file. /D var=value Defines variable with specified value. /L dir Location to place destination (default is current directory). /V[n] Verbosity level (1..3).Prepare a cab file DDF input file. For our Echo driver, it might look something like this:
;*** Echo.ddf example
;
.OPTION EXPLICIT     ; Generate errors
.Set CabinetFileCountThreshold=0
.Set FolderFileCountThreshold=0
.Set FolderSizeThreshold=0
.Set MaxCabinetSize=0
.Set MaxDiskFileCount=0
.Set MaxDiskSize=0
.Set CompressionType=MSZIP
.Set Cabinet=on
.Set Compress=on
;Specify file name for new cab file
.Set CabinetNameTemplate=Echo.cab
; Specify the subdirectory for the files.
; Your cab file should not have files at the root level,
; and each driver package must be in a separate subfolder.
.Set DestinationDir=Echo
;Specify files to be included in cab file
C:\Echo\Echo.Inf
C:\Echo\Echo.Sys
Enter the following command to create the CAB file.
C:\Echo> MakeCab /f "C:\Echo\Echo.ddfThe output of MakeCab should display the number of files in the created CAB file. In this case, there should be two files.
C:\Echo> MakeCab /f Echo.ddf
Cabinet Maker - Lossless Data Compression Tool

17,682 bytes in 2 files
Total files:              2
Bytes before:        17,682
Bytes after:          7,374
After/Before:            41.70% compression
Time:                     0.20 seconds ( 0 hr  0 min  0.20 sec)
Throughput:              86.77 Kb/second
Locate the CAB file in the
Disk1subdirectory. You can select the CAB file in File Explorer to verify that it contains the expected files.
Sign the CAB file with your EV certificate
To sign the CAB file with your EV certificate, use the process recommended by the EV certificate provider. For example, to sign your CAB file with an SHA256 Certificate/Digest Algorithm/Timestamp, enter the following command:
C:\Echo> SignTool sign /s MY /n "Company Name" /fd sha256 /tr http://sha256timestamp.ws.symantec.com/sha256/timestamp /td sha256 /v "C:\Echo\Disk1\Echo.cab"Important
Remember to use industry best practices to manage the security of the EV code signing process.
Submit the EV signed Cab file using the Partner Center
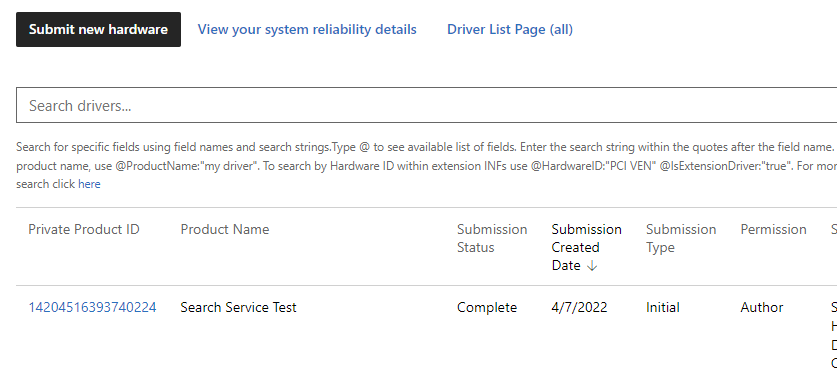
Go to Partner Center hardware dashboard and sign in using your credentials.
Select Submit new hardware.

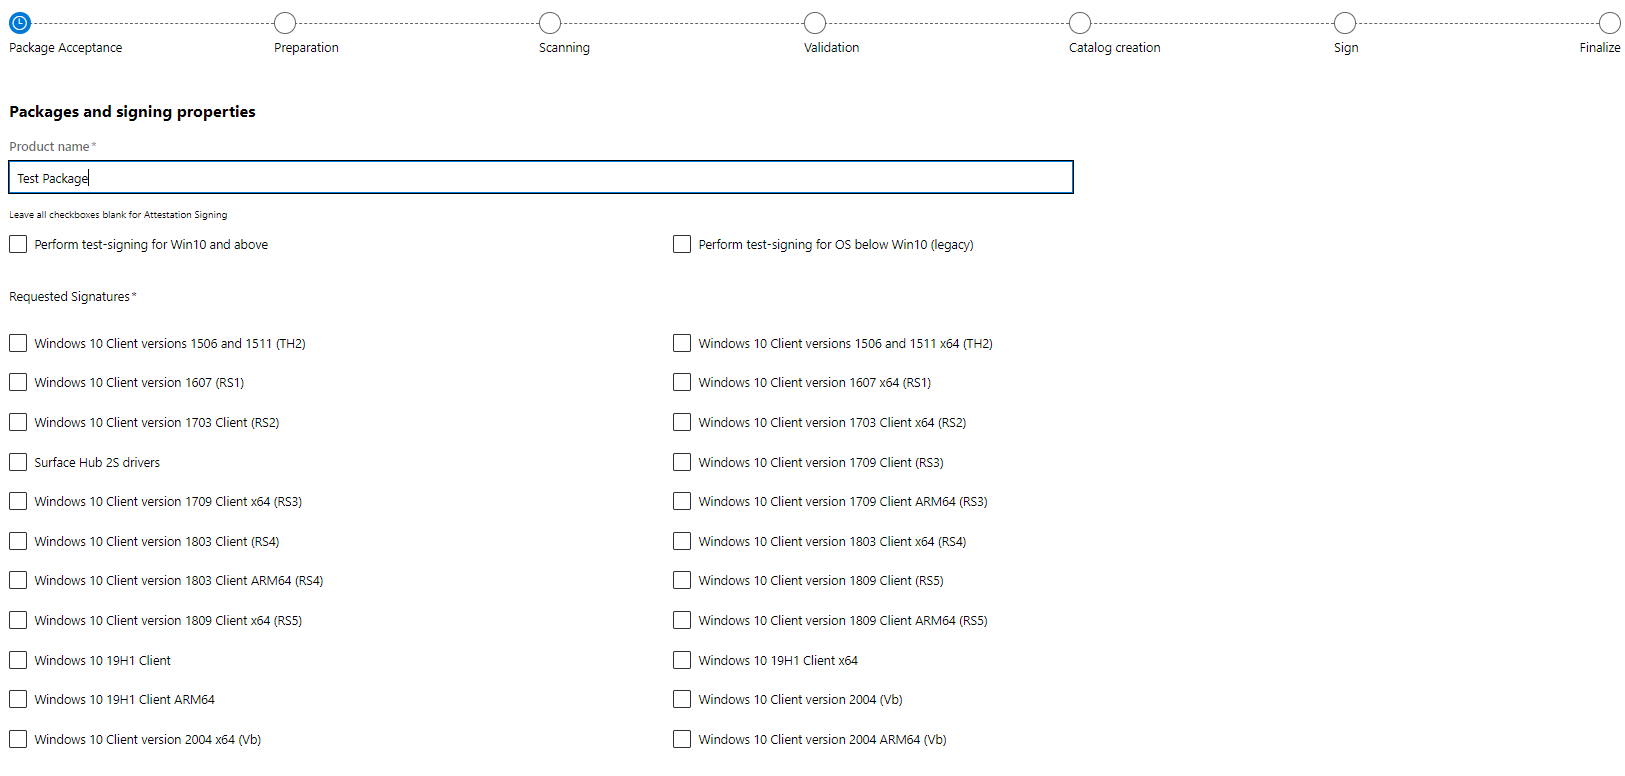
In the Packages and signing properties section, enter a product name for your driver submission. This name can be used to search for and organize your driver submissions.
Note
If you share your driver with another company, they will see this name.
Leave both test-signing options unchecked.
For Requested Signatures, select which signatures you wish to include in your driver package.

Move down through the page, and select Submit.
When the signing process is complete, download your signed driver from the hardware dashboard.
Validate that the driver was properly signed
Complete the following steps to ensure that the driver was properly signed.
After you download the submission file, extract the driver file.
Open a Command Prompt window as Administrator.
Enter the following command to verify that the driver was signed as expected.
C:\Echo> SignTool verify Echo.SysTo list additional information and have SignTool verify all signatures in a file with multiple signatures, enter the following command:
C:\Echo> SignTool verify /pa /ph /v /d Echo.SysTo confirm the EKUs of the driver complete the following steps.
Open Windows Explorer and locate the binary file. Select and hold (or right-click) the file and select Properties.
On the Digital Signatures tab, select the listed item in the Signature list.
Select Details, and then select View Certificate.
On the Details tab, select Enhanced Key Usage.
When the driver is resigned by the dashboard, the following process is used:
- Appends a Microsoft SHA2 embedded signature.
- If the driver binaries are embedded signed by the customer with their own certificates, those signatures aren't overwritten.
- Creates and signs a new catalog file with an SHA2 Microsoft certificate. This catalog replaces any existing catalog provided by the customer.
Test your driver on Windows
Use the following instructions to install the sample driver.
Open a Command Prompt window as Administrator. Go to your driver package folder, and enter the following command.
C:\Echo> devcon install echo.inf root\ECHOConfirm that the driver install process doesn't display the "Windows can't verify the publisher of this driver software." Windows security dialog box.
Create a submission with multiple drivers
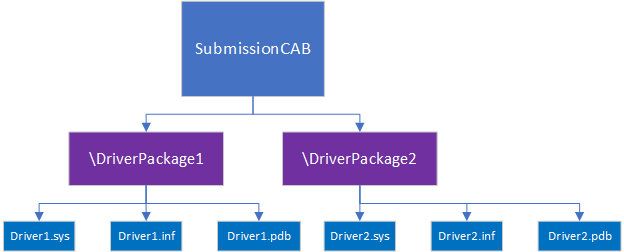
To submit multiple drivers at the same time:
Create a subdirectory for each driver.

Prepare a CAB file DDF input file that references the subdirectories. It might look something like this:
;*** Submission.ddf multiple driver example
;
.OPTION EXPLICIT     ; Generate errors
.Set CabinetFileCountThreshold=0
.Set FolderFileCountThreshold=0
.Set FolderSizeThreshold=0
.Set MaxCabinetSize=0
.Set MaxDiskFileCount=0
.Set MaxDiskSize=0
.Set CompressionType=MSZIP
.Set Cabinet=on
.Set Compress=on
;Specify file name for new cab file
.Set CabinetNameTemplate=Echo.cab
;Specify files to be included in cab file
; First Driver
.Set DestinationDir=DriverPackage1
C:\DriverFiles\DriverPackage1\Driver1.sys
C:\DriverFiles\DriverPackage1\Driver1.inf
; Second driver
.Set DestinationDir=DriverPackage2
C:\DriverFiles\DriverPackage2\Driver2.sys
C:\DriverFiles\DriverPackage2\Driver2.inf