Upload organizational data (subsequent upload)
If organizational data has already been uploaded into the advanced insights app, you as an admin can use the information in this article to:
- Edit existing data
- Replace existing data
- Delete organizational attributes and employees from existing data
Complete these steps after preparing the data as described in Prepare organizational data.
Important
Only follow these steps if this is not the first time you’ve uploaded organizational data. If this is your first upload, follow the steps in Upload organizational data (first upload).
For customers coming over from our legacy app:
If you're migrating from the legacy advanced insights app, the data you've uploaded to the legacy app will be automatically available in the new app. After you've started using the new app to upload your data, make all subsequent uploads here. Continuing to use the new app prevents data inconsistency.
Workflow
After you prepare the source data, the uploading process follows these steps, which are described in the following sections:
You upload the .csv file.
You map fields.
The app validates your data. (If validation isn’t successful, you can choose from a few options described in Validation fails.)
The app processes your data. (If processing isn’t successful, you can choose from a few options described in Processing fails.)
After the data successfully validates and processes, the overall data-upload task is complete.
To update, replace, or delete data
All three actions share the same two first steps:
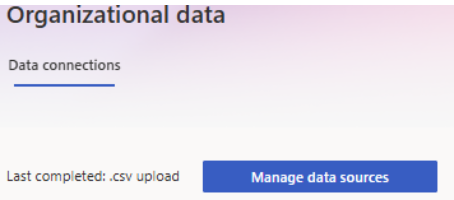
Select either the Start button on the Data hub tab or Manage data sources button on the Data connections tab.
The resulting page lists four options:
- Add or edit data
- Delete optional fields
- Delete employee data
- Replace all data
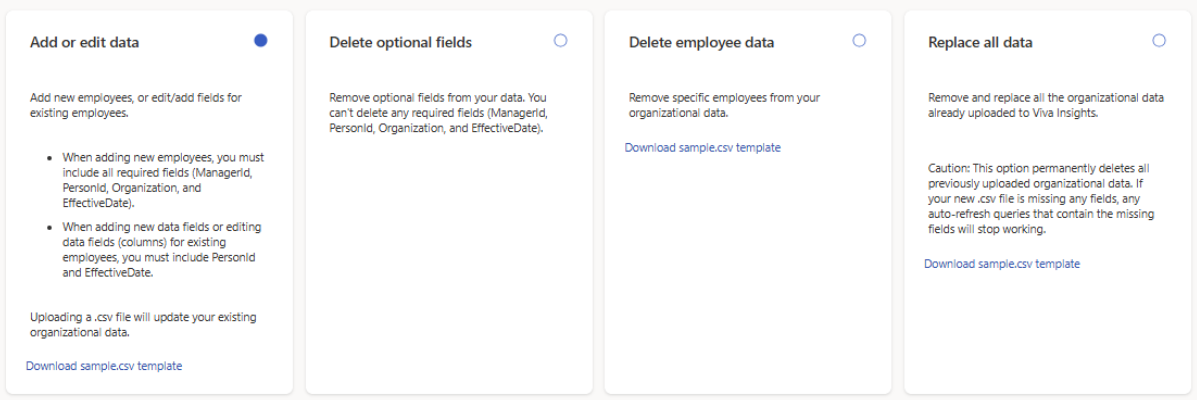
Make your selection based on what you want to do, then navigate to the corresponding section below for step 3.
Action Section Comments Add new employees (rows) Update existing organizational data Your file includes needs to include all required fields (PersonId, ManagerId, and Organization) and other optional fields. Add new fields (columns) Update existing organizational data Your file needs to include PersonId and other optional fields. Edit fields (columns) Update existing organizational data Your file needs to include PersonId and other optional fields. Delete attributes Delete optional fields from existing organizational data You can only delete optional attributes. If you delete fields used in autorefreshing queries, those queries will be disabled. Replace all existing organizational data Replace existing data This option permanently deletes all organizational data you’ve uploaded in the past. If your file is missing any fields, autorefreshing queries that use those fields will be disabled. Remove employees from organizational data Delete specific employees from existing organizational data This option lets you delete specific employees from your organizational data using a .csv file.
Update and replace existing data
Update existing data
File upload
Under Upload file, select the file you want to upload, then select Next.
Now you're ready to map fields. For your next steps, go to Field mapping.
Example: adding a new data column
Let’s say you want to upload a new engagement score value for each employee. You’ve already uploaded the recommended 13 months or more of snapshot data, which included the required columns for all employees; now you want to apply the engagement score value to all of that historical data. You’d choose the Update existing organizational data option. To upload your new EngagementScore data column, you’d need to upload the file that contains it.
Important steps for editing org attributes
If you want to edit past attributes, your .csv file must include updated values with the correct EffectiveDates, to ensure the updated values apply over the correct time period.
For example, consider this initial state of org data within Viva Insights:
| StartDate | EndDate | PersonId | ManagerId | BadgeData | Comments |
|---|---|---|---|---|---|
| 01/01/0001 | 09/01/2023 | W@contoso.com | R@contoso.com | - | In this period, BadgeData is - |
| 09/01/2023 | 09/08/2023 | W@contoso.com | R@contoso.com | 102 | In this period, BadgeData is 102 |
| 09/08/2023 | 12/31/9999 | W@contoso.com | R@contoso.com | 106 | In this period, BadgeData is 106 |
In this scenario, if you want to edit the ManagerId value beginning on 09/06/2023 and you want the new value to apply indefinitely going forward, you’ll need to update the ManagerId for every EffectiveDate starting 09/06/2023 from all past incremental upload(s) even if the ManagerId field was not part of those incremental upload(s).
Your new upload, therefore, would look like this:
| EffectiveDate | PersonId | ManagerId |
|---|---|---|
| 09/06/2023 | W@contoso.com | D@contoso.com |
| 09/08/2023 | W@contoso.com | D@contoso.com |
With that upload, your org data would then look like this. Note that for both 09/06/2023 and 09/08/2023, the ManagerId was updated to “D.”
| StartDate | EndDate | PersonId | ManagerId | BadgeData | Comments |
|---|---|---|---|---|---|
| 01/01/0001 | 09/01/2023 | W@contoso.com | R@contoso.com | - | |
| 09/01/2023 | 09/06/2023 | W@contoso.com | R@contoso.com | 102 | |
| 09/06/2023 | 09/08/2023 | W@contoso.com | D@contoso.com | 102 | This row was added, but it has an EndDate of 09/08/2023 because we have an existing future entry. |
| 09/08/2023 | 12/31/9999 | W@contoso.com | D@contoso.com | 106 |
Or, let’s imagine a different scenario. If you want to change the ManagerId only for the dates between 09/06/2023 and 09/08/2023, this would be your upload:
| EffectiveDate | PersonId | ManagerId |
|---|---|---|
| 09/06/2023 | W@contoso.com | D@contoso.com |
After that upload, your org data would look like this. Note that after 09/08/2023, the ManagerId is still “R,” because no change was made for the past entry on 09/08/2023.
| StartDate | EndDate | PersonId | ManagerId | BadgeData | Comments |
|---|---|---|---|---|---|
| 01/01/0001 | 09/01/2023 | W@contoso.com | R@contoso.com | - | |
| 09/01/2023 | 09/06/2023 | W@contoso.com | R@contoso.com | 102 | |
| 09/06/2023 | 09/08/2023 | W@contoso.com | D@contoso.com | 102 | This row was added, but it has an EndDate of 09/08/2023 because we have an existing future entry. |
| 09/08/2023 | 12/31/9999 | W@contoso.com | R@contoso.com | 106 |
Finally, if you don’t remember the previous values of the EffectiveDate field, you should delete the columns that need to be edited and upload the columns again with the updated values. Or, if there are multiple columns that need to be edited, you can also replace all past data with a new upload with the updated values.
Replace existing data
File upload
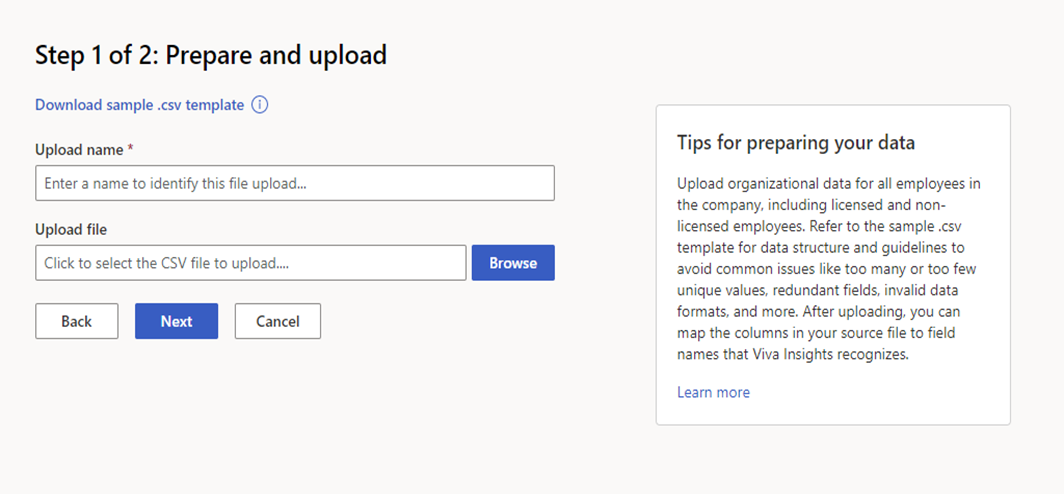
Enter an Upload name.
Under Upload file, select the .csv file you want to upload.
Make sure that the .csv file is:
UTF-8 encoded
Not open in a different program when you begin the upload process
Not larger than 1 GB
Note
To see the structure and guidelines for .csv files, and to avoid common issues during upload, you can download a template through the Download .csv template link.
Upload your file by selecting Next. If you need to cancel the upload, select Cancel.
Now you’re ready to map fields. For your next steps, go to Field mapping.
Delete optional fields from existing organizational data
- Name your delete action so you can refer to it later.
- Identify the attribute you want to delete, then check the corresponding box.
- The resulting screen lists which attributes have been deleted. Select Back to return to the Data hub.
The delete process is now complete.
Important
The following sections apply to upload and replace actions only.
Delete employees and data from existing organizational data
Select this option to remove organizational data you no longer need, or remove historical data for an employee so you can edit your data with a clean slate. After you remove the employees, you can upload a new file to add new data for the employees you deleted.
How to upload the file
Create a .csv file with the names of the employees you want to delete. The file should include a column named "PersonId," with the email address of each person you'd like to delete in each row of that column. For guidance, use this template file. Make sure the .csv file is:
- UTF-8 encoded
- Not open in a different program when you begin the upload process
- Not larger than 1 GB
Enter a Delete action name.
Under Upload a file with the employees you want to delete, select the .csv file.
To upload your file, select Submit. To cancel the upload, select Cancel.
The Import history table shows the status of your deletion.
- Select the download icon to download a list of employees deleted by the operation. You can access the download link for up to 30 days.
Field mapping
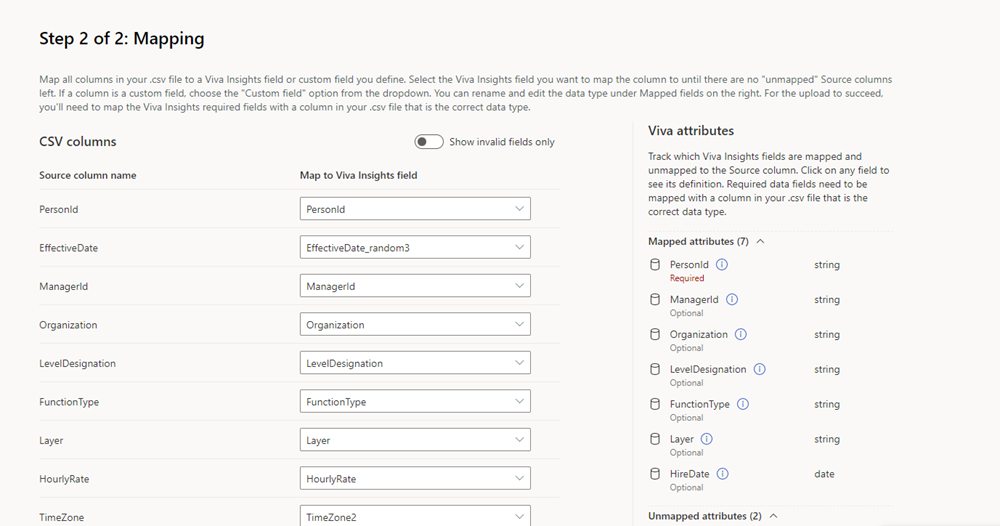
After you upload your file, you’ll see the field mapping page. To view insights from your data, you need to map fields (columns) from your .csv file to field names that the app recognizes.
There are two types of fields: System default and Custom.
System default (required or optional)
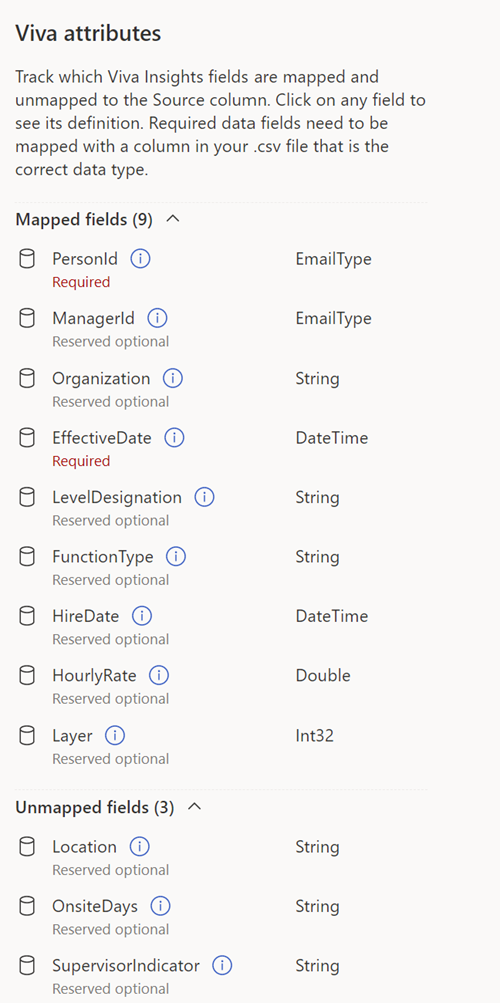
System default fields can be either required—which are PersonId, ManagerId, and Organization—or optional. These required and optional fields represent attributes that Viva Insights knows and uses in specific calculations beyond grouping and filtering.
Important
Every required field needs to have a valid, non-null value in every row. You need to map all required Viva Insights values, even if the column headers in your .csv files don’t exactly match the Viva Insights value name.
Optional fields are commonly encountered system fields that the app suggests for use. You don’t need to map optional fields if your organization doesn’t have data for them.
To find out whether a field is required or optional, refer to the Viva attributes section to the right of the mapping list. Required attributes have a “Required” label and optional attributes have an “Optional” label.
Custom
Custom fields are optional attributes you can create. The following section, step 5a, explains how to map and name a custom attribute.
To map fields
Follow the steps below to map your .csv data to Viva Insights attributes.
Important
All .csv header fields, which appear under Source column name, need to be mapped before you can advance to the next part of the upload process.
For each required Viva Insights field:
Find the corresponding column header under Source column name. To prevent a validation error later, make sure this column is the right data type.
Under the Map to Viva Insights field column, open the dropdown list and select the Viva Insights attribute that corresponds with the column header you identified in step a.
Tip
Hover over an attribute name to read its description.

If you’re updating data, you can choose to only see the new columns you’ve added or column headers you’ve changed. To do so, select the Show invalid fields only toggle.
Repeat steps 4a and 4b for custom and optional fields.
- To add a custom field, just include it as a column in your data file. The app will automatically assign it a name and map it. For this release of Viva Insights, all custom attributes are assigned a default name and can only be classified as String data types.
Important
Don't upload TimeZone as a column. You'll get an error.
- To add a custom field, just include it as a column in your data file. The app will automatically assign it a name and map it. For this release of Viva Insights, all custom attributes are assigned a default name and can only be classified as String data types.
After you map fields, the app validates and processes your data as described in the following sections. If validation and processing are successful, your input to the upload process is complete.
If expected columns are missing or excluded
For a query to run successfully, particular attributes (columns) need to be present in the organizational data. This requirement is also true for queries with the auto-refresh option turned on. If attributes (columns) that a query uses are missing from a data upload, the app will alert you. You’ll see a table that lists attribute fields and the queries those fields are used in, along with a warning message: “Proceeding will disable these queries. If an auto-refresh query that contains these fields is created while the function is in progress, it will also be disabled.”
After you review missing attributes:
- If you decide not to continue with the data upload or replacement, select Cancel. This button returns you to the field mapping page.
- If you decide to continue with data upload even though there are missing attributes, select Next. Note that this choice turns off auto-refresh for queries listed above. You can still access the results of the last runs of these queries.
Validation
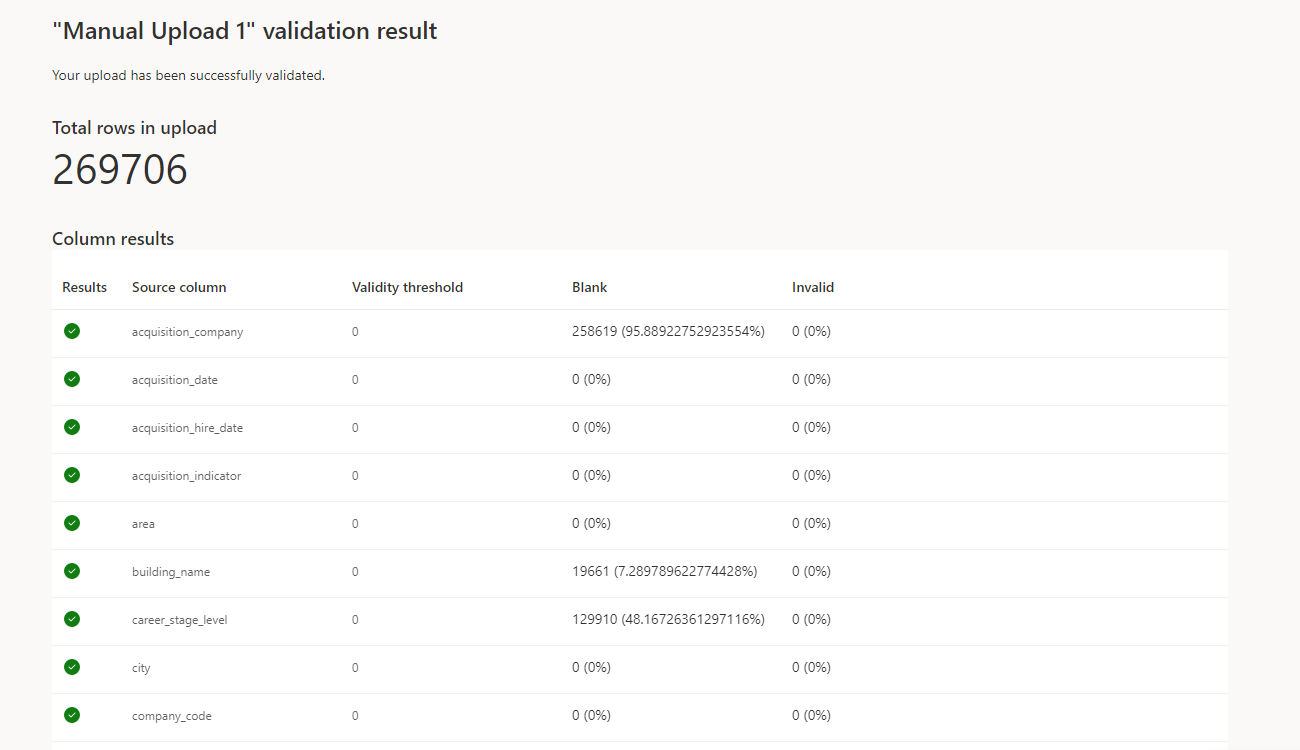
After you’ve mapped attributes, the app starts validating your data.
In most cases, file validation should complete quickly. If your organizational data file is large, validation could take up to one or two minutes.
After this phase completes, validation has either succeeded or failed.
For information about what happens next, go to the appropriate section:
Validation succeeds
After successful validation, Viva Insights starts processing your new data. Processing can take between a few hours and a day or so. During processing, you’ll see a “Processing” status on the Data connections > Upload or delete in progress table.
After processing completes, it has either succeeded or failed. Depending on the outcome, you’ll either receive a success notification or a failure notification in the top-right corner of the Data connections screen.
Processing succeeds
When processing succeeds, you’ll see a “Success” status in the Upload or delete history table. At this point, the upload process is complete.

Here's the typical amount of time needed for organizational data to be reflected after it's uploaded in the following experiences:
Success status shown in Data connections > Import history: A few hours
Data quality tab, flexible queries, and Power BI templates: One to two days
Leader/manager report in the Teams app: Next weekly refresh
After you receive the “Success” status, you can:
Select the view (eye) icon to see a summary of the validation results.
Select the mapping icon to see the mapping settings for the workflow.
Note
Each tenant can have only one upload in progress at a time. You need to complete the workflow of one data file, which means you either guide it to a successful validation and processing or abandon it, before you begin the workflow of the next data file. The status or stage of the upload workflow is shown on the Data connections tab.
Processing fails
If processing fails, you’ll see a failed status in the Upload or delete in progress table. Selecting the link in the status brings you to an explanation of the failure.
Select Edit or start new upload. This button lets you do the following things for the data file you uploaded earlier:
- Edit to add new rows or columns.
- Delete attributes.
- Replace existing file with a new file.
Note
Processing failures are generally due to backend errors. If you’re seeing persistent processing failures and you’ve corrected the data in your uploaded file, log a support ticket with us.
Validation fails
If data validation fails, you’ll see a new screen with a “Validation failed” error and some information about the failure. You can select the Cancel upload button if you don’t want to proceed with the upload process.
Before you make changes in the source file and try the upload again, you can select Download issues. This log file describes the problems in your data that might have caused the validation errors. Use this information to decide what to do next—fix the source data or change your mapping settings.
Guidelines for correcting errors in data
When any data row or column has an invalid value for any attribute, the entire upload will fail until you fix the source file (or you fix the attribute mapping).
To learn about formatting your file to prevent errors, refer to File rules and validation errors.
