Encodings and line endings
Special characters are commonly used to format code, file data, and program output. You might use the tab key to control spacing across a single line or apply a soft or hard line break to format multi-line data. Visual Studio interprets specific characters as line breaks or separators. The following table lists the recognized characters and their corresponding Unicode values:
| Character | Description | Unicode value |
|---|---|---|
| CR LF | Carriage return plus Line feed | 000D plus 000A |
| LF | Line feed | 000A |
| NEL | Next line | 0085 |
| LS | Line separator | 2028 |
| PS | Paragraph separator | 2029 |
When you copy text from another file or application, Visual Studio maintains the original encoding and line break characters in the copied value. For example, text copied from a Notepad file and pasted into a Visual Studio file use the original settings applied in Notepad. If you open a file that has unrecognized line break characters, Visual Studio might prompt you for instructions to normalize the inconsistent characters. You might also need to specify the type of line breaks to apply to the imported data.
Configure encoding for special characters
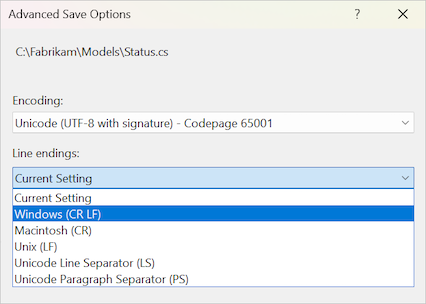
You can specify the type of line break characters to apply to your data with the Advanced Save Options dialog. Visual Studio applies your desired encoding when you save your project files:

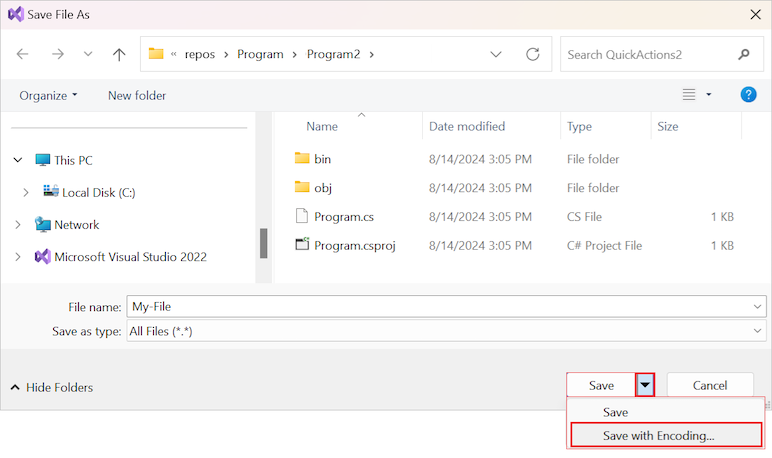
The Advanced Save Options dialog is available when you select File > Save <filename> As. In the Save File As dialog, expand the Save dropdown list and select Save with Encoding:

You can also place the Advanced Save Options command directly on the File menu for quick access:
- On the Visual Studio toolbar, select Tools > Customize.
- In the Customize dialog, select the Commands tab.
- Choose the Menu bar option, select File in the corresponding dropdown list, and then select Add Command.
- In the Add Command dialog, under Categories, select File.
- In the Commands list, select Advanced Save Options, and then select OK.
- In the Customize dialog, select the Advanced Save Options command and use the Move Up and Move Down actions to change the position of the command in the menu.
- Select Close to apply the menu change.
For more information, see Customize menus and toolbars.