Explore Dataflows Gen2 in Microsoft Fabric
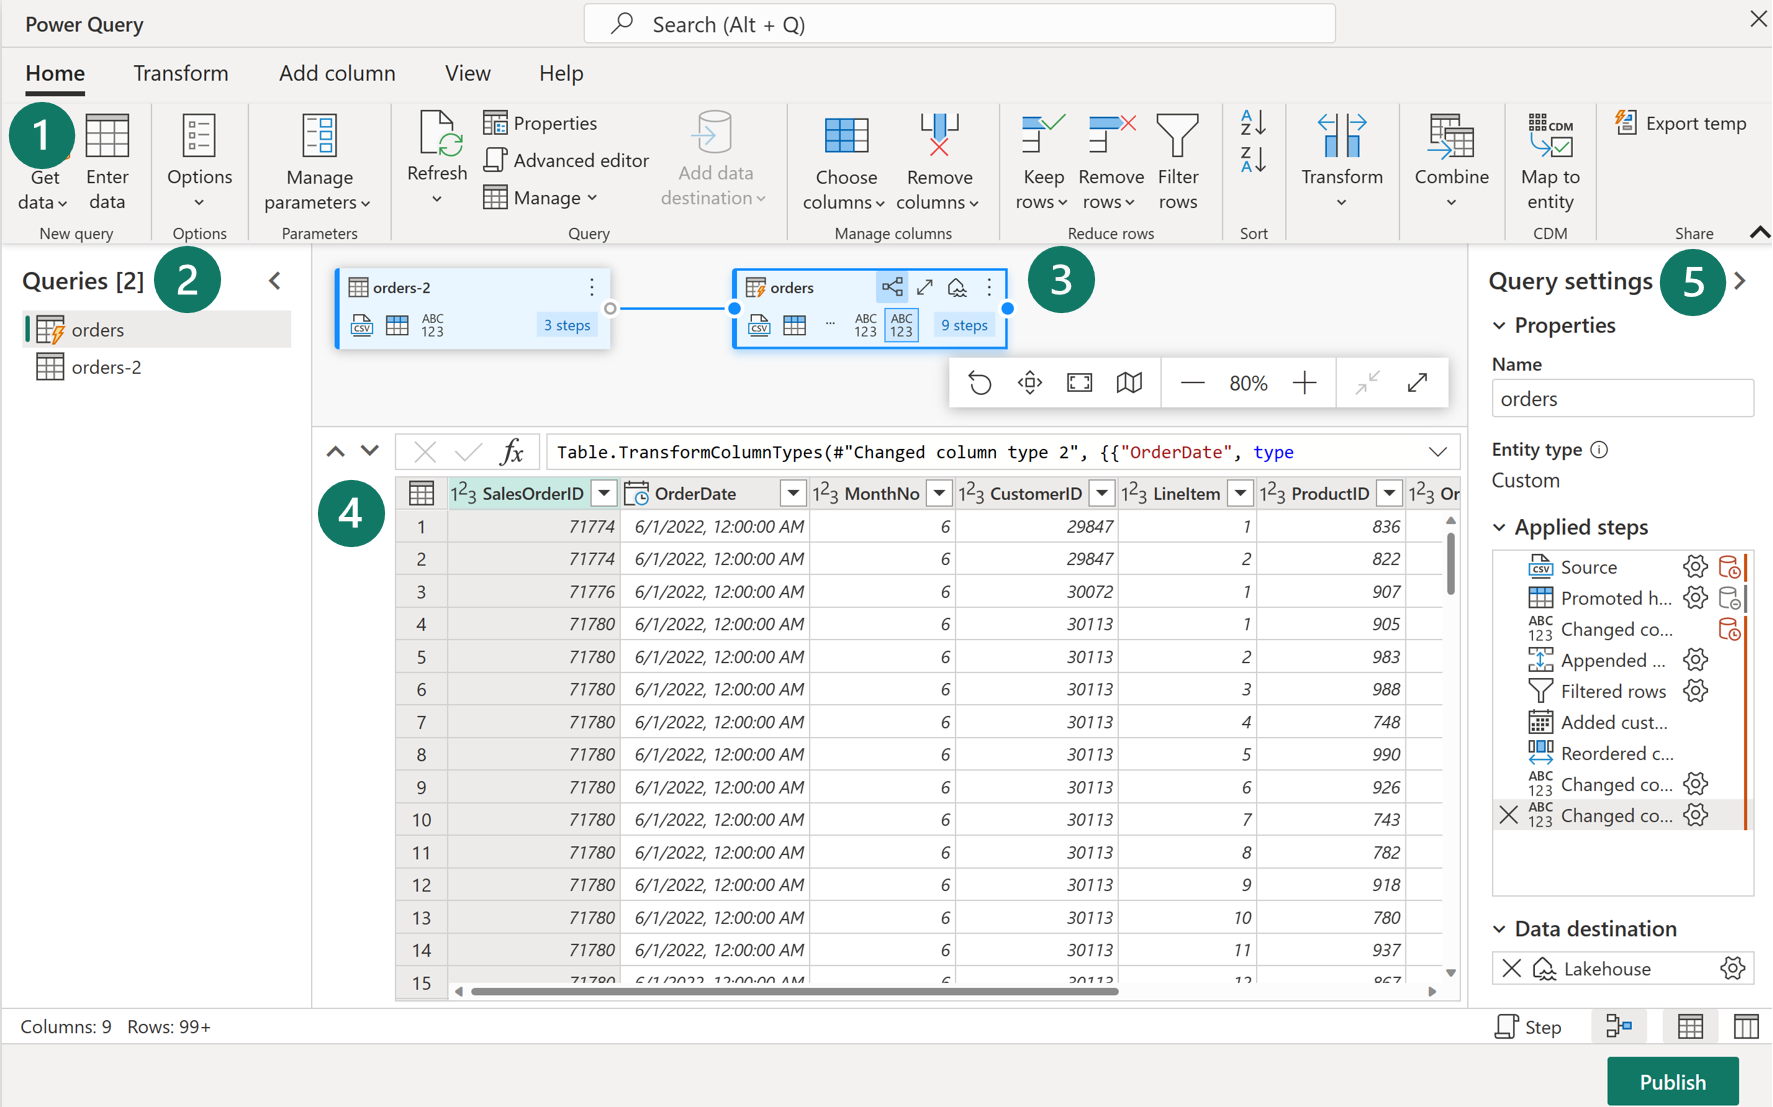
In Microsoft Fabric, you can create a Dataflow Gen2 in the Data Factory workload or Power BI workspace, or directly in the lakehouse. Since our scenario is focused on data ingestion, let's look at the Data Factory workload experience. Dataflows Gen2 use Power Query Online to visualize transformations. See an overview of the interface:

1. Power Query ribbon
Dataflows Gen2 support a wide variety of data source connectors. Common sources include cloud and on-premises relational databases, Excel or flat files, SharePoint, SalesForce, Spark, and Fabric lakehouses. Then there are numerous data transformations possible, such as:
- Filter and Sort rows
- Pivot and Unpivot
- Merge and Append queries
- Split and Conditional split
- Replace values and Remove duplicates
- Add, Rename, Reorder, or Delete columns
- Rank and Percentage calculator
- Choose Top N and Bottom N
You can also create and manage data source connections, manage parameters, and configure the default data destination in this ribbon.
2. Queries pane
The Queries pane shows you the different data sources - now called queries. These queries are called tables when loaded to your data store. You can duplicate or reference a query if you need multiple copies of the same data, such as creating a star schema and splitting data into separate, smaller tables. You can also disable the load of a query, in case you only need the one-time import.
3. Diagram view
The Diagram View allows you to visually see how the data sources are connected and the different applied transformations. For example, your dataflow connects to a data source, duplicates the query, removes columns from the source query, then unpivots the duplicate query. Each query is represented as a shape with all of the applied transformations and connected by a line for the duplicate query. You can turn this view on or off.
4. Data Preview pane
The Data Preview pane only shows a subset of data to allow you to see which transformations you should make and how they affect the data. You can also interact with the preview pane by dragging and dropping columns to change order or right-clicking on columns to filter or make changes. The data preview shows all of your transformations for the selected query.
5. Query Settings pane
The Query Settings pane includes the Applied Steps. Each transformation is represented as a step, some of which are automatically applied when you connect the data source. Depending on the complexity of the transformations, you might have several applied steps for each query. Most steps have a gear icon that allows you to modify the step, otherwise you must delete and repeat the transformation.
Each step also has a contextual menu when you right-click so you can rename, reorder, or delete the steps. You can also view the data source query when connecting to a data source that supports query folding.
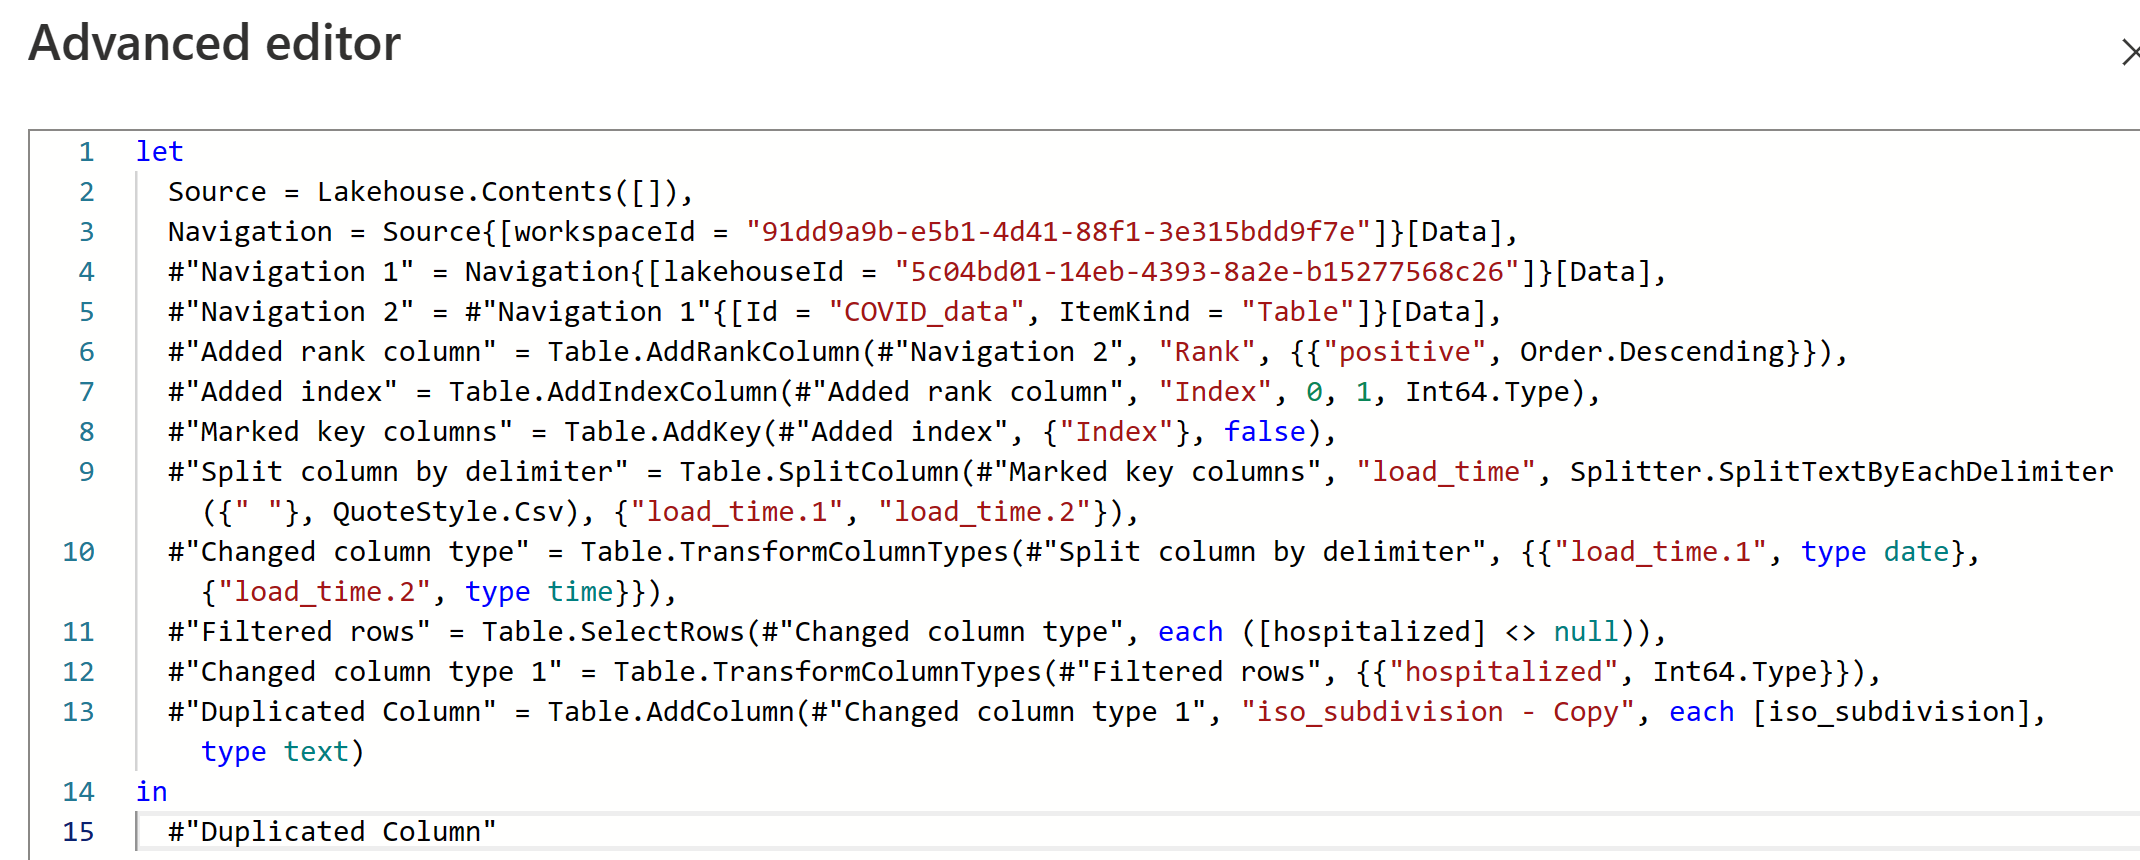
While this visual interface is helpful, you can also view the M code through Advanced editor.

In the Query settings pane, you can see a Data Destination option to land your data in one of the following locations in your Fabric environment:
- Lakehouse
- Warehouse
- SQL database
You can also load your dataflow to Azure SQL database, Azure Data Explorer, or Azure Synapse Analytics.
Dataflows Gen2 provide a low-to-no-code solution to ingest, transform, and load data into your Fabric data stores. Power BI developers are familiar and can quickly begin to perform transformations upstream to improve performance for their reports.
Note
For more information, see the Power Query documentation to optimize your dataflows.