Exercise - Build a cloud flow by using Copilot for Power Automate
In this exercise, you build a cloud flow by using Copilot for Power Automate.
Important
You must have a non-production environment with a Dataverse database and sample data installed and Office 365 Outlook.
Task: Import a solution
In this task, you import a mentoring management solution. The solution includes a model-driven application that manages mentoring requests, a canvas application that allows users to submit mentoring requests, and two tables: one for mentoring requests and one for mentors. This exercise includes a completed cloud flow that's currently turned off.
Download the MentoringSolution_1_0_0_1 zip file. The file is included. You need to select the ellipsis (three dots) and select download.
Go to https://make.powerautomate.com/ and make sure you that have the correct environment selected.
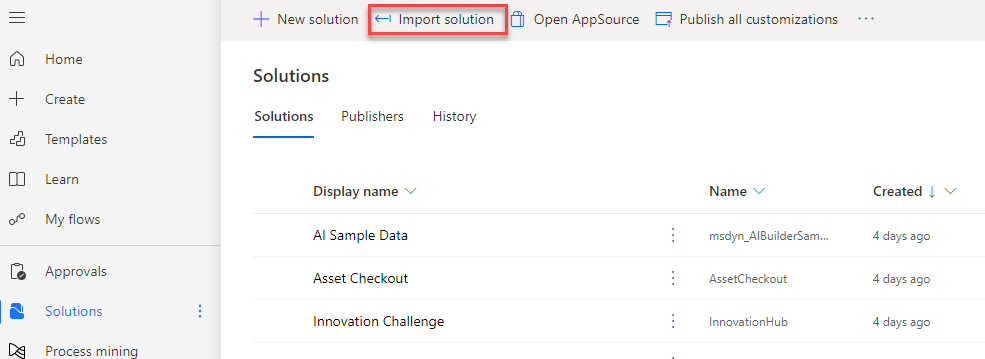
Select Solutions > Import solution.
Select the Browse button.
Find and select the MentoringSolution_1_0_0_1.zip file on your device and then select Open.
Select Next.
Select Next again.
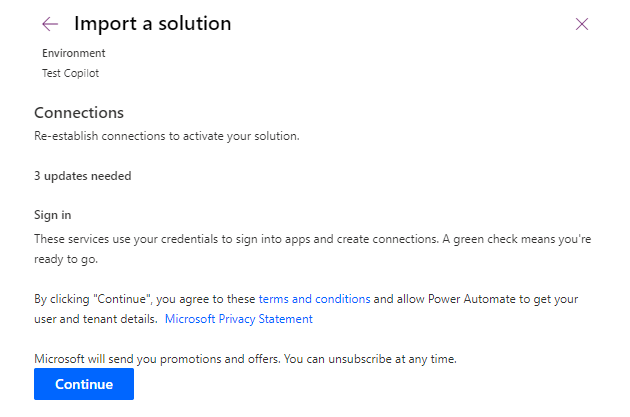
Select Continue.
This solution uses the three connectors as shown in the following screenshot.
Select Import and wait for the solution to import.
You should get a message when the solution import is complete.
Select Publish all customizations and then wait for the publishing to complete.
Don't navigate away from this page.
Task: Prepare the solution
In this task, you run the Mentoring Manager application and add mentors' data.
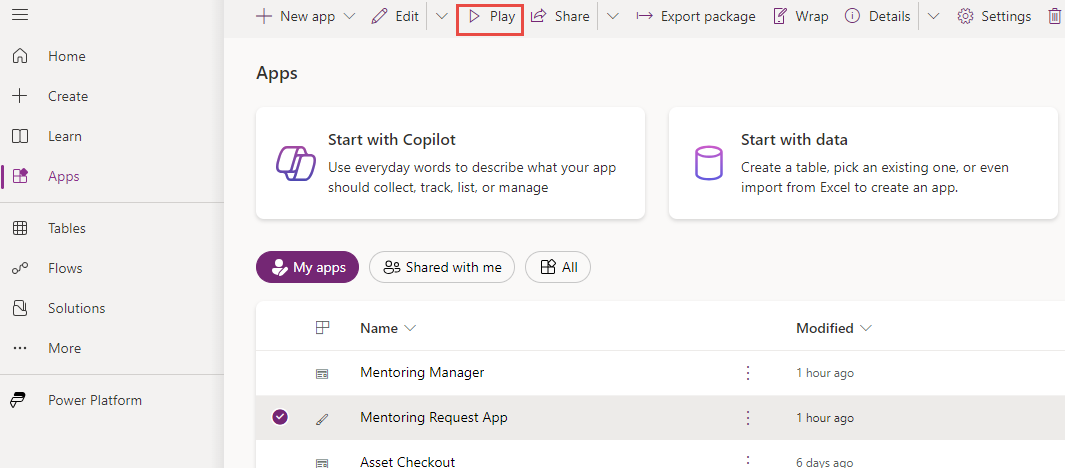
Select Apps, select the Mentoring Manager application, and then select the Play button.
Select Mentors from the left navigation and then select + New.
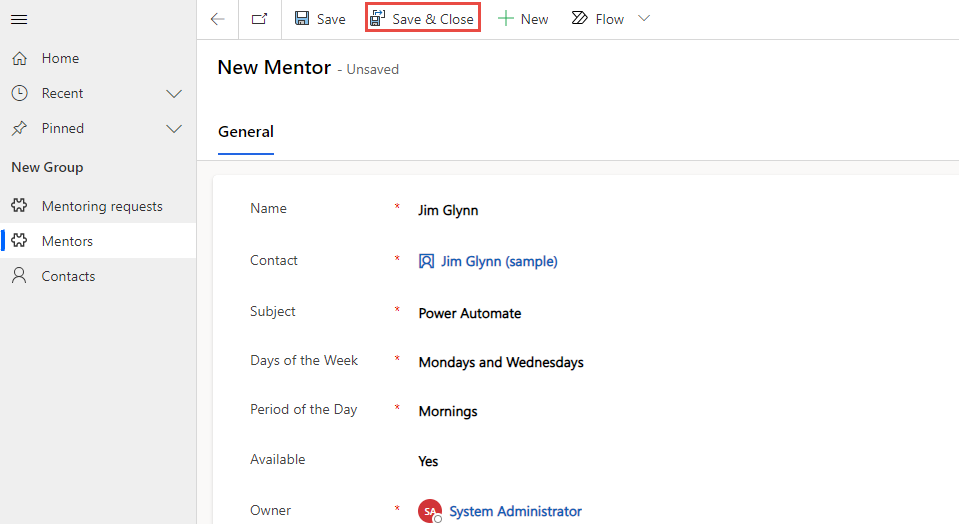
Enter Jim Glynn for the Name, select Power Automate for Subject, enter Mondays and Wednesdays as the Days of the Week, and enter Mornings as the Period of the Day.
Select the Contact field and create a New contact for Jim Glynn. A quick create panel opens on the right side of your screen. Enter Jim for the First Name field and Glynn for the Last Name field. Then Save and Close. When complete, your form looks similar to the screenshot below. Select Save and Close on the New Mentor form to continue.
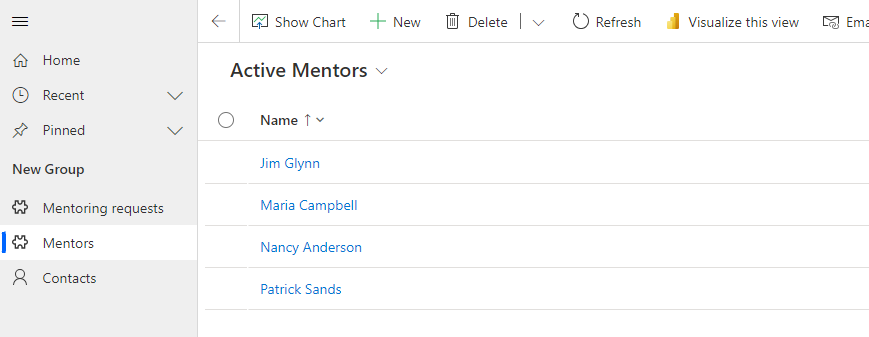
In similar fashion, create three more mentors: Maria Campbell, Nancy Anderson, and Patrick Sands.
You should now have four mentors showing on the Active Mentors screen.
You can close the Mentoring Manager application.
Task: Create a flow with Copilot
In this task, you use Copilot for Power Automate to create a cloud flow to trigger when someone creates a new mentoring request. The flow tries to find a mentor that matches the subject of the mentoring request. If it doesn't find one, the flow sends an email to the requestor. If the flow finds a match, it sends an approval request and then waits for the outcome. Then, the flow checks if the request was approved. If the approval request is approved, the flow sends an email to the requestor, assigns a mentor, and then sets the approval status to Approved. If the approval wasn't approved, the flow sends an approval rejection email to the requestor.
Note
As Copilots mature, your results might not exactly match the results in this exercise. If so, review the steps in this exercise and then try your own steps to gain similar results from the mentor app.
Go to https://make.powerautomate.com/ and make sure that you have the correct environment selected.
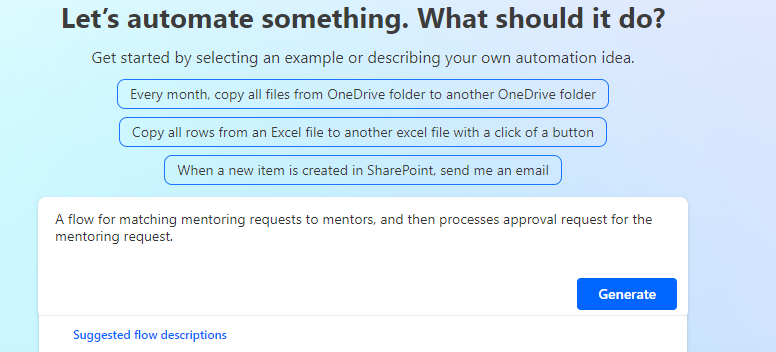
Go to the Copilot prompt, enter the following text, and then select the Generate button:
A flow for matching mentoring requests to mentors, and then processes approval request for the mentoring request.
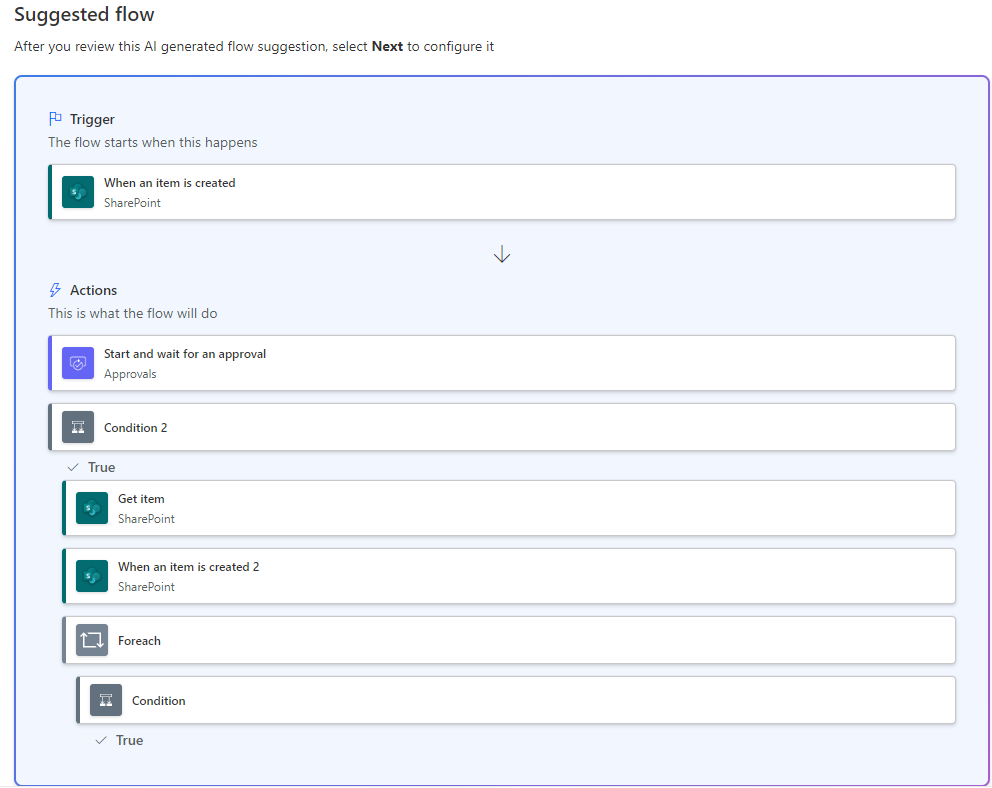
Copilot suggests a flow that might resemble the following image. You might notice that your suggested flow doesn't use Dataverse.
Give Copilot more context. Scroll up to the Copilot prompt, enter the following text, and then select the send button. Notice that the following prompt adds When a row is added to a Dataverse table, create.
When a row added to a Dataverse table, create a flow for matching mentoring requests to mentors, and then processes approval request for the mentoring request.
Copilot should now offer a different suggestion incorporating Dataverse. The suggestion might resemble the following image. If yours doesn't suggest something similar, you can try tweaking the wording in your request box.
Give Copilot more information. Enter the following text into the Copilot prompt and then select the send button:
When a row is added to a Dataverse table, retrieve the details of the mentoring request and list available mentors. If a mentor with a matching subject is found, start an approval and wait. If the approval outcome is "Approve," update the mentoring request and send approved email to the requester. If the outcome isn't "Approve," update the request and send a rejected email to the requester. If no matching mentor is found, send a notification email to the requester..
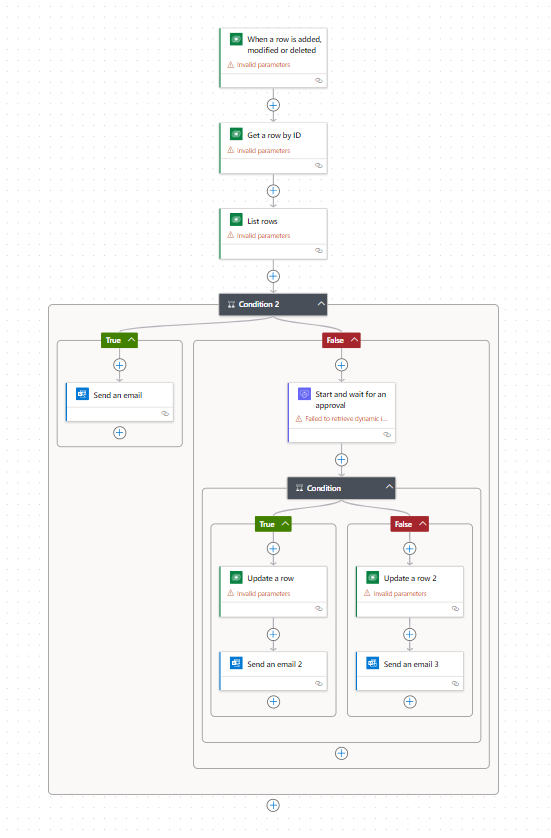
Copilot should now suggest a flow that resembles the following image. Select the Next button to continue to Step 2. If your suggested flow isn't what you want, try changing the description until you get something that's close to what you want.
On the Step 2 screen, check your connections, then select Create flow.
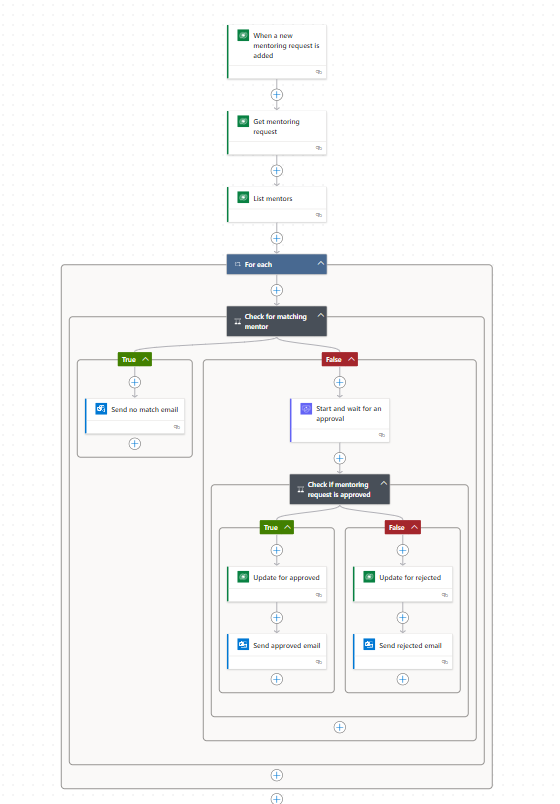
The created flow should resemble the following image.
Don't navigate away from this page.
Task: Edit the flow
Even if Copilot creates exactly what you wanted, you still need to complete configuration, such as selecting the correct tables and columns. It's also good practice to give the steps better and logical names that make sense to you.
These steps are detailed and manual. Try asking Copilot to complete some of the steps instead.
In this task, you rename the steps and edit the flow that Copilot created for you.
Give the flow a good name. Name the flow Process mentoring requests.
Select the trigger of the flow and change the name to When a new mentoring request is added.
Select Added for Change Type, select Mentoring requests for Table Name, select Organization for Scope, and then select the Get a row by ID action. If your suggested flow didn't include this step, go ahead and add it in manually.
Rename the step to Get mentoring request.
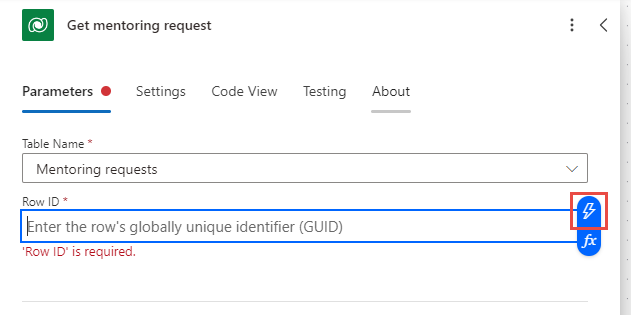
Find/select Mentoring requests for Table Name and then remove any value from the Row ID field if one shows.
Select the Row ID field and then select the Enter data from previous step (dynamic content) icon.
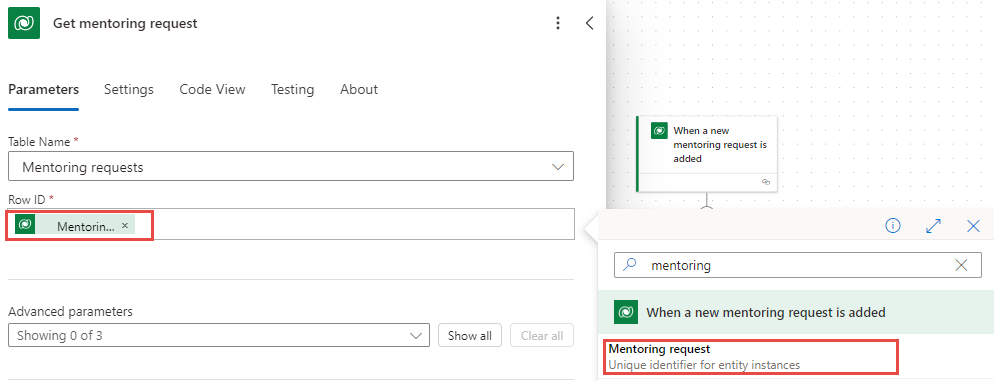
Select Mentoring request from the dynamic content pane.
Select the List rows action and then rename it to List mentors.
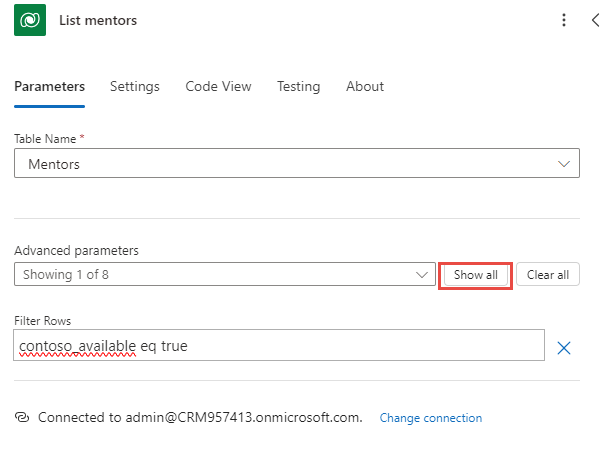
Find/select Mentors for Table Name.
Select the Show all button next to Advanced parameters.
For Filter Rows input contoso_available eq true.
For Row Count enter 1.
Select the condition below the List members action.
Rename the condition to Check for matching mentor.
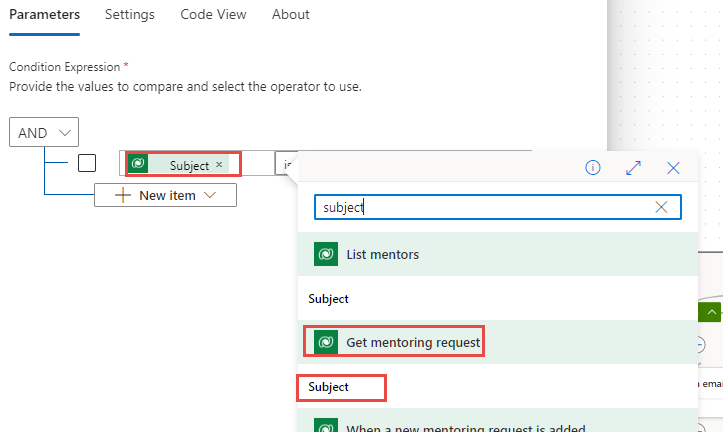
Select the left Choose a value field and then select the dynamic content icon.
Select the Subject under the Get mentoring request action.
Select Is equal to or Is not equal to, depending on which side of the approval that Copilot placed the approval step.
Select the right Choose a value field and then select the dynamic content icon.
Select the Subject under the List mentors action.
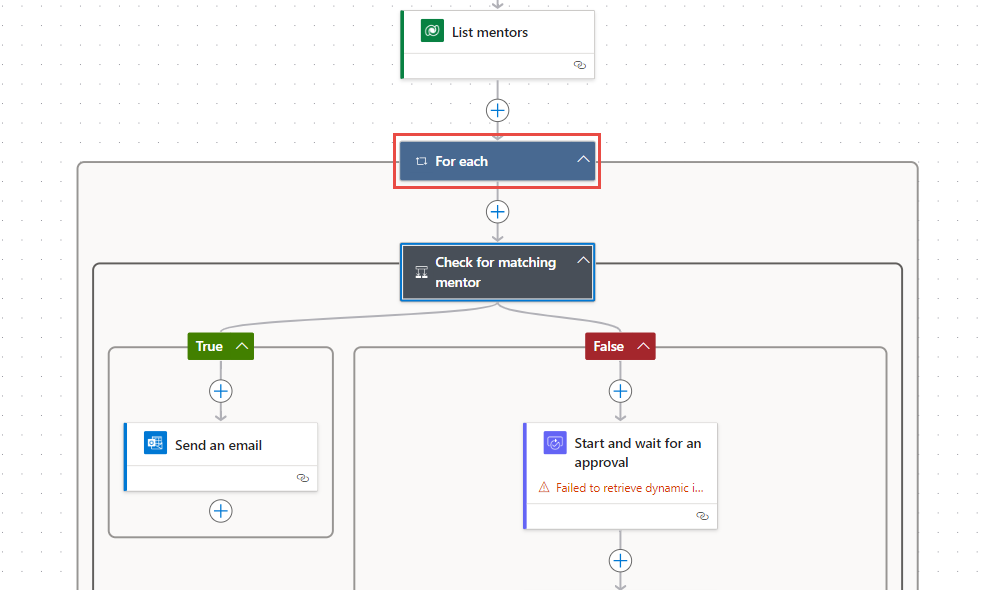
Power Automate adds a For each control to your flow.
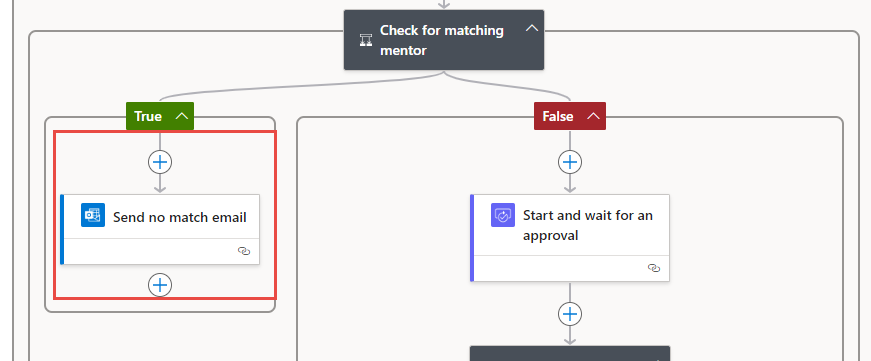
Select the Send an email action inside the branch of the Check for matching mentor condition that doesn't have the approval. If the Send an email step is missing, you can add one in!
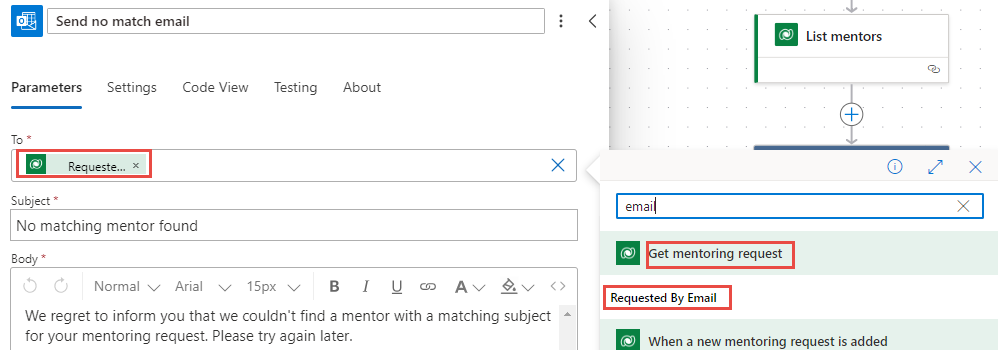
Review the email body and then rename it to Send no match email. Remove any To value.
Select the To input field, then select Enter custom value, then select the dynamic content icon.
Select Requested By Email of the Get mentoring request step from the Dynamic content pane.
For the email subject, input "No mentoring match found." For the email body, input "Sorry, there is no mentor available currently."
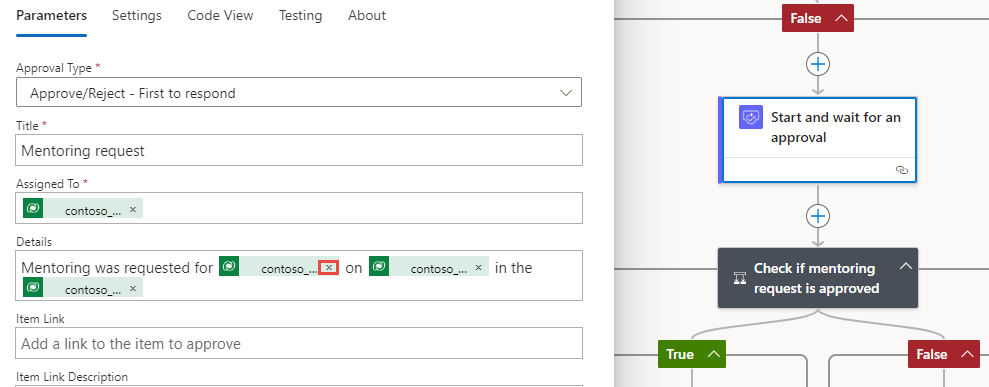
Select the Start and wait for an approval step.
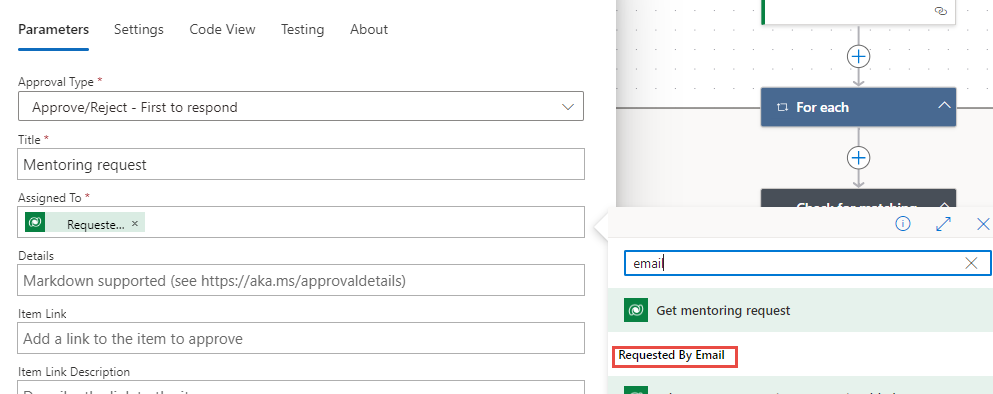
Change the Approval Type to Approve/Reject - First to respond.
Enter Mentoring request in the Title field.
Select the Assign To field and then select the dynamic content icon.
Select Requested By Email of the Get mentoring request step from the Get mentoring request action. Usually, this request goes to the person who manages mentoring requests, but to make testing easier, you use the requester's email for this exercise.
Enter Mentoring was requested for, followed by a space, in the Details field and then select the dynamic content icon.
Select Subject from the Get mentoring request step.
Enter the word on in front of the step and then select the dynamic content icon again. Be sure to add spaces between words/inputs.
Select Days of the Week from the Get mentoring request action.
Enter the words in the in front of Days of the Week and then select the dynamic content icon once more.
Select Period of the Day from the Get mentoring request action.
The Details should resemble the following image.
Select the condition below the approval.
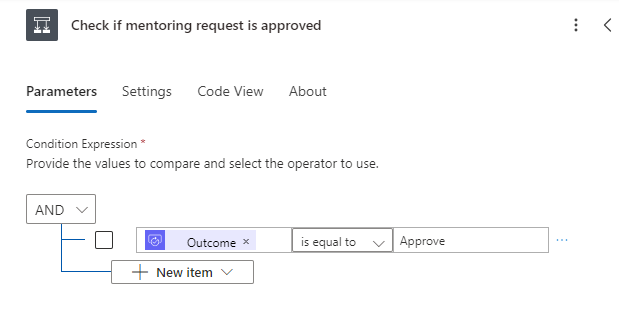
Rename the condition to Check if mentoring request is approved.
Select the left Choose a value field and then select the dynamic content icon.
Select Outcome from the Dynamic content pane.
Select is equal to.
Enter Approve to the right of the comparison dropdown.
Select the Update a row step in the True branch of the Check if mentoring request is approved condition.
Rename the step to Update for approved.
Select Mentoring requests for Table Name and then remove any value in the Row ID field.
With your cursor in the Row ID field, select the dynamic content icon.
Find/select Mentoring Request from the Dynamic content pane.
Scroll down and select the Show all button.
Select Approved for Approval Status.
Select Mentor. Input contoso_mentors() and select inside the parentheses, then select the dynamic content icon.
Select Mentor from under the List mentors step.
Select the Update a row step in the False branch of the Check if mentoring request is approved condition.
Rename the step to Update for rejected.
Find/select Mentoring requests for Table Name and then remove any value in the Row ID field.
Select the Row ID field and then select the dynamic content icon.
Select Mentoring Request from the Dynamic content pane.
Scroll down and select the Show all button.
Under Approval Status select Rejected.
Select the Send an email step in the True branch of the Check if mentoring request is approved condition. If Copilot didn't include this step, go ahead and add it under the Update a row step.
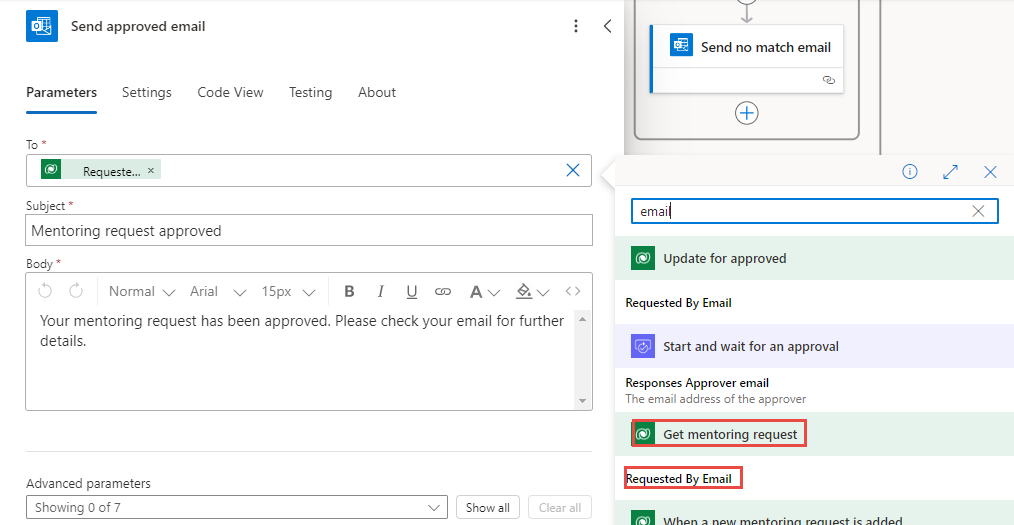
Rename the step to Send approved email and then remove any value from the To field.
Select the To field and select Enter custom value, then select the dynamic content icon.
Select the Requested By Email value of the Get mentoring request step from the Dynamic content pane.
Review the email content and add/edit if needed. Ensure that the email has a value for the Subject and the Body.
Select the Send an email step in the False branch of the Check if mentoring request is approved condition. Add a Send an email step if needed.
Rename the step to Send rejected email and then remove the value from the To field.
Select the To field and then select the Insert data from previous step icon.
Select the Requested By Email value of the Get mentoring request step from the Dynamic content pane.
Review the email content and edit if needed.
The complete flow should resemble the following image. Select Save to save the flow.
Task: Add an action by using Copilot
In this task, you add an action by using Copilot.
Go to the Copilot prompt and select the sparkle icon to view the available actions. You can select any of these to help you prompt Copilot.
Ask Copilot what the flow does by entering What does the flow do? Select the send button.
Read the answer and confirm that Copilot's answer is reasonably correct.
Select the Send no match email step under Check for matching mentor condition that doesn't begin the approval. In the example below it's, the True side.
Input the following in the Copilot input field: In the selected step, Please make a friendly-sounding note that no mentor is available for the requestor.
As you submit the input, Copilot attempts to rewrite the body of the email. You might notice that Copilot renames your steps in the flow. You can use Undo to revert back to the flow as it was before the most recent changes. A popup dialog asks you to confirm undoing the action. Then it confirms in the Copilot panel Action undone.
Let's try to add an action that updates the mentoring request. Enter Add an action to update the mentoring request and then select the send button.
Copilot should add an action, but the action is likely in the wrong location.
Select Undo to undo the changes.
Try asking Copilot to make changes and observe what it does. Make sure that you undo the changes whenever Copilot makes changes.
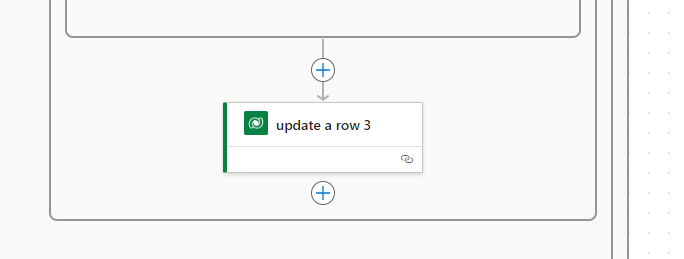
You can add an action manually that sets the mentoring request's approval status to Canceled.
Task: Test the flow
In this task, you test the cloud flow that you created with Copilot.
Go to https://make.powerapps.com/ and make sure that you have the correct environment selected.
Select Apps, select the Mentoring Request App, and then select Play.
Select the plus (+) icon.
Provide the following information and then select the check icon to submit.
Name - Power Automate mentoring
Description - I would like mentoring help with Power Automate.
Subject - Power Automate
Days of the Week - Mondays and Wednesdays
Period of the Day - Mornings
The system should create your new request.
Go to https://outlook.office.com to check your email.
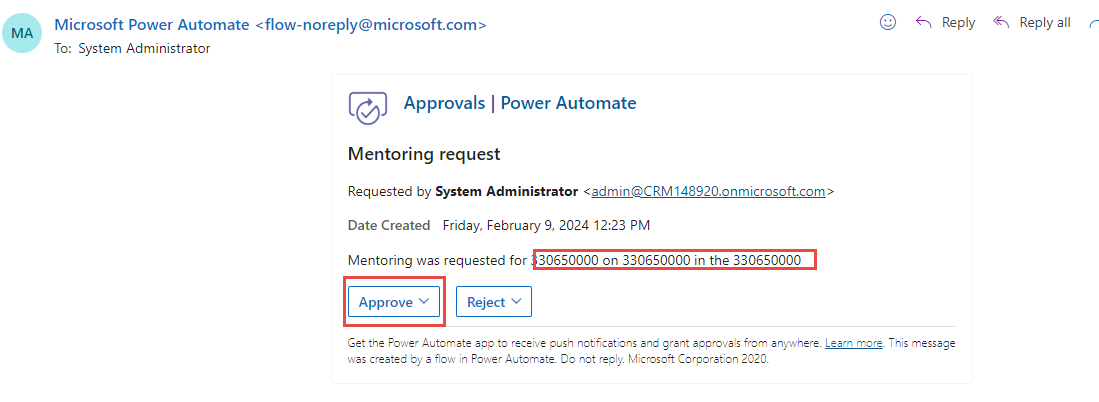
You should get an approval request email. Open the email.
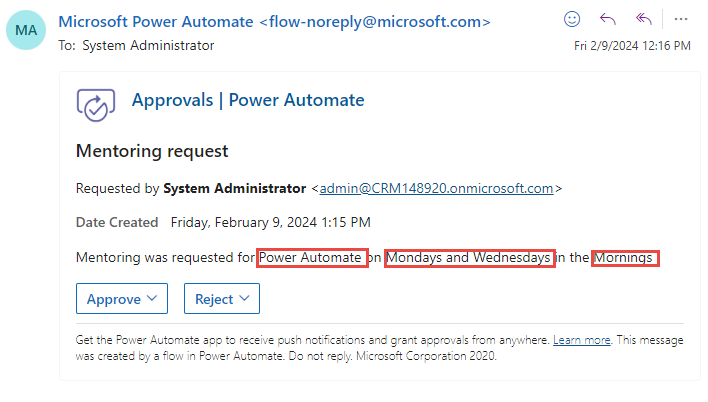
The subject and other choice values don't show as expected. Instead, the values display as numbers. Your next task is to fix this error in the following optional task. Select Approve.
Select Submit.
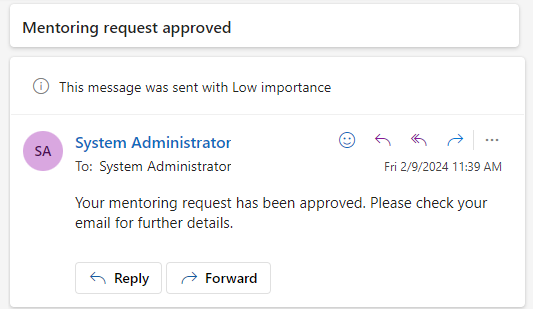
You should get the approved email.
You can now create more mentoring requests and test the flow for no match and rejected cases.
Task: Show the choice label (Optional)
In this task, you edit the Details value of the Send and wait for an approval step. Then, you show the label text of the selected choice instead of the value numbers.
Go to https://make.powerautomate.com/ and make sure that you have the correct environment.
Select My flows and then open the Process mentoring requests flow that you created.
Select Edit.
Scroll down and select Start and wait for an approval.
Remove the dynamic content after the word for.
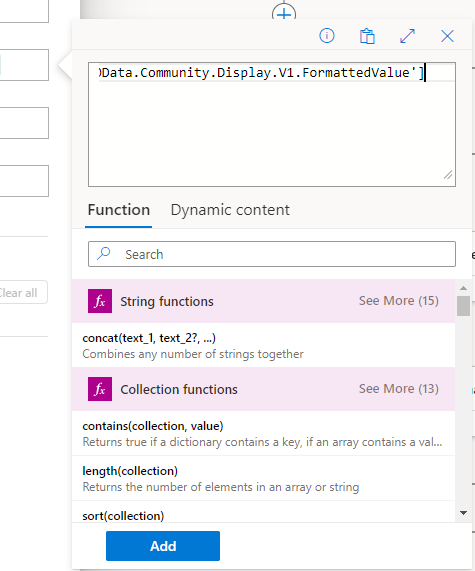
Place your cursor after the word for and then select the Insert expression icon.
Enter the following text in the expression field and then select Add.
outputs('Get_mentoring_request')?['body/contoso_subject@OData.Community.Display.V1.FormattedValue']Remove the dynamic content after the word on.
Place your cursor after the word on and then select the Insert expression icon.
Enter the following text in the expression field and then select Add.
outputs('Get_mentoring_request')?['body/contoso_daysoftheweek@OData.Community.Display.V1.FormattedValue']Remove the dynamic content after the word the.
Place your cursor after the word the and then select the Insert expression icon.
Enter the following text in the expression field and then select Add.
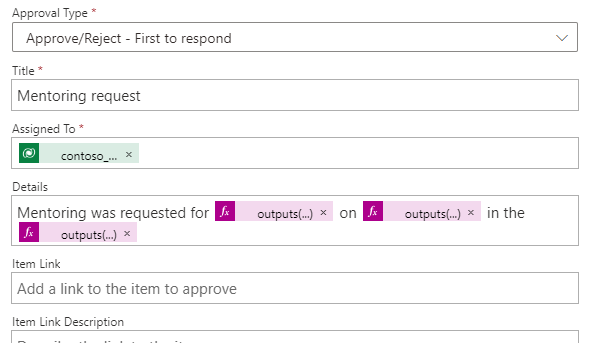
outputs('Get_mentoring_request')?['body/contoso_periodoftheday@OData.Community.Display.V1.FormattedValue']The Details value should resemble the following image.
Select Save and then wait for the flow to save. You can test the flow outputs again quickly, by selecting the Test button from the command bar to bring up the Test flow panel. Then select Automatically > With a recently used trigger > select your most recent run > Test. Or you can try a new request from the Mentoring Request App.
The approval request email that you get should resemble the following image.
