Export and import agents
You can export and import agents using solutions to move your agents across multiple environments. For example, you might build your agent in a development environment, then move it to a different environment for testing purposes. Once the testing is complete, you can move it to a production environment for the agent to be deployed to end users.
Solutions are the mechanism for implementing application lifecycle management (ALM). The solution acts as a carrier for the agents. You use solutions to export the agent from one environment and import it into another. For more information, see Solutions.
Export your agent
You can add an agent to an existing solution or create a new solution for your agent from Power Apps Solutions.
In your browser navigate to the Power Apps maker portal, make.powerapps.com.
On the left-hand side, select Solutions.
Select the solution you would like to add the agent to.
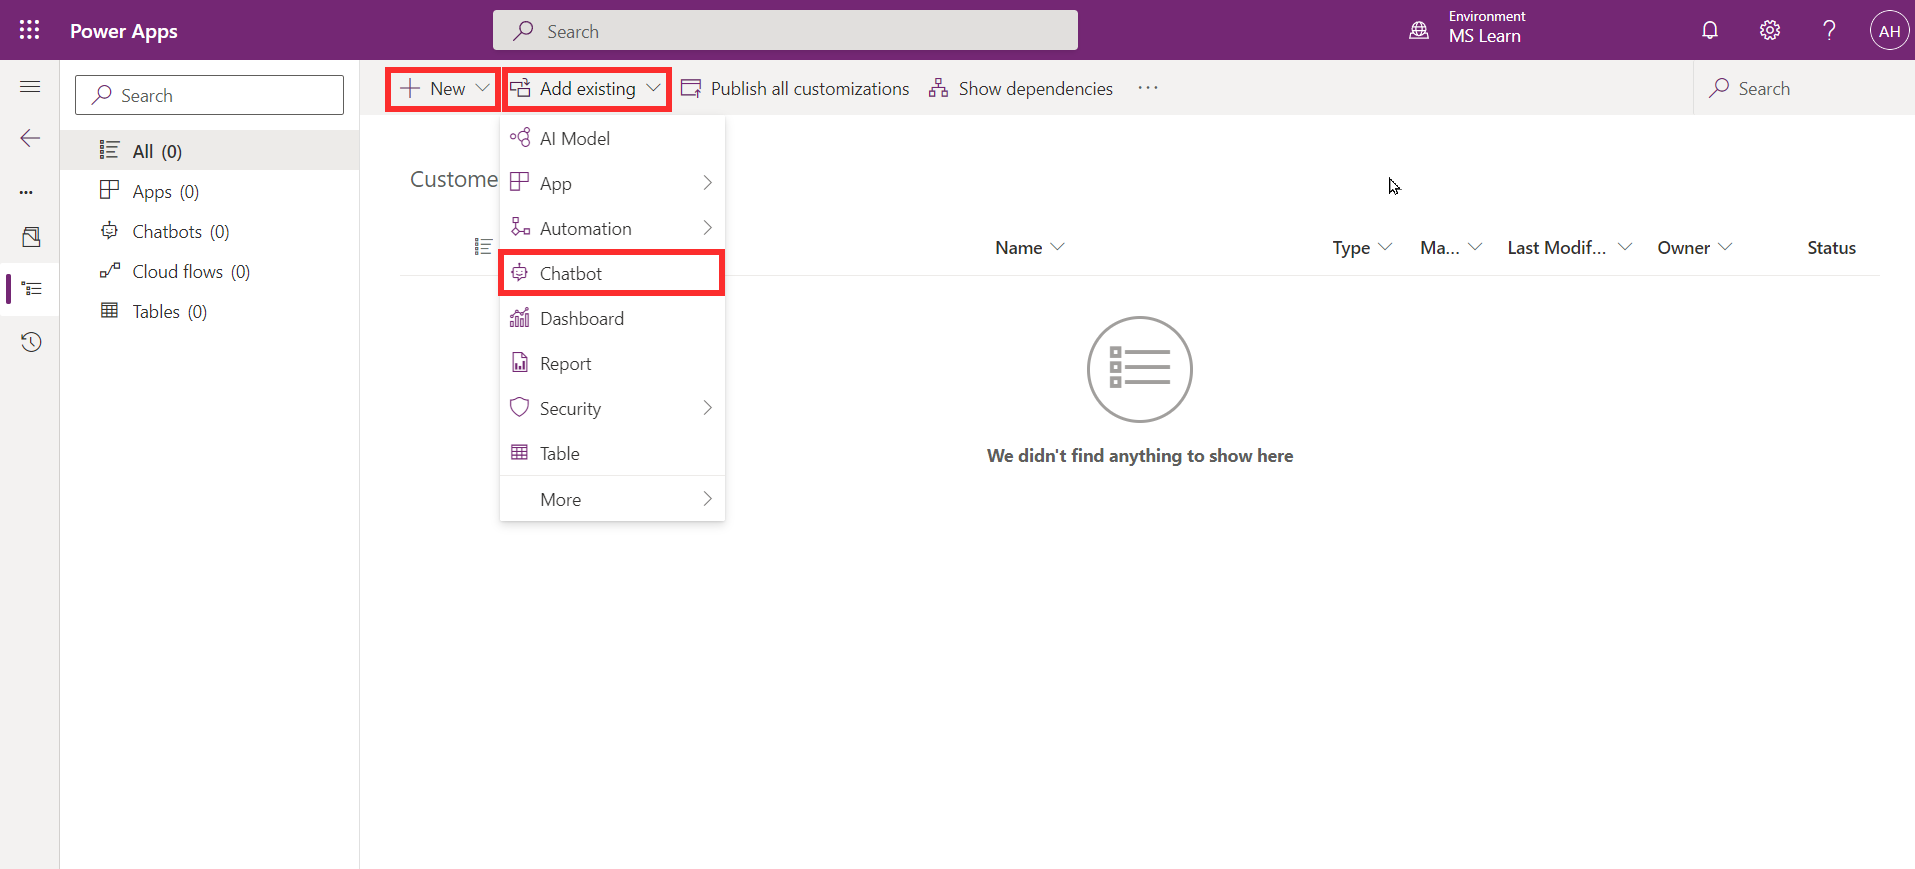
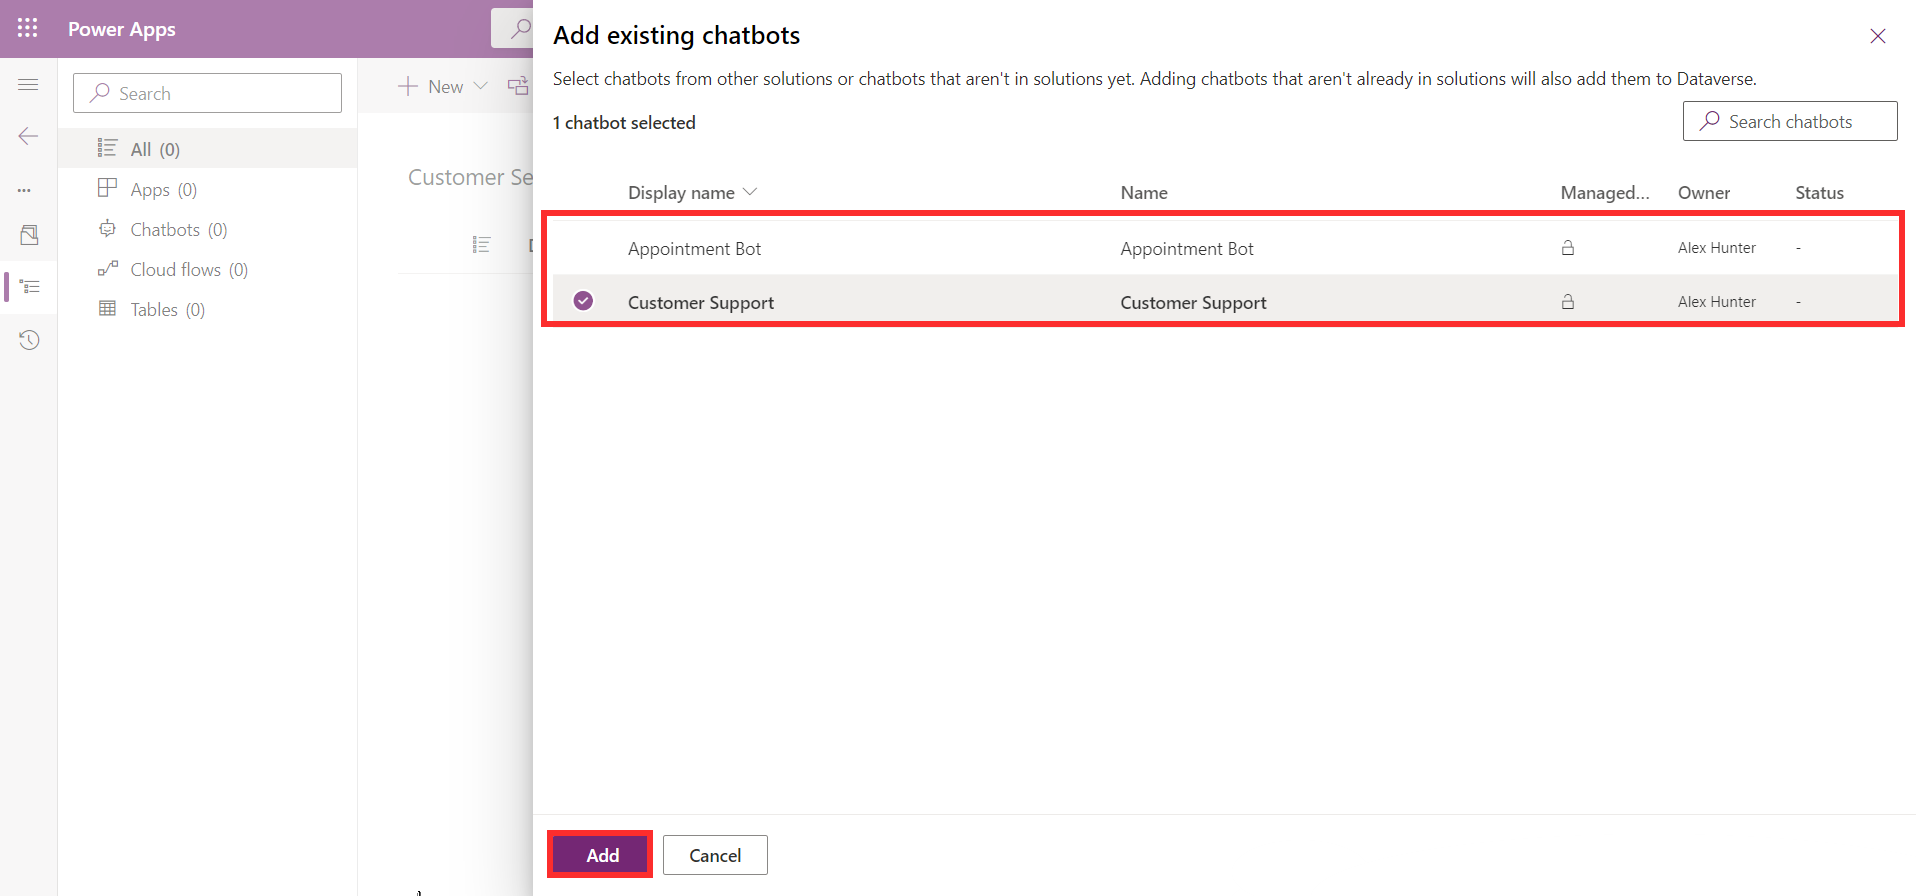
Within the solution, choose the agents you would like to add by clicking Add existing > Agent. Multiple agents can be added to a single solution.
Note
It is also possible to create a new agent from solutions.
Note
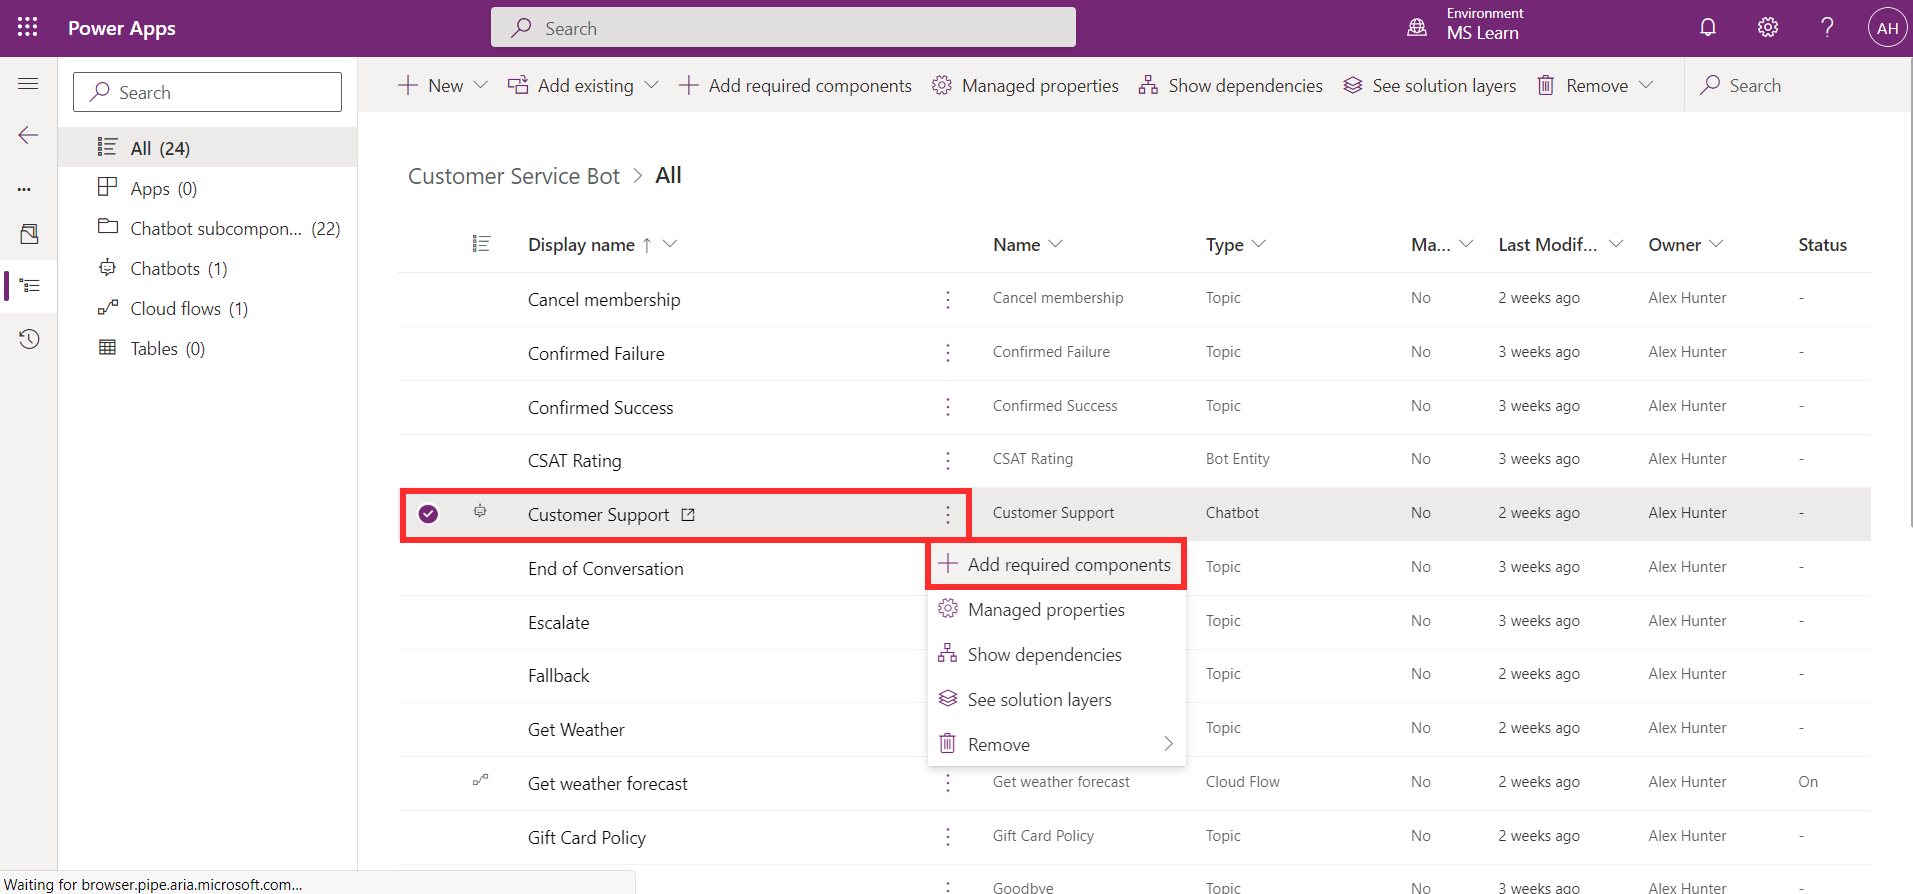
Subcomponents of the agent will be added to the solution, such as topics, entities, and cloud flows. You shouldn't remove or change any of the agent subcomponents from Power Apps as this can cause the export to fail.
Note
If you add more components to your agent, such as creating new topics, you can add these to the solution by selecting Add required components from the agent in the solution as shown here.
Once your solution is ready, you can export the package. Go back to all solutions by selecting the Back to solutions arrow on the left pane.
Select the circle next to the solution name that you would like to export.
Select the Export button at the top.
Select Next on the export pane, and then select Export.
This downloads a .zip file of the solution, which is used for importing the agent into another environment. If you're moving your agent to a test or production environment, you should export as a managed solution.
For more information, see Export solutions.
Import your agent
You use the solution package downloaded at the export stage to import your agent into the desired environment. It imports from Power Apps Solutions.
In the top right, select your environment name and change to the desired environment to import the solution and agent.
On the left-hand side, select Solutions
Select Import, and select your solution .zip file.
Select Next and then Import.
For more information, see Import solutions.
Once the import is complete, you see it appear in your solutions list. You can access your imported agent from Microsoft Copilot Studio as it now appears in your list of agents in the new environment.


