Harjoitus – Omatoimisen salasanan nollauksen määrittäminen
Tässä osiossa voit määrittää ja testata omatoimista salasanan palauttamista (SSPR) käyttämällä sähköpostia. Tässä harjoituksessa salasanan palautusprosessi on suoritettava sähköpostin avulla.
Luo ryhmä
Haluat ensin ottaa SSPR:n käyttöön rajoitetulle käyttäjäjoukolle varmistaaksesi, että SSPR-määrityksesi toimivat odotetulla tavalla. Aloitetaan luomalla käyttöoikeusryhmä rajoitetulle käyttöönotolle.
Valitse luomastasi Microsoft Entra -organisaatiosta Hallinta-kohdasta Ryhmät.
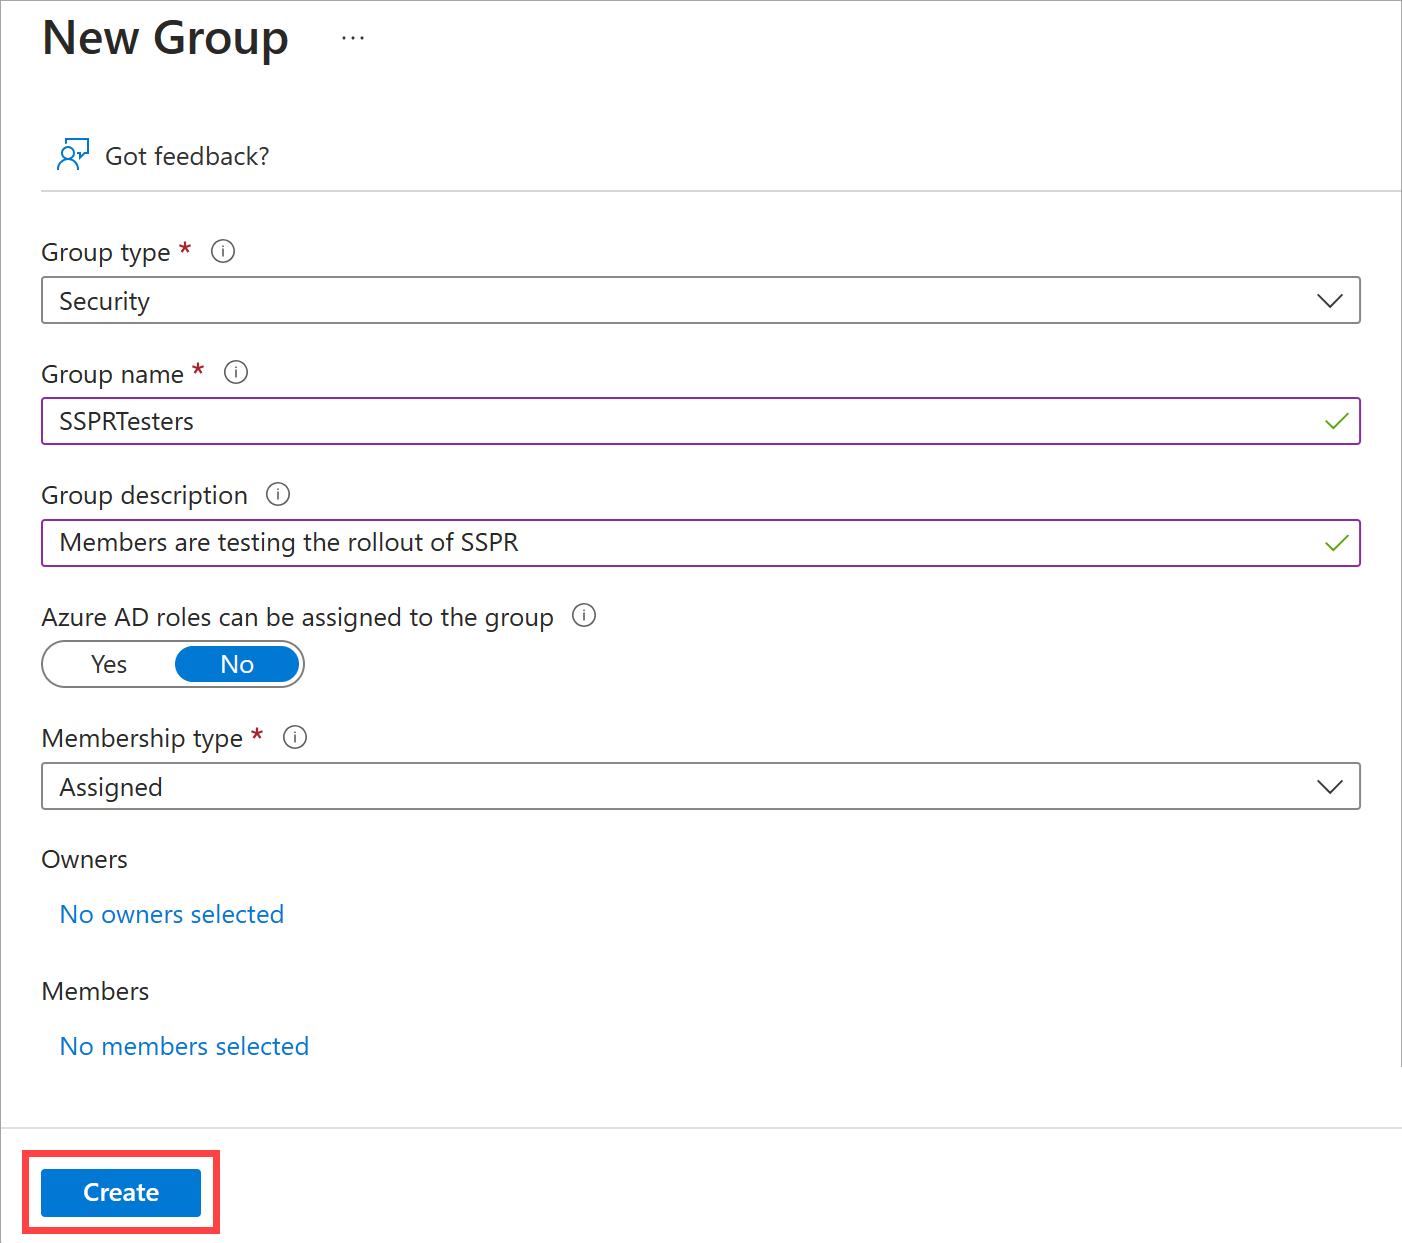
Valitse Uusi ryhmä -.
Anna seuraavat arvot:
Asetus Arvo Ryhmätyyppi Arvopaperi Ryhmän nimi SSPRTesters Ryhmän kuvaus Jäsenet testaavat SSPR:n käyttöönottoa Jäsenyystyyppi Määritetty Valitse Luo.

Käyttäjätilin luominen
Voit testata määrityksesi luomalla tilin, johon ei ole liitetty järjestelmänvalvojan roolia. Määrität myös tilin luomallesi ryhmälle.
Valitse Microsoft Entra -organisaatiosi Hallinta-kohdasta Käyttäjät.
Valitse + Uusi käyttäjä, valitse avattavasta valikosta Luo uusi käyttäjä - ja käytä seuraavia arvoja:
Asetus Arvo Käyttäjän päänimi Balas Näyttönimi Bala Sandhu Salasana Valitse automaattisesti luodun salasanan vieressä oleva Kopioi -kuvake ja liitä sitten salasana tekstieditoriin, kuten Muistioon. Valitse Määritykset -välilehti.
Valitse Lisää ryhmä, valitse SSPRTesters -ryhmän valintaruutu ja valitse sitten Valitse -painike.
Valitse Review + Create ja valitse sitten Luo.
Ota SSPR käyttöön
Nyt olet valmis ottamaan SSPR:n käyttöön ryhmälle.
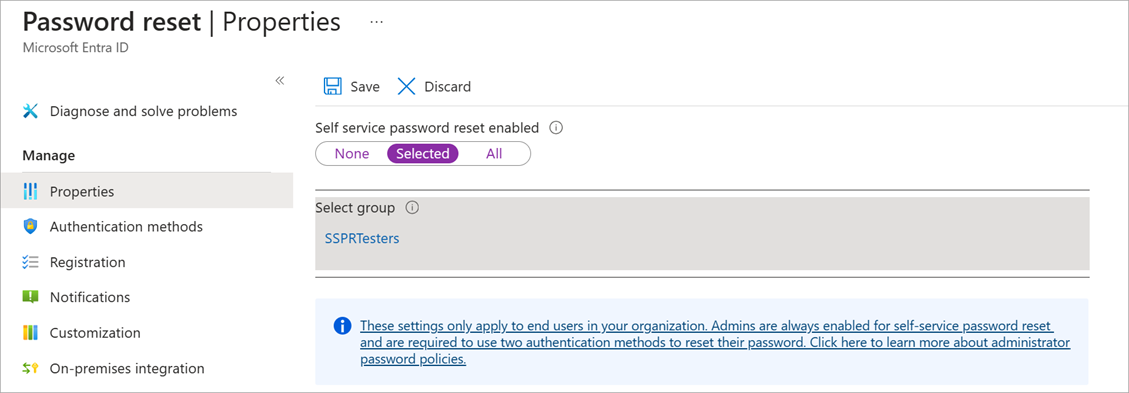
Valitse Microsoft Entra -organisaatiosi kohdassa hallinta Salasanan palautus.
Valitse ominaisuudet -sivun Selected . Valitse linkki kohdassa Valitse ryhmä, valitse SSPRTesters -ryhmän vieressä oleva ruutu ja valitse sitten Valitse -painike.
Valitse Tallenna.

Valitse Hallinta-kohdasta todentamismenetelmät, Rekisteröintija Ilmoitukset sivut oletusarvojen tarkistamiseksi. Varmista, todentamismenetelmissä on valittunaSähköposti-.
Valitse Mukauttaminen.
Valitse Kylläja kirjoita sitten Mukautettu mikrotuki - -tekstiruutuun admin@organization-domain-name.onmicrosoft.com. Korvaa "organization-domain-name" luomasi Microsoft Entra -organisaation toimialuenimellä. Jos olet unohtanut toimialuenimen, vie hiiren osoitin profiilisi päälle Azure-portaalissa.
Valitse Tallenna.
Rekisteröidy SSPR:ään
Nyt kun SSPR-määritys on valmis, rekisteröi luomasi käyttäjän sähköposti.
Muistiinpano
Jos näyttöön tulee sanoma "Järjestelmänvalvoja ei ole ottanut tätä ominaisuutta käyttöön", käytä yksityistä/incognito-tilaa selaimessasi.
Valitse uudessa selainikkunassa https://aka.ms/ssprsetup.
Kirjaudu sisään käyttäjänimellä balas@organization-domain-name.onmicrosoft.com ja salasanalla, jotka merkitsit muistiin aiemmin. Muista korvata organization-domain-name luomasi Microsoft Entra -organisaation toimialuenimellä.
Jos sinua pyydetään päivittämään salasanasi, anna valitsemasi uusi salasana. Varmista, että kirjoitat uuden salasanan muistiin.
Valitse Suojaustiedot -välilehti ja valitse sitten + Lisää sisäänkirjautumismenetelmä -.
Valitse Lisää menetelmä -ruudunSähköposti-.
Anna sähköpostisi tiedot.

Kun saat koodin sähköpostiin, kirjoita koodi tekstiruutuun ja valitse Seuraava.
Testaa SSPR
Testataan sitten, voiko käyttäjä vaihtaa salasanansa.
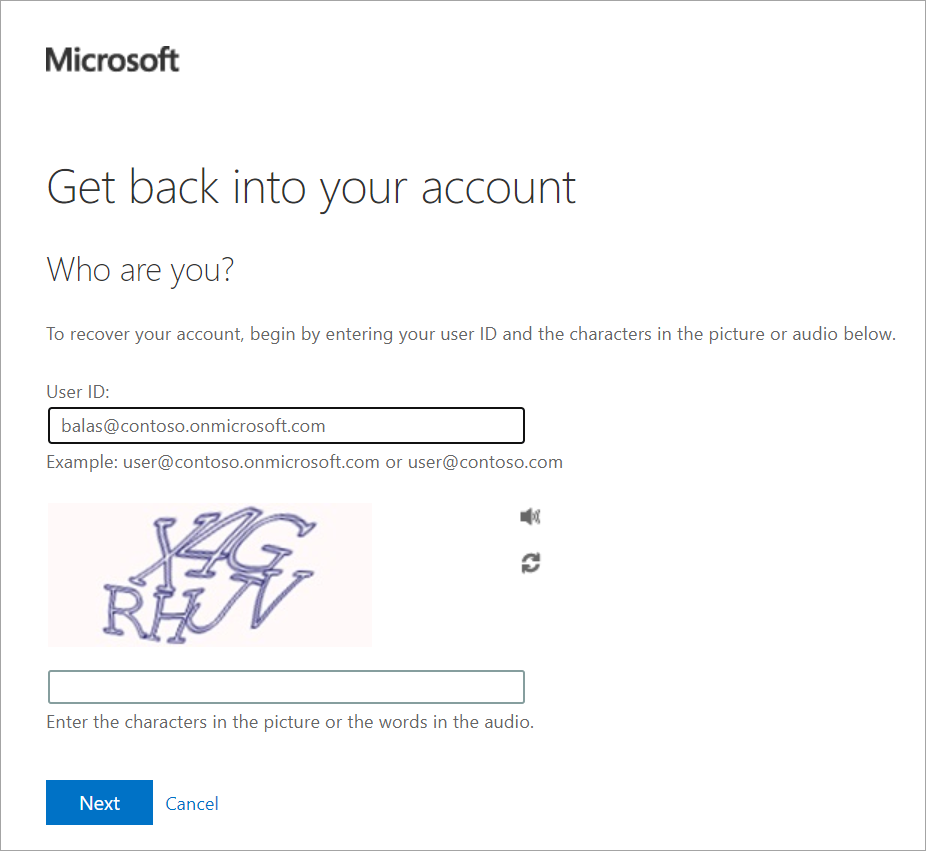
Valitse uudessa selainikkunassa https://aka.ms/sspr.
Kirjoita Käyttäjätunnus-kohtaan balas@organization-domain-name.onmicrosoft.com. Korvaa "organization-domain-name" toimialueella, jota käytit Microsoft Entra -organisaatiossasi.

Viimeistele CAPTCHA ja valitse Seuraava.
Valitse Sähköpostin vaihtoehtoinen sähköposti -valintanappi. Valitse Sähköposti-.
Kun sähköpostiviesti saapuu, kirjoita Vahvista koodisi -tekstiruutu ja kirjoita sinulle lähetetty koodi. Valitse Seuraava.
Kirjoita uusi salasana ja valitse sitten Lopeta. Varmista, että kirjoitat uuden salasanan muistiin.
Sulje selainikkuna.