Use a grounded prompt in a custom copilot
In this section, you create a grounded prompt from Microsoft Copilot Studio.
Create your prompt from Copilot Studio
To create your prompt from Copilot Studio, follow these steps:
Sign in to Copilot Studio.
On the left navigation pane, select Library.
Select + Add an Item.
Select New Action.
Select Prompt.
Add a Name and Description.
In the Prompt settings pane, select Input > + Add input. Select Name and then enter ProposalName.
Select Data use (preview), select + Add data, and then search for Proposal.
Note
Adding inputs and data grounding in your prompt settings helps you fine-tune your prompt response.
ProposalName should show as the Input and Proposal should show in Data used (preview).
In the Prompt window, enter the following content:
Create a summary of the proposal <ProposalName> as paragraphs and fewer than 50 words.
Include the following information in the summary <Proposal.description>, <Proposal.Proposal (RelatedParty).Name>, <Proposal.Issuer (Issuer).Name>.
Also include the <Proposal.Name> as title of the summary.
The prompt should resemble the following image.
Test your grounded prompt in Copilot Studio
To test your grounded prompt in Copilot Studio, follow these steps:
On the right pane, expand Input and then expand ProposalName.
In the Sample data field, enter Proposal Name 1.
Select Test prompt.
Finalize and create an AI plug-in
In this task, you finalize and create an AI plug-in by following these steps:
Select Finalize prompt and then select Create AI plugin.
Refresh your browser.
After the prompt successfully saves, it should display in the list of plug-ins.
Now, you can use this prompt plug-in to add content generation behaviors to your copilots.
Use the prompt in a custom copilot
In this section, you add the prompt that you created to a custom copilot.
On the left pane, select + Create and then select New custom copilot.
Select Create.
From the upper-right corner, select Settings and then change the My copilot's name to Learning grounded prompt Copilot.
Select Save.
The copilot takes a few minutes to provision.
On the left pane, select Copilots and then select Learning grounded prompt Copilot from the list of copilots.
From the upper-right corner, select Settings.
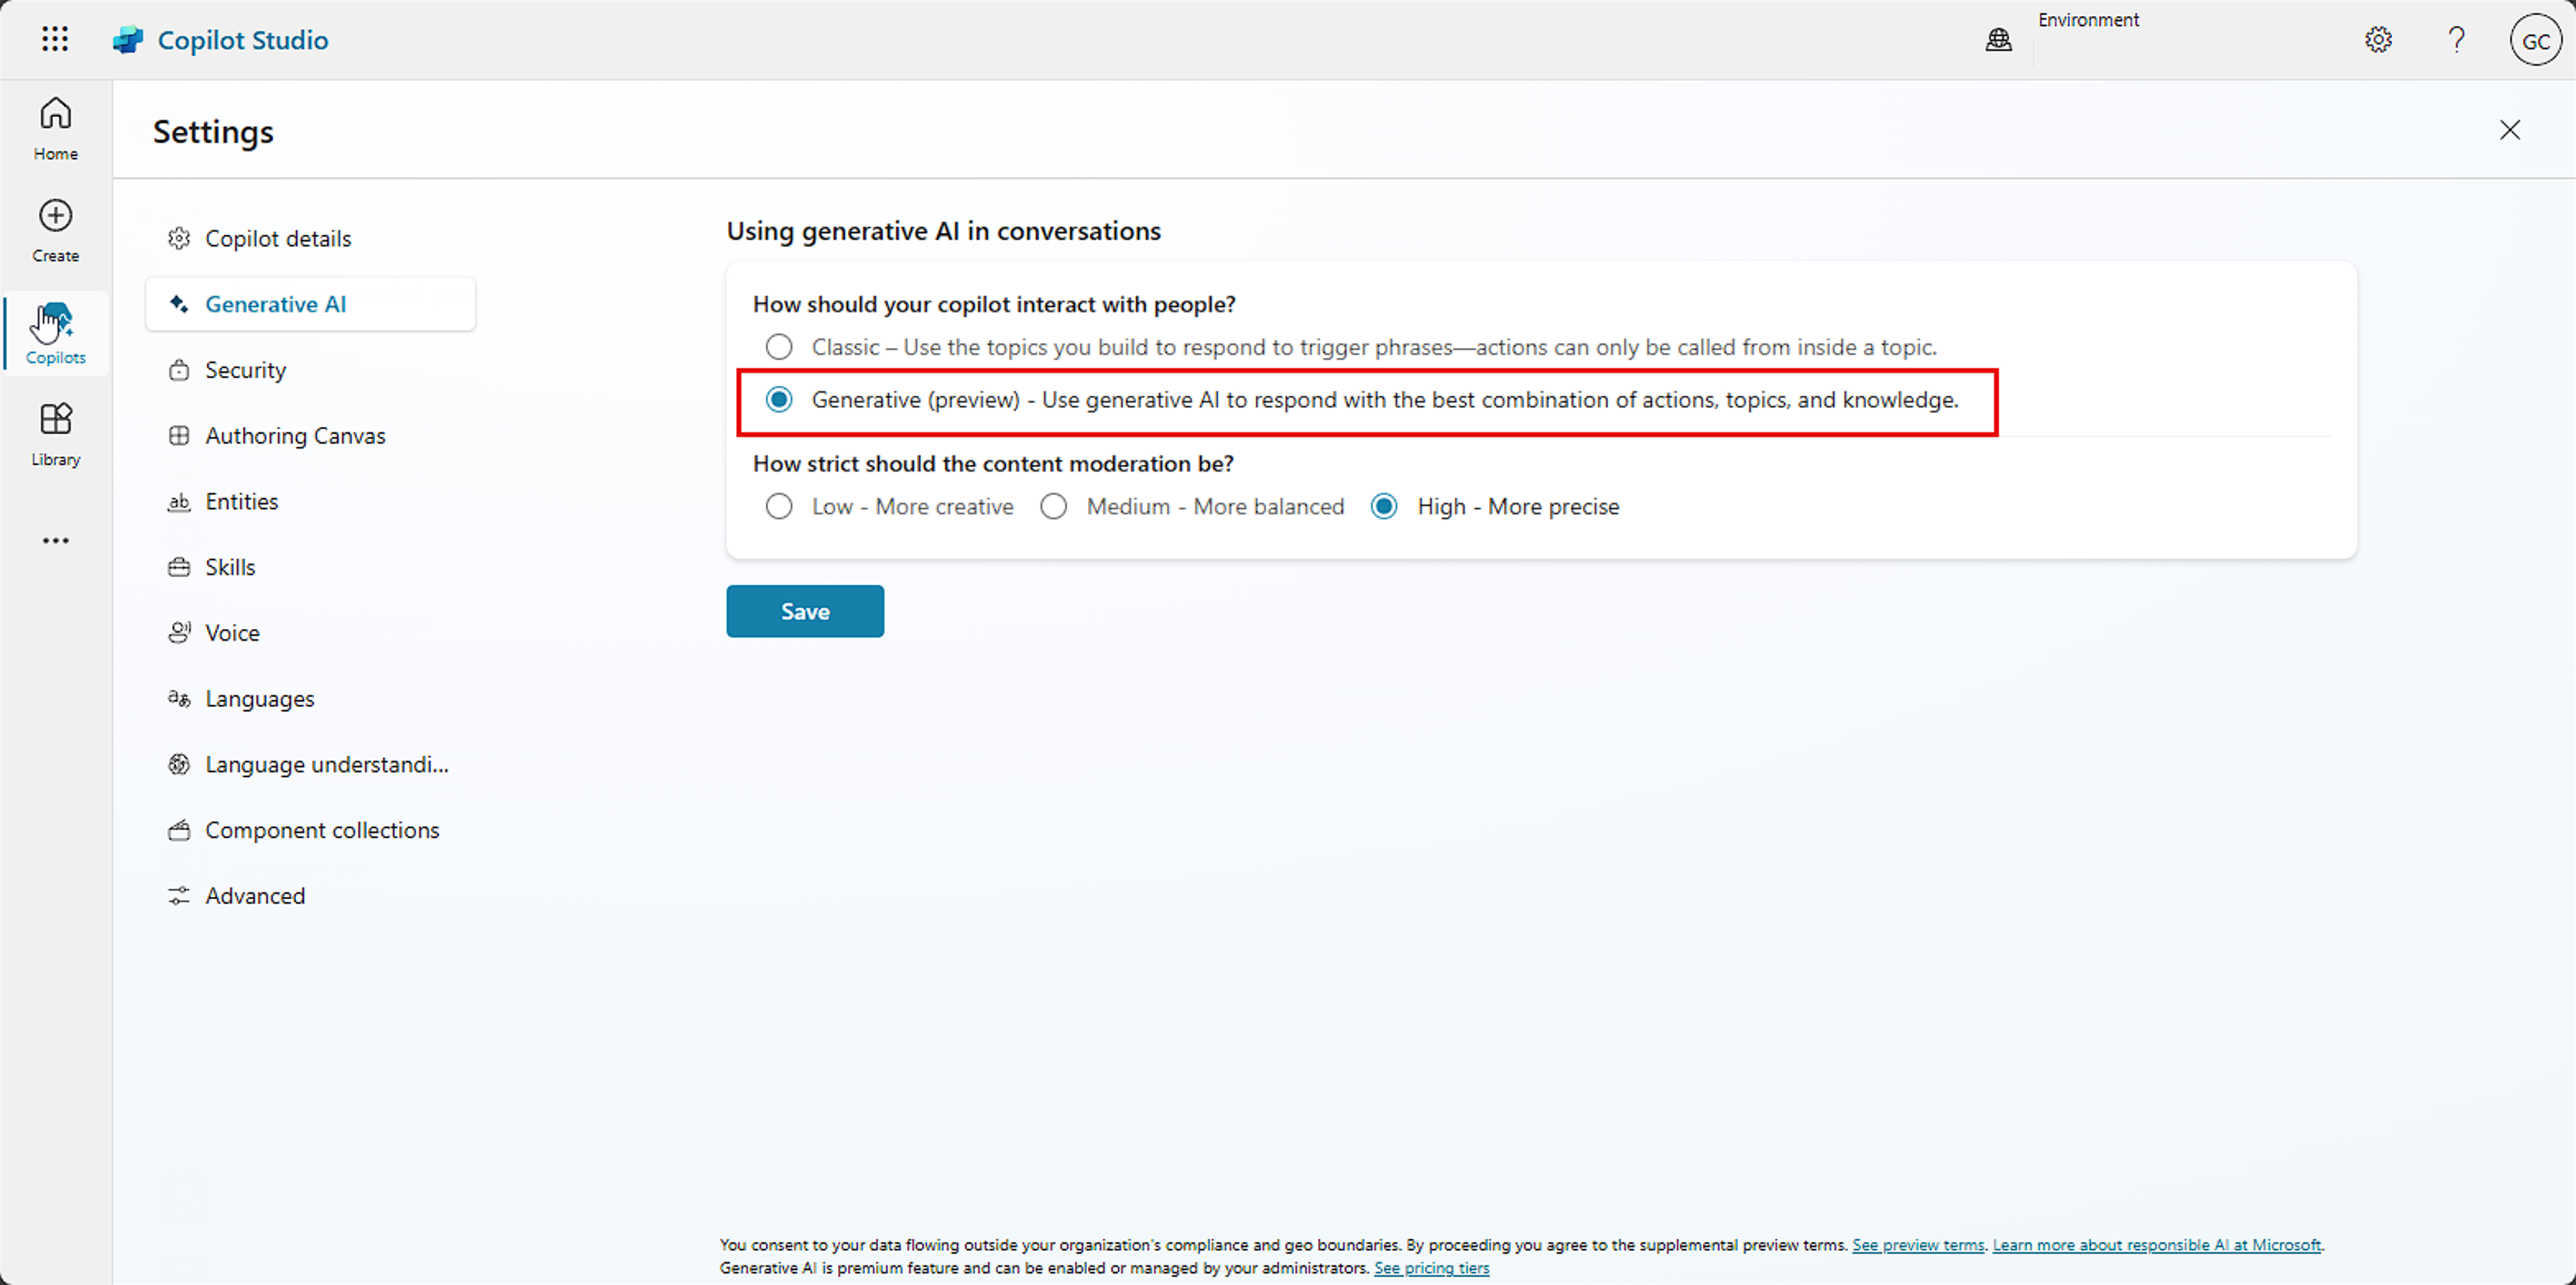
Select Generative AI > Generative (preview).
On the left pane, select Copilots. Select Learning grounded prompt Copilot from the list of custom copilots.
Use Topics in a custom copilot
In this next task, you use the Topics feature in your custom copilot in Copilot Studio.
From the upper bar menu, select Topics and then select + Add a topic.
Select Untitled, and then change the name to Summarize Proposal.
In the trigger window, enter Summarize Proposal.
Select + Add node, select Ask a question, and then enter What is the name of the proposal?
Select Identify > Multiple choice options and change it to User’s entire response.
Select Var1 and rename it to VarUserResponse.
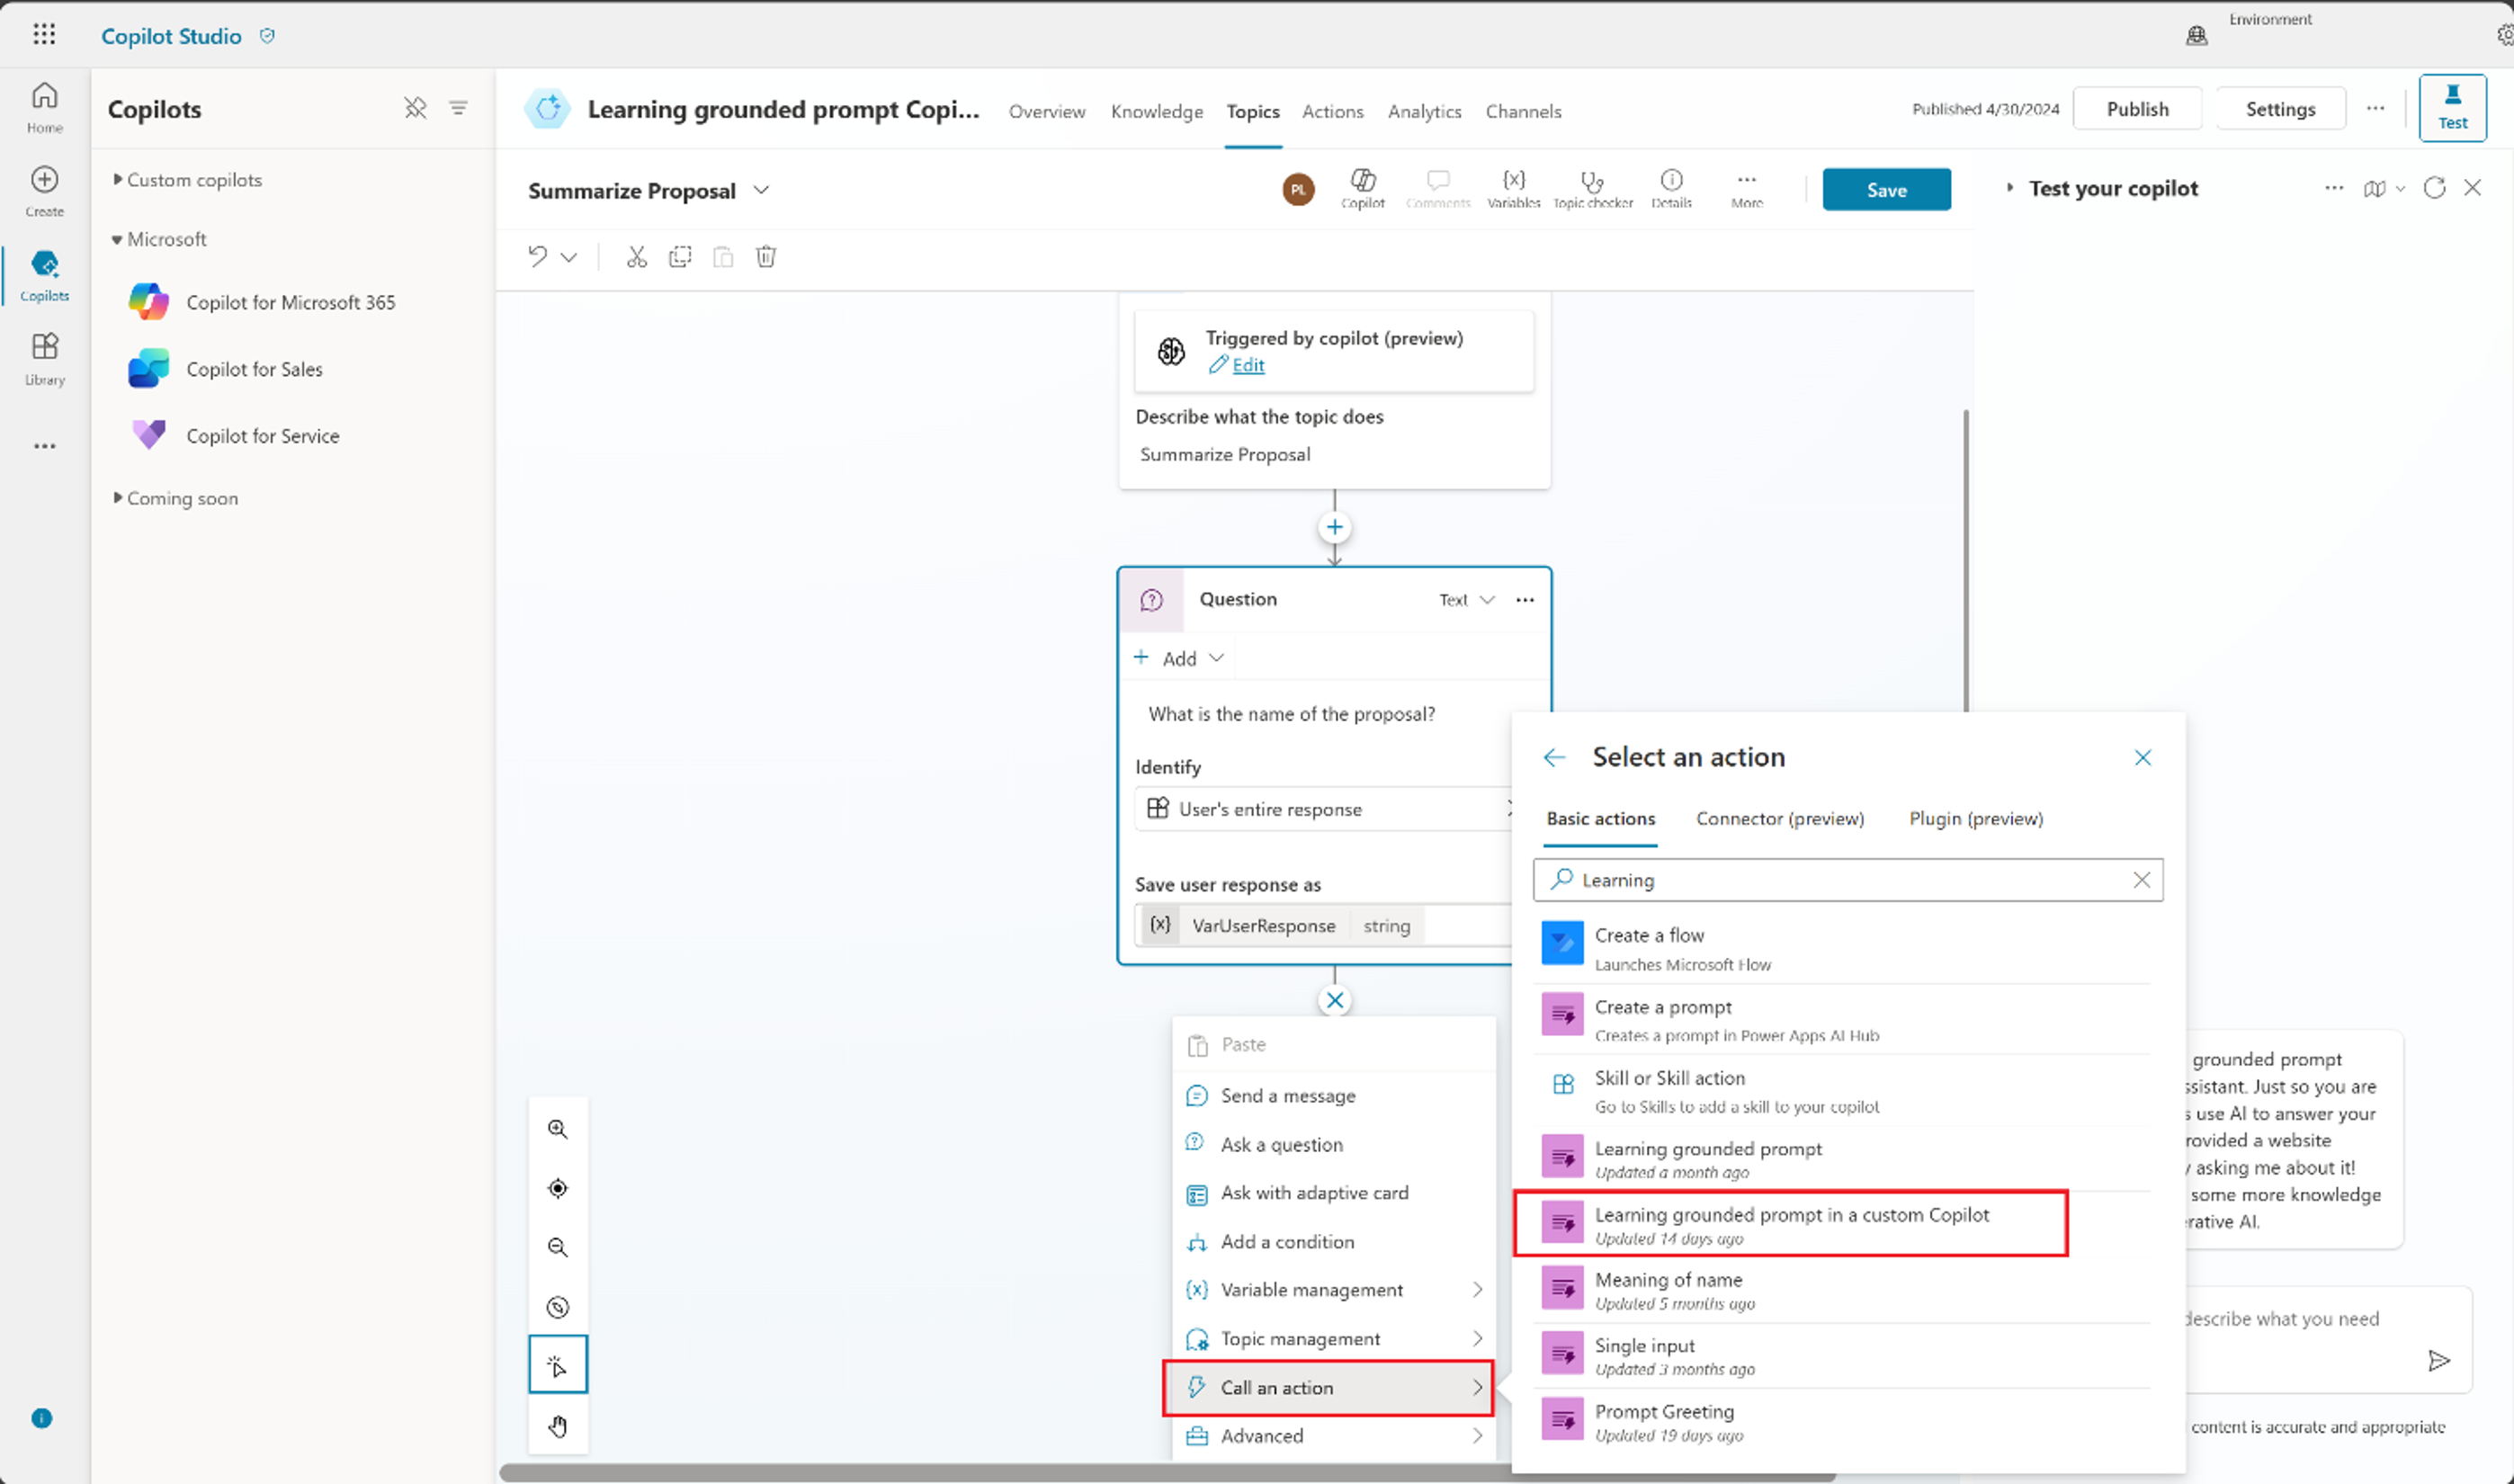
Select + Add node, select Call an action, and then select the prompt that you previously created: Learning grounded prompt in a custom Copilot.
Select the VarUserResponse value.
Select Select a variable > Create new.
Select Var1 and rename it to VarOutput.
Select + Add node and then select send a message.
Select insert variable {x} and then select VarOutput.text.
- Select Save.
Test your copilot
Now, you can test your copilot by following these steps:
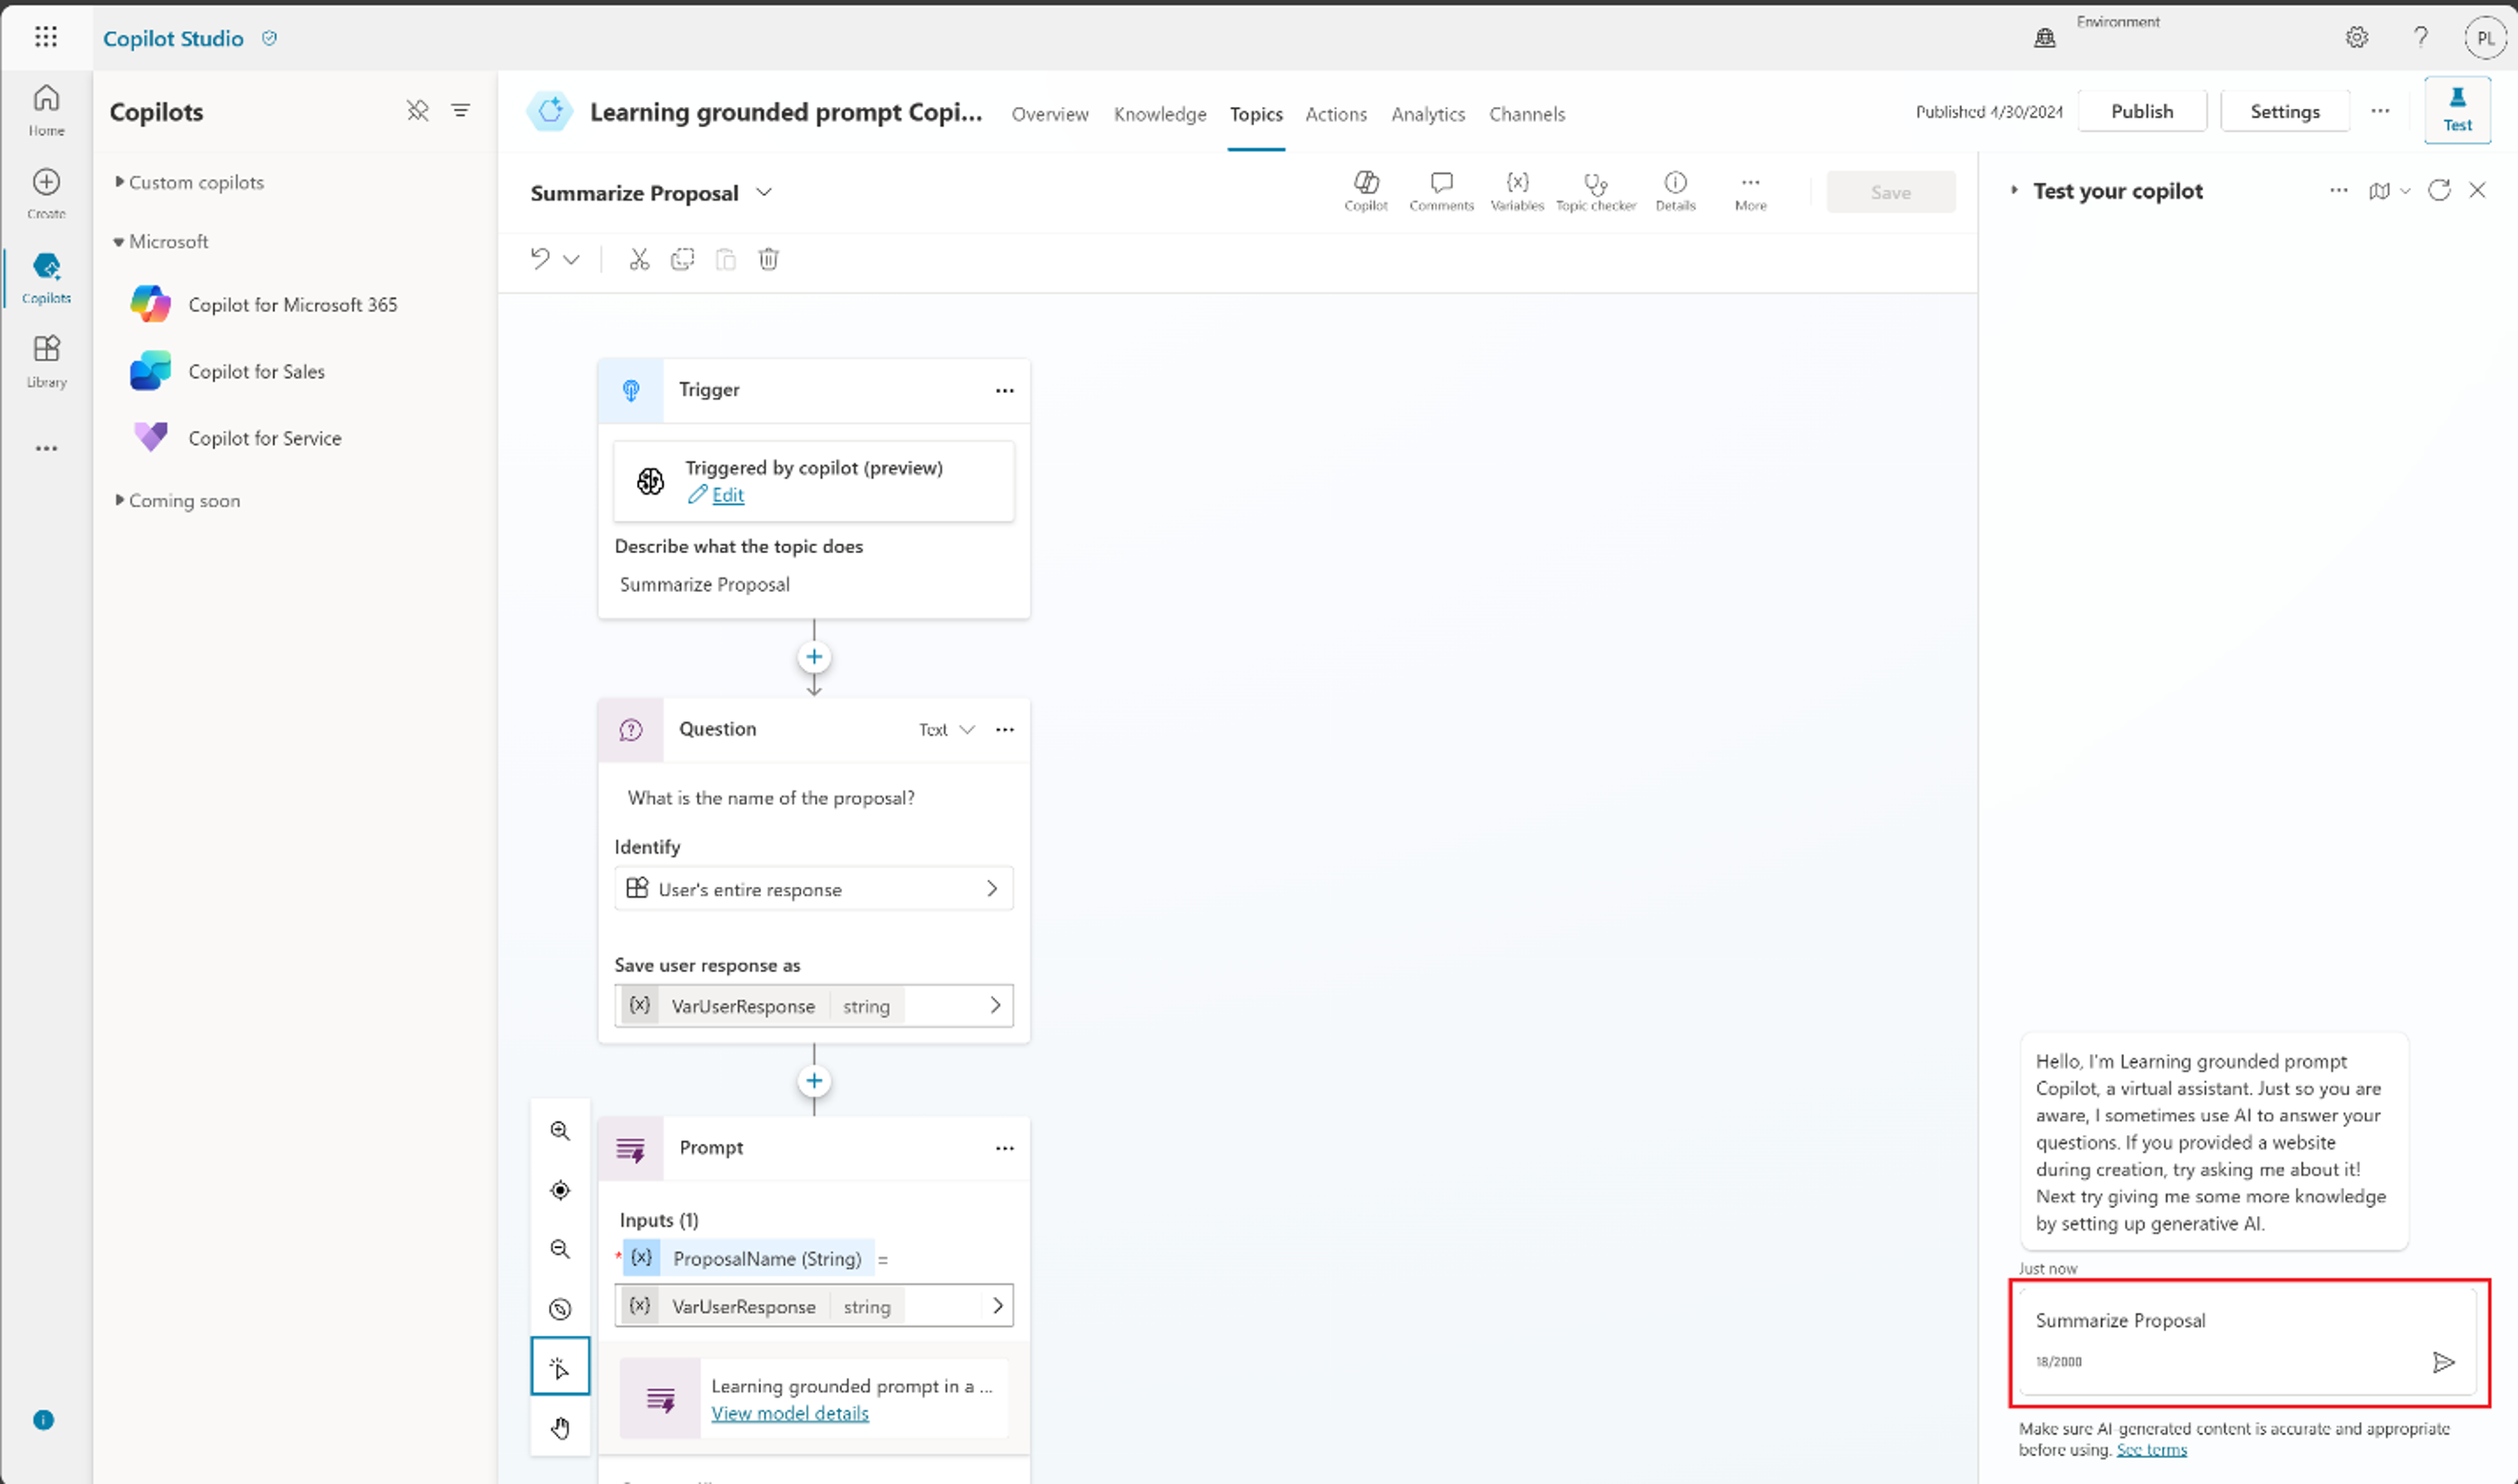
In the prompt window, enter Summarize Proposal. Press the Enter key.
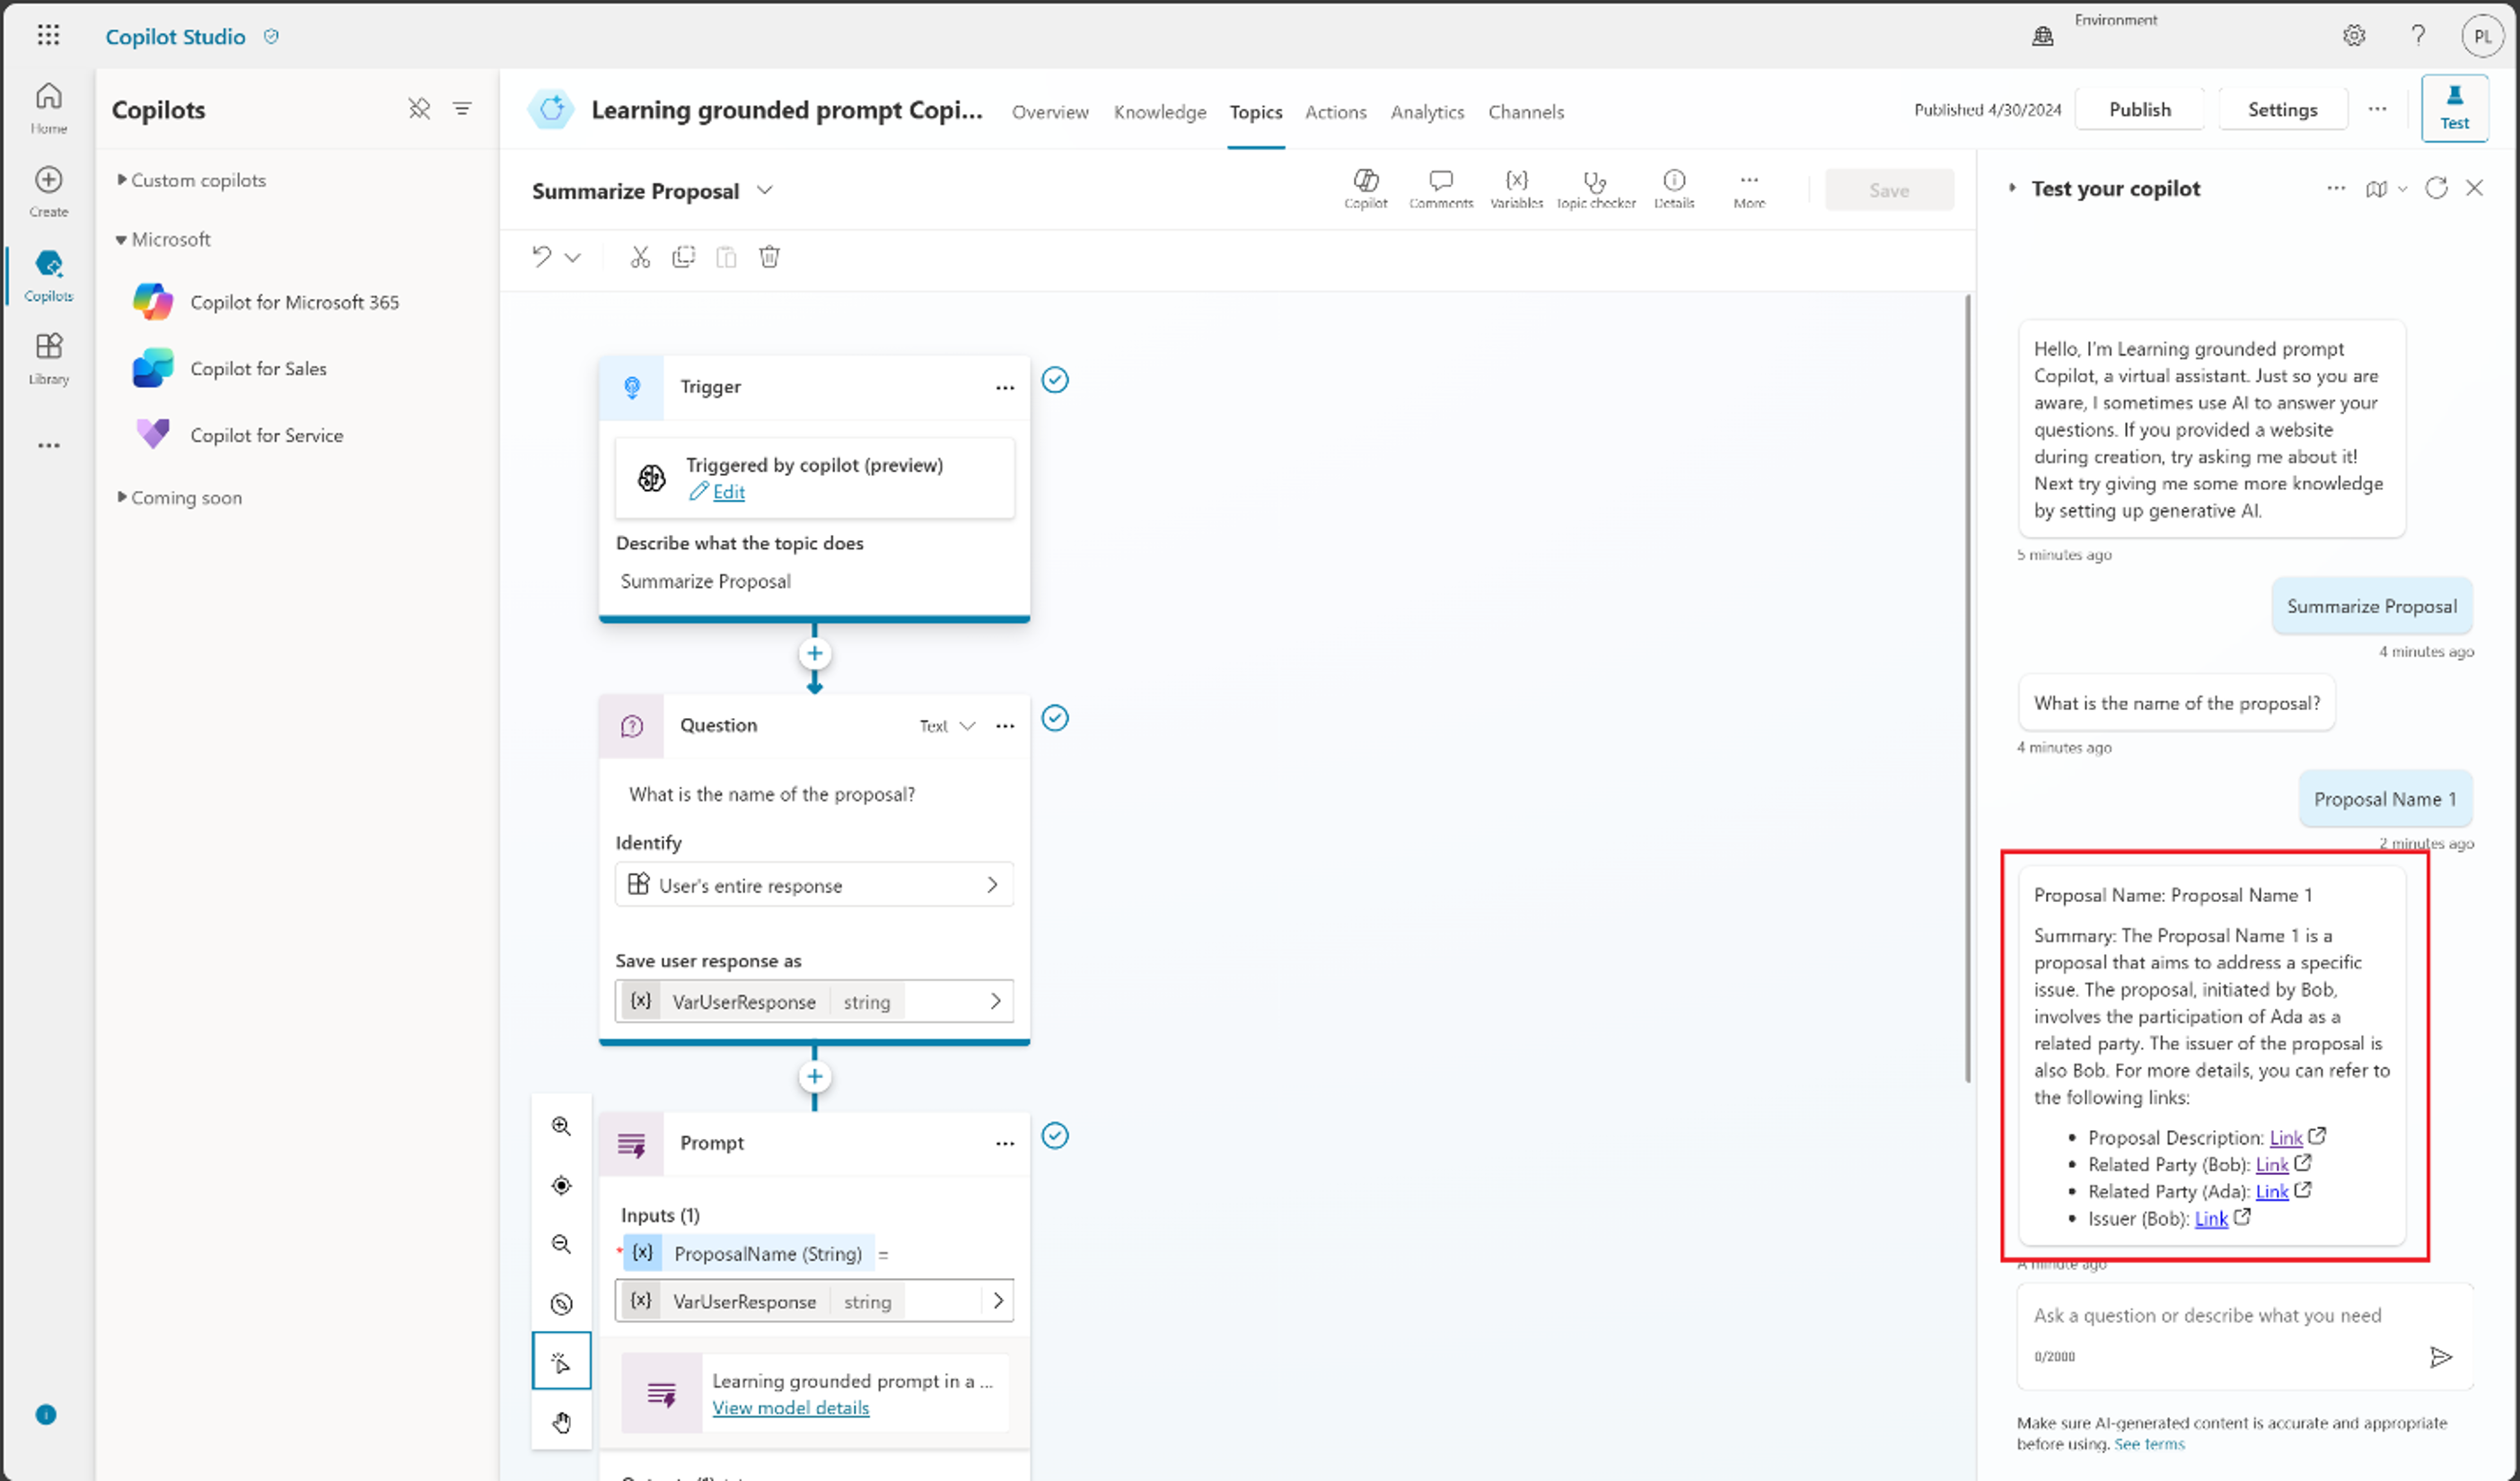
Answer the What is the name of the proposal question in the prompt by entering Proposal Name 1, as shown in the following screenshot. When you're done, press the Enter key.
Congratulations, you successfully created a custom copilot and used Topics to call a grounded prompt as an action.


