Walkthrough: Publish an SSIS Package as a SQL View
Applies to:
SQL Server
SSIS Integration Runtime in Azure Data Factory
This walkthrough provides detailed steps to publish an SSIS package as a SQL view in a SQL Server database.
Prerequisites
You must have the following software installed on your computer to perform this walkthrough.
SQL Server with SQL Server Integration Services.
Step 1: Build and Deploy SSIS Project to the SSIS Catalog
In this step, you create an SSIS package that extracts data from an SSIS supported data source - in this example, we use a SQL Server database - and outputs the data using a Data Streaming Destination component. Then you build and deploy the SSIS project to the SSIS catalog.
Launch SQL Server Data Tools. On the Start menu, point to All Programs, point to Microsoft SQL Server, and click SQL Server Data Tools.
Create a new Integration Services project.
Click File on the menu bar, point to New, and click Project.
Expand Business Intelligence in the left pane and click Integration Services in the tree view.
Select Integration Services Project if it is not already selected.
Specify SSISPackagePublishing for the project name.
Specify a location for the project.
Click OK to close the New Project dialog box.
Drag the Data Flow component from SSIS Toolbox to the design surface of the Control Flow tab.
Double-click Data Flow component in the Control Flow to open Data Flow Designer.
Drag a source component from the toolbox to the Data Flow Designer and configure it to extract data from a data source.
For the purpose of the walkthrough, create a test database: TestDB with a table: Employee. Create the table with three columns, ID, FirstName and LastName.
Set ID as a primary key.
Insert two records with the following data.
ID FIRSTNAME LASTNAME 1 John Doe 2 Jane Doe Drag the OLE DB Source component from the SSIS Toolbox on to the Data Flow Designer.
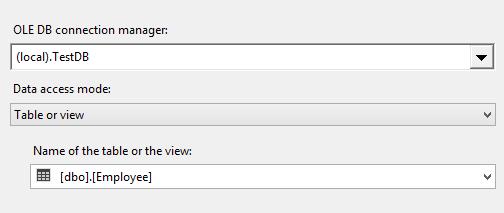
Configure the component to extract data from the Employee table in the TestDB database. Select (local).TestDB for OLE DB connection manager, Table or view for Data access mode, and [dbo].[Employee] for Name of the table or the view.
Now, drag the Data Streaming Destination from the toolbox to the data flow. You should find this component in the Common section of the toolbox.
Connect the OLE DB Source component in the data flow to the Data Streaming Destination component.
Build and deploy the SSIS project to SSIS Catalog.
Click Project on the menu bar and click Deploy.
Follow the instructions on the wizard to deploy the project to the SSIS Catalog in the local database server. The following example uses Power BI as the folder name and SSISPackagePublishing as the project name in the SSIS catalog.
Step 2: Use the SSIS Data Feed Publishing Wizard to Publish SSIS Package as a SQL View
In this step, you will use the SQL Server Integration Services (SSIS) Data Feed Publishing Wizard to publish the SSIS package as a view in a SQL Server database. The output data of the package can be consumed by querying this view.
The SSIS Data Feed Publishing Wizard creates a linked server using the OLE DB Provider for SSIS (SSISOLEDB) and then creates a SQL view that consists of a query on the linked server. This query includes folder name, project name, and package name in the SSIS catalog.
At runtime, the view sends the query to the OLE DB Provider for SSIS via the linked server you created. The OLE DB Provider for SSIS executes the package you specified in the query and returns the tabular result set to the query.
Launch SSIS Data Feed Publishing Wizard by running ISDataFeedPublishingWizard.exe from C:\Program Files\Microsoft SQL Server\130\DTS\Binn or by clicking Microsoft SQL Server 2016\SQL Server 2016 Data Feed Publishing Wizard under Start\All Programs.
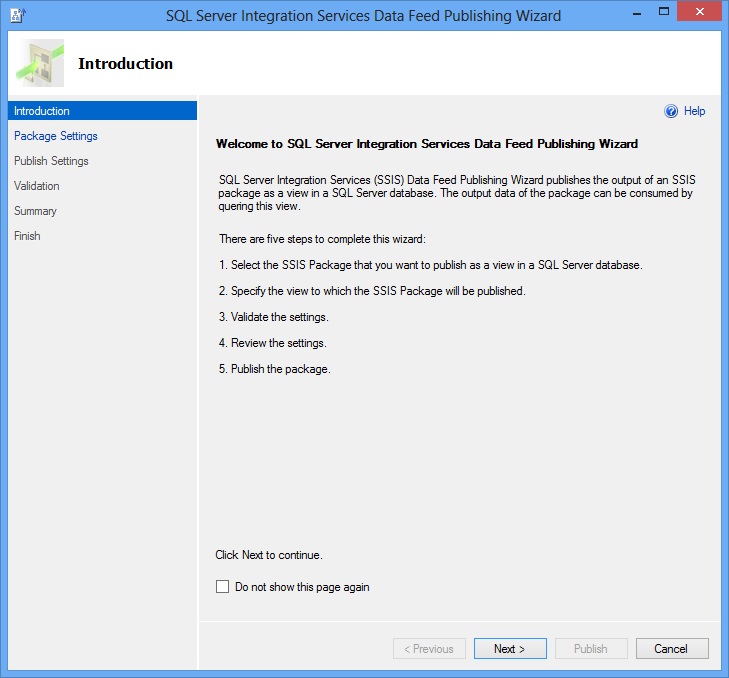
Click Next on the Introduction page.
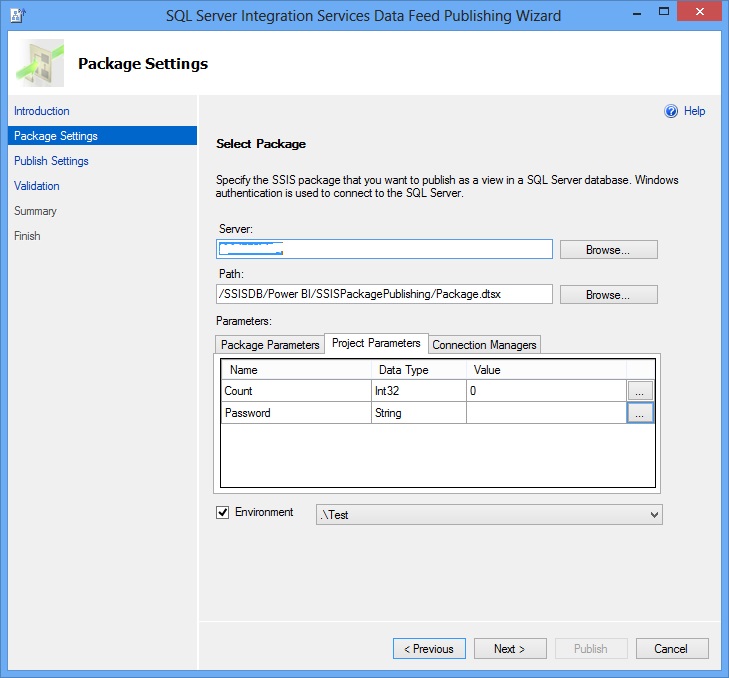
On the Package Settings page, perform the following tasks:
Type the name of the SQL Server instance that contains the SSIS catalog or click Browse to select the server.
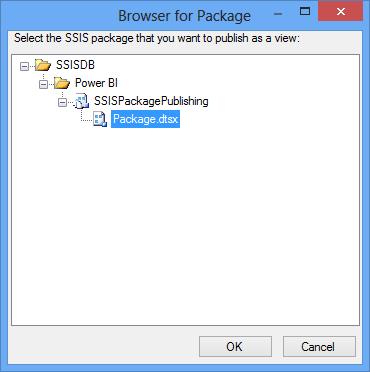
Click Browse next to Path field, browse the SSIS catalog, select the SSIS package you want to publish (for example: SSISDB->SSISPackagePublishing->Package.dtsx), and click OK.
Using the Package Parameters, Project Parameters, and Connection Managers tabs at the bottom of the page, enter values for any package parameters, project parameters, or connection manager settings for the package. You can also indicate an environment reference to be used for the package execution and bind project/package parameters to environment variables.
We recommend that you bind sensitive parameters to environment variables. This is to ensure that the value of a sensitive parameter is not stored in the plain text format in the SQL view created by the wizard.
Click Next to switch the Publish Settings page.
On the Publish Settings page, perform the following tasks:
Select the database for the view to be created.
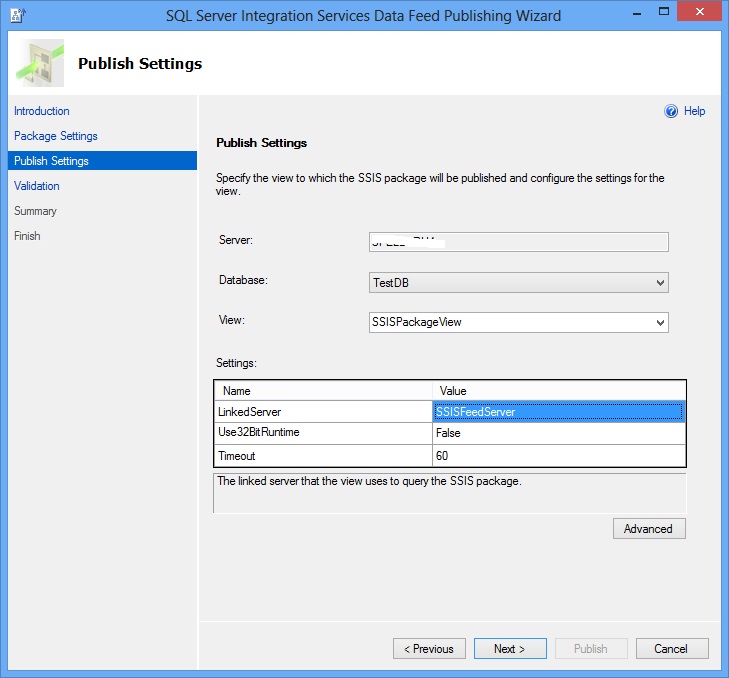
Type a name for the view. You can also select an existing view from the drop-down list.
In the Settings list, specify a name of the linked server to be associated with the view. If linked server does not already exist, the wizard will create the linked server before creating the view. You can also set values for User32BitRuntime and Timeout values here.
Click the Advanced button. You should see the Advanced Settings dialog box.
On the Advanced Settings dialog box, do the following:
Specify the database schema in which you want the view to be created (Schema field).
Specify whether data should be encrypted before sending it over the network (Encrypt field). See Using Encryption Without Validation topic for more details about this setting and the TrustServerCertificate setting.
Specify whether a self-signed server certificate can be used when the encryption setting is enabled (TrustServerCertificate field).
Click OK to close the Advanced Settings dialog box.
Click Next to switch to the Validation page.
On the Validation page, review the results from the validating the values for all the settings. In the following example, you see a warning on the existence of linked server because the linked server does not exist on the selected SQL Server instance. If you see Error for Result, hover the mouse over Error and you will see the details about the error. For example, if you had not enabled the Allow inprocess option for the SSISOLEDB provider, you will get an error on the Configuration of Linked Server action.
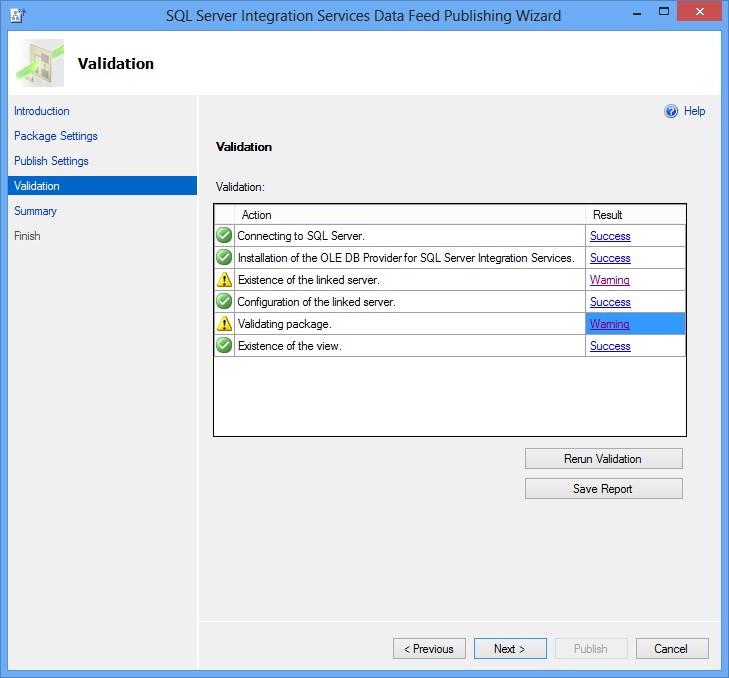
To save this report as an XML file, click Save Report.
Click Next on the Validation page to switch to the Summary page.
Review your selection in the Summary page and click Publish to start the publishing process, which will create the linked server if it does not exist already on the server and then create the view using the linked server.
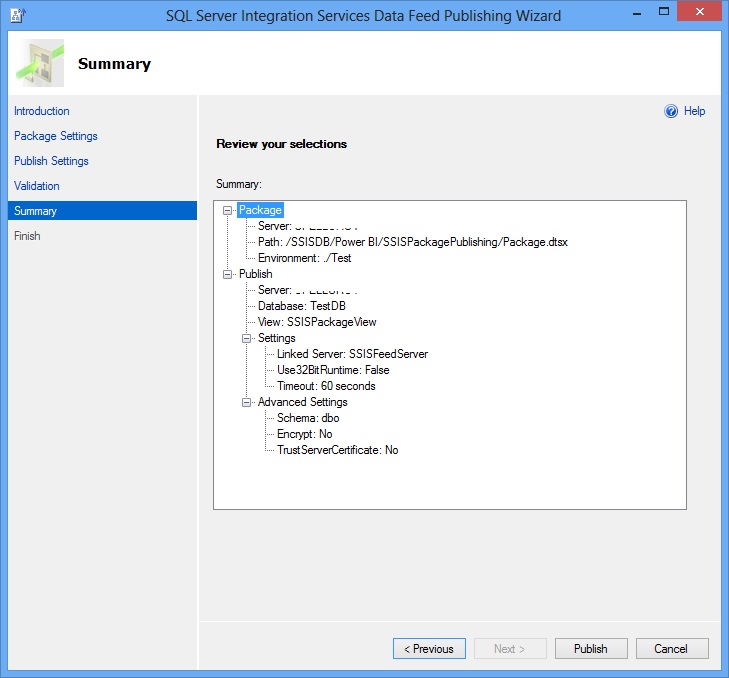
The output data of the package can now be queried by executing the following SQL statement against the TestDB database: SELECT * FROM [SSISPackageView].
To save this report as an XML file, click Save Report.
Review the results from the publishing process and click Finish to close the wizard.
Note
The following data types are not supported : text, ntext, image, nvarchar(max), varchar(max), and varbinary(max).
Step 3: Test the SQL view
In this, you will run the SQL view created by the SSIS Data Feed Publishing Wizard.
Launch SQL Server Management Studio.
Expand <machine name>, Databases, <database you selected in the wizard>, and Views.
Right-click the <view created by the wizard> created by the wizard and click Select top 1000 rows.
Confirm that you see results from the SSIS package.
Step 4: Verify the SSIS Package Execution
In this step, you will verify that the SSIS package was executed.
In SQL Server Management Studio, expand Integration Services Catalogs, expand SSISDB, expand folder in which your SSIS project exists, expand Projects, expand your project node, and expand Packages.
Right-click on the SSIS package, and click point to Reports, point to Standard Reports, and click All Executions.
You should see the SSIS package execution in the report.
Note
On a Windows Vista Service Pack 2 computer, you may see two SSIS package executions in the report, a successful one and a failed one. Ignore the failed one as it is caused by a known issue in this release.
More info
The Data Feed Publish Wizard performs the following important steps:
Creates a linked server and configures it to use the OLE DB Provider for SSIS.
Creates a SQL view in the specified database, which queries the linked server with catalog information for the selected package.
This section has procedures for creating a linked server and a SQL view without using the Data Feed Publish Wizard. It also has additional information about using the OPENQUERY function with the OLE DB Provider for SSIS.
Create a Linked Server using the OLE DB Provider for SSIS
Create a linked server using the OLE DB Provider for SSIS (SSISOLEDB) by running the following query in SQL Server Management Studio.
USE [master]
GO

EXEC sp_addlinkedserver
@server = N'SSISFeedServer',
@srvproduct = N'Microsoft',
@provider = N'SSISOLEDB',
@datasrc = N'.'
GO
Create a View using Linked Server and SSIS Catalog Information
In this step, you will create a SQL view that runs a query on the linked server you created in the previous section. The query will include folder name, project name, and package name in the SSIS Catalog.
At runtime, when the view is executed, the linked server query that is defined in the view starts the SSIS package specified in the query and receives the package output as a tabular result set.
Before creating the view, type and run the following query in the new query window. OPENQUERY is a rowset function supported by SQL Server. It executes the specified pass-through query on the specified linked server using the OLE DB Provider associated with the linked server. OPENQUERY can be referenced in the FROM clause of a query as if it were a table name. See OPENQUERY documentation on MSDN Library for more information.
SELECT * FROM OPENQUERY(SSISFeedServer,N'Folder=Eldorado;Project=SSISPackagePublishing;Package=Package.dtsx')
GO
Important
Update folder name, project name, and package name if needed. If the OPENQUERY function fails, in the SQL Server Management Studio, expand Server Objects, expand Linked Servers, expand Providers, and double-click SSISOLEDB provider, and ensure that the Allow inprocess option is enabled.
Create a view in the database TestDB for the purpose of this walkthrough) by running the following query.
USE [TestDB]
GO

CREATE VIEW SSISPackageView AS
SELECT * FROM OPENQUERY(SSISFeedServer, 'Folder=Eldorado;Project=SSISPackagePublishing;Package=Package.dtsx')
GO
Test the view by running the following query.
SELECT * FROM SSISPackageView
OPENQUERY Function
The syntax for OPENQUERY function is:
SELECT * FROM OPENQUERY(<LinkedServer Name>, N'Folder=<Folder Name from SSIS Catalog>; Project=<SSIS Project Name>; Package=<SSIS Package Name>; Use32BitRuntime=[True | False];Parameters="<parameter_name_1>=<value1>; parameter_name_2=<value2>";Timeout=<Number of Seconds>;')
Folder, Project, and Package parameters are mandatory. Use32BitRuntime, Timeout and Parameters are optional.
The value of Use32BitRuntime can be 0, 1, true, or false. It indicates whether the package should run with 32-bit runtime (1 or true) when the platform of SQL Server is 64-bit.
Timeout indicates the number of seconds that the OLE DB provider for SSIS can wait before new data arrives from the SSIS package. By default, the timeout is 60 seconds. You can specify an integer value for the timeout between 20 and 32000.
Parameters contain the value of both package parameters and project parameters. The rules for parameters are same as parameters in DTExec.
The following list specifies the special characters allowed in the query clause:
Single Quote (') - This is supported by the standard OPENQUERY. If you want to use the single quote in the query clause, use two single quotes ('').
Double-Quote (") - The parameters part of the query is enclosed in double-quotes. If a parameter value itself contains a double-quote, use the escape character. For example: ".
Left and right square brackets ([ and ]) - These characters are used to indicate leading/rear spaces. For example, "[ some spaces ]" represents the string " some spaces " with one leading space and one trailing space. If these characters themselves are used in the query clause, they must be escaped. For example: \[ and \].
Forward Slash (\) - Every \ used in the query clause must use escape character. For example, \\ is evaluated as \ in the query clause.
See Also
Data Streaming Destination
Configure Data Streaming Destination