Configure Windows Server Update Services (WSUS) in Analytics Platform System
These instructions walk you through the steps for using the Windows Server Update Services (WSUS) Configuration Wizard to configure WSUS for Analytics Platform System. You need to configure WSUS before you can apply software updates to the appliance. WSUS is already installed on the VMM virtual machine of the appliance.
For more information about configuring WSUS, see the WSUS Step-by-Step Installation Guide on the WSUS website. After configuring WSUS, see Download and Apply Microsoft Updates (Analytics Platform System) to initiate an update.
Warning
If you encounter any errors during this configuration process, stop and contact support for assistance. Do not ignore errors or continue in the process after errors are received.
Before You Begin
To configure WSUS, you need to:
Have the Analytics Platform System appliance domain administrator account login information.
Have an Analytics Platform System login with permissions to access the Admin Console and view appliance state information.
Know the IP address of the upstream WSUS server if you are planning to synchronize updates from an upstream WSUS server instead of synchronizing updates directly from Microsoft Update. Make sure your upstream WSUS server is set to allow anonymous connections and supports SSL.
Know the IP address of the proxy server if your appliance will be using a proxy server to access the upstream server or Microsoft Update.
In most cases, WSUS needs to access servers outside of the appliance. To support this usage scenario the Analytics Platform System DNS can be configured to support an external name forwarder that will allow the Analytics Platform System hosts and Virtual Machines (VMs) to use external DNS servers to resolve names outside of the appliance. For more information, see Use a DNS Forwarder to Resolve Non-Appliance DNS Names (Analytics Platform System).
To configure Windows Server Update Services (WSUS)
Log into the Admin Console. On the Appliance State tab, verify that the Cluster and Network columns show green (or NA) for all nodes. Verify the status indicators for all nodes on the Appliance State.
It is safe to continue with green or NA indicators.
Evaluate non-critical (yellow) warning errors. In some cases warning messages will not block updates. If there is a non-critical disk volume error that is not on the C:\ drive, you can proceed to the next step before resolving the disk volume error.
Most red indicators must be resolved before continuing. If there are disk failures, use the Admin Console Alerts page to verify there is no more than one disk failure within each server or SAN array. If there is no more than one disk failure within each server or SAN array, you can proceed to the next step before fixing the disk failures. Be sure to contact Microsoft support to fix the disk failures as soon as possible.
Log on to the VMM virtual machine as an appliance domain administrator.
Launch the configuration wizard.
To launch the configuration wizard
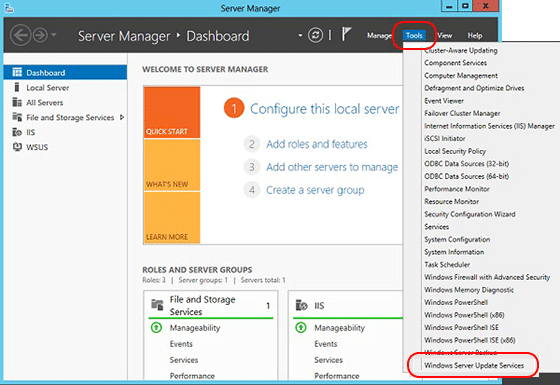
In the Server Manager Dashboard, on the Tools menu, click Windows Server Update Services.
In the left pane of the Update Services window, click to expand the Virtual Machine Management node server (appliance_domain-VMM), and then click Options.
In the Options pane, click WSUS Server Configuration Wizard to launch the configuration wizard.
If this is the first time you have run the WSUS wizard, you may be asked to configure a directory for storing the updates.
C:\wsusis an appropriate location; however you may provide a different path.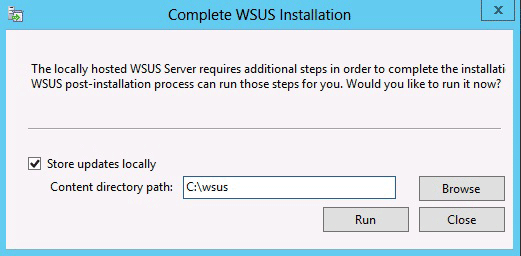
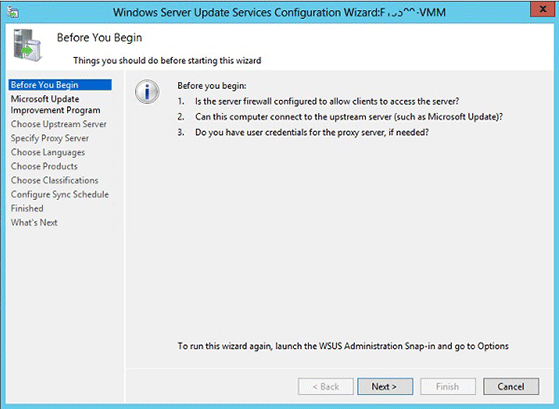
Review the Before You Begin list of items to complete before you complete the wizard.
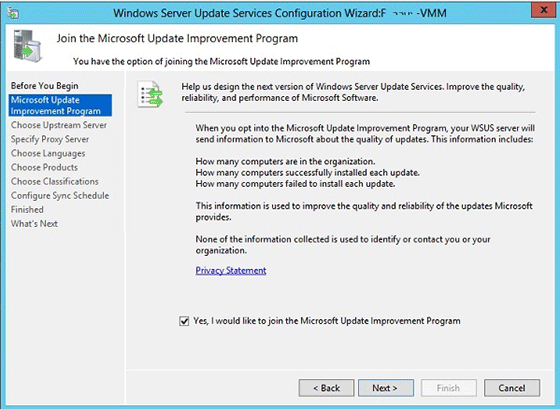
On the Join the Microsoft Update Improvement Program page, select Yes, I would like to join the Microsoft Update Improvement Program, and then click Next.
You should now see the Choose Upstream Server page. The following screenshot is the starting point of the configuration wizard.
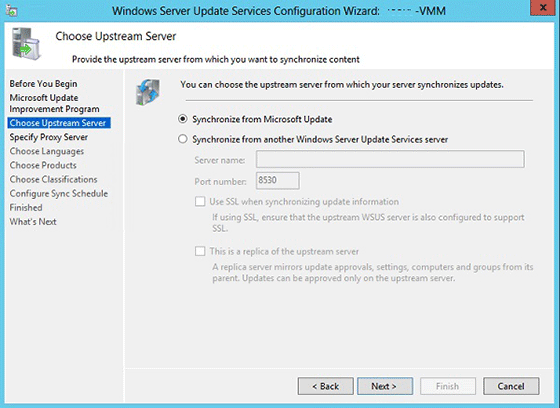
Choose the upstream server.
On the Choose Upstream Server page of the WSUS configuration wizard, you will select how WSUS on the Virtual Machine Management node will connect to an upstream server to obtain software updates. Your two choices are to synchronize the upstream server with Microsoft Update or to synchronize updates with another Windows Server Update Services server.
To update by using Microsoft Update
If you choose to synchronize with Microsoft Update, you do not need to make any changes to the Choose Upstream Server page. Click Next.

To update from another WSUS server
If you choose to synchronize with a source other than Microsoft Update (an upstream server), specify the server (enter the IP address) and the port on which this server will communicate with the upstream server.
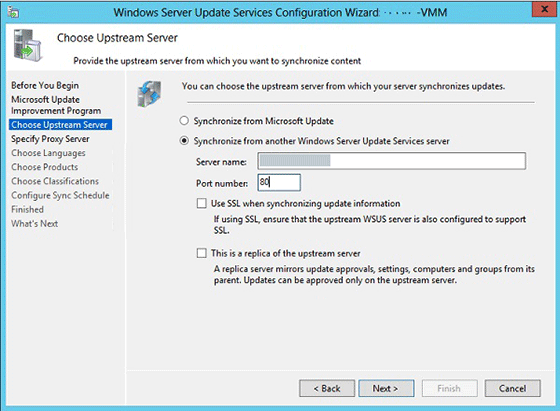
To use Secure Sockets Layer (SSL), select the Use SSL when synchronizing update information check box. In that case the servers will use port 443 for synchronization.
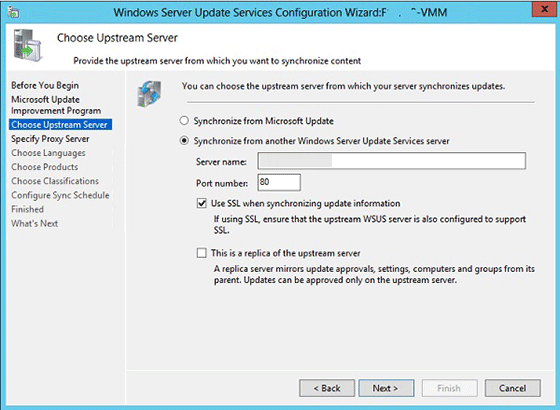
If this is a replica server, select the This is a replica of the upstream server check box. It is possible to select both Use SSL when synchronizing update information and This is a replica of the upstream server.
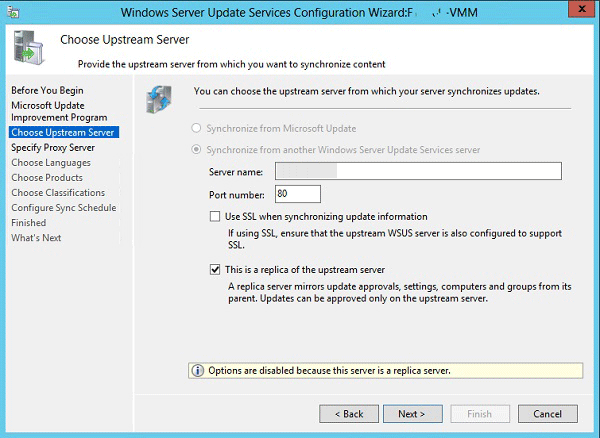
At this point, you are finished with upstream server configuration. Click Next, or select Specify proxy server in the left navigation pane.
Specify the proxy server.
If this server requires a proxy server to access Microsoft Update or a different upstream server, you can configure the proxy server settings here; otherwise, click Next.
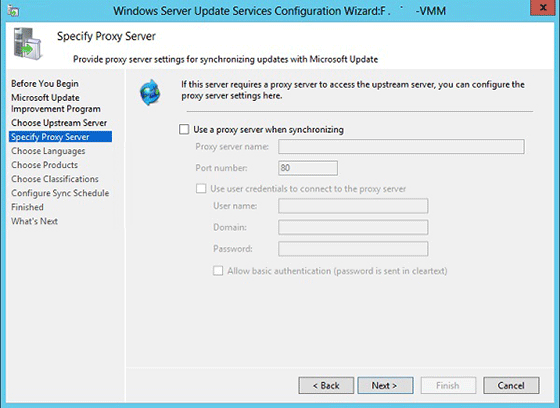
To configure proxy server settings
On the Specify Proxy Server page of the configuration wizard, select the Use a proxy server when synchronizing check box, and then type the proxy server IP address (not name) and port number (port 80 by default) in the corresponding boxes.
If you want to connect to the proxy server by using specific user credentials, select the Use user credentials to connect to the proxy server check box, and then type the user name, domain, and password of the user in the corresponding boxes. If you want to enable basic authentication for the user connecting to the proxy server, select the Allow basic authentication (password is sent in cleartext) check box.
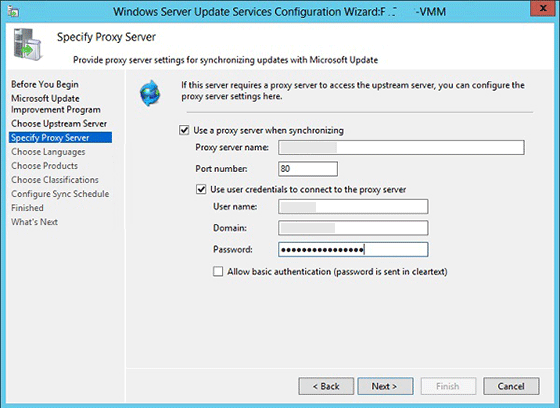
At this point, you are finished with proxy server configuration. Click Next to go to the next page, where you can start to set up the synchronization process.
Start connecting.
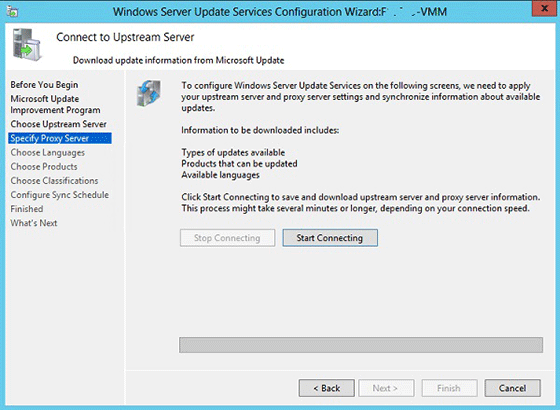
Click Start Connecting.
After the connection has succeeded, click Next to go to the next page, where you can choose languages.
Choose languages.
Select Download updates only in these languages.
Select English, and then click Next.

Choose products.
Note
If you are using an Upstream Server, you may not be able to Choose Products. If this option is not available, skip this step.
Warning
Please exclude any SQL Server 2016 updates.
Unselect all selected updates.
Select SQL Server 2012, SQL Server 2014, Windows Server 2012 R2, System Center 2012 R2 - Virtual Machine Manager, Windows Server 2016, and System Center 2016 - Virtual Machine Manager and then click Next.
Choose classifications.
Note
If you are using an Upstream Server, you may not be able to Choose Classifications. If this option is not available, skip this step.
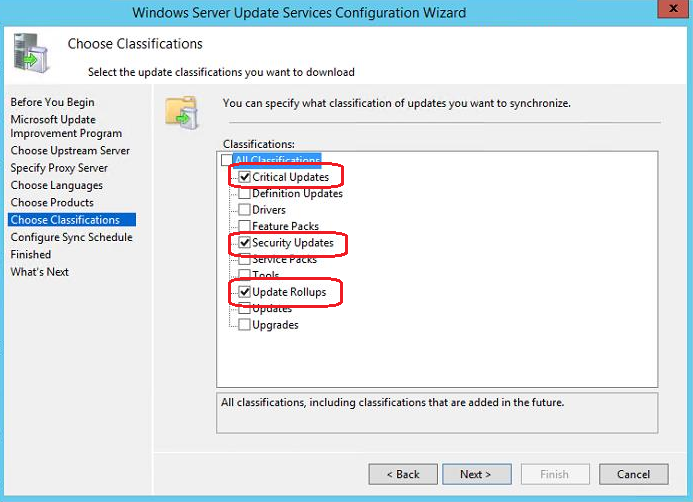
Unselect all previously selected updates.
Select Critical Updates, Security Updates and Update Rollups for the updates that will be synchronized for the Analytics Platform System appliance, and then click Next.
Configure the synchronization schedule.
Select Synchronize Manually, and then click Next.

Begin initial synchronization.
Select Begin initial synchronization, then click Next.
Finish.
Click Finish.
Group the Appliance Servers in WSUS
After configuring WSUS for Analytics Platform System, the next step is to group the appliance servers. By adding all of the appliance servers to a group, WSUS will be able to apply software updates to all servers in the appliance.
Note
The WSUS system is designed to run asynchronously. Initiating activity does not always result in an immediately update. Therefore, you might need to wait a while until computers will be visible in the WSUS dialog boxes. Running the setup.exe /action=ReportMicrosoftUpdateClientStatus /DomainAdminPassword="<password>" command described at the end of the topic Download and Apply Microsoft Updates (Analytics Platform System) can help refresh the dialog boxes.
To group the appliance servers
Open the WSUS console, right-click All Computers and then click Add Computer Group.

Enter the name "APS" for the computer group, and then click Add.

Click All Computers again, change the status in the Status drop-down menu to Any, and then click Refresh. You may need to expand All Computers by clicking it on the tree control on the left in order to see the new group you just added.

Select all computers that are part of the appliance, right-click, and then click Change Membership.

Select the new computer group that you created by clicking the check box and then clicking OK.

Select the new computer group, change its Status to Any, and then click Refresh. All computers should now be assigned to this group and listed in the right pane. It is generally safe to continue when nodes show warnings such as This node has not reported status yet.
