Build your first SharePoint Framework Extension (Hello World part 1)
SharePoint Framework (SPFx) Extensions are client-side components that run inside the context of a SharePoint page. You can deploy extensions to SharePoint Online, and you can use modern JavaScript tools and libraries to build them.
You can also follow the steps in this article by watching the video on the Microsoft 365 Platform Communtiy (PnP) YouTube Channel:
Important
The SharePoint page HTML DOM is not an API. You should avoid taking any dependencies on the page DOM structure or CSS styles, which are subject to change and potentially break your solutions. SharePoint Framework provides a rich API to customize the SharePoint experience in reliable ways and is the only supported means to interact with the SharePoint page HTML DOM.
Create an extension project
Create a new project directory in your favorite location.
md app-extensionGo to the project directory.
cd app-extensionCreate a new HelloWorld extension by running the SharePoint Framework Yeoman generator.
yo @microsoft/sharepointWhen prompted, enter the following values (select the default option for all prompts omitted below):
- What is your solution name?: app-extension
- Which type of client-side component to create?: Extension
- Which type of client-side extension to create?: Application Customizer
- What is your Application Customizer name? HelloWorld
Note
If you use a name for the extension that is too long, you might encounter issues. The entries provided are used to generate an alias entry for the Application Customizer manifest JSON file. If the alias is longer than 40 characters, you get an exception when you try to serve the extension by using gulp serve --nobrowser. You can resolve this by updating the alias entry afterward.
At this point, Yeoman installs the required dependencies and scaffolds the solution files along with the HelloWorld extension. This usually takes 1-3 minutes.
Next, type the following into the console to start Visual Studio Code.
code .Note
Because the SharePoint client-side solution is HTML/TypeScript based, you can use any code editor that supports client-side development to build your extension.
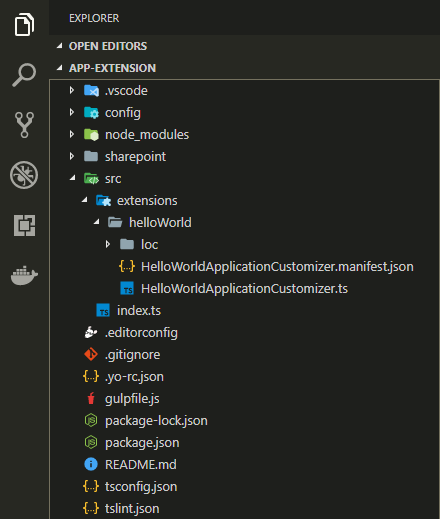
Notice how the default solution structure looks like the solution structure for client-side web parts. This is the basic SharePoint Framework solution structure, with similar configuration options across all solution types.

Open ./src/extensions/helloWorld/HelloWorldApplicationCustomizer.manifest.json.
This file defines your extension type and a unique identifier for your extension. You’ll need this ID later when you debug and deploy your extension to SharePoint.
{
  "$schema": "https://developer.microsoft.com/json-schemas/spfx/client-side-extension-manifest.schema.json",

   "id": "05966ad1-55c7-47f6-9ff5-4fee8bff838a",
   "alias": "HelloWorldApplicationCustomizer",
   "componentType": "Extension",
   "extensionType": "ApplicationCustomizer",

   // The "*" signifies that the version should be taken from the package.json
   "version": "*",
   "manifestVersion": 2,
   // If true, the component can only be installed on sites where Custom Script is allowed.
   // Components that allow authors to embed arbitrary script code should set this to true.
   // https://support.office.com/article/Turn-scripting-capabilities-on-or-off-1f2c515f-5d7e-448a-9fd7-835da935584f
   "requiresCustomScript": false
   }
Code your Application Customizer
Open the ./src/extensions/helloWorld/HelloWorldApplicationCustomizer.ts file.
Notice that base class for the Application Customizer is imported from the @microsoft/sp-application-base package, which contains SharePoint framework code required by the Application Customizer.
import { Log } from '@microsoft/sp-core-library';
import {
    BaseApplicationCustomizer
} from '@microsoft/sp-application-base';
import { Dialog } from '@microsoft/sp-dialog';
The logic for your Application Customizer is contained in the onInit() method, which is called when the client-side extension is first activated on the page. This event occurs after this.context and this.properties are assigned. As with web parts, onInit() returns a promise that you can use to do asynchronous operations.
Note
The class constructor is called at an early stage, when this.context and this.properties are undefined. Custom initiation logic is not supported here.
The following are the contents of onInit() in the default solution. This default solution writes a log to the Dev Dashboard, and then displays a simple JavaScript alert when the page renders.
public onInit(): Promise<void> {
  Log.info(LOG_SOURCE, `Initialized ${strings.Title}`);

  let message: string = this.properties.testMessage;
  if (!message) {
    message = '(No properties were provided.)';
  }

  Dialog.alert(`Hello from ${strings.Title}:\n\n${message}`);

  return Promise.resolve();
}
Note
SharePoint Framework Dev Dashboard is additional UI dashboard, which can be started with CTRL+F12 on Windows. This is developer oriented logging information, which you can take advantage as developer.
If your Application Customizer uses the ClientSideComponentProperties JSON input, it's deserialized into the BaseExtension.properties object. You can define an interface to describe it. The default template is looking for a property called testMessage. If that property is provided, it outputs it in an alert message.
Debug your Application Customizer
You can't use the SharePoint Workbench to test SharePoint Framework Extensions. You need to test them against a live SharePoint Online site. However, you don't have to deploy your customization to the app catalog to test the solution, which makes the debugging experience simple and efficient.
Open the ./config/serve.json file.
Notice that this file has been updated with the default settings matching your project. You can notice that there's a specific GUID mentioned under the
customActionselement. This is automatically updated to match your component when project was scaffold. If you'll add new components or change the properties for the component, you'll need to update this file for testing.Update pageURL to match your own tenant, which you want to use for testing. You can use any URL with modern experience. For example, a welcome page of a new group associated team site, which would mean something like the following URL:
https://sppnp.sharepoint.com/sites/yoursite/SitePages/Home.aspxYour serve.json file should look similar to the following (updated with your tenant details):
{
  "$schema": "https://developer.microsoft.com/json-schemas/spfx-build/spfx-serve.schema.json",
  "port": 4321,
  "https": true,
  "serveConfigurations": {
    "default": {
      "pageUrl": "https://sppnp.sharepoint.com/sites/mySite/SitePages/myPage.aspx",
      "customActions": {
        "54328ea6-0591-4fbd-aadb-5dc51fd53235": {
          "location": "ClientSideExtension.ApplicationCustomizer",
          "properties": {
            "testMessage": "Test message"
          }
        }
      }
    },
    "helloWorld": {
      "pageUrl": "https://sppnp.sharepoint.com/sites/mySite/SitePages/myPage.aspx",
      "customActions": {
        "54328ea6-0591-4fbd-aadb-5dc51fd53235": {
          "location": "ClientSideExtension.ApplicationCustomizer",
          "properties": {
            "testMessage": "Test message"
          }
        }
      }
    }
  }
}
Note
The GUID in the above JSON excerpt is the unique ID of the SPFx extension component. This is defined in the component's manifest. The GUID in your solution will be different as every component ID is unique.
Compile your code and host the compiled files from your local computer by running the following command:
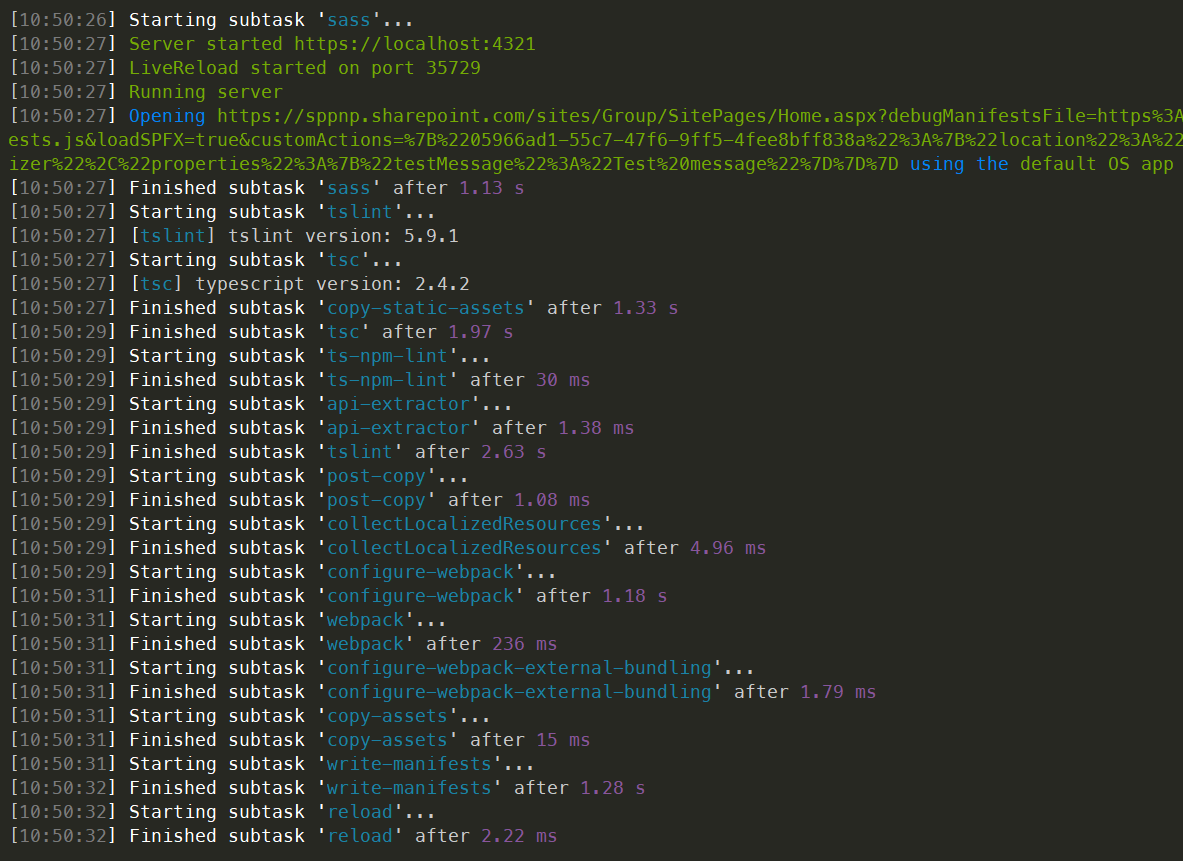
gulp serveWhen the code compiles without errors, it serves the resulting manifest from https://localhost:4321 and also starts your default browser with needed query parameters.

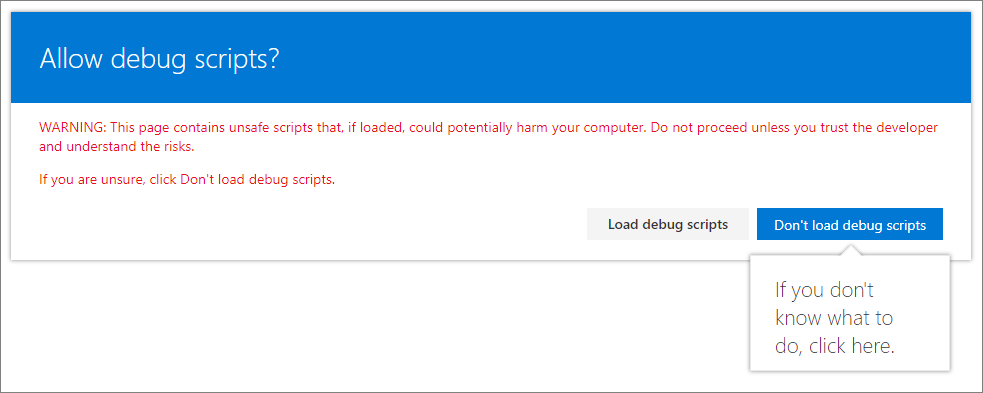
Move to your browser and select Load debug scripts to continue loading scripts from your local host.

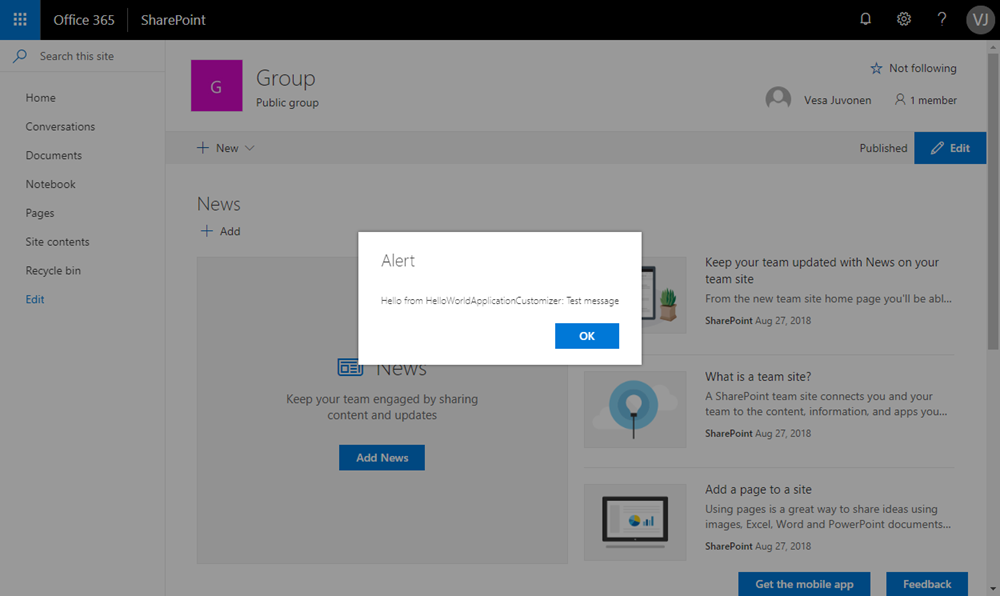
You should now see the dialog message on your page.

This dialog is thrown by your SharePoint Framework Extension. Because you provided the
testMessageproperty as part of the debug query parameters, it's included in the alert message. You can configure your extension instances based on the client component properties, which are passed for the instance in runtime mode.
Next steps
Congratulations, you got your first SharePoint Framework Extension running!
To continue building out your extension, see Using page placeholders from Application Customizer (Hello World part 2). You'll use the same project and take advantage of specific content placeholders for modifying the UI of SharePoint. Notice that the gulp serve command is still running in your console window (or in Visual Studio Code if you're using the editor). You can continue to let it run while you go to the next article.