Quickstart: Create a collection and assign permissions in the Microsoft Purview Data Map
Collections are the Microsoft Purview Data Map's tool to manage ownership and access control across assets, sources, and information. They also organize your sources and assets into categories that are customized to match your management experience with your data. This guide will take you through setting up your first collection and collection admin to prepare your Microsoft Purview environment for your organization.
Prerequisites
An Azure account with an active subscription. Create an account for free.
Your own Microsoft Entra tenant.
An active Microsoft Purview account.
Check permissions
In order to create and manage collections in the Microsoft Purview Data Map, you'll need to be a Collection Admin within the Microsoft Purview governance portal. We can check these permissions in the governance portal. You can find the governance portal by:
- Browsing directly to https://web.purview.azure.com and selecting your Microsoft Purview account.
- Open the Azure portal, search for and select the Microsoft Purview account you want to use to receive the share. Open the Microsoft Purview governance portal.
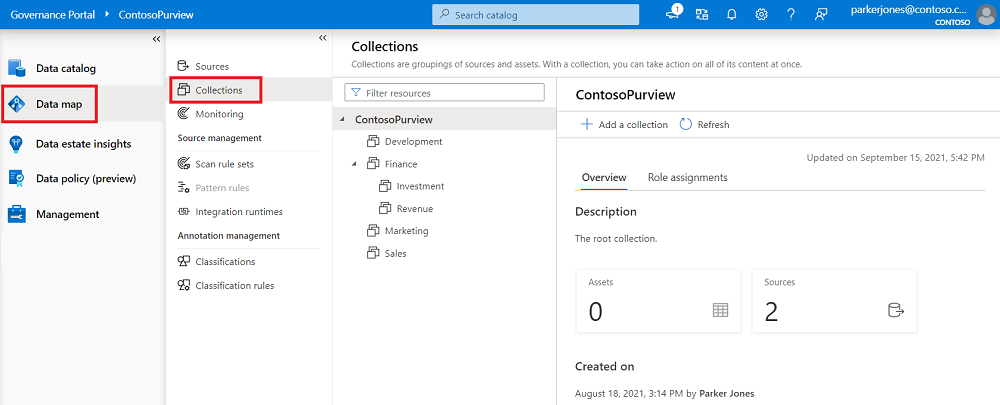
Select Data Map > Collections from the left pane to open collection management page.
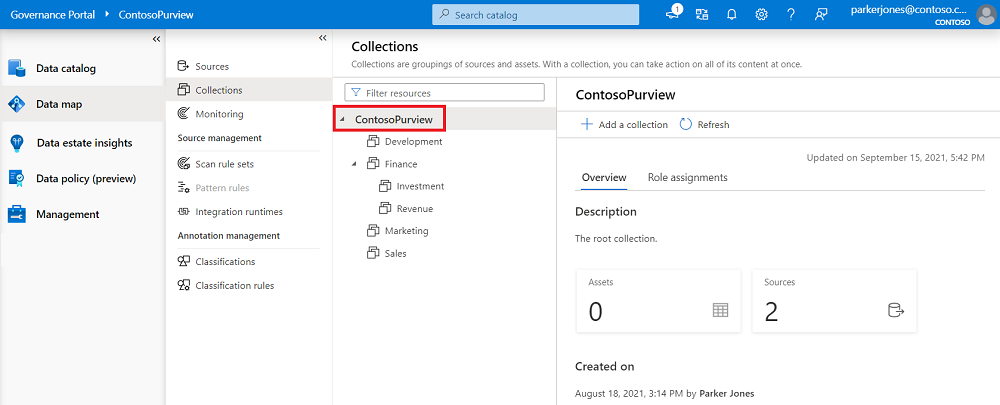
Select your root collection. This is the top collection in your collection list and will have the same name as your Microsoft Purview account. In our example below, it's called ContosoPurview.
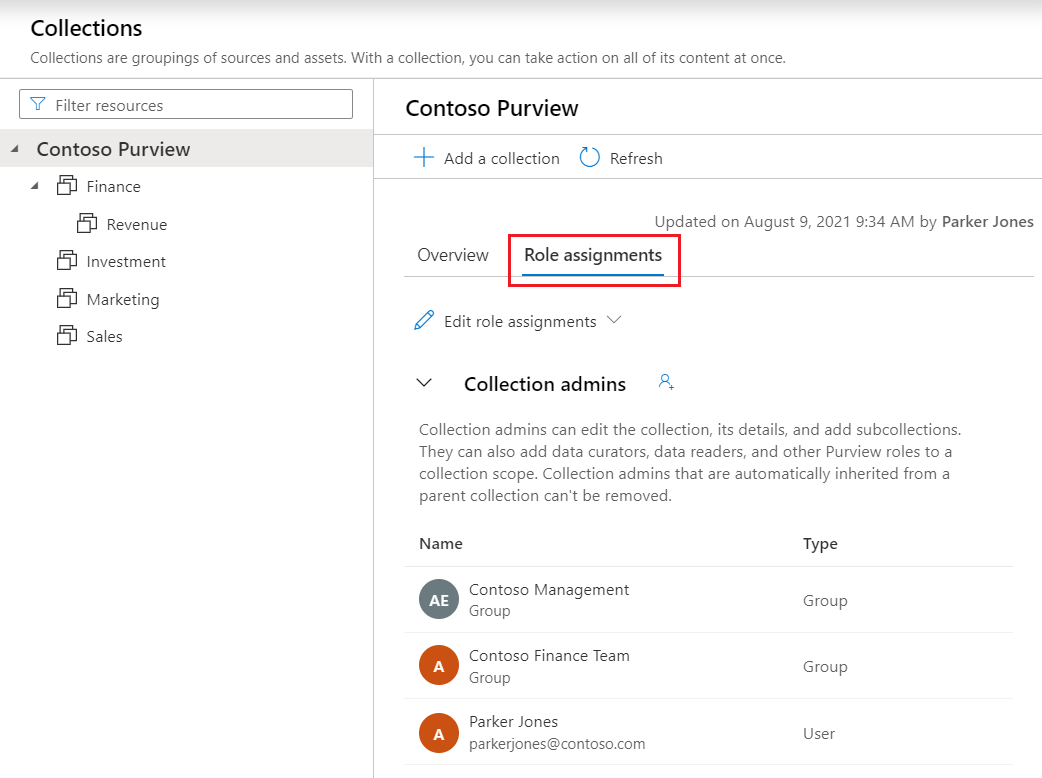
Select role assignments in the collection window.
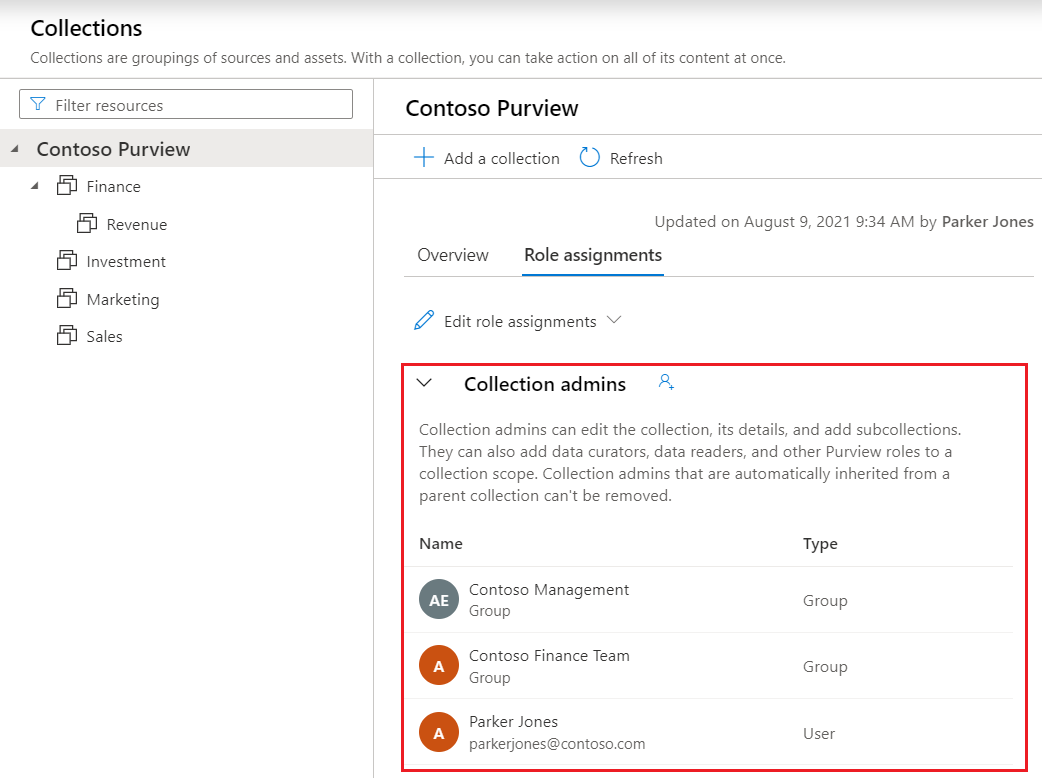
To create a collection, you'll need to be in the collection admin list under role assignments. If you created the account, you should be listed as a collection admin under the root collection already. If not, you'll need to contact the collection admin to grant you permission.
Create a collection in the portal
To create your collection, we'll start in the Microsoft Purview governance portal. You can find the portal by:
- Browsing directly to https://web.purview.azure.com and selecting your Microsoft Purview account.
- Opening the Azure portal, searching for and selecting the Microsoft Purview account. Select the the Microsoft Purview governance portal button.
Select Data Map > Collections from the left pane to open collection management page.

Select + Add a collection.
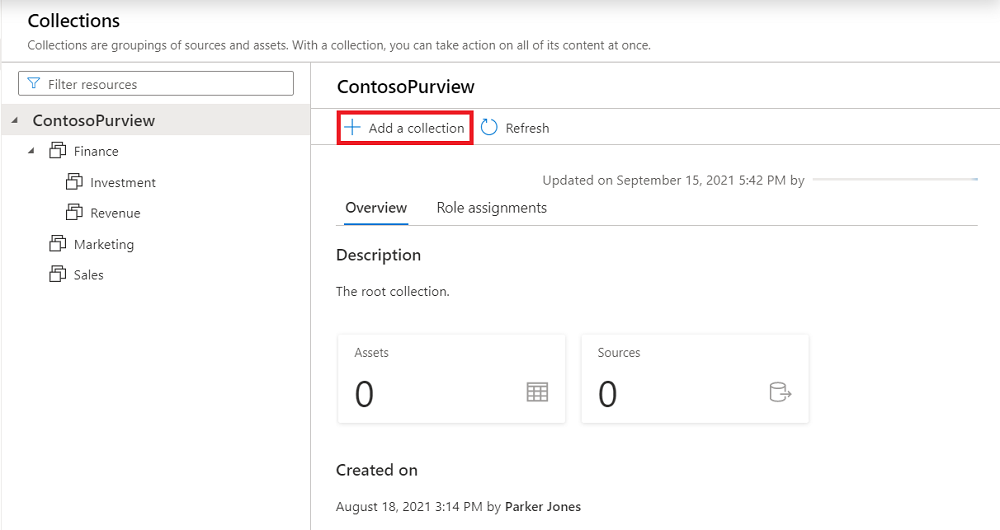
In the right panel, enter the collection name, description, and search for users to add them as collection admins.
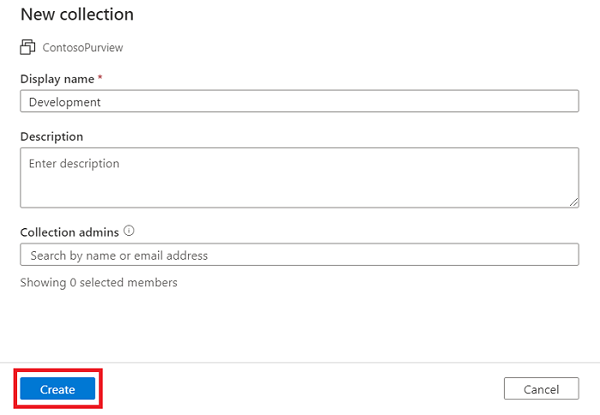
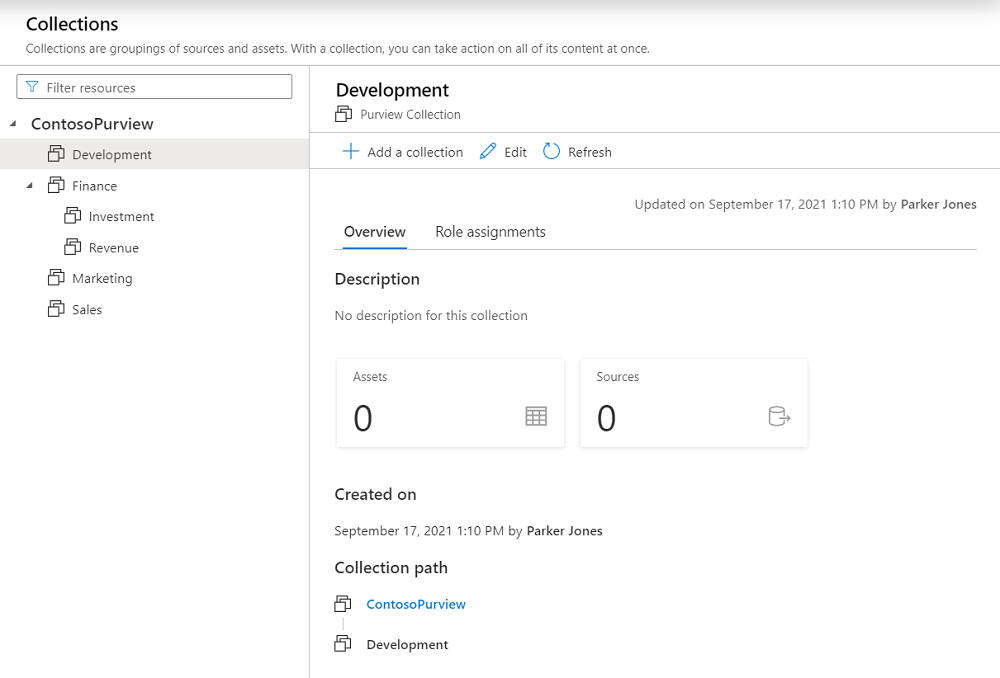
Select Create. The collection information will reflect on the page.
Assign permissions to collection
Now that you have a collection, you can assign permissions to this collection to manage your users access to the Microsoft Purview governance portal.
Roles
All assigned roles apply to sources, assets, and other objects within the collection where the role is applied.
- Collection admins - can edit a collection, its details, manage access in the collection, and add subcollections.
- Data source admins - can manage data sources and data scans.
- Data curators - can create, read, modify, and delete actions on catalog data objects.
- Data readers - can access but not modify catalog data objects.
Assign permissions
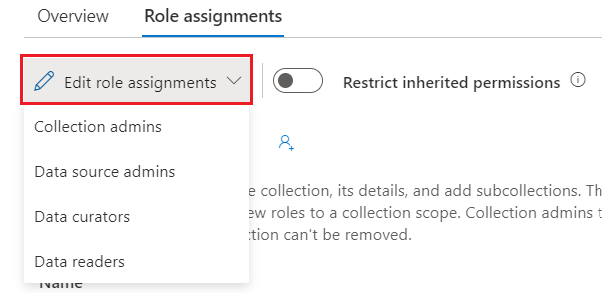
Select Role assignments tab to see all the roles in a collection.
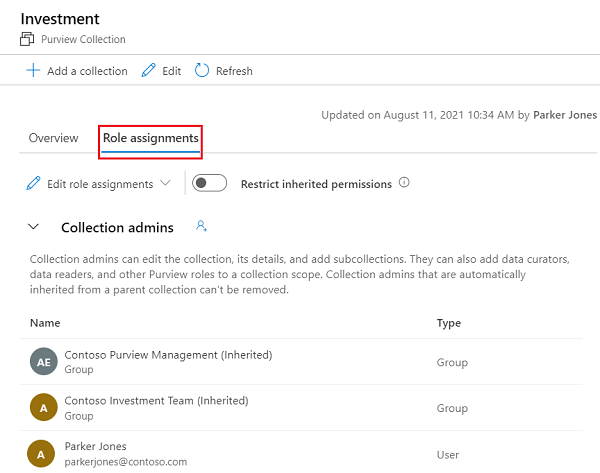
Select Edit role assignments or the person icon to edit each role member.
Type in the textbox to search for users you want to add to the role member. Select OK to save the change.
Next steps
Now that you have a collection, you can follow these guides below to add resources, scan, and manage your collections.