Accessibility on macOS
This page describes how to use the macOS Accessibility APIs to build apps according to the accessibility checklist. Refer to the Android accessibility and iOS accessibility pages for other platform APIs.
To understand how the accessibility APIs work in macOS (formerly called OS X), first review the OS X accessibility model.
Describing UI elements
AppKit uses the NSAccessibility protocol to expose APIs that help
make the user interface accessible. This includes a default behavior
that attempts to set meaningful values for accessibility properties, such
as setting a button's AccessibilityLabel. The label
is typically a single word or short phrase describing the control or view.
Storyboard Files
Xamarin.Mac uses the Xcode Interface Builder to edit storyboard files. Accessibility information can be edited in the Identity inspector when a control is selected on the design surface (as shown in the screenshot below):
Code
Xamarin.Mac does not currently expose as AccessibilityLabel setter. Add
the following helper method to set the accessibility label:
public static class AccessibilityHelper
{
    [System.Runtime.InteropServices.DllImport (ObjCRuntime.Constants.ObjectiveCLibrary)]
    extern static void objc_msgSend (IntPtr handle, IntPtr selector, IntPtr label);

    static public void SetAccessibilityLabel (this NSView view, string value)
    {
        objc_msgSend (view.Handle, new ObjCRuntime.Selector ("setAccessibilityLabel:").Handle, new NSString (value).Handle);
    }
}
This method can then be used in code as shown:
AccessibilityHelper.SetAccessibilityLabel (someButton, "New Accessible Description");
The AccessibilityHelp property is for an explanation of what the control
or view does, and should only be added when the label may not provide sufficient
information. The help text should still be kept as short as possible, for
example "Deletes the document".
Some user interface elements are not relevant for accessible access (such as
a label next to an input that has its own accessibility label and help).
In these cases, set AccessibilityElement = false so that these controls or
views will be skipped by screen readers or other accessibility tools.
Apple provides accessibility guidelines that explains the best practices for accessibility labels and help text.
Custom controls
Refer to Apple's guidelines for accessible custom controls for details on the additional steps required.
Testing accessibility
macOS provides an Accessibility Inspector that helps test accessibility functionality. The inspector is included with Xcode.
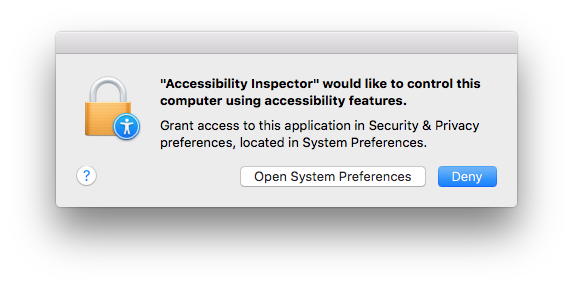
The first time it is launched, the Accessibility Inspector will require permission to control the computer via accessibility:

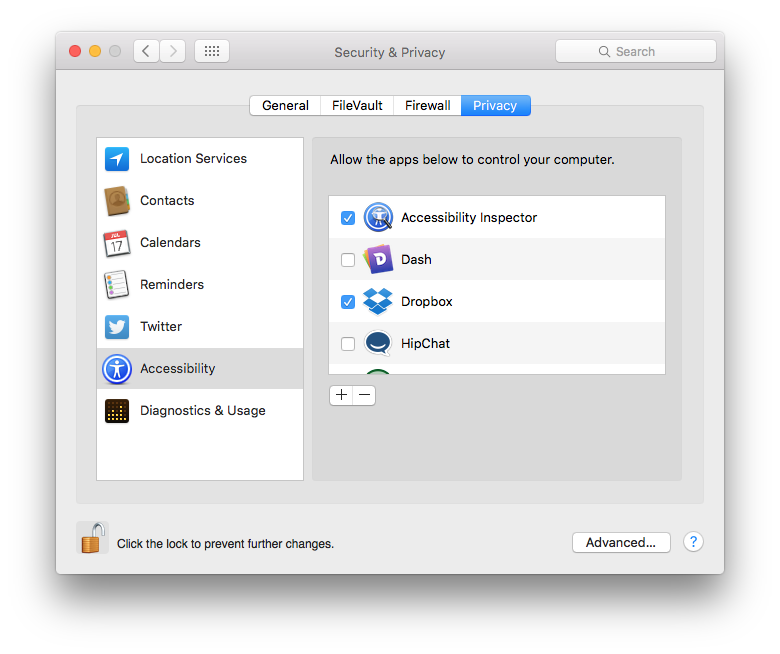
Unlock the settings screen (if required, on the lower-left) and tick the Accessibility Inspector:

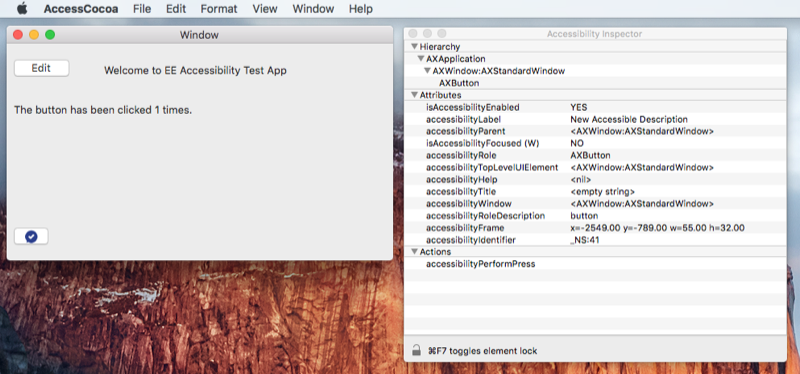
Once enabled, the inspector appears as a floating window that can be moved around the screen. The screenshot below shows the inspector running next to a sample Mac app. As the cursor is moved over the window, the inspector displays all the accessible properties of each control:
For more information, read the testing accessibility for OS X guide.

