Replacing the Action Bar
Overview
One of the most common uses for the Toolbar is to replace the
default action bar with a custom Toolbar (when a new Android project
is created, it uses the default action bar). Because the Toolbar provides the
ability to add branded logos, titles, menu items, navigation buttons,
and even custom views to the app bar section of an Activity's UI, it
offers a significant upgrade over the default action bar.
To replace an app's default action bar with a Toolbar:
Create a new custom theme and modify the app's properties so that it uses this new theme.
Disable the
windowActionBarattribute in the custom theme and enable thewindowNoTitleattribute.Define a layout for the
Toolbar.Include the
Toolbarlayout in the Activity's Main.axml layout file.Add code to the Activity's
OnCreatemethod to locate theToolbarand callSetActionBarto install theToolBaras the action bar.
The following sections explain this process in detail. A simple app is
created and its action bar is replaced with a customized Toolbar.
Start an App Project
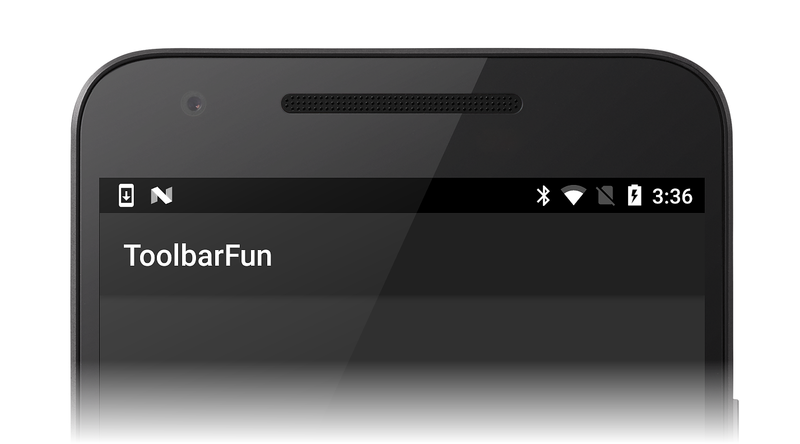
Create a new Android project called ToolbarFun (see Hello, Android for more information about creating a new Android project). After this project is created, set the target and minimum Android API levels to Android 5.0 (API Level 21 - Lollipop) or later. For more information about setting Android version levels, see Understanding Android API Levels. When the app is built and run, it displays the default action bar as seen in this screenshot:
Create a Custom Theme
Open the Resources/values directory and a create a new file called styles.xml. Replace its contents with the following XML:
<?xml version="1.0" encoding="utf-8" ?>
<resources>
  <style name="MyTheme" parent="@android:style/Theme.Material.Light.DarkActionBar">
    <item name="android:windowNoTitle">true</item>
    <item name="android:windowActionBar">false</item>
    <item name="android:colorPrimary">#5A8622</item>
  </style>
</resources>
This XML defines a new custom theme called MyTheme that is based on
the Theme.Material.Light.DarkActionBar theme in Lollipop. The
windowNoTitle attribute is set to true to hide the title bar:
<item name="android:windowNoTitle">true</item>
To display the custom toolbar, the default ActionBar must be
disabled:
<item name="android:windowActionBar">false</item>
An olive-green colorPrimary setting is used for the background
color of the toolbar:
<item name="android:colorPrimary">#5A8622</item>
Apply the Custom Theme
Edit Properties/AndroidManifest.xml and add the following
android:theme attribute to the <application> element so that the
app uses the MyTheme custom theme:
<application android:label="@string/app_name" android:theme="@style/MyTheme"></application>
For more information about applying a custom theme to an app, see Using Custom Themes.
Define a Toolbar Layout
In the Resources/layout directory, create a new file called toolbar.xml. Replace its contents with the following XML:
<?xml version="1.0" encoding="utf-8"?>
<Toolbar xmlns:android="http://schemas.android.com/apk/res/android"
    android:id="@+id/toolbar"
    android:layout_width="match_parent"
    android:layout_height="wrap_content"
    android:minHeight="?android:attr/actionBarSize"
    android:background="?android:attr/colorPrimary"
    android:theme="@android:style/ThemeOverlay.Material.Dark.ActionBar"/>
This XML defines the custom Toolbar that replaces the default
action bar. The minimum height of the Toolbar is set to the size of
the action bar that it replaces:
android:minHeight="?android:attr/actionBarSize"
The background color of the Toolbar is set to the olive-green color
defined earlier in styles.xml:
android:background="?android:attr/colorPrimary"
Beginning with Lollipop, the android:theme attribute can be used to
style an individual view. The ThemeOverlay.Material themes introduced
in Lollipop make it possible to overlay the default Theme.Material
themes, overwriting relevant attributes to make them either light or
dark. In this example, the Toolbar uses a dark theme so that its
contents are light in color:
android:theme="@android:style/ThemeOverlay.Material.Dark.ActionBar"
This setting is used so that menu items contrast with the darker background color.
Include the Toolbar Layout
Edit the layout file Resources/layout/Main.axml and replace its contents with the following XML:
<?xml version="1.0" encoding="utf-8"?>
<RelativeLayout xmlns:android="http://schemas.android.com/apk/res/android"
    android:layout_width="match_parent"
    android:layout_height="match_parent">
    <include
        android:id="@+id/toolbar"
        layout="@layout/toolbar" />
</RelativeLayout>
This layout includes the Toolbar defined in toolbar.xml and
uses a RelativeLayout to specify that the Toolbar is to be
placed at the very top of the UI (above the button).
Find and Activate the Toolbar
Edit MainActivity.cs and add the following using statement:
using Android.Views;
Also, add the following lines of code to the end of the OnCreate
method:
var toolbar = FindViewById<Toolbar>(Resource.Id.toolbar);
SetActionBar(toolbar);
ActionBar.Title = "My Toolbar";
This code finds the Toolbar and calls SetActionBar so that the
Toolbar will take on default action bar characteristics. The title of
the Toolbar is changed to My Toolbar. As seen in this code
example, the ToolBar can be directly referenced as an action bar.
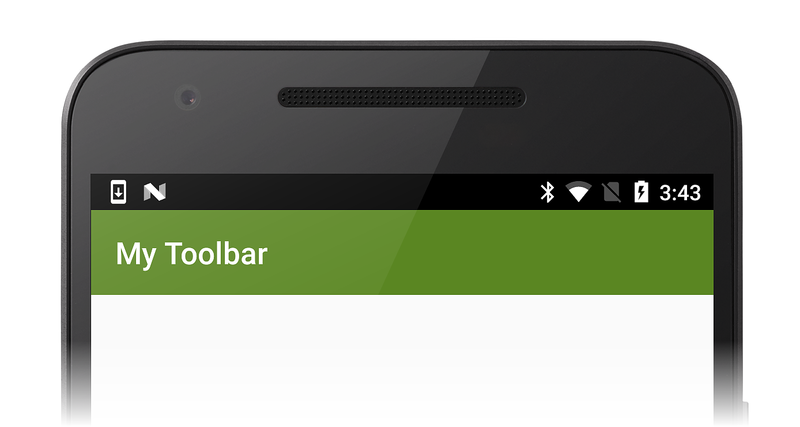
Compile and run this app – the customized Toolbar is displayed
in place of the default action bar:
Notice that the Toolbar is styled independently of the
Theme.Material.Light.DarkActionBar theme that is applied to
the remainder of the app.
If an exception occurs while running the app, see the Troubleshooting section below.
Add Menu Items
In this section, menus are added to the Toolbar. The upper right area
of the ToolBar is reserved for menu items – each menu item
(also called an action item) can perform an action within the current
activity or it can perform an action on behalf of the entire app.
To add menus to the Toolbar:
Add menu icons (if required) to the
mipmap-folders of the app project. Google provides a set of free menu icons on the Material icons page.Define the contents of the menu items by adding a new menu resource file under Resources/menu.
Implement the
OnCreateOptionsMenumethod of the Activity – this method inflates the menu items.Implement the
OnOptionsItemSelectedmethod of the Activity – this method performs an action when a menu item is tapped.
The following sections demonstrate this process in detail by adding
Edit and Save menu items to the customized Toolbar.
Install Menu Icons
Continuing with the ToolbarFun example app, add menu icons to the app
project. Download
toolbar icons,
unzip, and copy the contents of the extracted mipmap- folders to
the project mipmap- folders under ToolbarFun/Resources and
include each added icon file in the project.
Define a Menu Resource
Create a new menu subdirectory under Resources. In the menu subdirectory, create a new menu resource file called top_menus.xml and replace its contents with the following XML:
<?xml version="1.0" encoding="utf-8" ?>
<menu xmlns:android="http://schemas.android.com/apk/res/android">
  <item
       android:id="@+id/menu_edit"
       android:icon="@mipmap/ic_action_content_create"
       android:showAsAction="ifRoom"
       android:title="Edit" />
  <item
       android:id="@+id/menu_save"
       android:icon="@mipmap/ic_action_content_save"
       android:showAsAction="ifRoom"
       android:title="Save" />
  <item
       android:id="@+id/menu_preferences"
       android:showAsAction="never"
       android:title="Preferences" />
</menu>
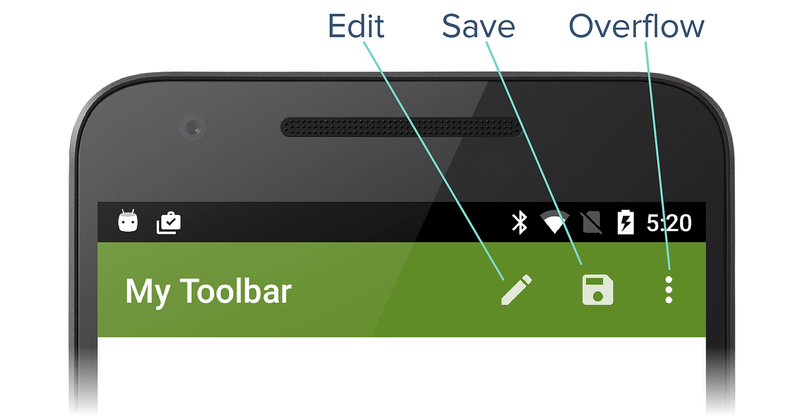
This XML creates three menu items:
An Edit menu item that uses the
ic_action_content_create.pngicon (a pencil).A Save menu item that uses the
ic_action_content_save.pngicon (a diskette).A Preferences menu item that does not have an icon.
The showAsAction attributes of the Edit and Save menu
items are set to ifRoom – this setting causes these menu
items to appear in the Toolbar if there is sufficient room for
them to be displayed. The Preferences menu item sets
showAsAction to never – this causes the Preferences
menu to appear in the overflow menu (three vertical dots).
Implement OnCreateOptionsMenu
Add the following method to MainActivity.cs:
public override bool OnCreateOptionsMenu(IMenu menu)
{
    MenuInflater.Inflate(Resource.Menu.top_menus, menu);
    return base.OnCreateOptionsMenu(menu);
}
Android calls the OnCreateOptionsMenu method so that the app can
specify the menu resource for an activity. In this method, the
top_menus.xml resource is inflated into the passed menu. This
code causes the new Edit, Save, and Preferences menu
items to appear in the Toolbar.
Implement OnOptionsItemSelected
Add the following method to MainActivity.cs:
public override bool OnOptionsItemSelected(IMenuItem item)
{
    Toast.MakeText(this, "Action selected: " + item.TitleFormatted,
        ToastLength.Short).Show();
    return base.OnOptionsItemSelected(item);
}
When a user taps a menu item, Android calls the OnOptionsItemSelected
method and passes in the menu item that was selected. In this example,
the implementation just displays a toast to indicate which menu item
was tapped.
Build and run ToolbarFun to see the new menu items in the toolbar.
The Toolbar now displays three menu icons as seen in this
screenshot:
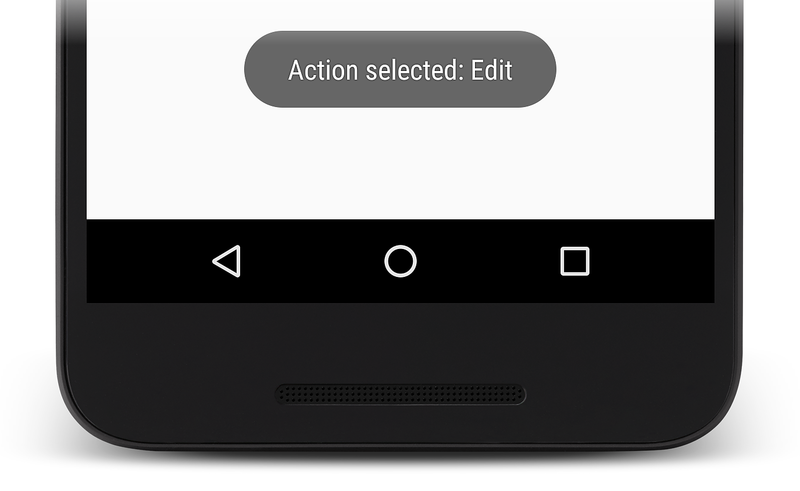
When a user taps the Edit menu item, a toast is displayed to
indicate that the OnOptionsItemSelected method was called:
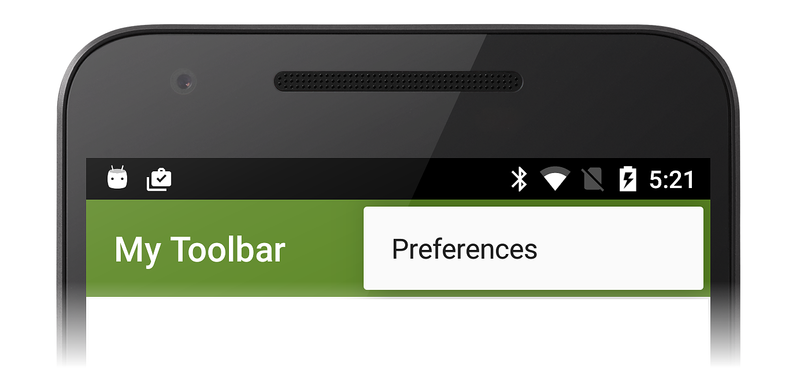
When a user taps the overflow menu, the Preferences menu item is displayed. Typically, less-common actions should be placed in the overflow menu – this example uses the overflow menu for Preferences because it is not used as often as Edit and Save:
For more information about Android menus, see the Android Developer Menus topic.
Troubleshooting
The following tips can help to debug problems that may occur while replacing the action bar with a toolbar.
Activity Already Has an Action Bar
If the app is not properly configured to use a custom theme as explained in Apply the Custom Theme, the following exception may occur while running the app:

In addition, an error message such as the following may be produced: Java.Lang.IllegalStateException: This Activity already has an action bar supplied by the window decor.
To correct this error, verify that the android:theme attribute for
the custom theme is added to <application> (in
Properties/AndroidManifest.xml) as described earlier in
Apply the Custom Theme. In addition,
this error may be caused if the Toolbar layout or custom theme
is not configured properly.
