Hardware acceleration for emulator performance (Hyper-V & HAXM)
This article explains how to use your computer's hardware acceleration features to maximize Android Emulator performance.
Visual Studio makes it easier for developers to test and debug their Xamarin.Android applications by using the Android emulator in situations where an Android device is unavailable or impractical. However, the Android emulator runs too slowly if hardware acceleration is not available on the computer that runs it. You can drastically improve the performance of the Android emulator by using special x86 virtual device images in conjunction with the virtualization features of your computer.
| Scenario | HAXM | WHPX | Hypervisor.Framework |
|---|---|---|---|
| You have an Intel Processor | X | X | X |
| You have an AMD Processor | X | ||
| You want to support Hyper-V | X | ||
| You want to support nested Virtualization | Limited | ||
| You want to use technologies like Docker | (with WSL2) | X | X |
Accelerating Android emulators on Windows
The following virtualization technologies are available for accelerating the Android emulator:
Microsoft's Hyper-V and the Windows Hypervisor Platform (WHPX). Hyper-V is a virtualization feature of Windows that makes it possible to run virtualized computer systems on a physical host computer.
Intel's Hardware Accelerated Execution Manager (HAXM). HAXM is a virtualization engine for computers running Intel CPUs.
For the best experience on Windows, it is recommended that you use WHPX to accelerate the Android emulator. If WHPX is not available on your computer, then HAXM can be used. The Android emulator will automatically make use of hardware acceleration if the following criteria are met:
Hardware acceleration is available and enabled on your development computer.
The emulator is running a system image created for an x86-based virtual device.
Important
You can't run a VM-accelerated emulator inside another VM, such as a VM hosted by VirtualBox, VMware, or Docker (unless using WSL2). You must run the Android emulator directly on your system hardware.
For information about launching and debugging with the Android emulator, see Debugging on the Android Emulator.
Accelerating with Hyper-V
Before enabling Hyper-V, read the following section to verify that your computer supports Hyper-V.
Verifying support for Hyper-V
Hyper-V runs on the Windows Hypervisor Platform. To use the Android emulator with Hyper-V, your computer must meet the following criteria to support the Windows Hypervisor Platform:
Your computer hardware must meet the following requirements:
- A 64-bit Intel or AMD Ryzen CPU with Second Level Address Translation (SLAT).
- CPU support for VM Monitor Mode Extension (VT-c on Intel CPUs).
- Minimum of 4-GB memory.
In your computer's BIOS, the following items must be enabled:
- Virtualization Technology (may have a different label depending on motherboard manufacturer).
- Hardware Enforced Data Execution Prevention.
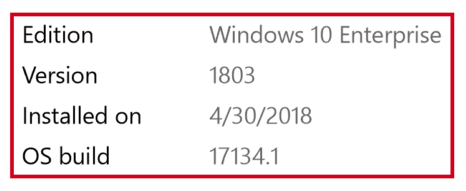
Your computer must be updated to Windows 10 April 2018 update (build 1803) or later. You can verify that your Windows version is up-to-date by using the following steps:
To verify that your computer hardware and software is compatible with Hyper-V, open a command prompt and type the following command:
systeminfo
If all listed Hyper-V requirements have a value of Yes, then your computer can support Hyper-V. For example:
Enabling Hyper-V acceleration
If your computer meets the above criteria, use the following steps to accelerate the Android emulator with Hyper-V:
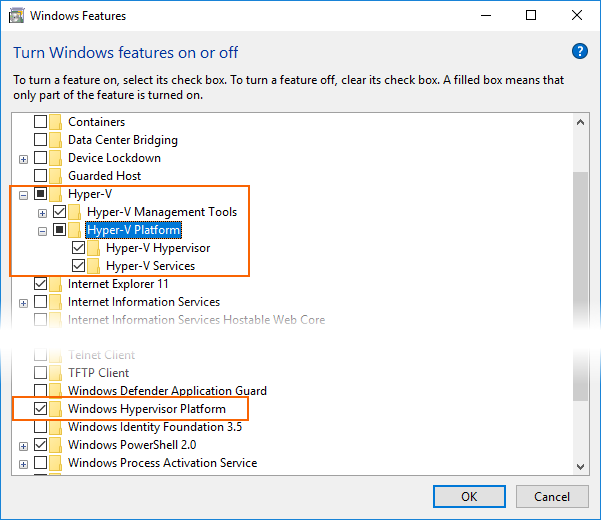
Enter windows features in the Windows search box and select Turn Windows features on or off in the search results. In the Windows Features dialog, enable both Hyper-V and Windows Hypervisor Platform:
After making these changes, reboot your computer.
Important
On Windows 10 October 2018 Update (RS5) and higher, you only need to enable Hyper-V, as it will use Windows Hypervisor Platform (WHPX) automatically.
Install Visual Studio 15.8 or later (this version of Visual Studio provides IDE support for running the Android emulator with Hyper-V).
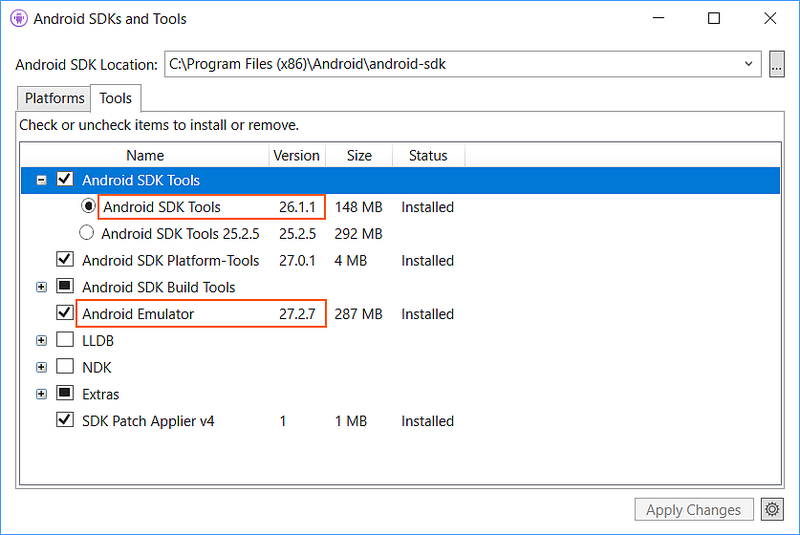
Install the Android Emulator package 27.2.7 or later. To install this package, navigate to Tools > Android > Android SDK Manager in Visual Studio. Select the Tools tab and ensure that the Android emulator version is at least 27.2.7. Also ensure that the Android SDK Tools version is 26.1.1 or later:
When you create a virtual device (see Managing Virtual Devices with the Android Device Manager), be sure to select an x86-based system image. If you use an ARM-based system image, the virtual device will not be accelerated and will run slowly.
Hyper-V should now be enabled and you can run your accelerated Android emulator.
Accelerating with HAXM
If your computer does not support Hyper-V, you may use HAXM to accelerate the Android emulator. You must disable Device Guard if you want to use HAXM.
Verifying HAXM support
To determine if your hardware supports HAXM, follow the steps in Does My Processor Support Intel Virtualization Technology?. If your hardware supports HAXM, you can check to see if HAXM is already installed by using the following steps:
Open a command prompt window and enter the following command:
sc query intelhaxmExamine the output to see if the HAXM process is running. if it is, you should see output listing the
intelhaxmstate asRUNNING. For example: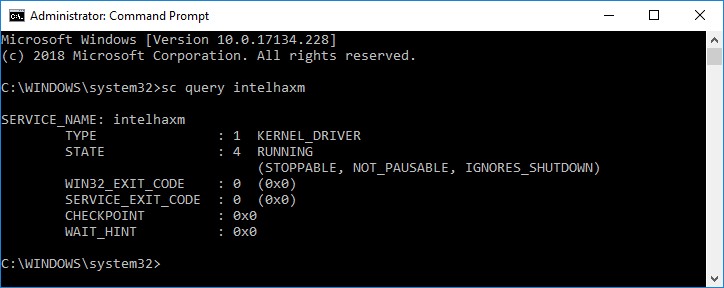
If
STATEis not set toRUNNING, then HAXM is not installed.
If your computer can support HAXM but HAXM is not installed, use the steps in the next section to install HAXM.
Installing HAXM
HAXM install packages for Windows are available from the Intel Hardware Accelerated Execution Manager GitHub releases page. Use the following steps to download and install HAXM:
From the Intel website, download the latest HAXM virtualization engine installer for Windows. The advantage of downloading the HAXM installer directly from the Intel website is that you can be assured of using the latest version.
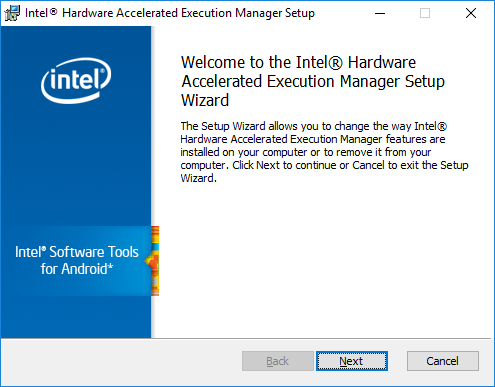
Run haxm-N.N.N-setup.exe (where N.N.N is the version number) to start the HAXM installer. Accept the default values in the installer dialogs:
When you create a virtual device (see Managing Virtual Devices with the Android Device Manager), be sure to select an x86-based system image. If you use an ARM-based system image, the virtual device will not be accelerated and will run slowly.
Troubleshooting
For help with troubleshooting hardware acceleration issues, see the Android emulator Troubleshooting guide.
Accelerating Android emulators on macOS
The following virtualization technologies are available for accelerating the Android emulator:
Apple's Hypervisor Framework. Hypervisor is a feature of macOS 10.10 and later that makes it possible to run virtual machines on a Mac.
Intel's Hardware Accelerated Execution Manager (HAXM). HAXM is a virtualization engine for computers running Intel CPUs.
It is recommended that you use the Hypervisor Framework to accelerate the Android emulator. If the Hypervisor Framework is not available on your Mac, then HAXM can be used. The Android emulator will automatically make use of hardware acceleration if the following criteria are met:
Hardware acceleration is available and enabled on the development computer.
The emulator is running a system image created for an x86-based virtual device.
Important
You can't run a VM-accelerated emulator inside another VM, such as a VM hosted by VirtualBox, VMware, or Docker. You must run the Android emulator directly on your system hardware.
For information about launching and debugging with the Android emulator, see Debugging on the Android Emulator.
Accelerating with the Hypervisor Framework
To use the Android emulator with the Hypervisor Framework, your Mac must meet the following criteria:
Your Mac must be running macOS 10.10 or later.
Your Mac's CPU must be able to support the Hypervisor Framework.
If your Mac meets these criteria, the Android emulator will automatically use the Hypervisor Framework for acceleration. If you are not sure if Hypervisor Framework is supported on your Mac, see the Troubleshooting guide for ways to verify that your Mac supports Hypervisor.
If the Hypervisor Framework is not supported by your Mac, you can use HAXM to accelerate the Android emulator (described next).
Accelerating with HAXM
If your Mac does not support the Hypervisor framework (or you are using a version of macOS earlier than 10.10), you can use Intel's Hardware Accelerated Execution Manager (HAXM) to speed up the Android emulator.
Before using the Android emulator with HAXM for the first time, it's a good idea to verify that HAXM is installed and available for the Android emulator to use.
Verifying HAXM support
You can check to see if HAXM is already installed by using the following steps:
Open a Terminal and enter the following command:
~/Library/Developer/Xamarin/android-sdk-macosx/tools/emulator -accel-checkThis command assumes that the Android SDK is installed at the default location of ~/Library/Developer/Xamarin/android-sdk-macosx; if not, modify the above path for the location of the Android SDK on your Mac.
If HAXM is installed, the above command will return a message similar to the following result:
HAXM version 7.2.0 (3) is installed and usable.If HAXM is not installed, a message similar to the following output is returned:
HAXM is not installed on this machine (/dev/HAX is missing).
If HAXM is not installed, use the steps in the next section to install HAXM.
Installing HAXM
HAXM installation packages for macOS are available from the Intel Hardware Accelerated Execution Manager page. Use the following steps to download and install HAXM:
From the Intel website, download the latest HAXM virtualization engine installer for macOS.
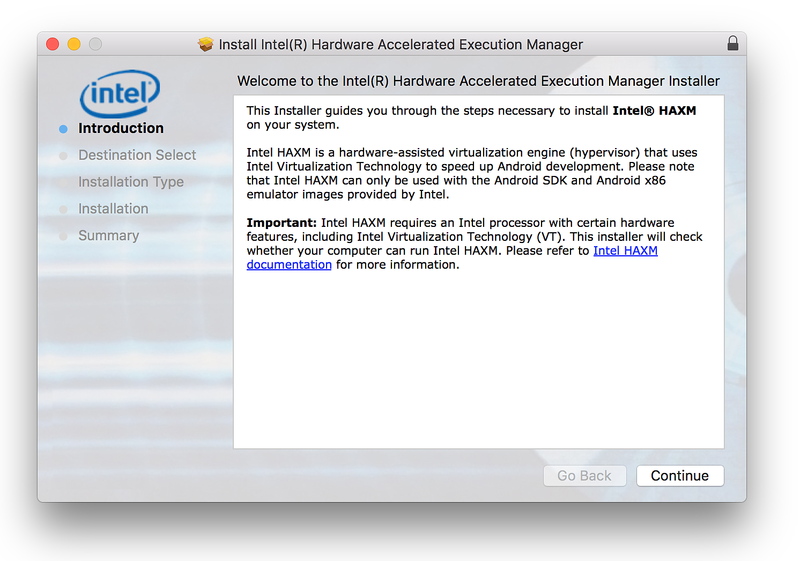
Run the HAXM installer. Accept the default values in the installer dialogs:
Troubleshooting
For help with troubleshooting hardware acceleration issues, see the Android emulator Troubleshooting guide.
