Publish packages to NuGet.org
TFS 2017
NuGet.org is a package manager that enables developers to share reusable code. A NuGet package is a compressed file with .nupkg extension that contains compiled code that can be consumed in other projects. Packages hosted in NuGet.org are available to all developers around the world.
Prerequisites
- Any version of Visual Studio 2019 and the .NET Core workload.
dotnetCLI. If you don't have it already, install the .NET Core SDK.- Register for a free account on nuget.org if you don't have one already.
Create a project
You can use your own .NET project to build and generate a NuGet package, or create a new basic .NET class library as follows:
In Visual Studio, select File, New, then Project.
Select the Class Library (.NET Standard) template and select Next.
Name your project and your solution then select a location to save the project locally. Select Create when you are done.
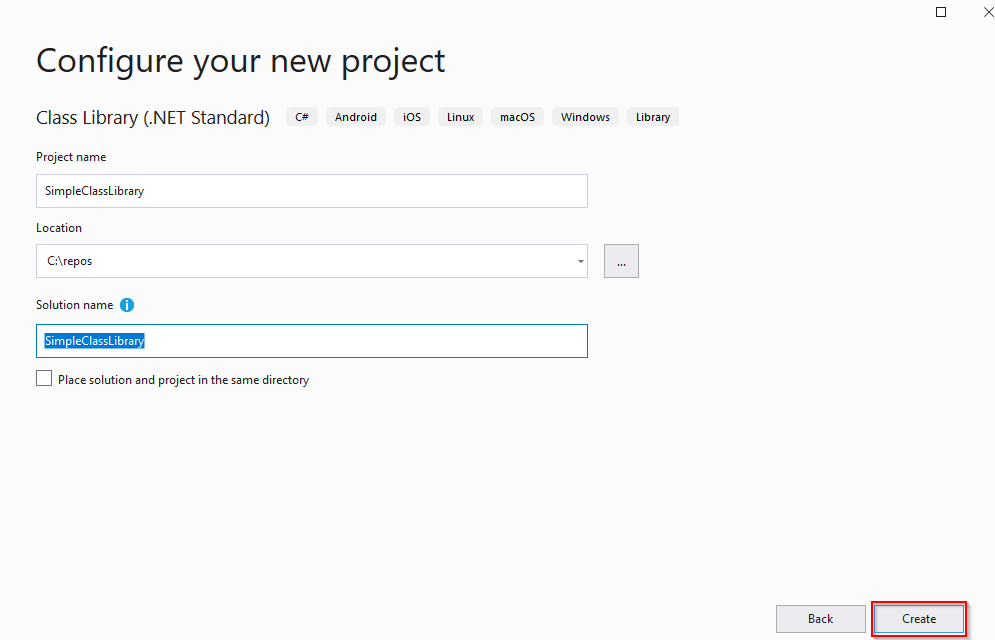
The template class library is sufficient to create a NuGet package so for this tutorial we will use the existing template and we won't be writing any additional code.
Set up and generate a package
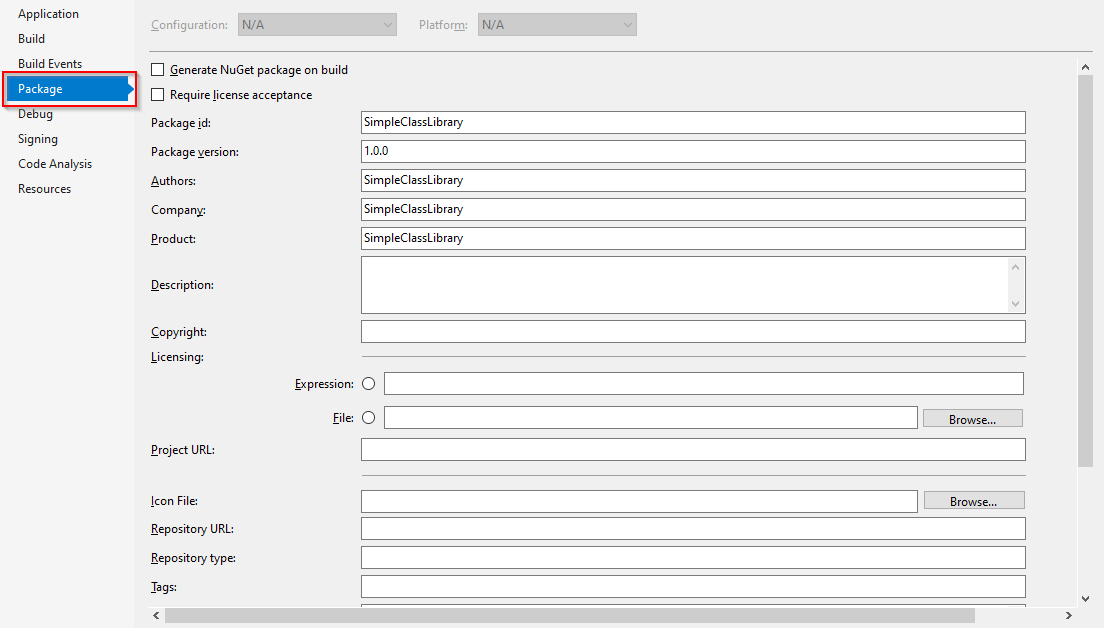
Select your project from the solution explorer, right-click and select properties then Package.
Fill out the form and make sure that your package id is unique otherwise it may conflict with existing packages on NuGet.org. A common naming convention is something like: Company.Product.Feature. If you want to generate your package every time you build your project, select the Generate NuGet package on build checkbox.
Select your project from the solution explorer, right-click then select Pack to generate your
.nupkgpackage.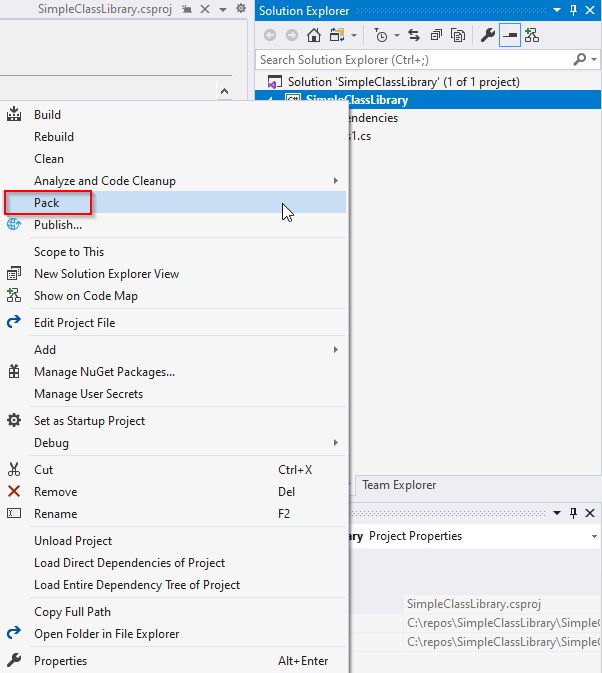
Check the status of the pack command in the output window.

Generate an API key
Now that we created our nupkg package, we are almost ready to publish it, but first we need to generate an API key to connect to the NuGet.org API.
Sign in to your NuGet.org account or create one if you haven't.
Select your user name icon then select API Keys.
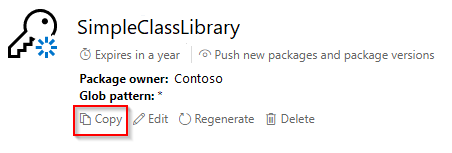
Select Create then enter a name for your key. Give your key a Push new packages and package version scope, and enter
*in the glob pattern field to select all packages. Select Create when you are done.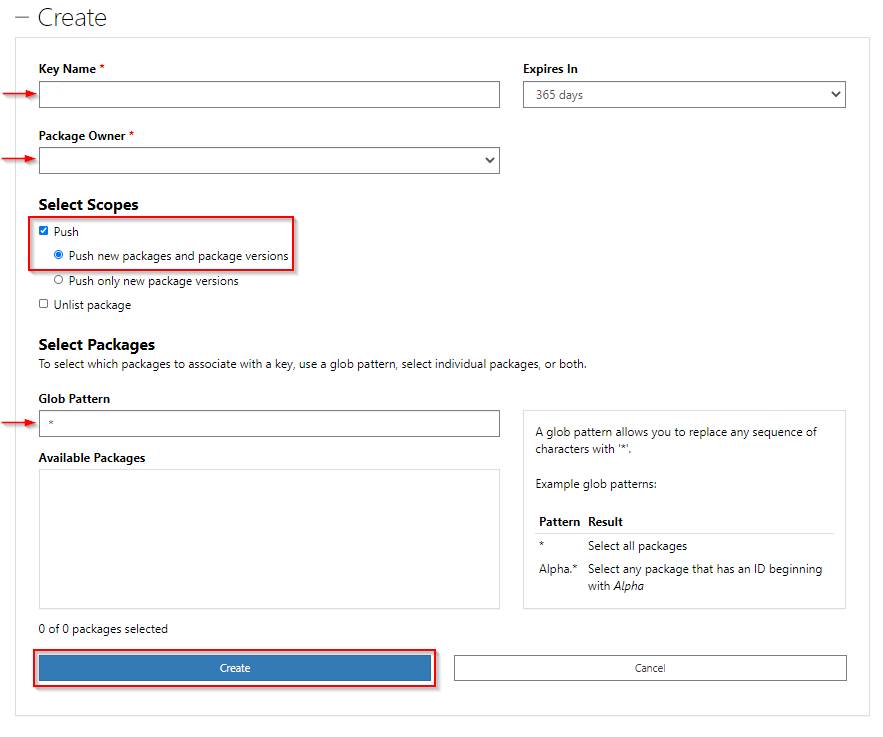
Select Copy and save your API key in a secure location. We will need this key to publish our NuGet package.
Publish a package to NuGet.org
You can publish your package using the web UI, dotnet CLI, or nuget.exe CLI. We are going to focus on publishing packages by using the command line in this section. You will need the name of your package, an API key, and the source URL to do so.
In an elevated command prompt, navigate to the folder containing your
nupkgpackage.Run the following command to publish your package to NuGet.org. Replace the placeholders with your package name and API key.
dotnet nuget push <packageName> --api-key <APIKey> --source https://api.nuget.org/v3/index.jsonThe output of the previous command should look something like this.

