Handle OnMessageSend and OnAppointmentSend events in your Outlook add-in with Smart Alerts
The OnMessageSend and OnAppointmentSend events take advantage of Smart Alerts, which allows you to run logic after a user selects Send in their Outlook message or appointment. With Smart Alerts, users of your add-in can take the opportunity to improve the content of their email, add a missing sensitivity label, or include an important recipient in a meeting invite.
Smart Alerts is available through the event-based activation feature. To understand how to configure your add-in to use this feature, use other available events, debug your add-in, and more, see Configure your Outlook add-in for event-based activation.
Note
The OnMessageSend and OnAppointmentSend events were introduced in requirement set 1.12. Additional functionality and customization options were also added to subsequent requirement sets. To verify that your Outlook client supports these events and features, see Supported clients and platforms and the specific sections in the walkthrough that describe the features you want to implement.
Supported clients and platforms
The following table lists supported client-server combinations for the Smart Alerts feature, including the minimum required Exchange Server Cumulative Update where applicable. Excluded combinations aren't supported.
| Client | Exchange Online | Exchange 2019 on-premises (Cumulative Update 12 or later) | Exchange 2016 on-premises (Cumulative Update 22 or later) |
|---|---|---|---|
| Web browser (modern UI) | Yes | Not applicable | Not applicable |
| new Outlook on Windows | Yes | Not applicable | Not applicable |
| Windows (classic) Version 2206 (Build 15330.20196) or later |
Yes | Yes | Yes |
| Mac Version 16.65 (22082700) or later |
Yes | Not applicable | Not applicable |
| Android | Not applicable | Not applicable | Not applicable |
| iOS | Not applicable | Not applicable | Not applicable |
Try out Smart Alerts in an event-based add-in
To see Smart Alerts in action, try out the walkthrough. You'll create an add-in that checks whether a document or picture is attached to a message before it's sent.
Smart Alerts feature behavior and scenarios
The following sections include guidance on the send mode options and the behavior of the feature in certain scenarios.
Available send mode options
When you configure your add-in to respond to the OnMessageSend or OnAppointmentSend event, you must include the send mode property in the manifest. Its markup varies depending on the type of manifest your add-in uses.
- Add-in only manifest: Set the SendMode property of the LaunchEvent element.
- Unified manifest for Microsoft 365: Set the "sendMode" option of the event object in the "autoRunEvents" array.
If the conditions implemented by your add-in aren't met or your add-in is unavailable when the event occurs, a dialog is shown to the user to alert them that additional actions may be needed before the mail item can be sent. The send mode property determines the options available to the user in the dialog.
The following table lists the available send mode options.
| Send mode option canonical name | Add-in only manifest name | Unified manifest for Microsoft 365 name |
|---|---|---|
| prompt user | PromptUser |
promptUser |
| soft block | SoftBlock |
softBlock |
| block | Block |
block |
Tip
Starting in Mailbox requirement set 1.14, your add-in can now override its send mode option at runtime. To learn more, see Override the send mode option at runtime (optional).
prompt user
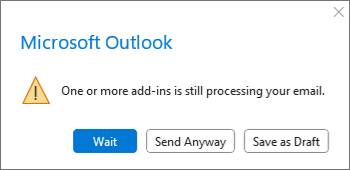
If the item doesn't meet the add-in's conditions, the user can choose Send Anyway in the alert, or address the issue then try to send the item again. If the add-in is taking a long time to process the item, the user will be prompted with the option to stop running the add-in and choose Send Anyway. In the event the add-in is unavailable (for example, there's an error loading the add-in), the item will be sent.
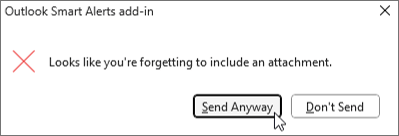
Use the prompt user option in your add-in if one of the following applies.
- The condition checked by the add-in isn't mandatory, but is nice to have in the message or appointment being sent.
- You'd like to recommend an action and allow the user to decide whether they want to apply it to the message or appointment being sent.
Some scenarios where the prompt user option is applied include suggesting to tag the message or appointment as low or high importance and recommending to apply a color category to the item.
soft block
Default option if the send mode property of your manifest isn't configured. The user is alerted that the item they're sending doesn't meet the add-in's conditions and they must address the issue before trying to send the item again. However, if the add-in is unavailable (for example, there's an error loading the add-in), the item will be sent.
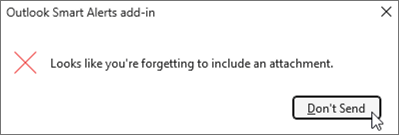
Use the soft block option in your add-in when you want a condition to be met before a message or appointment can be sent, but you don't want the user to be blocked from sending the item if the add-in is unavailable. Sample scenarios where the soft block option is used include prompting the user to set a message or appointment's importance level and checking that the appropriate signature is applied before the item is sent.
block
The item isn't sent if any of the following situations occur.
- The item doesn't meet the add-in's conditions.
- The add-in is unable to connect to the server.
- There's an error loading the add-in.

Use the block option if the add-in's conditions are mandatory, even if the add-in is unavailable. For example, the block option is ideal when users are required to apply a sensitivity label to a message or appointment before it can be sent.
Add-in is unavailable
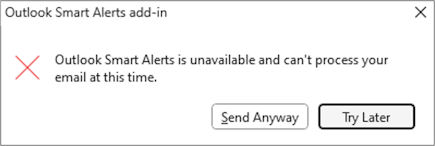
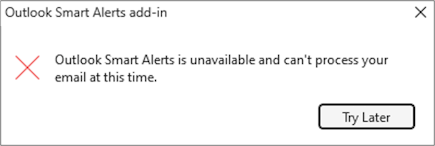
If the add-in is unavailable when a message or appointment is being sent (for example, an error occurs that prevents the add-in from loading), the user is alerted. The options available to the user differ depending on the send mode option applied to the add-in.
If the prompt user or soft block option is used, the user can choose Send Anyway to send the item without the add-in checking it, or Try Later to let the item be checked by the add-in when it becomes available again.
If the block option is used, the user can't send the item until the add-in becomes available.
Important
If a Smart Alerts add-in that implements the send mode override feature can't complete processing an event due to an error or is unavailable when the event occurs, it uses the send mode option specified in the manifest.
Long-running add-in operations
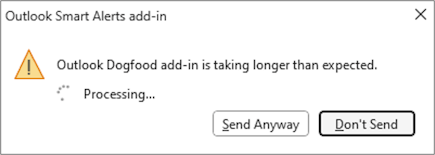
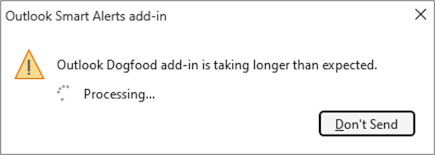
If the add-in runs for more than five seconds, but less than five minutes, the user is alerted that the add-in is taking longer than expected to process the message or appointment.
If the prompt user option is used, the user can choose Send Anyway to send the item without the add-in completing its check. Alternatively, the user can select Don't Send to stop the add-in from processing.
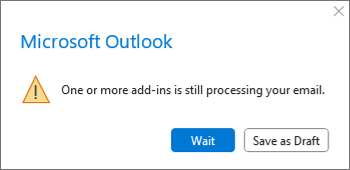
However, if the soft block or block option is used, the user will not be able to send the item until the add-in completes processing it.
OnMessageSend and OnAppointmentSend add-ins should be short-running and lightweight. To avoid the long-running operation dialog, use other events to process conditional checks before the OnMessageSend or OnAppointmentSend event is activated. For example, if the user is required to encrypt attachments for every message or appointment, consider using the OnMessageAttachmentsChanged or OnAppointmentAttachmentsChanged event to perform the check.
Add-in timed out
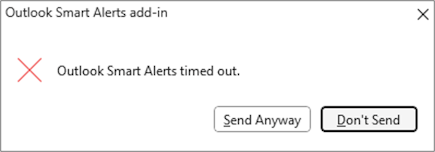
If the add-in runs for five minutes or more, it will time out. If the prompt user option is used, the user can choose Send Anyway to send the item without the add-in completing its check. Alternatively, the user can choose Don't Send.
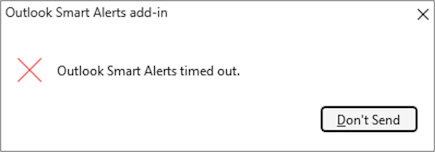
If the soft block or block option is used, the user can't send the item until the add-in completes its check. The user must attempt to send the item again to reactivate the add-in.
Outlook client in Work Offline mode
In Outlook on Windows (classic client starting in Version 2310 (Build 16913.10000)) and on Mac (starting in Version 16.80 (23121017)), a Smart Alerts add-in that implements the soft block or block option can only process a mail item while the Outlook client is online. If Work Offline mode is turned on in the Outlook client when a mail item is sent, the item isn't saved to the Outbox folder and the user is alerted that they must deactivate Work Offline mode before they can attempt to send their item.
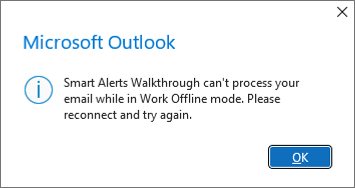
If the Smart Alerts add-in implements the prompt user option, it doesn't process mail items while Work Offline mode is turned on. The item is saved to the Outbox folder instead.
User navigates away from current message
When a user navigates away from the message they're sending (for example, to read a message in their inbox), the behavior of a Smart Alerts add-in differs between Outlook clients. Select the tab for the Outlook client on which the add-in is running.
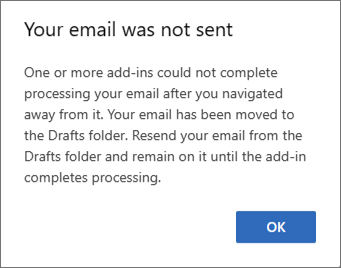
In Outlook on the web or in new Outlook on Windows, a user must remain on the message being sent until the Smart Alerts add-in completes processing it. Otherwise, once the user navigates away from the item, the add-in terminates the Smart Alerts operation and saves a draft to the mailbox's Drafts folder. The user is then alerted that they must resend the message from the Drafts folder and remain on the message until the add-in completes processing it.
Activate Smart Alerts in applications that use Simple MAPI
Note
This feature is currently only supported in classic Outlook on Windows starting in Version 2301 (Build 17126.20004).
Users can send mail items through certain applications that use Simple MAPI, even if the Outlook client isn't running at the time the item is sent. When this occurs, any installed Smart Alerts add-in won't activate to check the mail item for compliance.
To ensure that outgoing items meet the conditions of your Smart Alerts add-in before they're sent, you must turn on the Running Outlook for Simple MAPI Mail Sending Group Policy setting on every applicable machine in your organization.
Behavior when the setting is turned on
When the Running Outlook for Simple MAPI Mail Sending setting is set to Enabled, users are required to have their Outlook client running at the time a mail item is sent in the following scenarios.
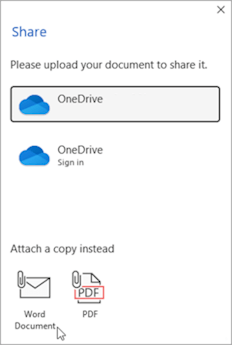
A file is sent as an attachment through the Share > Attach a copy instead option in Excel, Word, or PowerPoint.
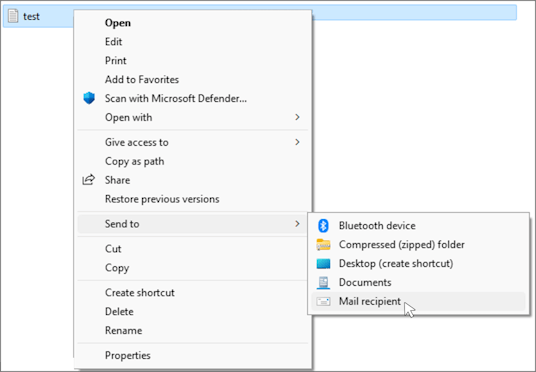
A file is sent as an attachment through the Send to > Mail recipient option in File Explorer.
A file is sent through an application that uses Simple MAPI, which opens a new message Outlook window.
If a user's Outlook client isn't running at the time the mail item is sent, a dialog is shown to notify them that they must open their client to send the item.

Behavior when the setting is turned off or not configured
When the Running Outlook for Simple MAPI Mail Sending setting is set to Disabled or Not Configured in your organization, any user who uses applications that implement Simple MAPI to send mail items will be able to do so without activating their Smart Alerts add-in for compliance checks.
Configure the Group Policy setting
By default, the Running Outlook for Simple MAPI Mail Sending setting is set to Not Configured. To turn on the setting, perform the following:
- Download the latest Administrative Templates tool.
- Open the Local Group Policy Editor (gpedit.msc).
- Navigate to User Configuration\Administrative Templates\Microsoft Outlook 2016\Miscellaneous.
- Open the Running Outlook for Simple MAPI Mail Sending setting.
- In the dialog that appears, select Enabled.
- Select OK or Apply to save your change.
Limitations
Because the OnMessageSend and OnAppointmentSend events are supported through the event-based activation feature, the same feature limitations apply to add-ins that activate as a result of these events. For a description of these limitations, see Event-based activation behavior and limitations.
In addition to these constraints, only one instance each of the OnMessageSend and OnAppointmentSend event can be declared in the manifest. If you require multiple OnMessageSend or OnAppointmentSend events, you must declare each one in a separate add-in.
While you can change the Smart Alerts dialog message and Don't Send button to suit your add-in scenario, the following can't be customized.
- The dialog's title bar. Your add-in's name is always displayed there.
- The font or color of the dialog message. However, you can use Markdown to format certain elements of your message. For a list of supported elements, see Limitations to formatting the dialog message using Markdown.
- The icon next to the dialog message.
- Dialogs that provide information on event processing and progress. For example, the text and options that appear in the timeout and long-running operation dialogs can't be changed.
You can customize the Don't Send button in the dialog to open a task pane or run a function. For guidance on the types of add-in commands, see Types of add-in commands.
Note
Support to customize the Don't Send button was introduced in Mailbox requirement set 1.14.
In Outlook on the web and in new Outlook on Windows:
- The
OnAppointmentSendevent only occurs when the meeting being sent was created through the New Event option. If the meeting being sent was created by selecting a date and time directly from the calendar, theOnAppointmentSendevent doesn't occur. - When forwarding a meeting, the
OnAppointmentSendevent only occurs if the organizer forwards the meeting. It doesn't occur if an attendee forwards the meeting to which they're invited.
Limitations to formatting the dialog message using Markdown
Note
Support for Markdown in a Smart Alerts dialog is currently in preview in Outlook on the web and on Windows (new and classic). Features in preview shouldn't be used in production add-ins. We invite you to try out this feature in test or development environments and welcome feedback on your experience through GitHub (see the Feedback section at the end of this page).
To test this feature in classic Outlook on Windows, you must install Version 2403 (Build 17330.10000) or later. Then, join the Microsoft 365 Insider program and select the Beta Channel option in your Outlook client to access Office beta builds.
You can use Markdown to format the message of a Smart Alerts dialog. However, only the following elements are supported.
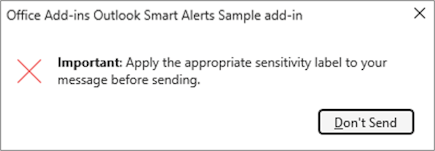
Bold, italic, or bold and italic text. Both the asterisk (*) and underscore (_) formats are supported.
event.completed({
  allowEvent: false,
  ...
  errorMessageMarkdown: "**Important**: Apply the appropriate sensitivity label to your message before sending."
});
Bulleted or unordered lists. To create an item in the list, begin with a dash (
-) or asterisk (*), add the content, then append\rto signify item completion.event.completed({ allowEvent: false, ... errorMessageMarkdown: "Your email doesn't meet company guidelines.\n\nFor additional assistance, contact the IT Service Desk:\n\n- Phone number: 425-555-0102\r- Email: it@contoso.com\r- Website: [Contoso IT Service Desk](https://www.contoso.com/it-service-desk)\r" });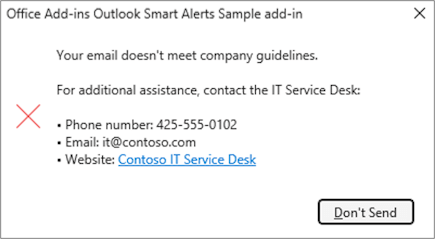
Numbered or ordered lists. To create an item in the list, begin with a number followed by a period, add the content, then append
\rto signify item completion. The first item of the list must start with the number one (1.) and the succeeding numbers must be in numerical order.event.completed({ allowEvent: false, ... errorMessageMarkdown: "Help your recipients know your intentions when you send a mail item. To set the sensitivity level of an item:\n\n1. Select **File** > **Properties**.\r2. From the **Sensitivity** dropdown, select **Normal**, **Personal**, **Private**, or **Confidential**.\r3. Select **Close**.\r" });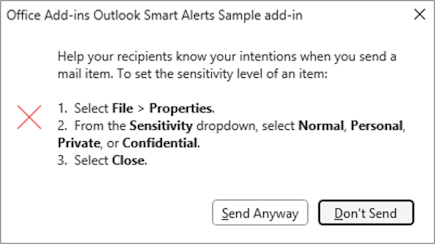
Links. To create a link, enclose your link text in square brackets (
[]), then enclose the HTTPS URL in parentheses (()). You must provide an HTTPS URL, otherwise it won't render as a link that a user can select from the dialog. The angle brackets format (<>) isn't supported.event.completed({ allowEvent: false, ... errorMessageMarkdown: "Need onsite assistance on the day of your meeting? Visit the [Contoso Facilities](https://www.contoso.com/facilities/meetings) page to learn more." });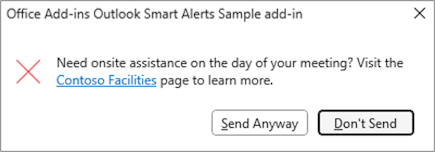
New lines. Use
\n\nto create a new line.event.completed({ allowEvent: false, ... errorMessageMarkdown: "Add a personalized user avatar to your signature today!\n\nTo customize your signature, visit [Customize my email signature](https://www.fabrikam.com/marketing/customize-email-signature)." });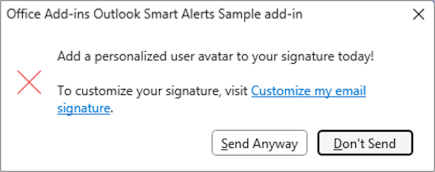
Tip
To escape characters in your message, such as an asterisk, add a backslash (\) before the character.
Best practices
The Smart Alerts feature ensures that all outgoing mail items are compliant with the information protection policies of an organization and helps users improve their messages through recommendations. To ensure your add-in always provides users with a smooth and efficient sending experience, observe the following guidelines.
- Don't let your add-in further delay the send operation. Smart Alerts add-ins must be short-running and lightweight. Avoid overloading the
OnMessageSendandOnAppointmentSendevent handlers with heavy validations. To prevent this, preprocess information when other events occur, such as theOnMessageRecipientsChangedorOnMessageAttachmentsChangedevent. To determine which events your add-in can respond to, see the "Supported events" section of Configure your Outlook add-in for event-based activation. - Don't implement additional dialogs. Prevent overwhelming your users with too many dialogs. Instead, customize the text in the Smart Alerts dialog to convey information. If needed, you can also customize the Don't Send button to provide users with additional information and functionality through a task pane or function.
- Enable the appropriate Group Policy settings in your organization. To ensure that your Smart Alerts add-in activates on each mail item, including those sent using applications that implement Simple MAPI, configure the Running Outlook for Simple MAPI Sending setting. To learn more about this setting, see Activate Smart Alerts in applications that use Simple MAPI.
Debug your add-in
For guidance on how to troubleshoot your Smart Alerts add-in, see Troubleshoot event-based and spam-reporting add-ins.
Deploy to users
Similar to other event-based add-ins, add-ins that use the Smart Alerts feature must be deployed by an organization's administrator. For guidance on how to deploy your add-in via the Microsoft 365 admin center, see the "Deploy to users" section in Configure your Outlook add-in for event-based activation.
Important
Add-ins that use the Smart Alerts feature can only be published to AppSource if the manifest's send mode property is set to the soft block or prompt user option. If an add-in's send mode property is set to block, it can only be deployed by an organization's admin as it will fail AppSource validation. To learn more about publishing your event-based add-in to AppSource, see AppSource listing options for your event-based Outlook add-in.
Differences between Smart Alerts and the on-send feature
While Smart Alerts and the on-send feature provide your users the opportunity to improve their messages and meeting invites before they're sent, Smart Alerts is a newer feature that offers you more flexibility with how you prompt your users for further action. Key differences between the two features are outlined in the following table.
| Attribute | Smart Alerts | On-send |
|---|---|---|
| Minimum supported requirement set | Mailbox 1.12 | Mailbox 1.8 |
| Supported Outlook clients |
|
|
| Supported events | Add-in only manifest
Unified manifest for Microsoft 365
|
XML manifest
Unified manifest for Microsoft 365
|
| Manifest extension property | Add-in only manifest
Unified manifest for Microsoft 365
|
XML manifest
Unified manifest for Microsoft 365
|
| Supported send mode options |
To learn more about each option, see Available send mode options. |
Block |
| Maximum number of supported events in an add-in | One OnMessageSend and one OnAppointmentSend event. |
One ItemSend event. |
| Add-in deployment | Add-in can be published to AppSource if its send mode property is set to the soft block or prompt user option. Otherwise, the add-in must be deployed by an organization's administrator. | Add-in can't be published to AppSource. It must be deployed by an organization's administrator. |
| Additional configuration for add-in installation | No additional configuration is needed once the manifest is uploaded to the Microsoft 365 admin center. | Depending on the organization's compliance standards and the Outlook client used, certain mailbox policies must be configured to install the add-in. |
See also
- Configure your Outlook add-in for event-based activation
- AppSource listing options for your event-based Outlook add-in
- Office Add-ins code sample: Office Add-ins code sample: Verify the color categories of a message or appointment before it's sent using Smart Alerts
- Office Add-ins code sample: Verify the sensitivity label of a message
Office Add-ins
