Step 3: Create a group to manage users
In this article, you'll use Intune to create a group based on an existing user. Groups are used to manage your users and control your employees' access to your company resources. These resources can be part of your company's intranet or can be external resources, such as SharePoint sites, SaaS apps, or web apps.
Note
Use the information provided in this series of topics to try and evaluate Microsoft Intune. When you're ready, follow the complete process to set up Intune. For more information, see Set up Microsoft Intune.
If you don't have an Intune subscription, sign up for a free trial account.
Note
Intune provides pre-created All Users and All Devices groups in the console with built-in optimizations for your convenience.
Prerequisites
- Microsoft Intune subscription - sign up for a free trial account.
- To complete this step, you must create a user.
Sign in to the Microsoft Intune admin center
Sign in to Microsoft Intune admin center as an Intune administrator. If you've created an Intune Trial subscription, the account you created the subscription with is the Global administrator.
Create a group
You'll create a group that will be used later in this evaluation series. To create a group:
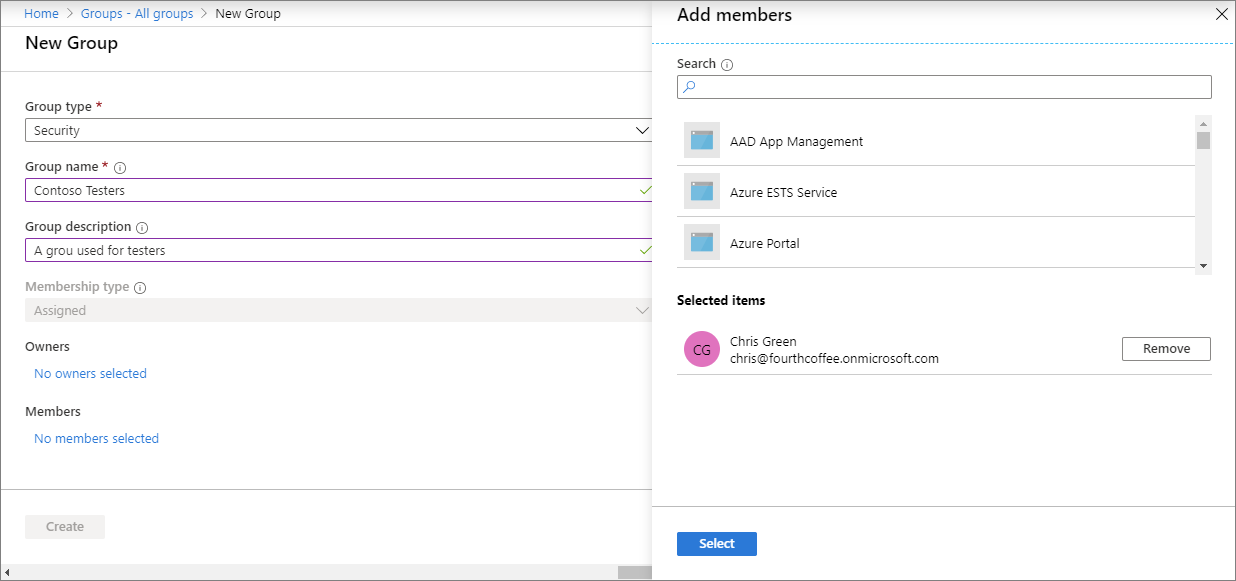
Once you've opened the Microsoft Intune admin center, select Groups > New group.
In the Group type dropdown box, select Security.
In the Group name field, enter the name for the new group (for example, Contoso Testers).
Add a Group description for the group.
Set the Membership type to Assigned.
Under Members, select the link and add one or more members for the group from the list.

Click Select > Create.
Once you've successfully created the group, it will appear in the list of All groups.
Next steps
In this article, you used Intune to create a group based on an existing user. For more information about adding groups to Intune, see Add groups to organize users and devices.
To continue to evaluate Microsoft Intune, go to the next step: