Configure Retail industry data model
After you successfully deploy Retail data solutions and few required entities from the Retail industry data model, you can use the various features available in the solution capability like adding more entities or deleting the capability etc. This article explains how to use these features.
Import data into the lakehouse
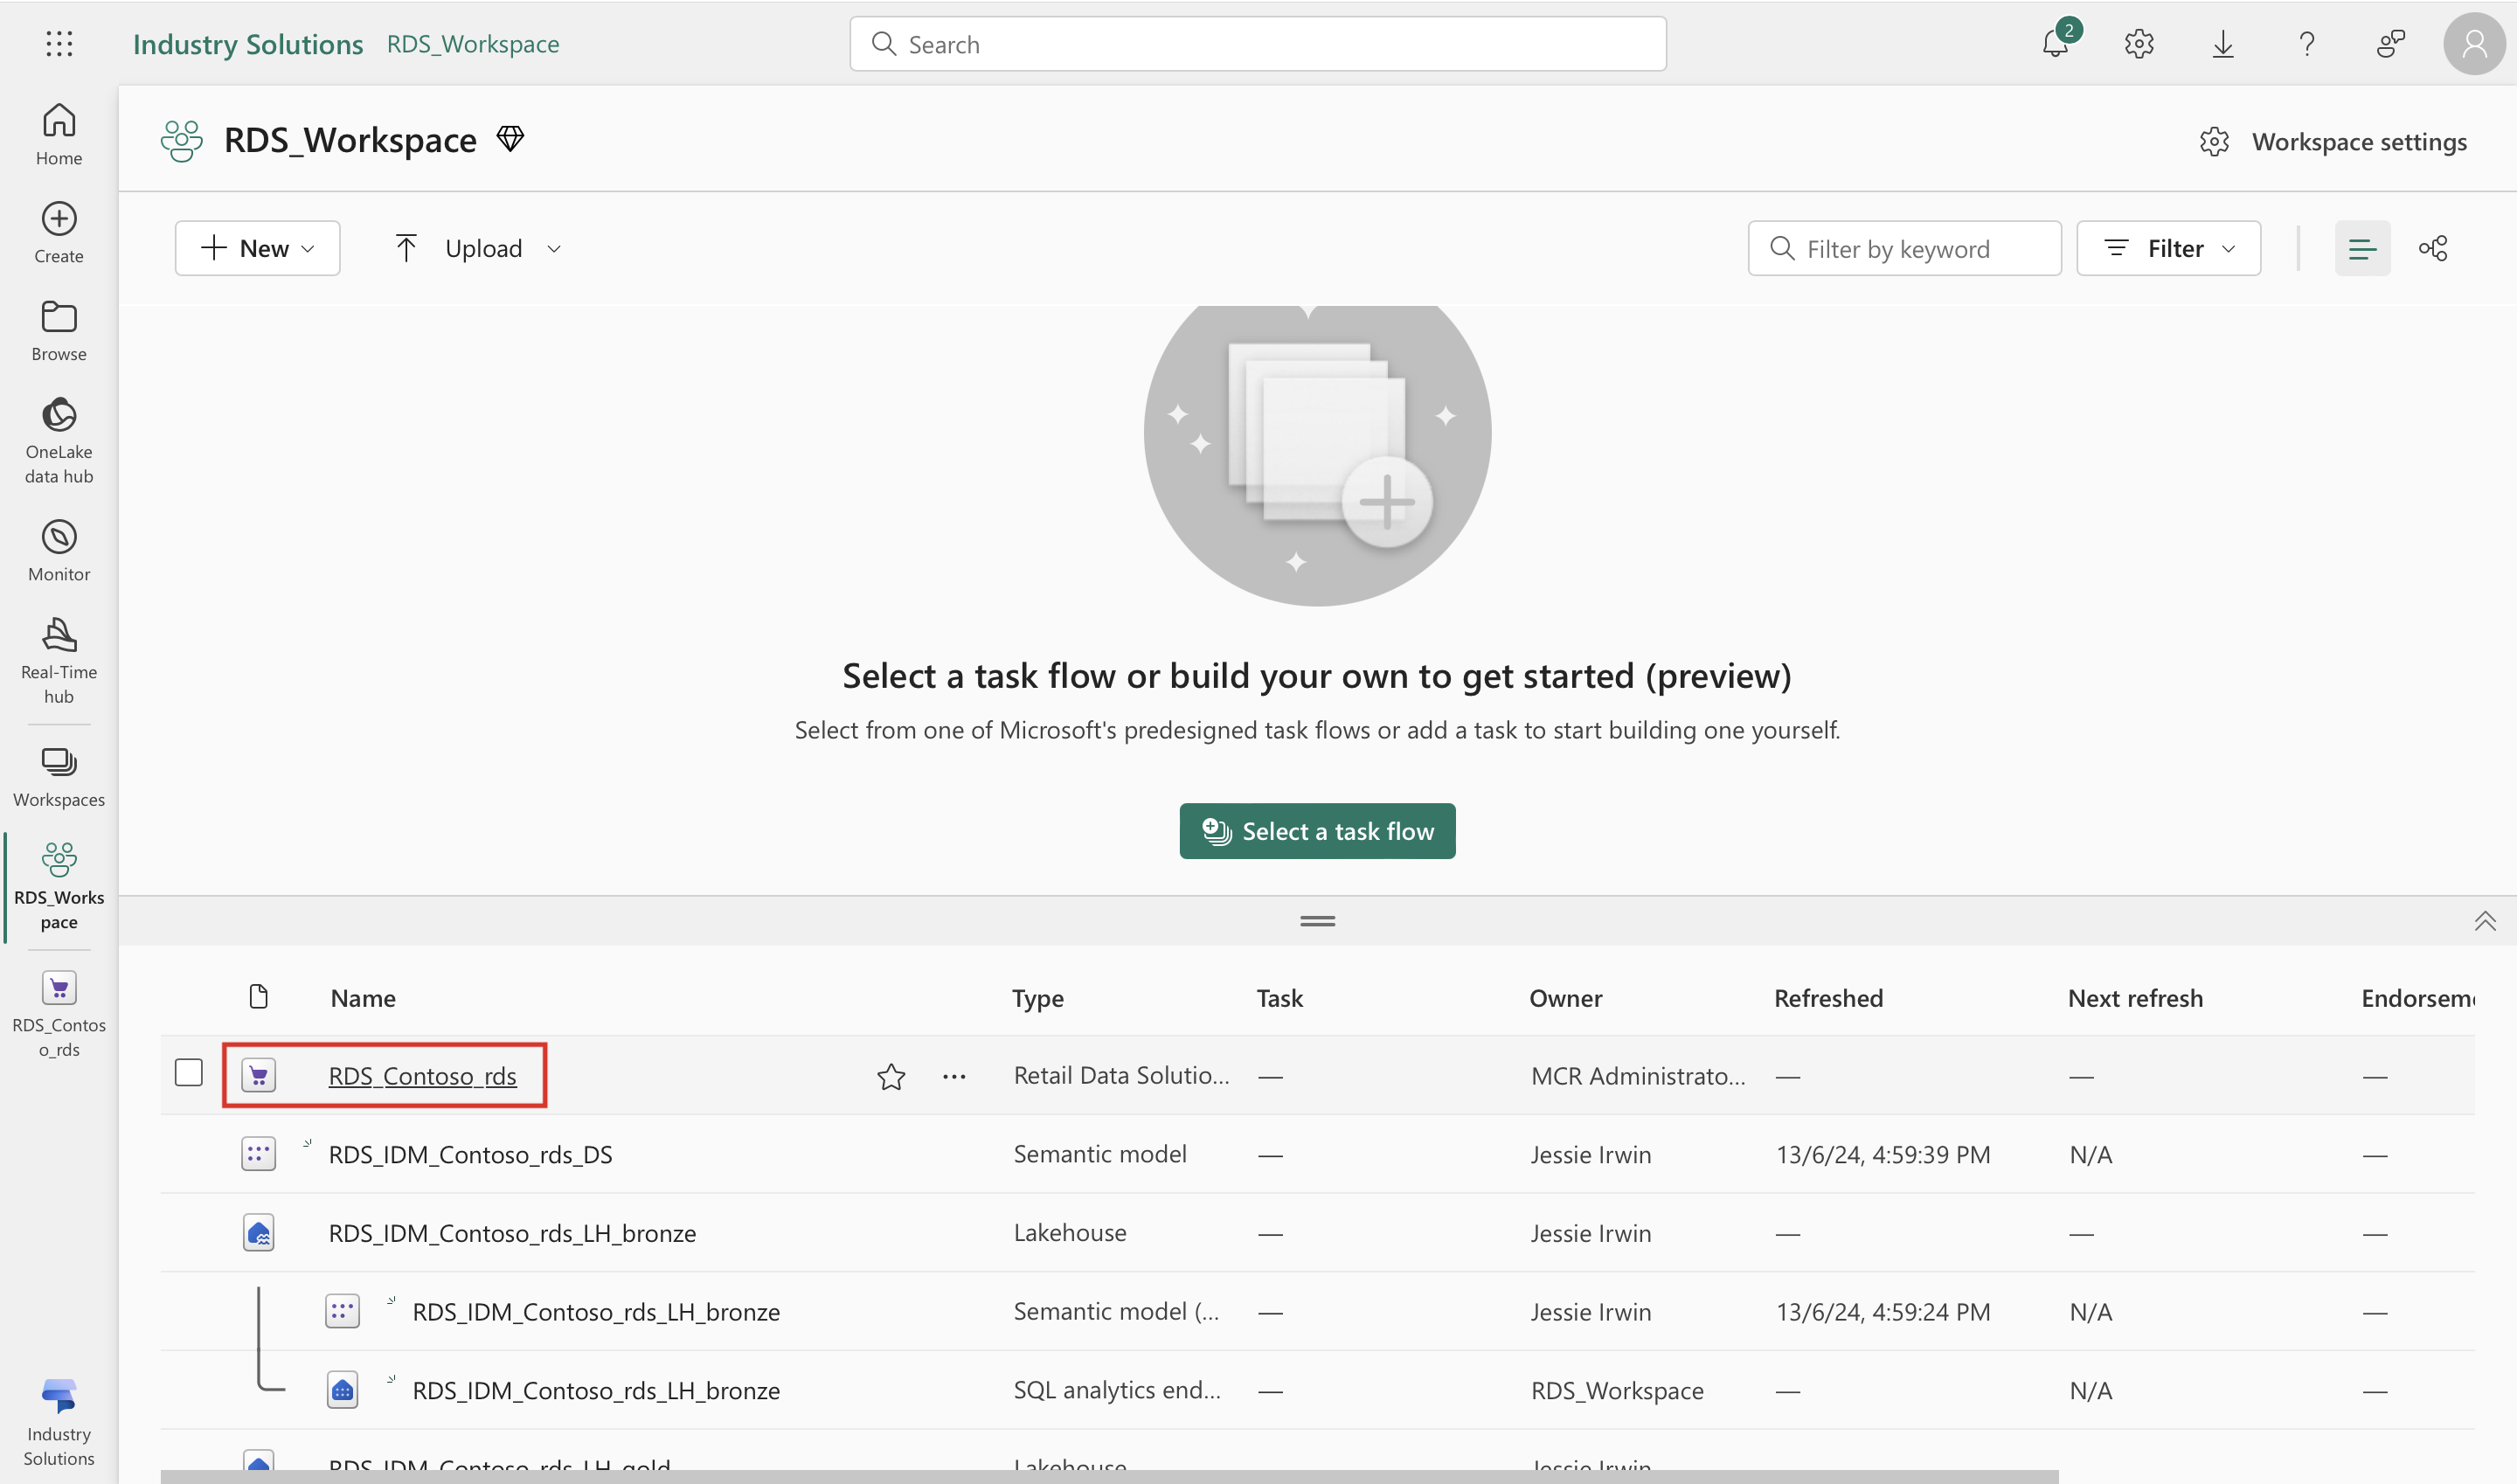
Navigate to the Power BI URL of your organization and select the right workspace from Workspaces. In this page, you see the artifacts available in the workspace. Select the Retail data manager artifact.
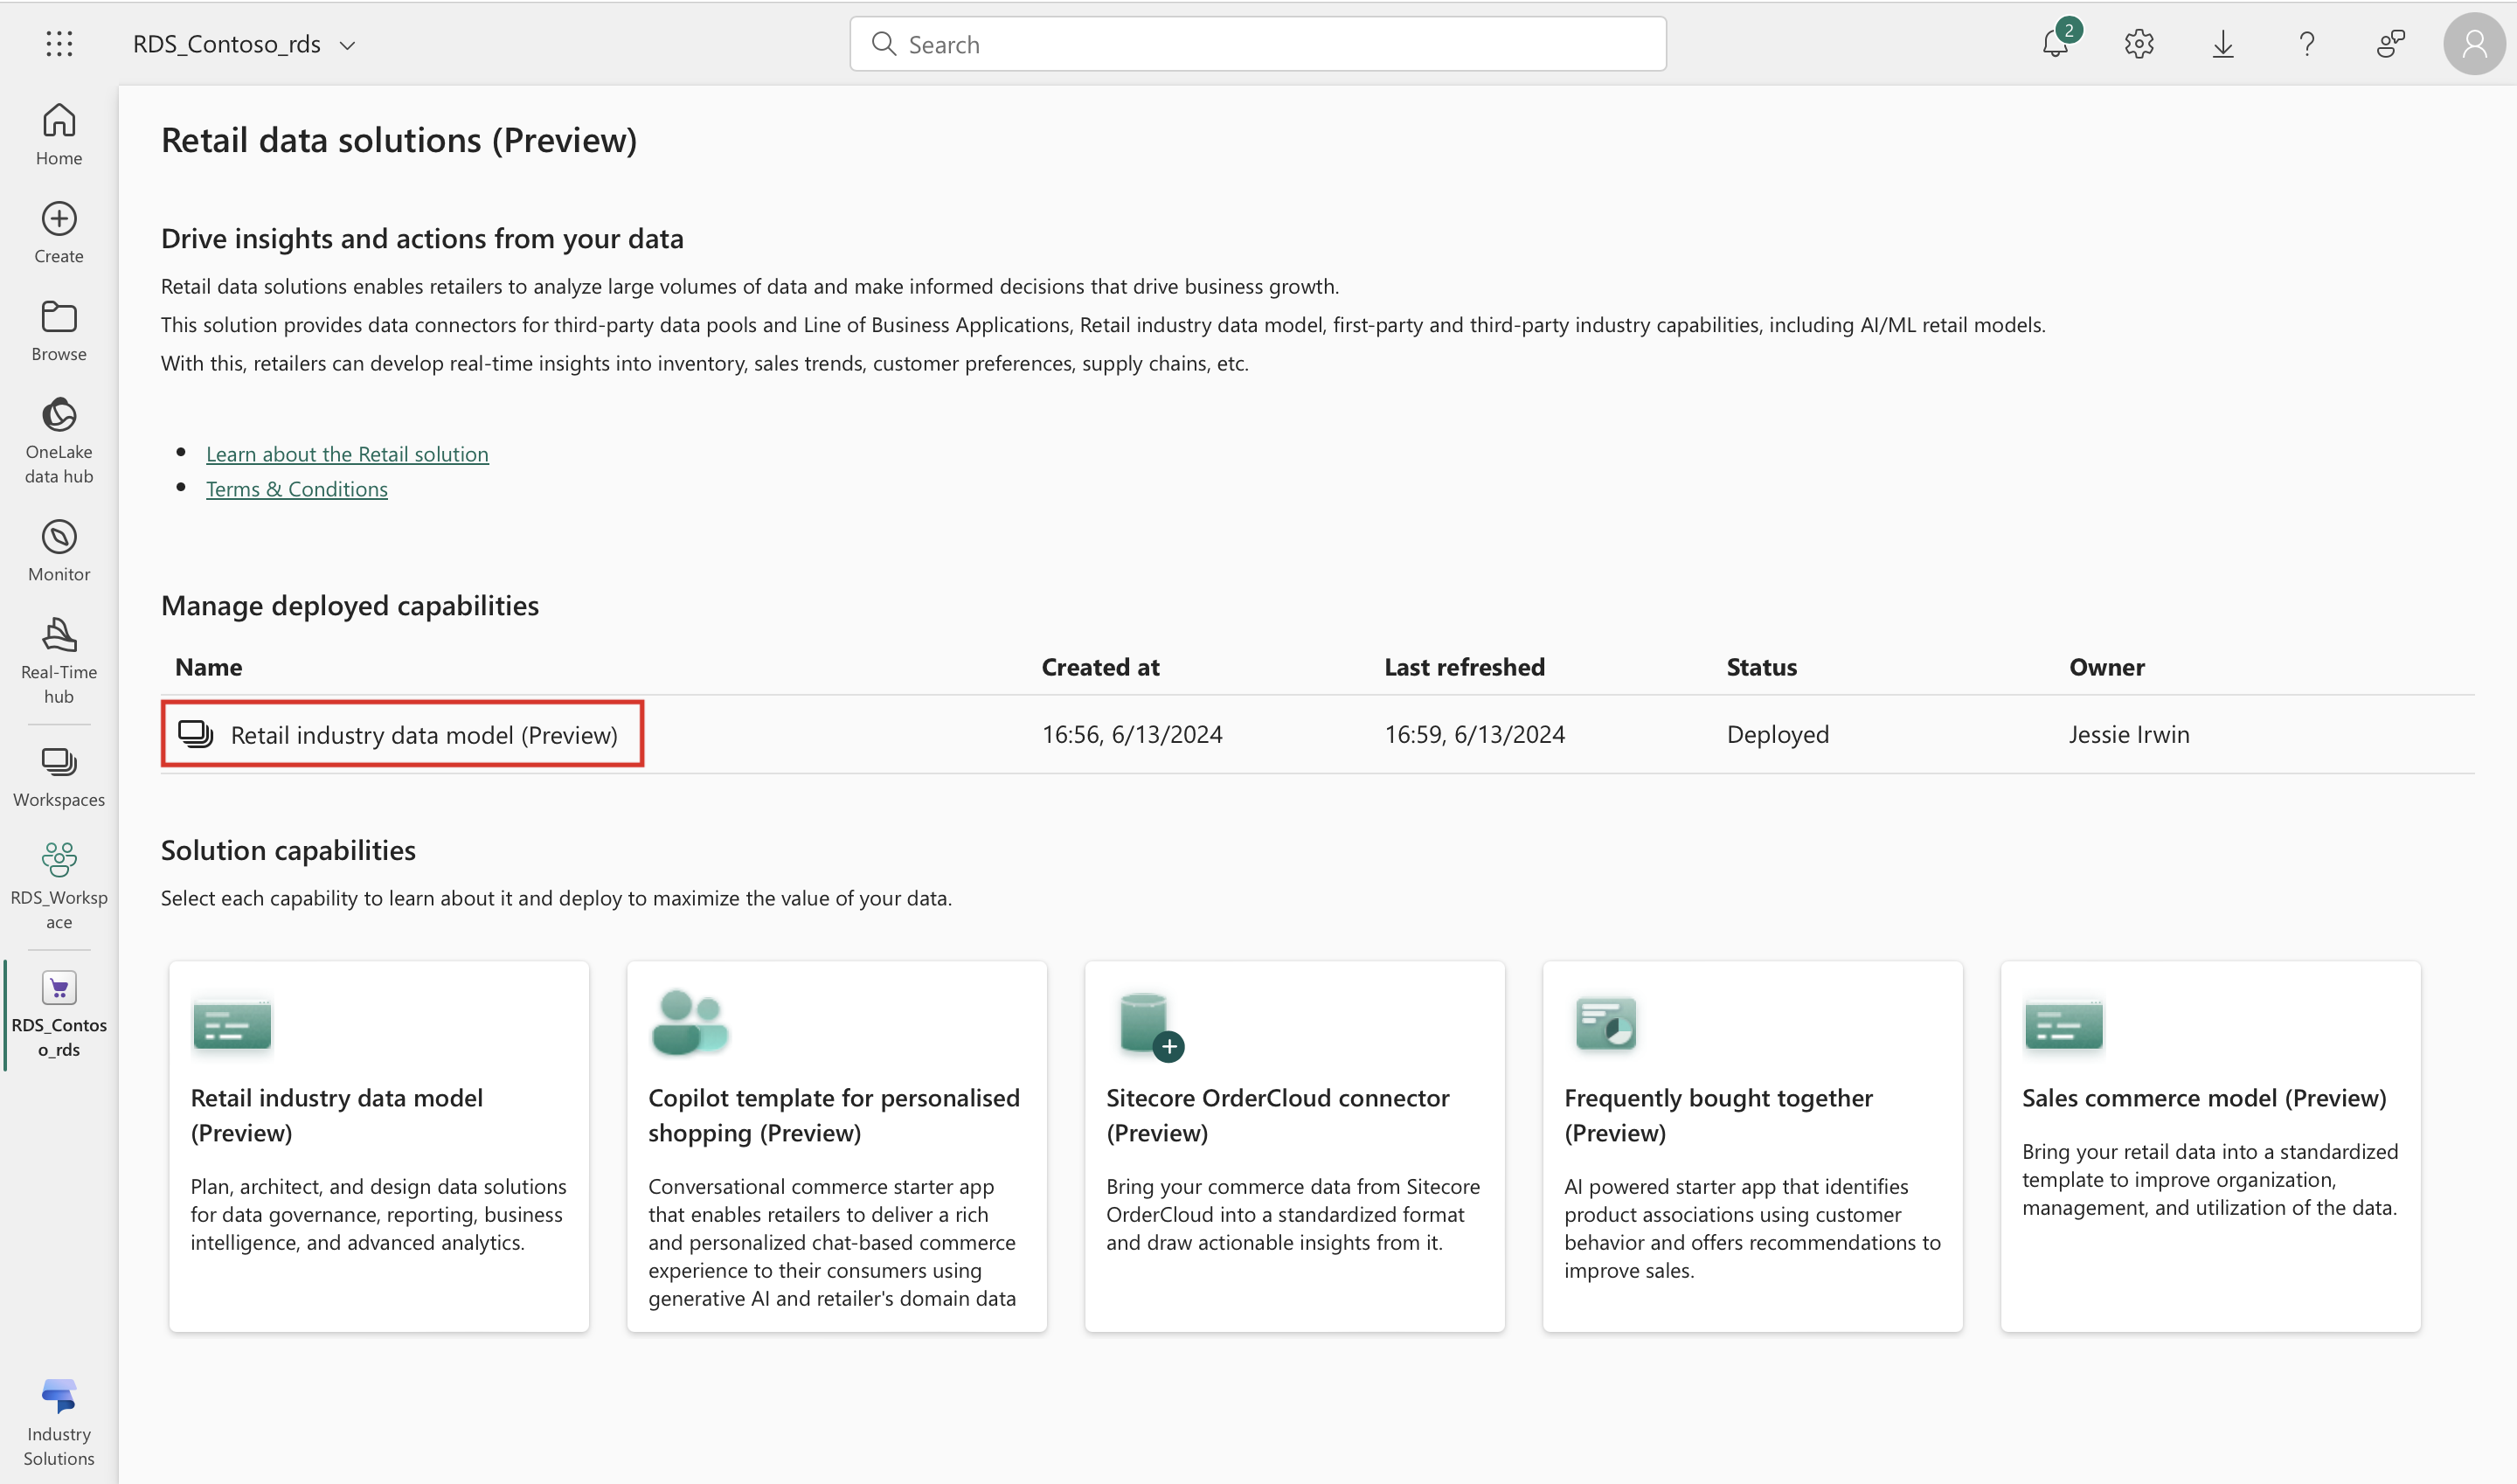
The Retail data solutions homepage opens. On this page, under Managed deployed capabilities, select the instance of Retail data solution installed.
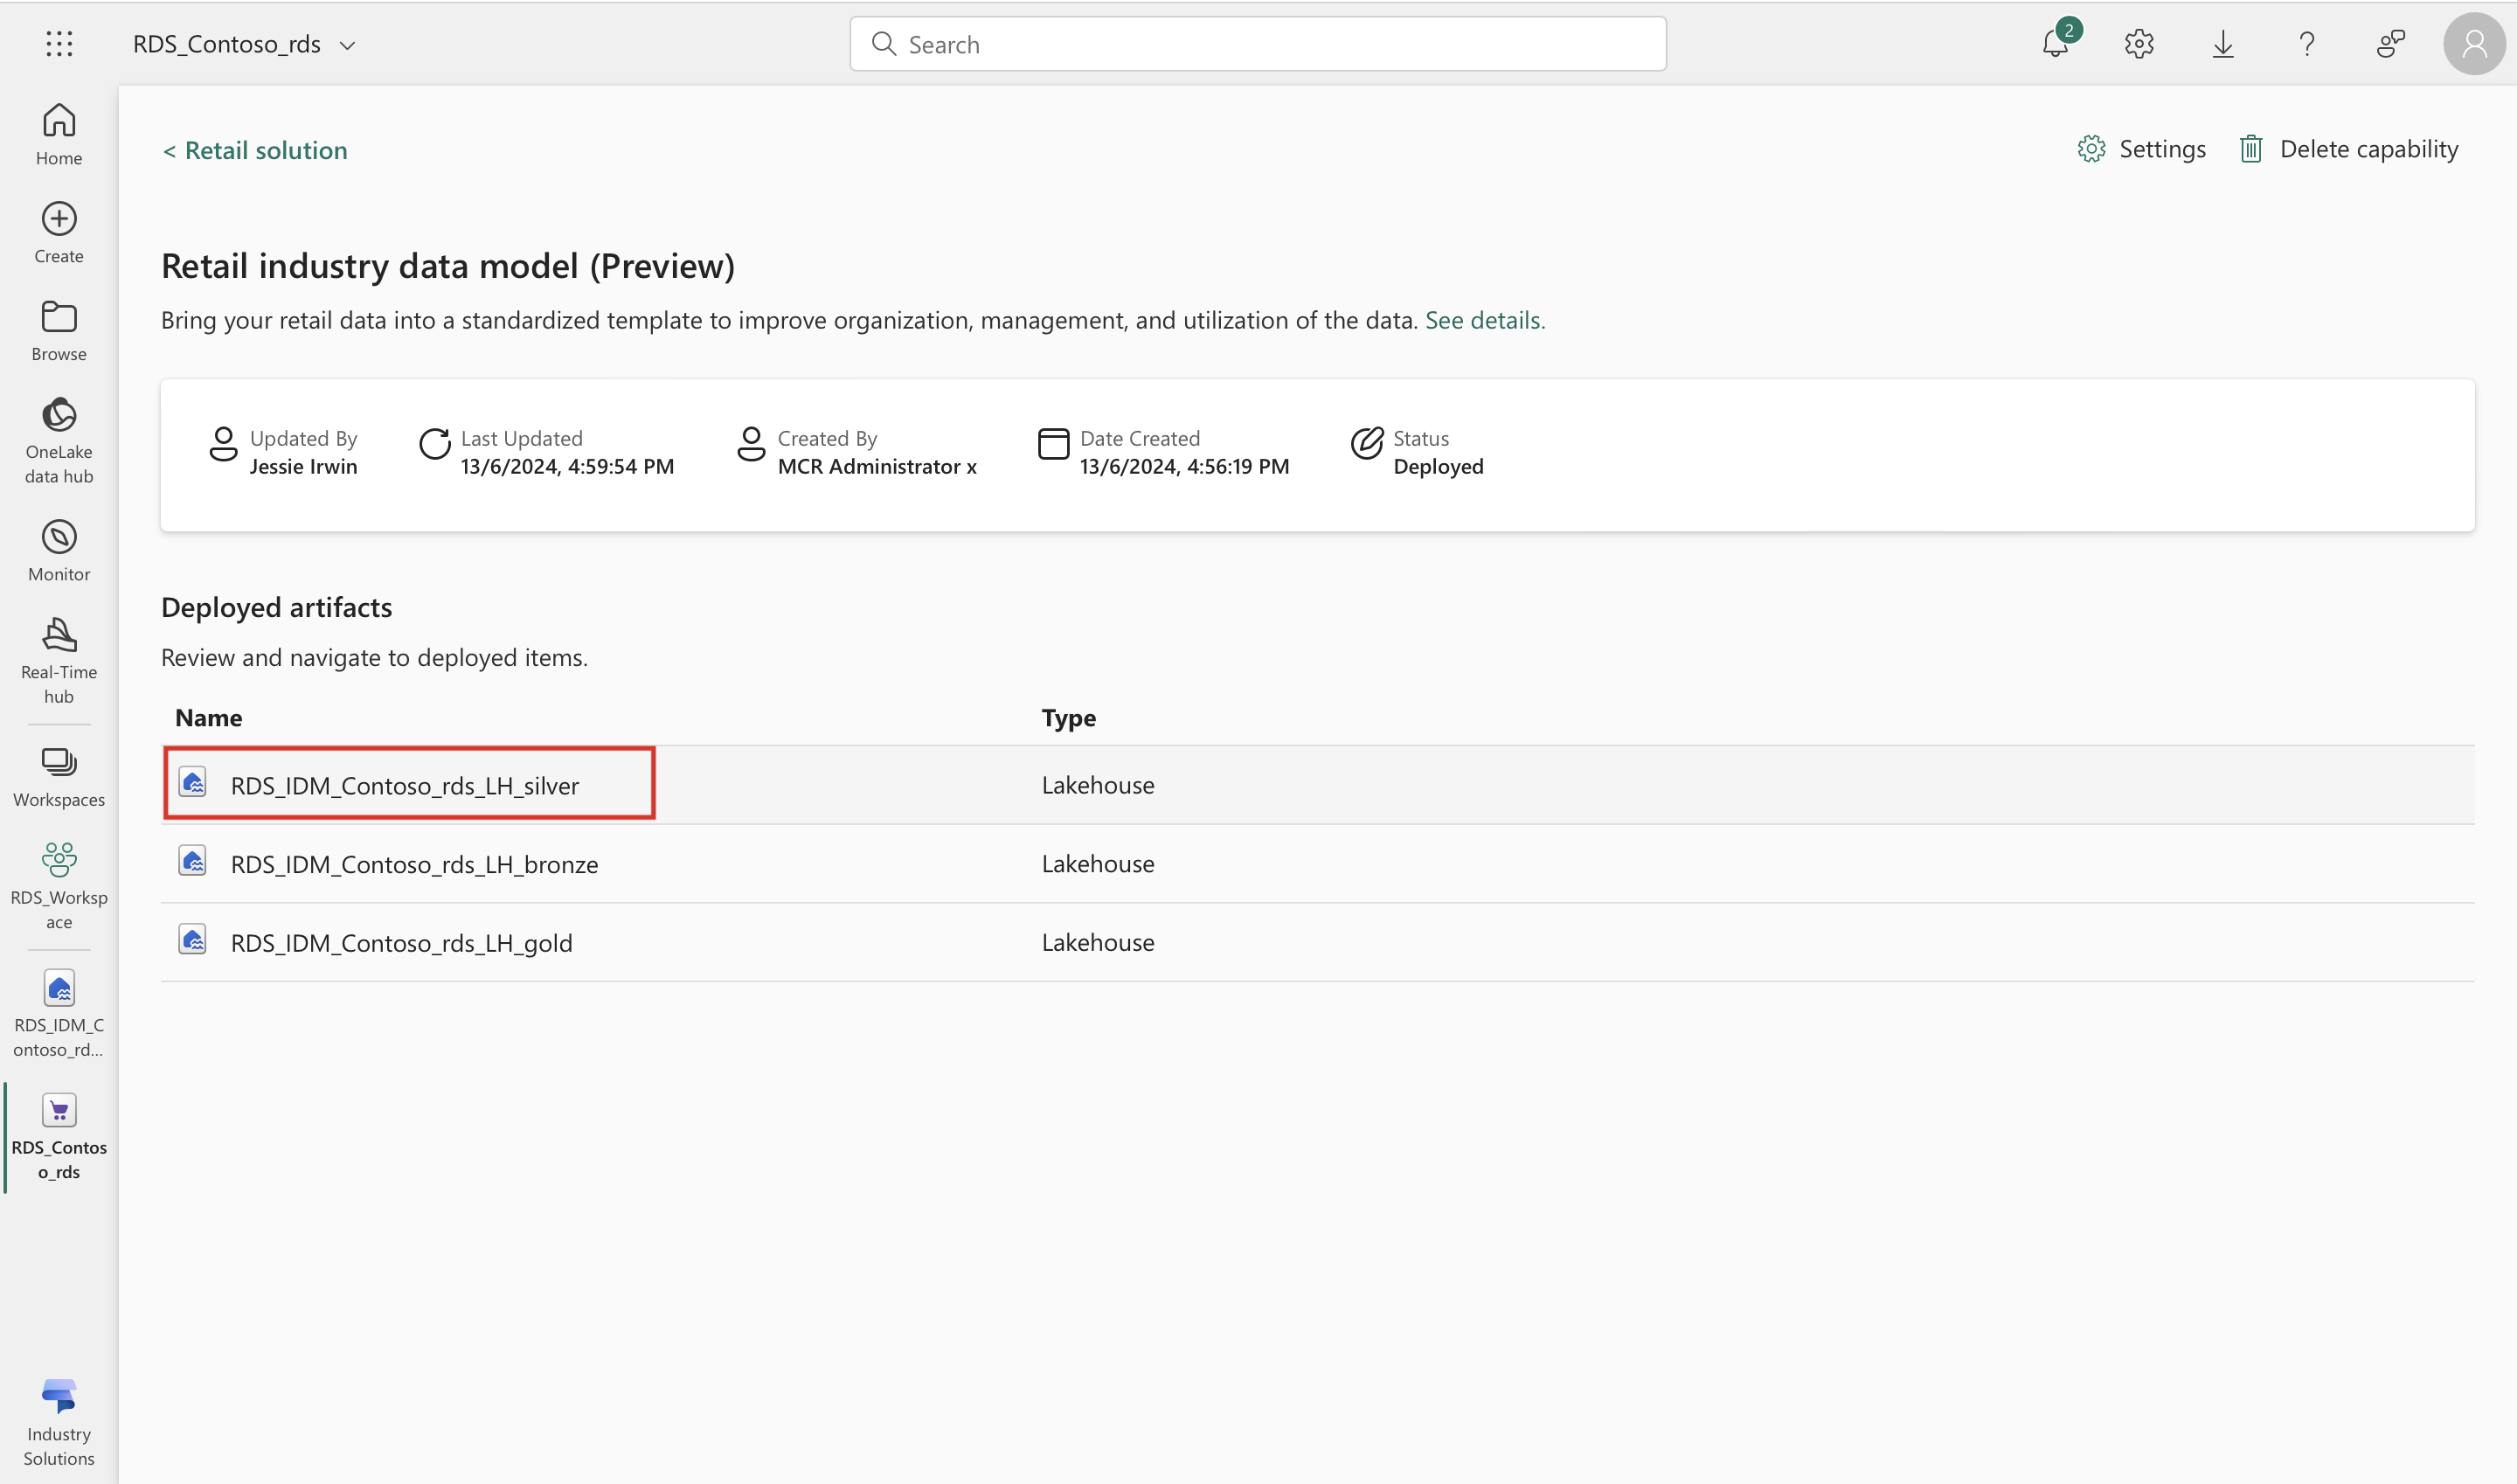
The Retail data industry model capabilities page opens. In the deployed artifacts section, you can see various artifacts deployed in the environment as part of the capability. Select the Lakehouse artifact to open the Lakehouse in the Fabric interface.
Explore the entities created within the Lakehouse. You can now use data pipelines or import data from excel or csv file into the Lakehouse. For more information, see Import data into Lakehouse.
Add more entities
Navigate to the Power BI URL of your organization and select the right workspace from Workspaces. In this page, you see the artifacts available in the workspace. Select the Retail data manager artifact.
The Retail data solutions homepage opens. On this page, under Managed deployed capabilities, select the instance of Retail data solution installed.
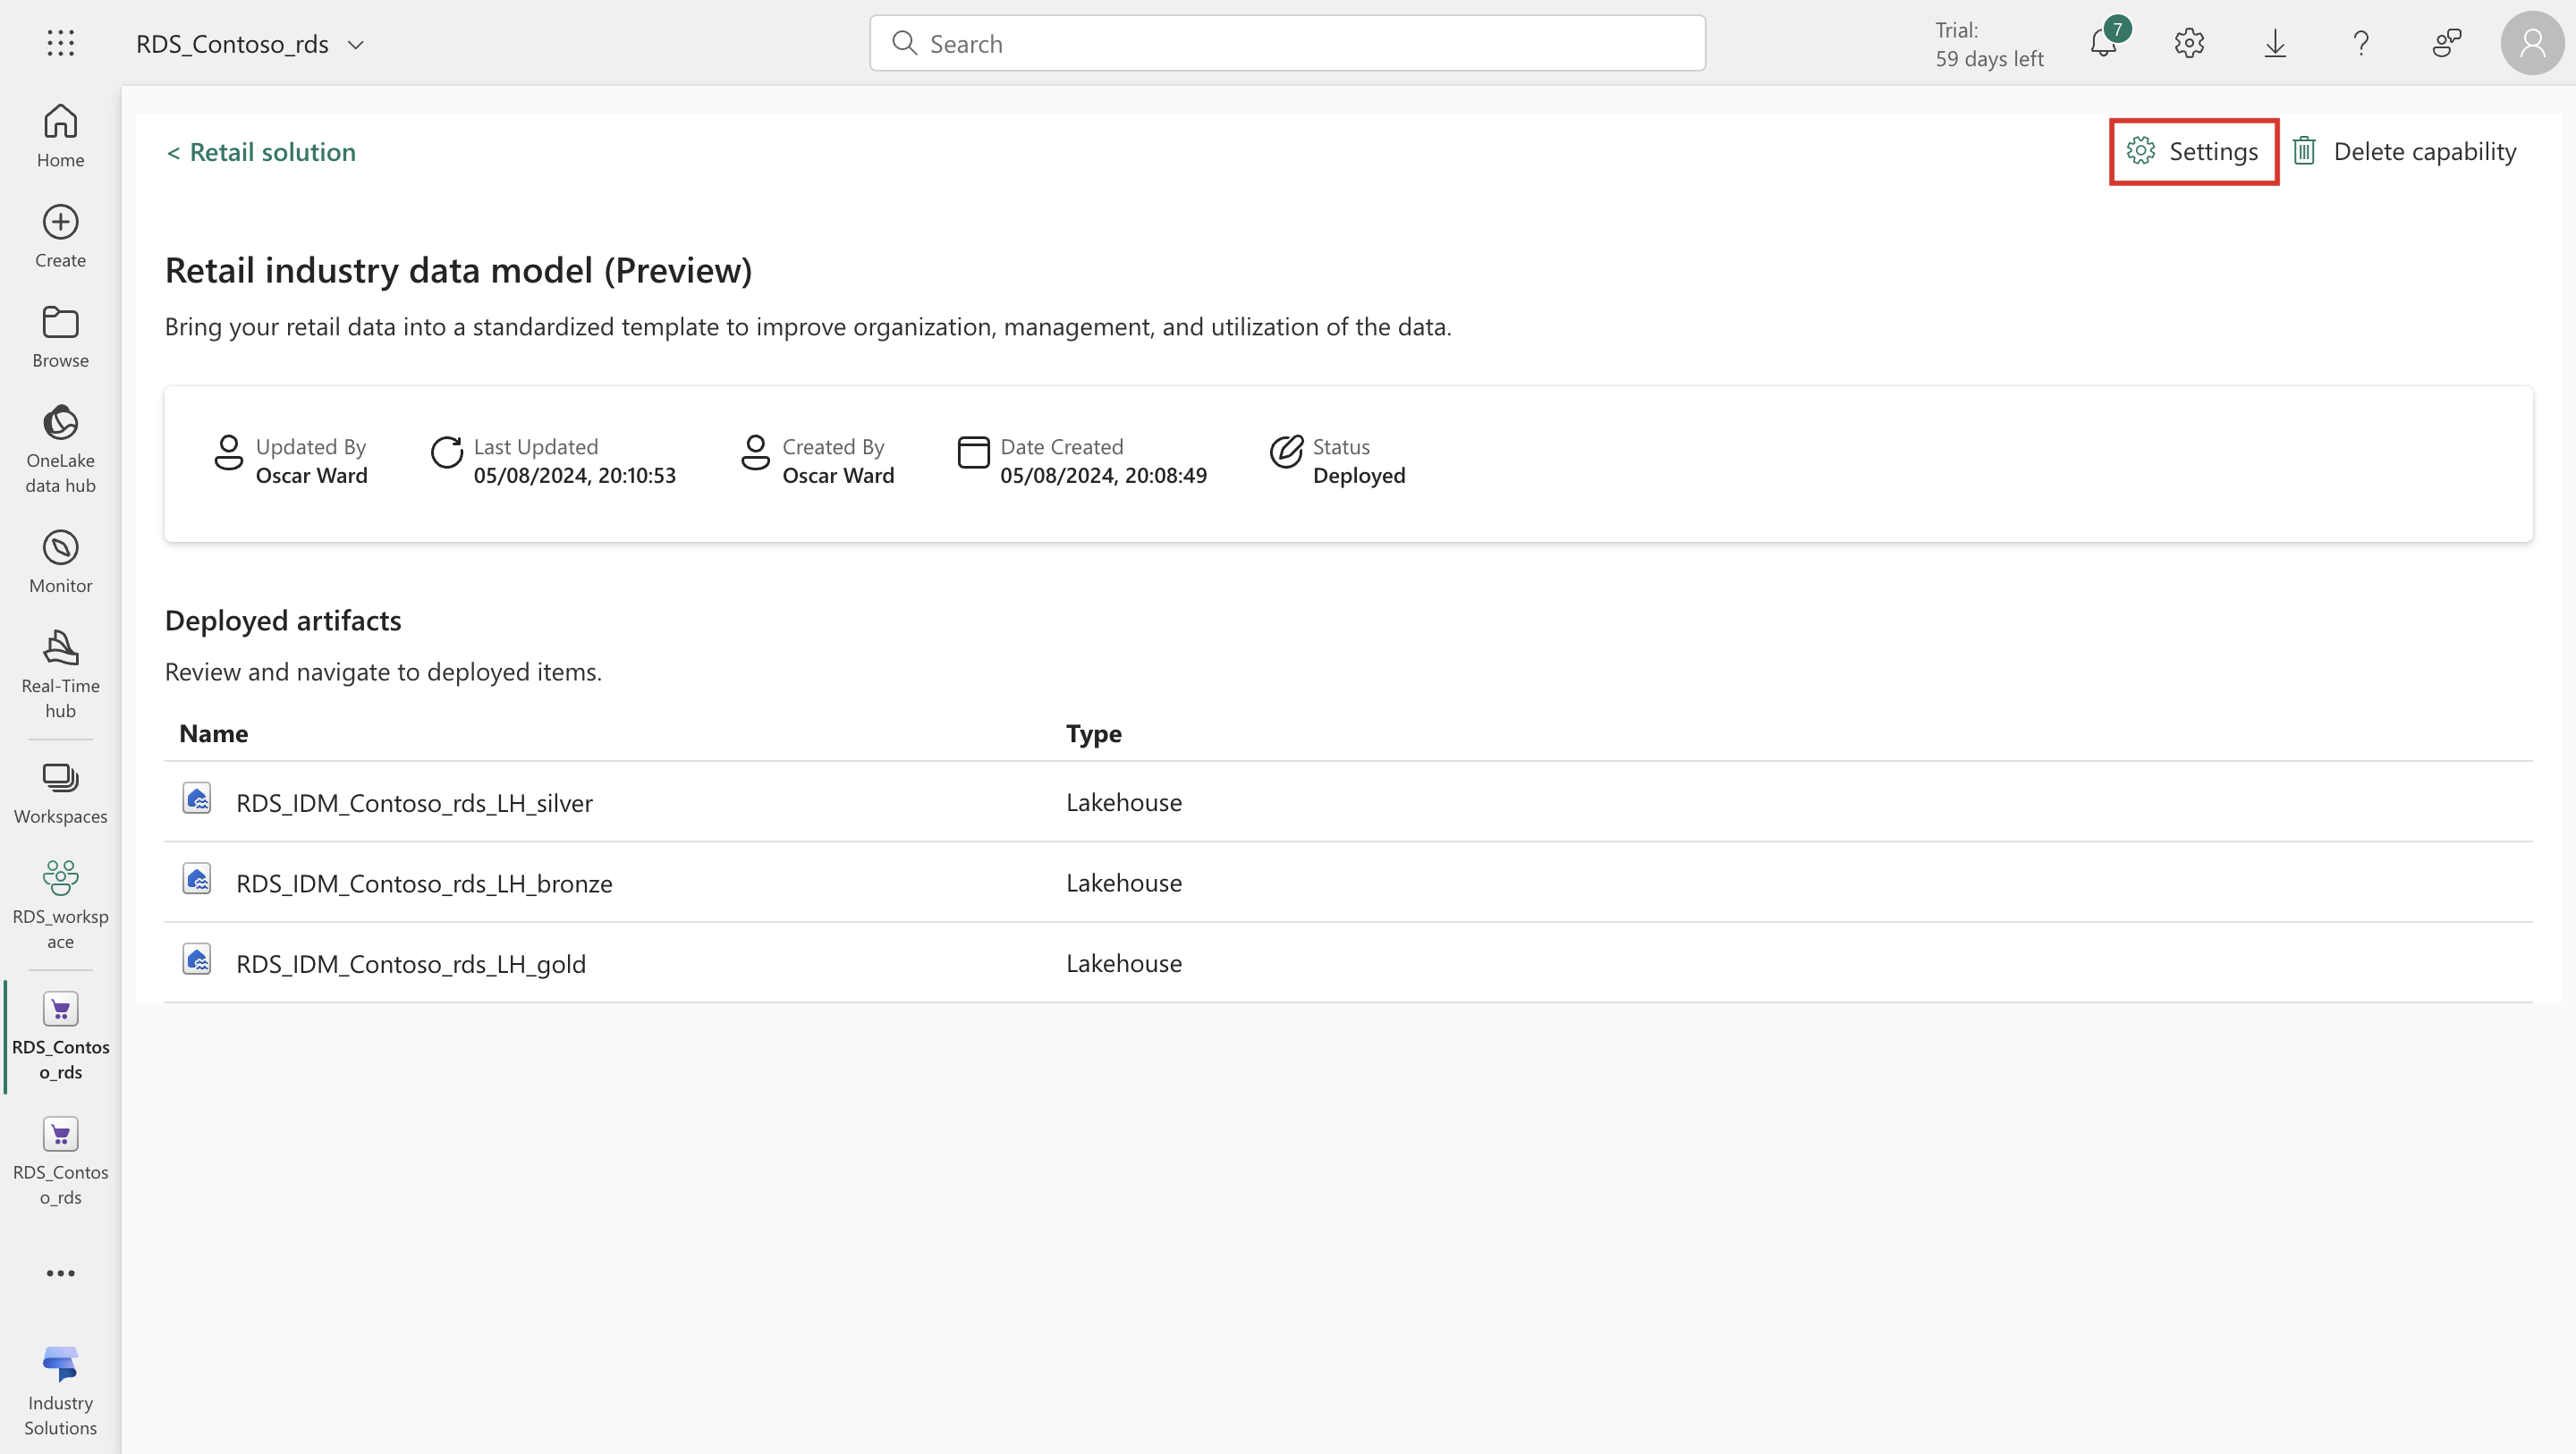
The Retail data industry model capabilities page opens. Select Settings displayed on the top right corner of the screen.
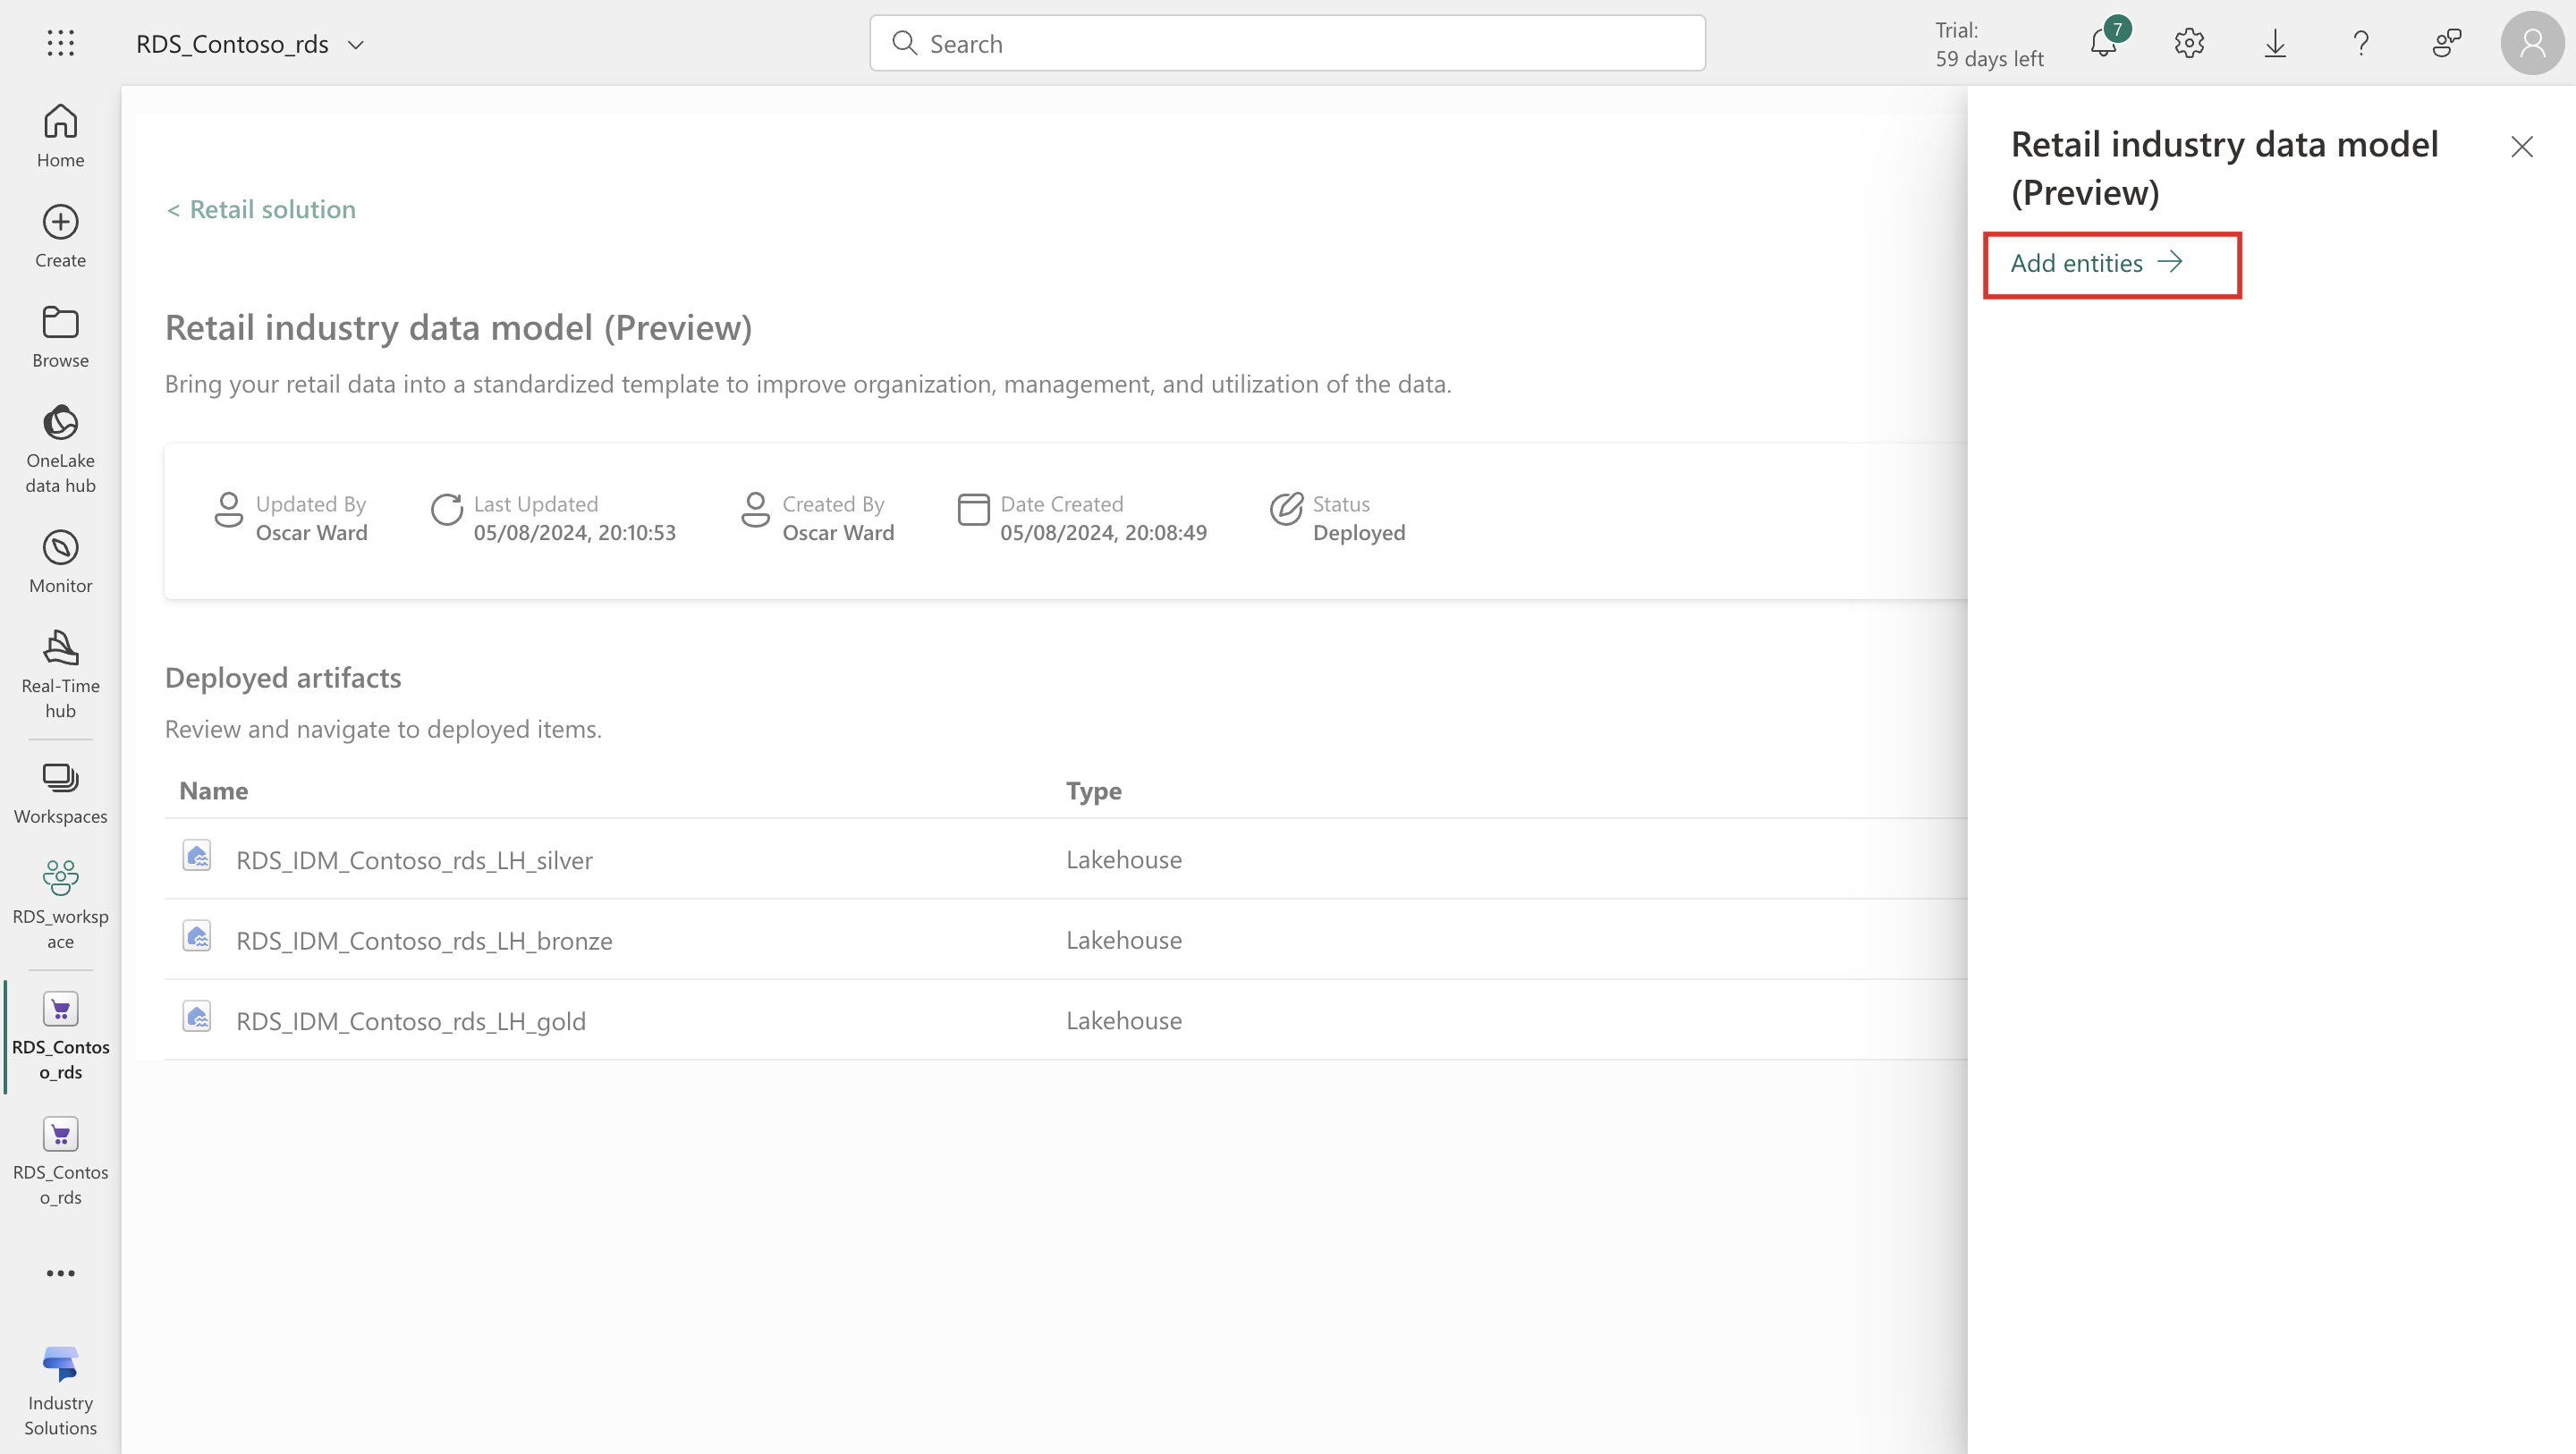
You see a window on the right side of the screen. Select Add entities to add any new entities to the existing data model that is installed. Select Next.
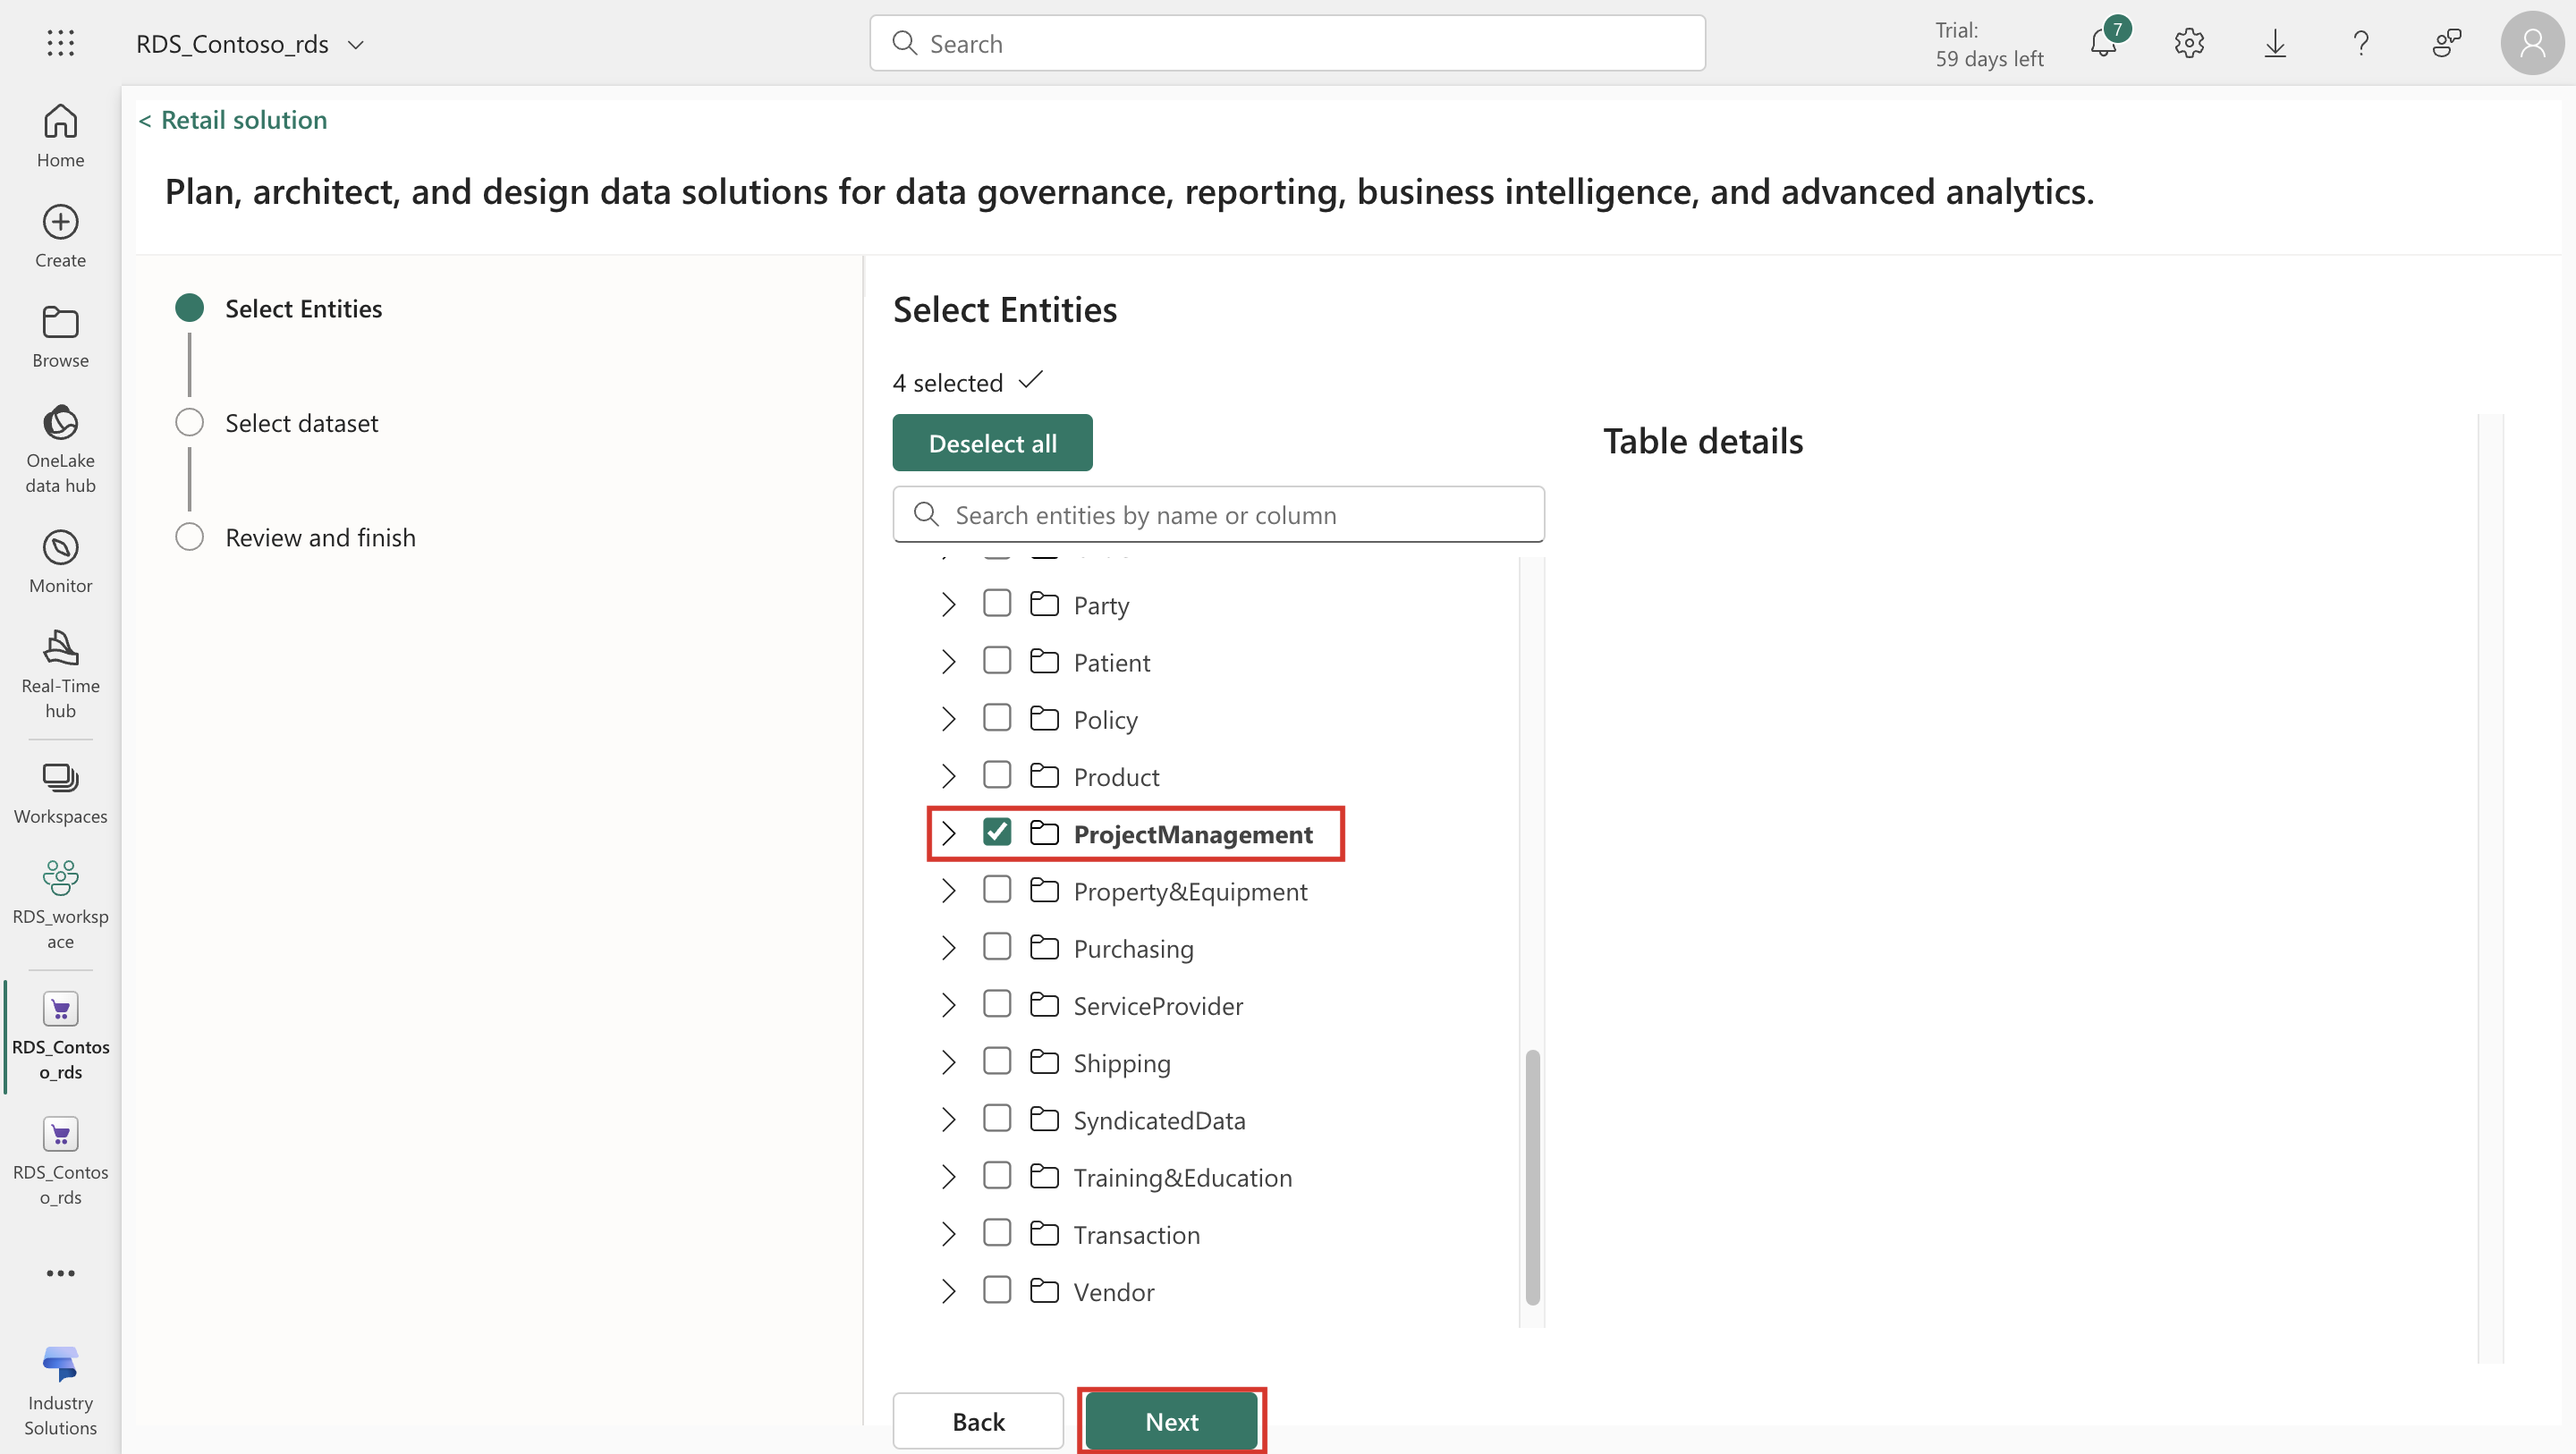
The Select Entities page open, where all existing entities already deployed are preselected and you can add more entities from the industry data model provided. Select Next.
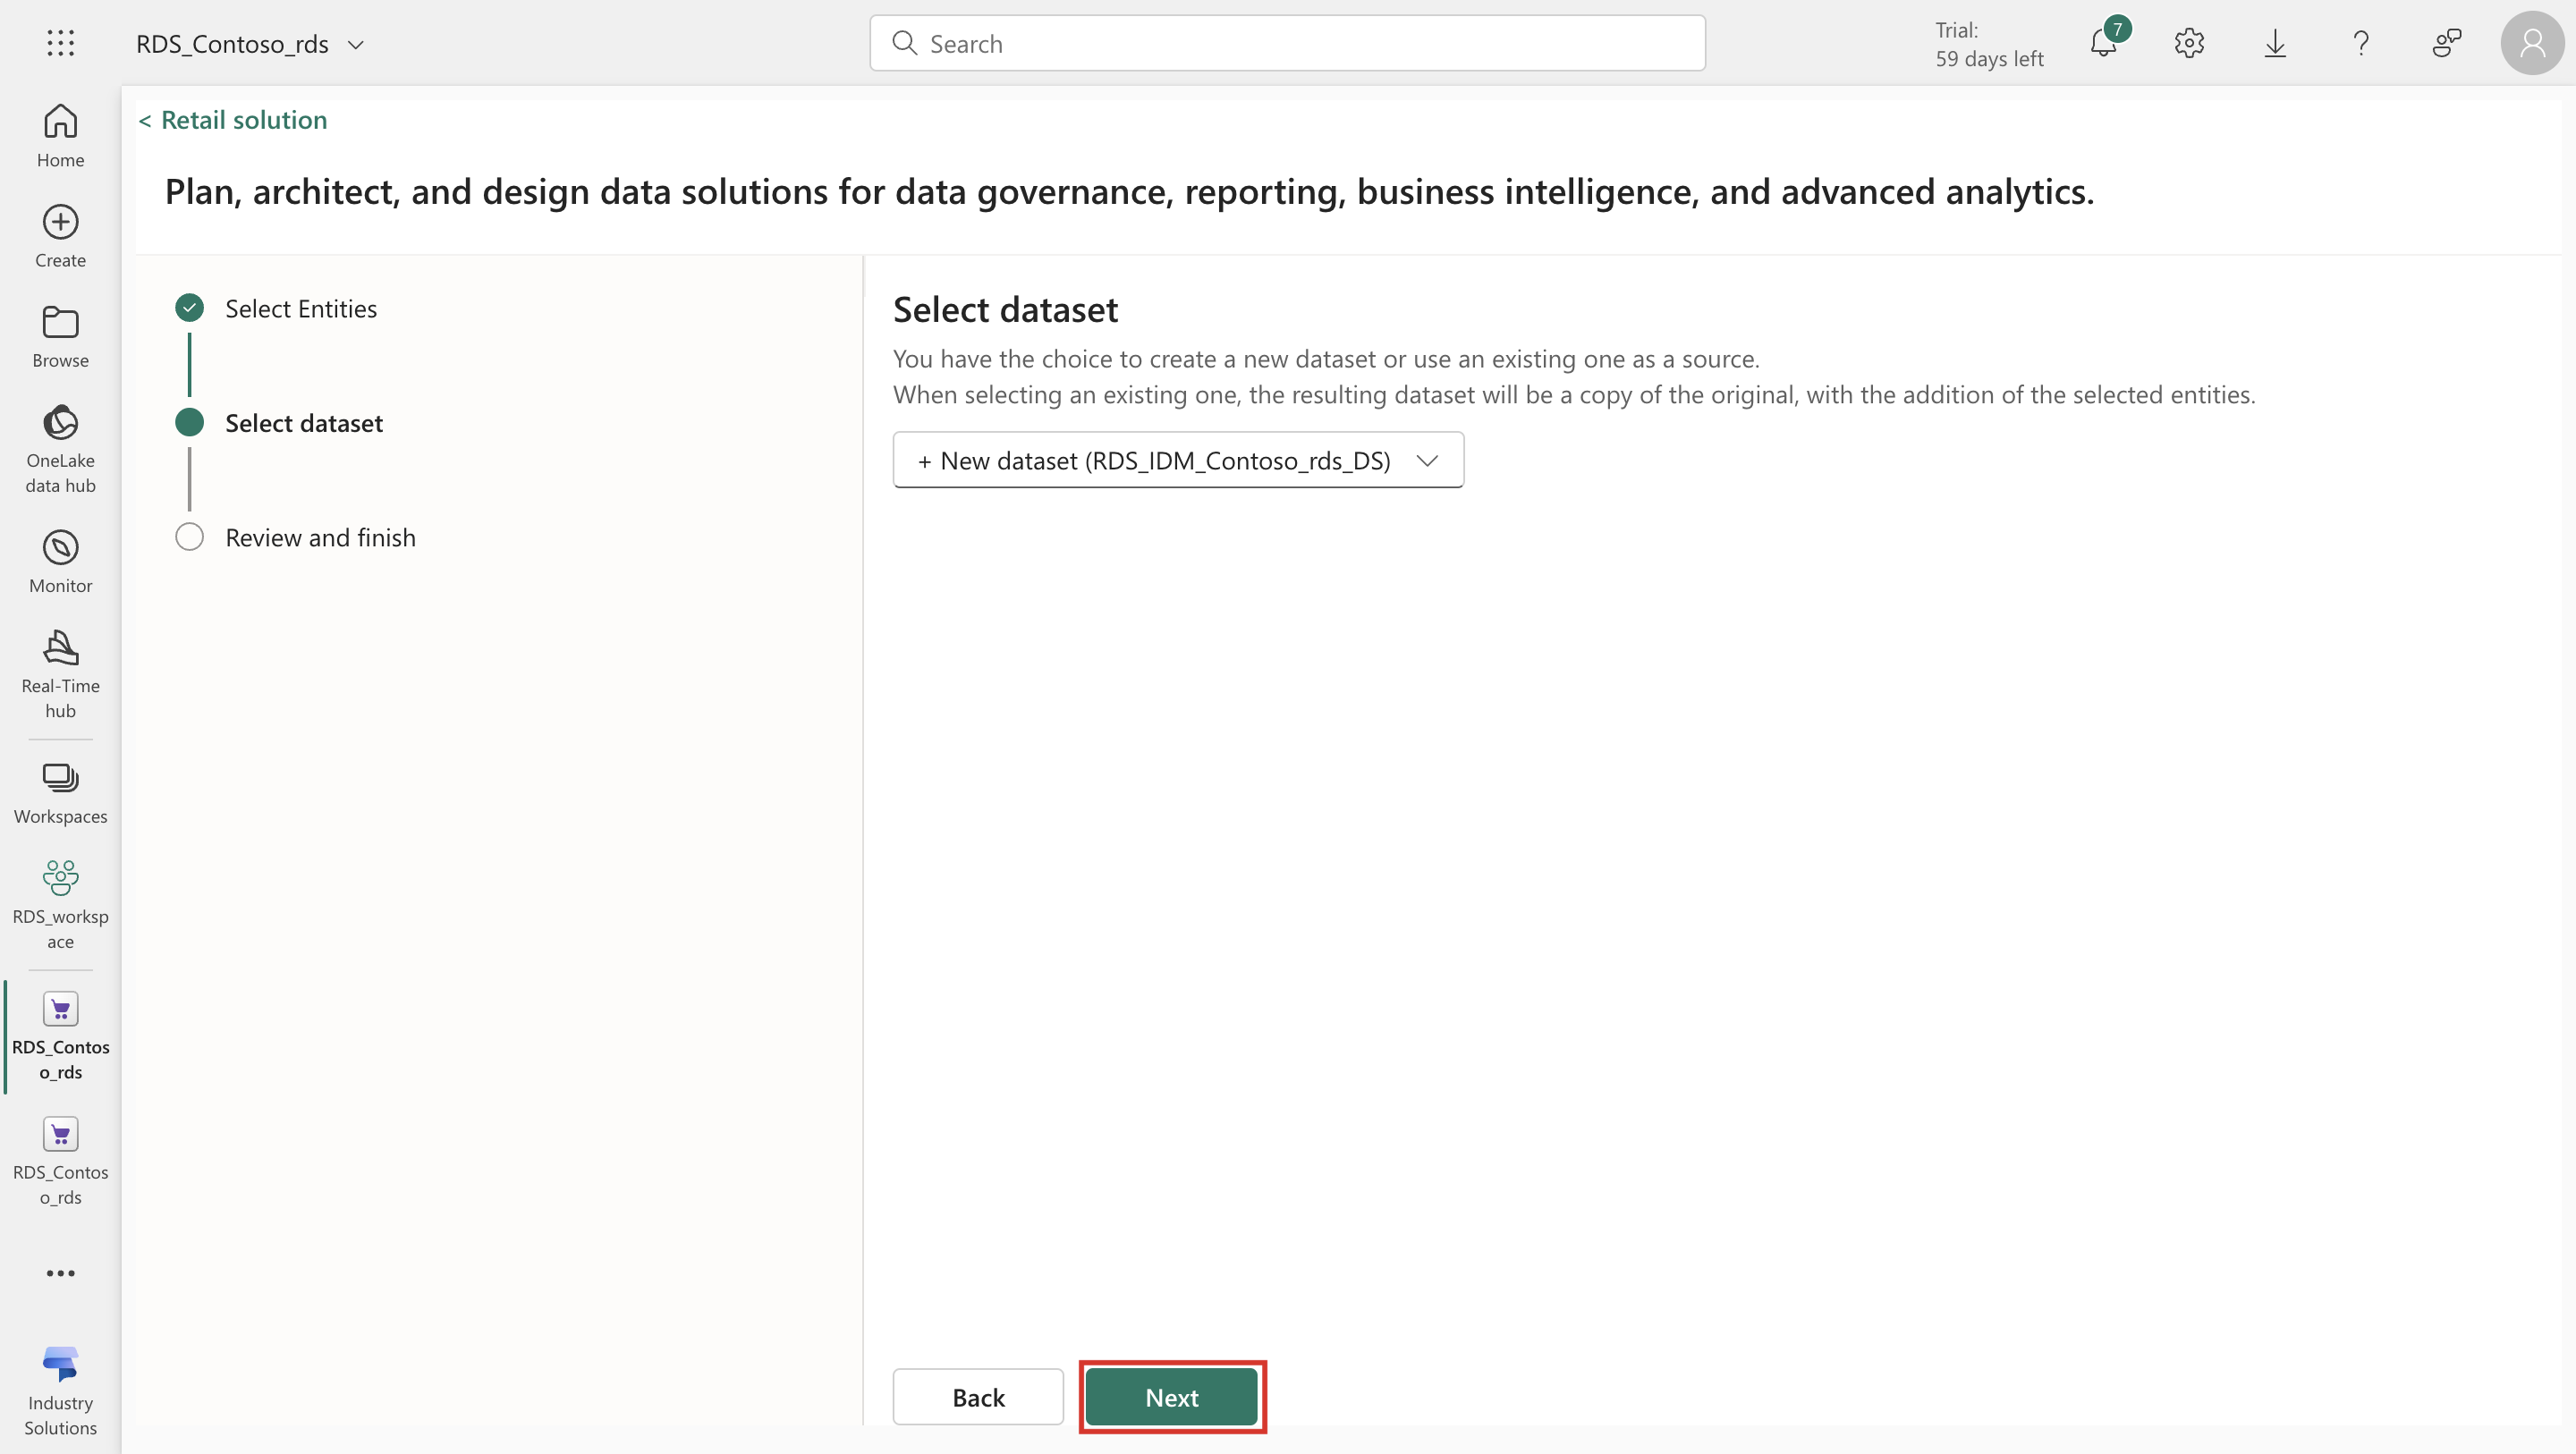
On the Select dataset page, keep the default settings and select Next.
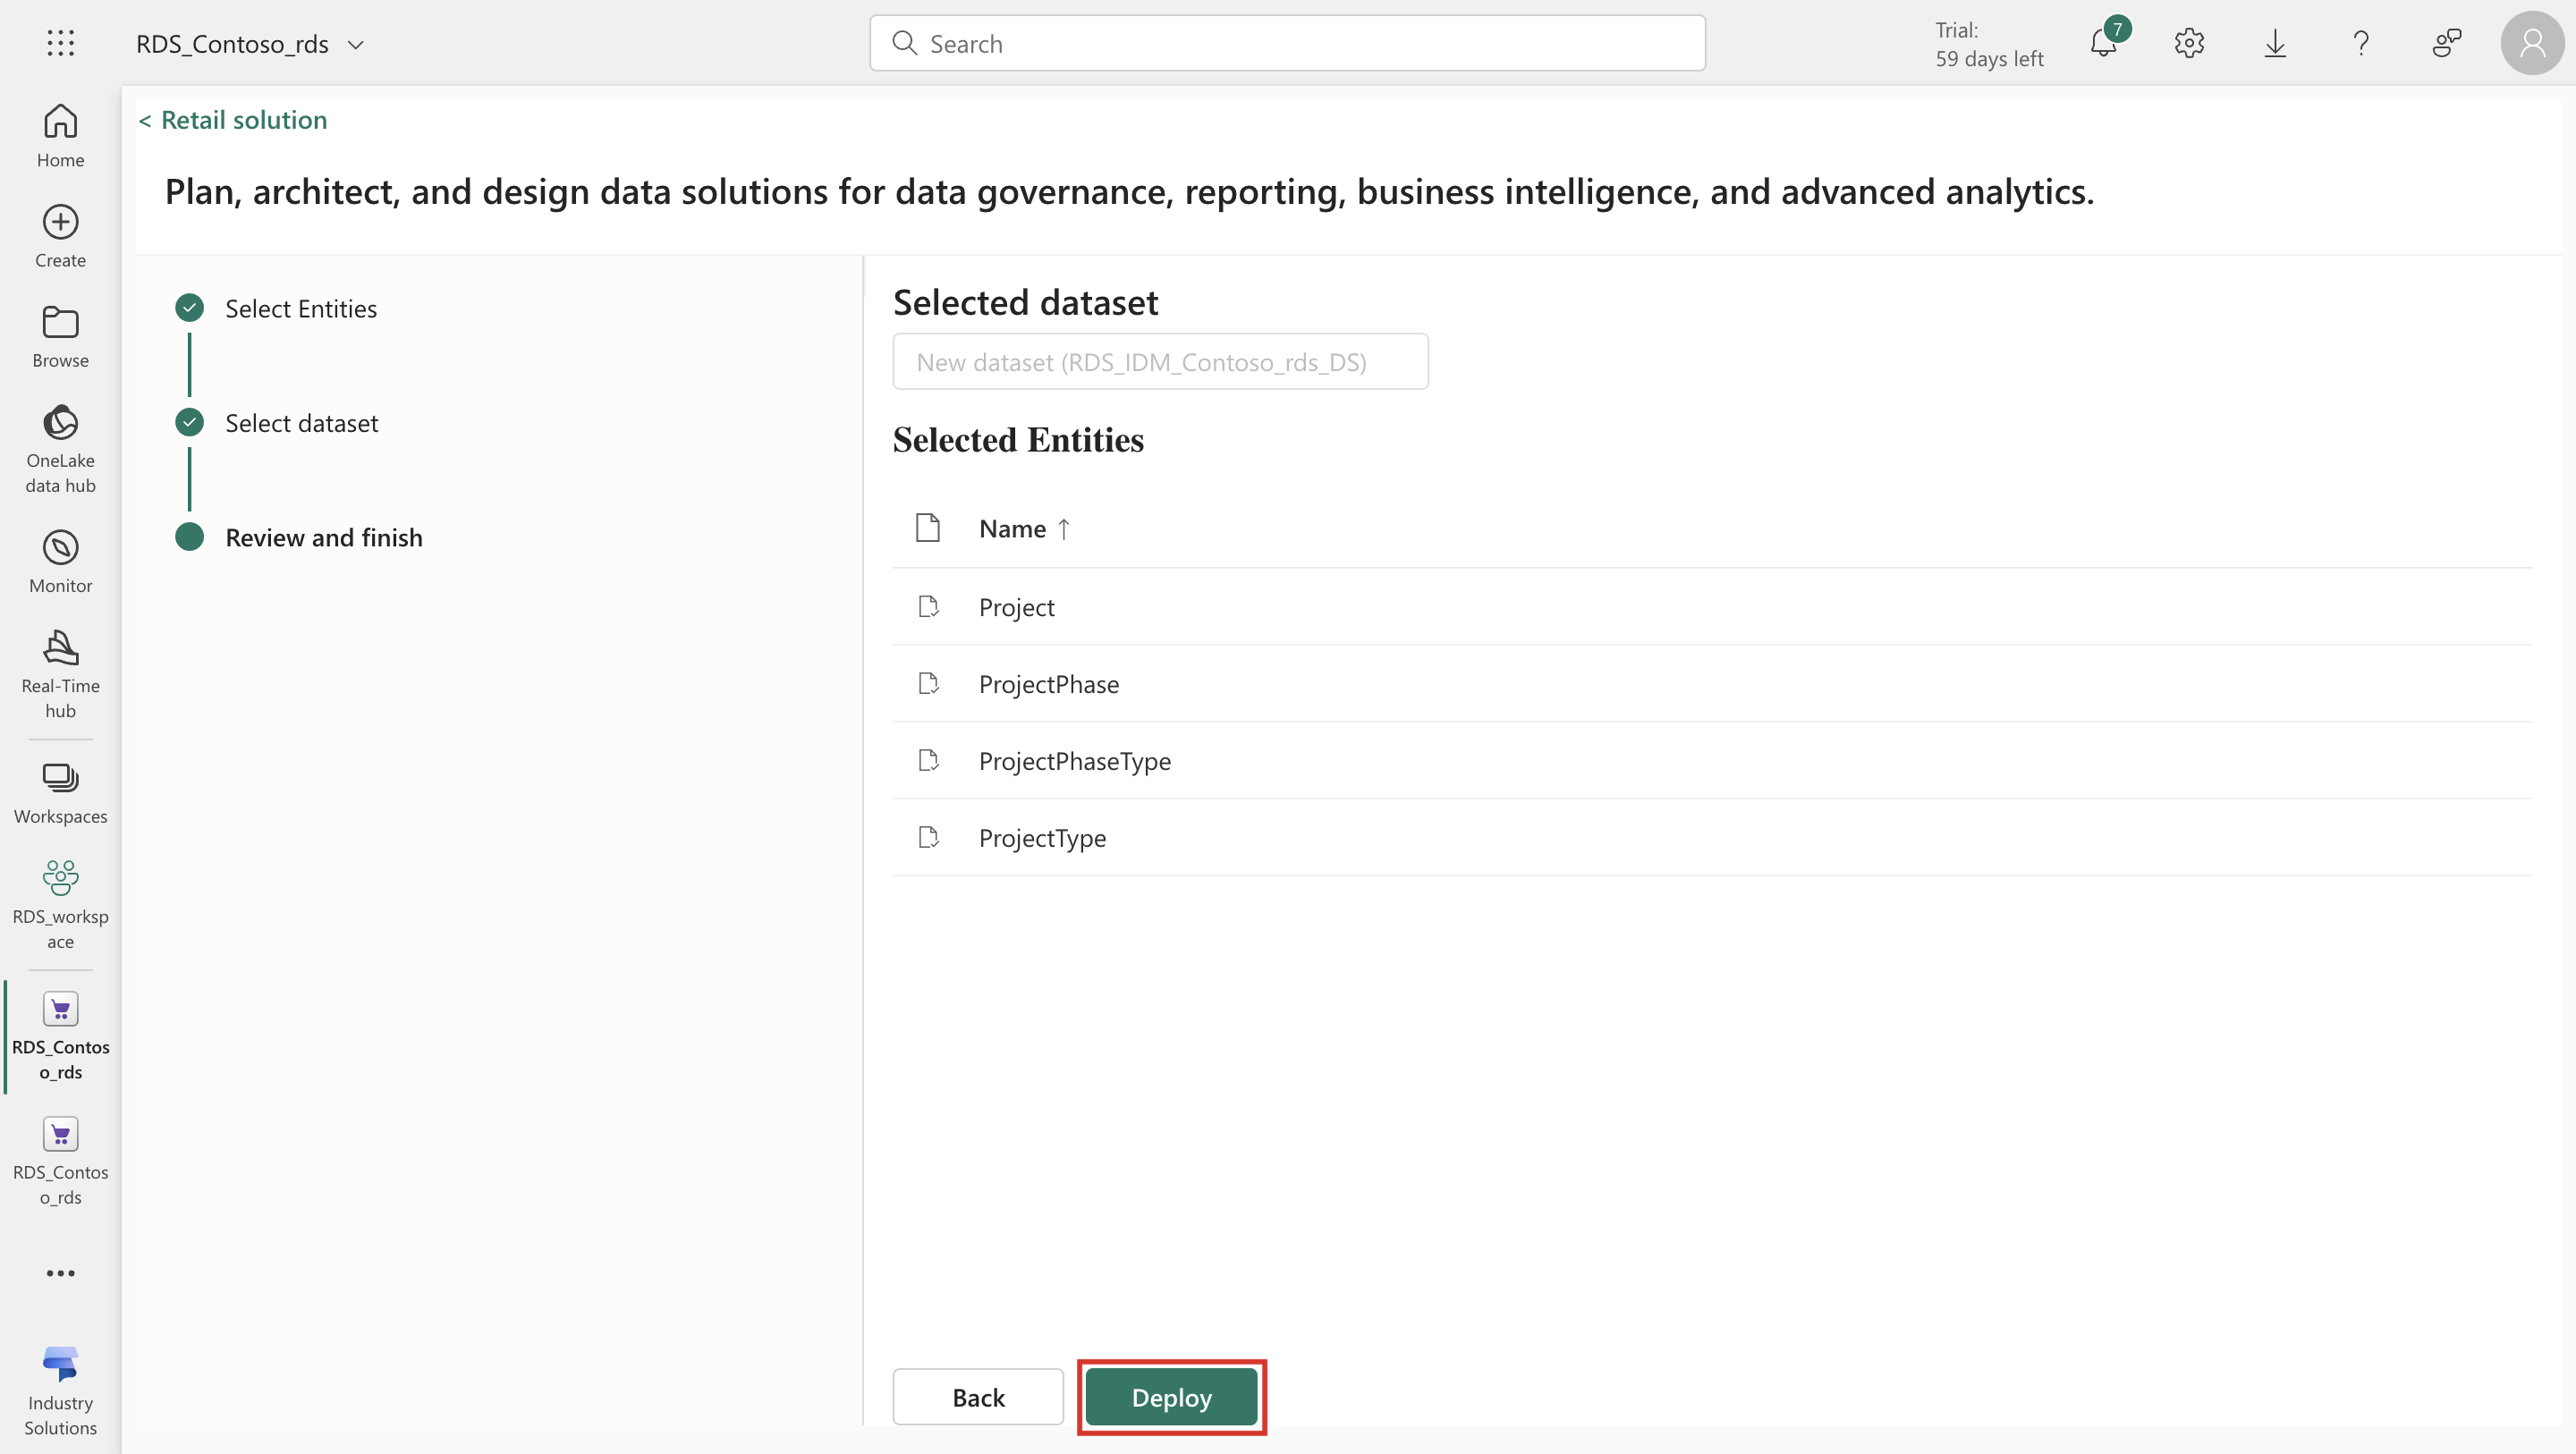
The Selected Entities page opens. Review the changes and select Deploy. The system now deploys the newly selected entities in the environment.
Delete capability
Navigate to the Power BI URL of your organization and select the right workspace from Workspaces. In this page, you see the artifacts available in the workspace. Select the Retail data manager artifact.
The Retail data solutions homepage opens. On this page, under Managed deployed capabilities, select the instance of Retail data solution installed.
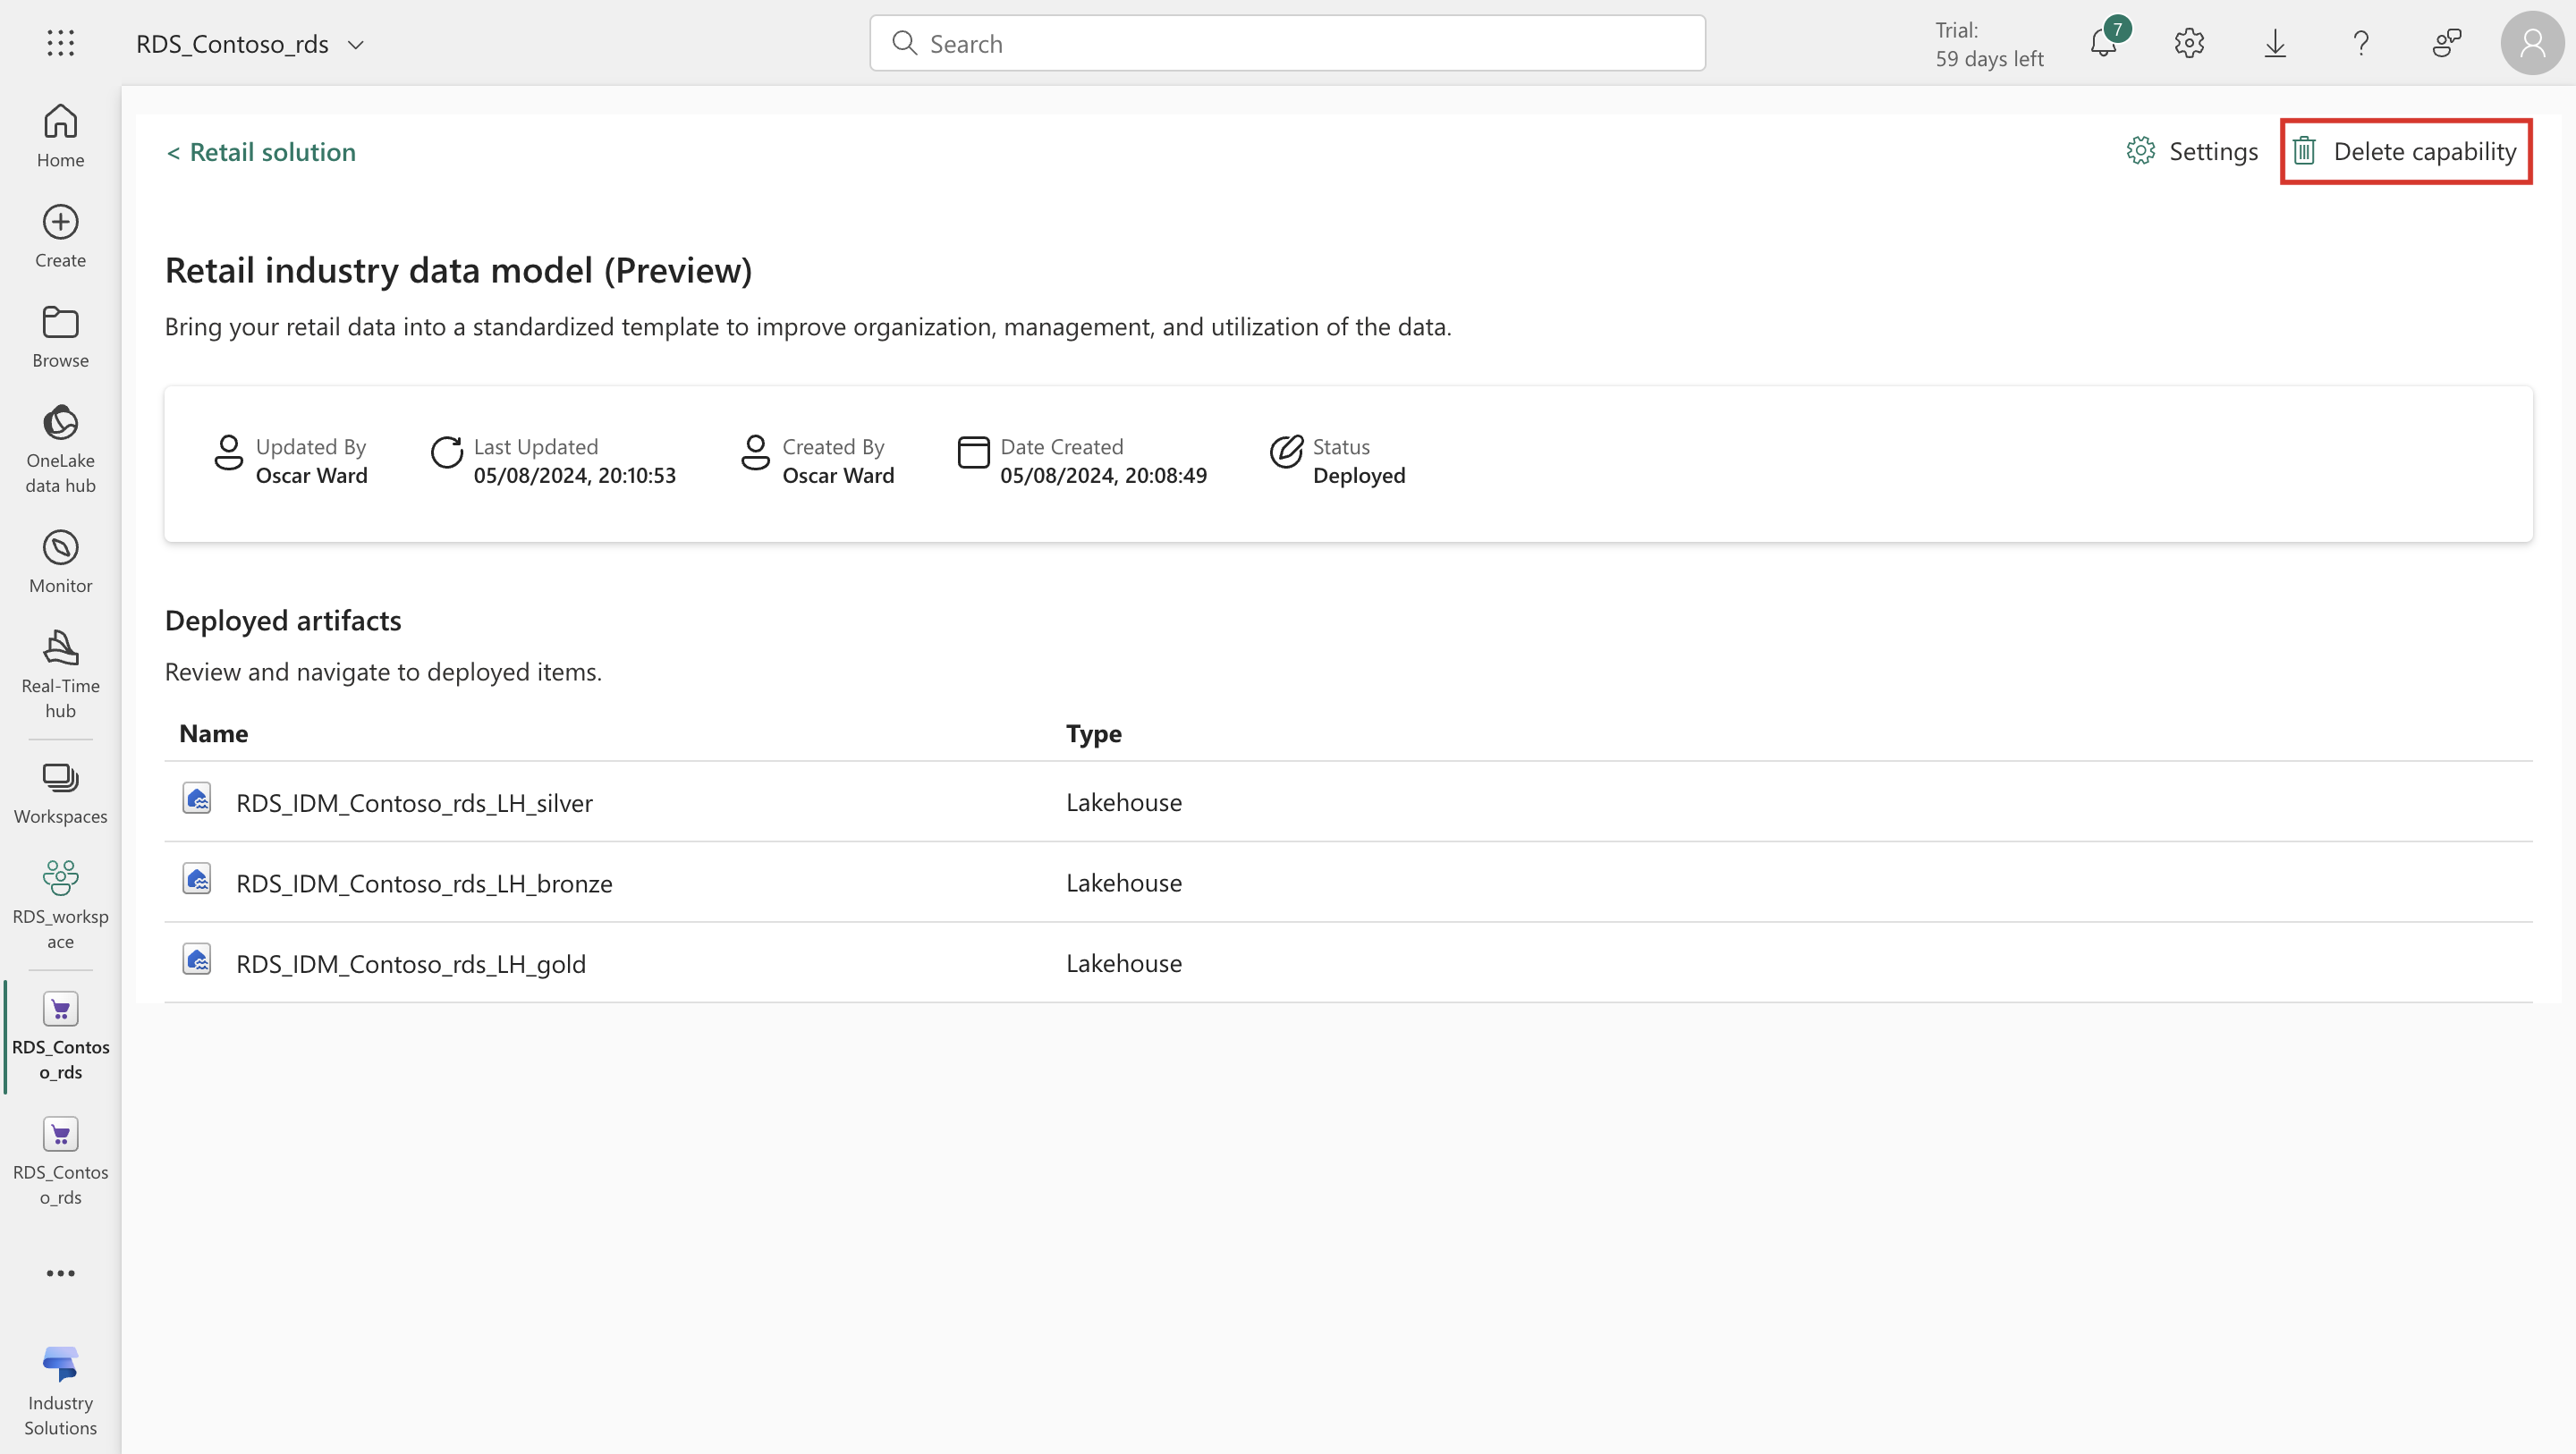
Select Delete capability displayed on the top right corner of the screen.
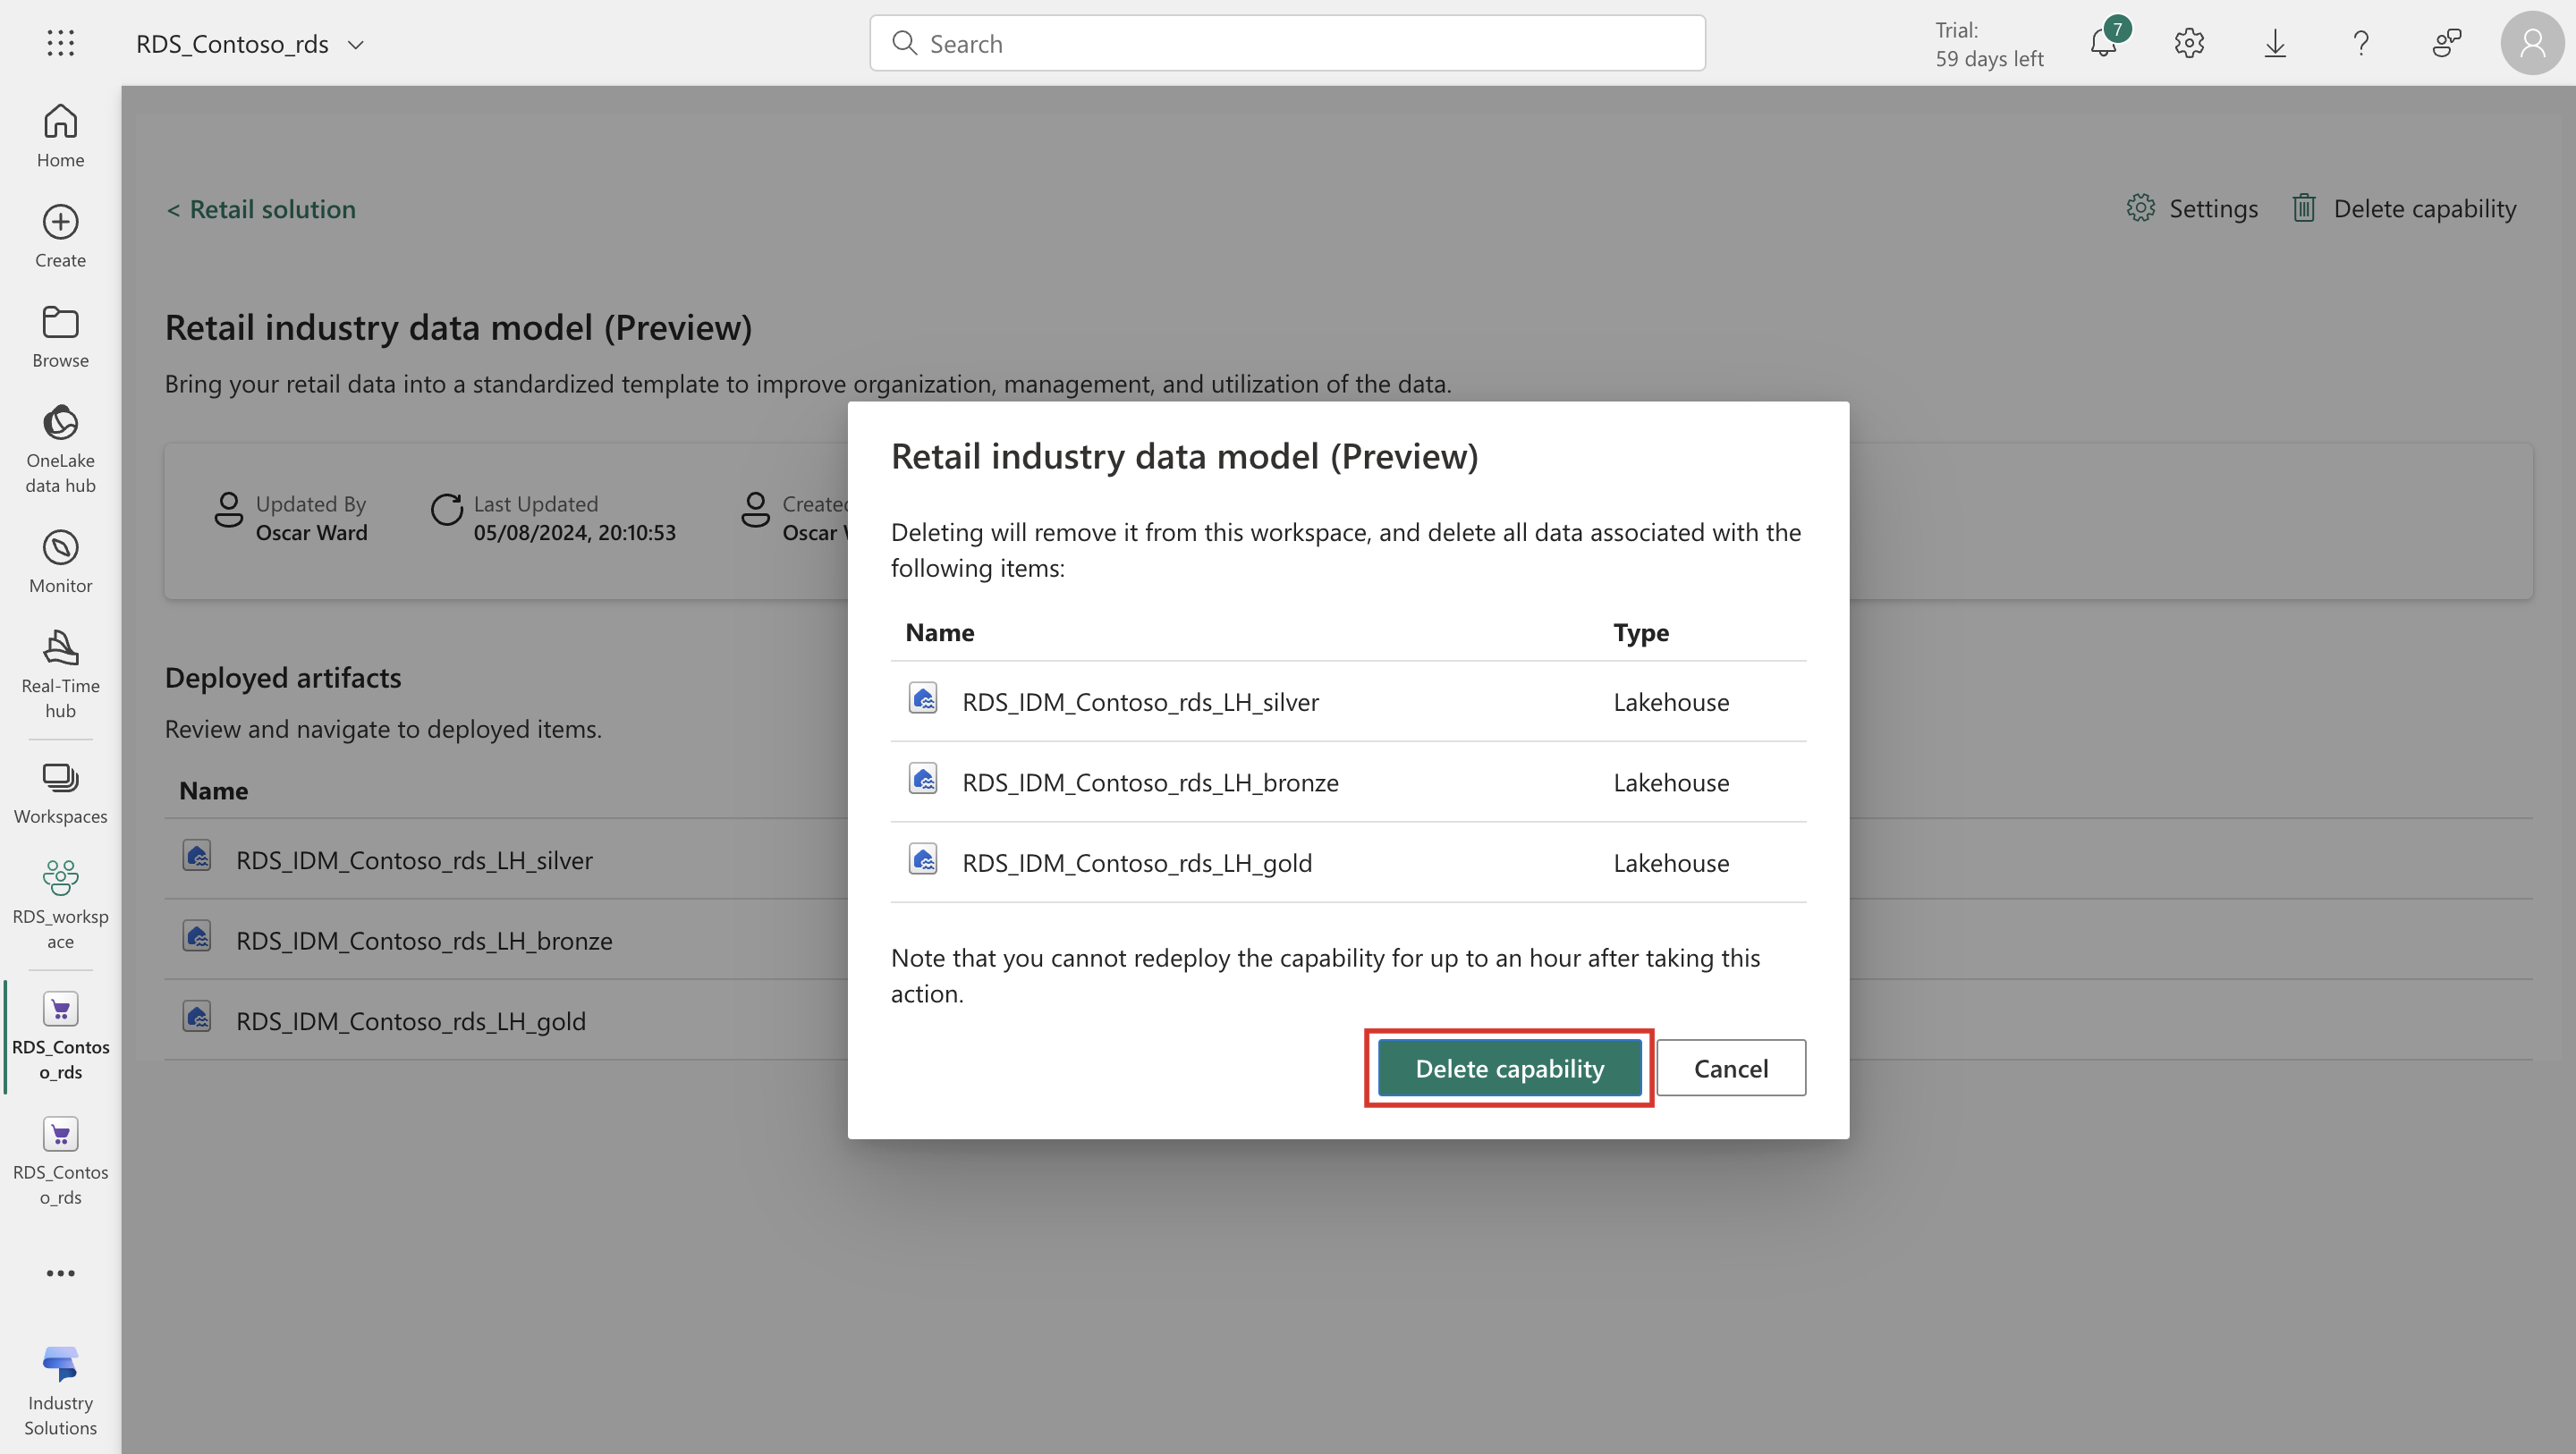
You see a confirmation box to confirm if you really want to delete the solution. Select Delete capability.
The entire capability including all the data for that capability is deleted from the system. After you delete a capability, you can't roll back to the previous state. Hence, in case you want to use the data or artifacts from an existing capability, you must take a backup from the workspace for those artifacts.
