Manage opportunities
Important
Fundraising and Engagement is being retired. Support for Fundraising and Engagement will end at 11:59 PM Pacific Time on December 31, 2026. For more information, go to What’s new in Fundraising and Engagement.
From prospect to grant, pledge, or donation, opportunity management helps you to manage opportunities. An opportunity process supports the request that leads to a myriad of outcomes, including a major gift, corporate sponsorship, or a grant.
In the navigation pane, select Development from the Change area menu. Then, under Prospecting, select Opportunities.

Create an opportunity
Creating an opportunity is a two-step process. The first step is to identify a potential donor or prospect for the pipeline using the Add to Discovery option. This option signifies that the donor could become a future opportunity. You can decide whether the individual in discovery should proceed as a real opportunity for your organization.
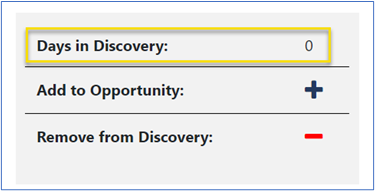
Once the prospect is identified as an opportunity, the second step is to add them to the opportunity process:
In the contact or organization record.
In the middle of the Summary tab, select Add to opportunity to create a new opportunity record.
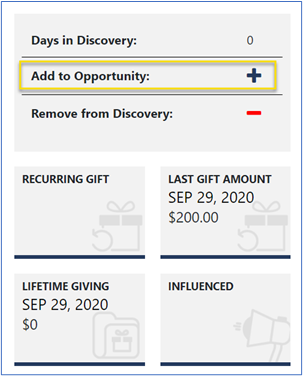
You can also add an opportunity from a view of Opportunities.
In the navigation pane, under Prospecting select Opportunities.
In the view that opens, select New on the action pane.

Fill in the required fields, marked with a red asterisk (*).
Select Save on the action pane.
Opportunity process
The process of managing an opportunity from beginning to end is tracked in the solution with a sequential series of stages.
The stages of the opportunity process display at the top of the opportunity form. They're an interactive map that represents the workflow stages you go through to obtain a gift or grant. You can configure the process to match your organization’s opportunity workflow.

Note
The following stages might not necessarily represent the workflow of your organization.
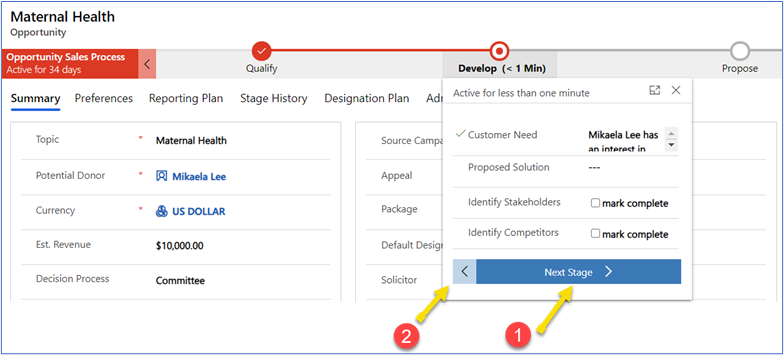
The process map shows each stage as a circle. A completed stage contains a check mark and the current stage contains a dot. The left contains the number of days the opportunity has been active.
To move between the different stages, on the process map select the stage, and then:
- Select Next Stage to move forward, or
- Select the back arrow (<) to move backward.
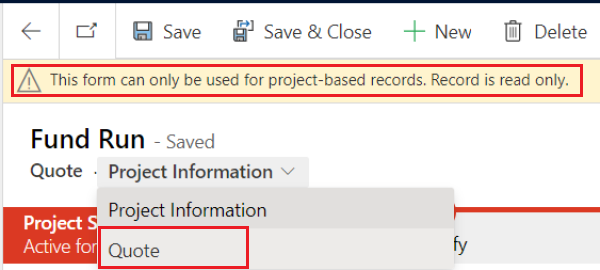
If you see a warning at the top of the opportunity record that mentions project-based records, select the menu just under the opportunity name, and then select the name of the current stage.
Note
To close out an opportunity, select either Close as Won or Close as Lost on the action pane. You can't close the opportunity by proceeding through the phases and closing the opportunity.
Summary
The Summary tab displays information about how the contact, organization account, and household account relate to the opportunity.
Note
These fields aren't mandatory. The can help you to quickly identify relevant information about an opportunity.
| # | Field | Description |
|---|---|---|
| 1 | Topic | Used to add a custom name to the opportunity. |
| 2 | Potential Donor | A lookup to the contact or organization record to identify who is associated with the opportunity. |
| 3 | Expected Amount | The expected giving amount of the opportunity. |
| 4 | Currency | The currency of this opportunity, to ensure that the budget reports in the correct currency. |
| 5 | Decision Process | Choose whether an individual or committee is involved in the donation or purchase process for the lead. |
| 6 | Description | Used to add additional information to describe the opportunity for the prospect. |
| 7 | Source Campaign | The related potential campaign that this opportunity is associated with. |
| 8 | Appeal | The related appeal that this opportunity is associated with. |
| 9 | Package | The related package that this opportunity is associated with. |
| 10 | Default Designation | The potential designation that a gift might be directed toward. The designation might change over the course of the opportunity. You can change it again after it transitions to a gift. |
| 11 | Solicitor | The related staff who has been assigned to the related contact or organization. |
| 12 | Solicitation Type | Show the giving type being solicited, such as Renewal or Additional, or the communication medium used to reach the donor, such as TV, radio, or raffle. This value is copied from the associated campaign at gift creation and can be manually changed if necessary. |
| 13 | Est. Close Date | The expected close date of the opportunity, to help make an accurate revenue forecast. |
| 14 | Primary Objective | The primary objective of this opportunity. |
| 15 | Opportunity Manager | The staff associated with the opportunity, who can be an individual other than the solicitor. |
| 16 | Event | The related event that the opportunity supports. |
Preferences
The information on the Preferences tab helps you to identify the subject matter that the contact or organization prefers to support.
You can use the Opportunity Preferences grid to display and create opportunity preferences.
- Select Opportunity Preferences to add a new opportunity preference. The quick create window displays.1. The opportunity relation automatically populates from the opportunity. Select the preference relation and add a short description.
Preferences are filtered for the opportunity's donor and already assigned preferences. If you're adding a new preference, a quick create window opens.
Reporting Plan
With the Reporting Plan tab, you can input and track deliverables and associated deadlines for an opportunity.
- To create a new reporting plan item, select New Funding Report from the Opportunity funding reports grid.
- To update existing reporting plan item, edit the values directly in the grid and select the Save icon in the right corner of the grid.
- To delete an existing reporting plan item, select one or multiple rows in the grid and select Delete Funding Report.
Stage history
The Stage History tab shows the opportunity progression of the stages. You can see when each opportunity started, finished, the number of days each opportunity has been active, and the number of activities created.
Designation plan
The purpose of the designation plan is to forecast and manage opportunity-related payments. The designation plan, as displayed on the Designation Plan tab, consists of a series of dates that define when payments are made and to what specific area of the nonprofit organization as specified by the donor. If no designation is applied, organizations place the funds into their general operating budget and areas of greatest fundraising need.
Add designation line
To create a designation plan:
- Select the Add designation plan button.
- Complete the available fields in the quick create pane.
- Select the designation that you want to use.
- Specify the date of the donation and the amount.
If you select an amount, the percentage field calculates automatically after you save the record.
Split designation line
To add a child designation plan item:
- Select the Add designation plan button.
- Complete the available fields in the quick create pane.
- Select the designation that you want to use.
- Specify the date of the donation and the amount, and then select a parent designation plan from the lookup field.
In the split designation line, you can select the new designation and the amount to use.
Create a donor commitment
To create a donor commitment, the opportunity record should already have a designation plan created. Confirm that Estimated Close Date, Expected Amount, and Campaign fields have been completed on the Summary tab, and then select Save. Then follow these steps:
Select Set Committed.

Create Donor Commitment appears on the action pane.

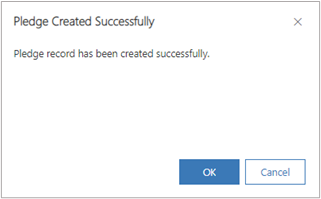
Select Create Donor Commitment. The solution creates the donor commitment automatically.
Validate donor commitments
To validate donor commitments that have been created, go to the Related tab, and then select Donor Commitment.
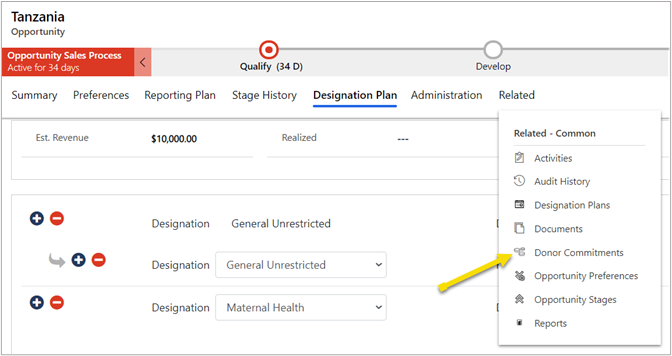
The donor commitment grid shows all donor commitments associated with the opportunity record.

LinkedIn Sales Navigator in an opportunity
When you view an opportunity, the LinkedIn Sales Navigator section functions the same way that it functions for a contact, embedding up-to-date information about the contact from LinkedIn. For more information, go to LinkedIn Sales Navigator in Contacts.
See also
Relationships overview
Contacts in Fundraising and Engagement
Organizations in Fundraising and Engagement
Funding reports in Fundraising and Engagement