Enable mail flow for subdomains in Exchange Online
If you have a hybrid environment, with mailboxes hosted both in Exchange Online and on-premises Exchange, and you have subdomains of the accepted domains that only exist in your on-premises environment, you can enable email flow to and from these on-premises subdomains. For example, if you have an accepted domain called Contoso.com, and you enable match subdomains, users can send email to, or receive email from all subdomains of Contoso.com that exist in your on-premises environment, such as marketing.contoso.com and nwregion.contoso.com. In Microsoft Forefront Online Protection for Exchange (FOPE), this feature was called catch-all domains.
Important
- If you have a limited number of subdomains, and know all the subdomain names, we recommend setting up each subdomain as an accepted domain in the Microsoft 365 admin center, instead of using the procedures in this topic. By setting up each subdomain separately, you can have finer control over mail flow and can include unique mail flow rules (also known transport rules) for each subdomain. For more information about adding a domain in the Microsoft 365 admin center, see Add a domain to Microsoft 365.
- In order to enable match subdomains, an accepted domain must be set up as an internal relay domain. For information about setting the domain type to internal relay, see Manage accepted domains in Exchange Online.
- In order to send email to public folders within your Exchange Online environment, you need to set the domain type to internal relay if the domain contains recipient addresses assigned to public folders. Directory-Based Edge Blocking cannot be used for public folders.
- After you enable match subdomains, in order for the service to deliver mail for all subdomains to your organization's email server (outside Microsoft 365 or Office 365), you must also change the connector that is used for transmitting messages from Office 365 to your organization's email server. For instructions, see Use the EAC to add the domain to the connector used for transmitting messages from Office 365 to your organization's email server.
What do you need to know before you begin?
Estimated time to complete: 5 minutes
You need permissions before you can perform this procedure or procedures. To see what permissions you need, see the "Domains" entry in the Feature permissions in Exchange Online topic.
To open the Exchange admin center (EAC), see Exchange admin center in Exchange Online. To connect to Exchange Online PowerShell, see Connect to Exchange Online PowerShell.
For information about keyboard shortcuts that may apply to the procedures in this topic, see Keyboard shortcuts for the Exchange admin center.
Tip
Having problems? Ask for help in the Exchange forums. Visit the forums at Exchange Online or Exchange Online Protection.
Use the Exchange admin center (EAC) to set up match subdomains on a domain
Set up match subdomains in the new EAC
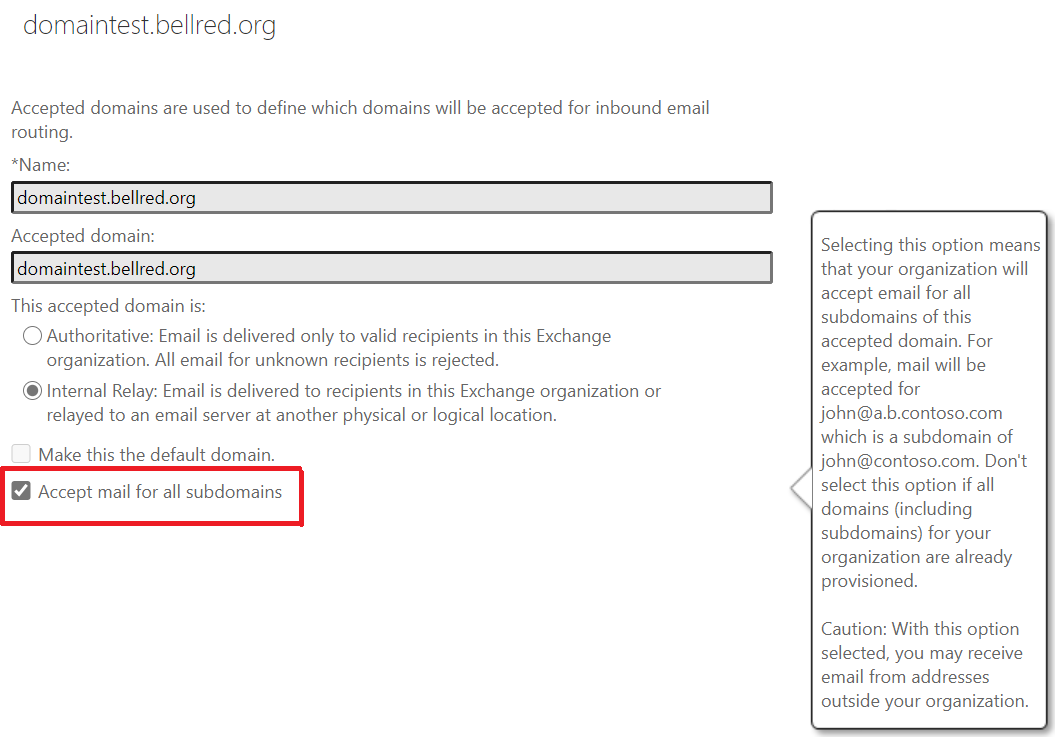
Navigate to Mail Flow > Accepted domains. The Accepted domains screen appears.
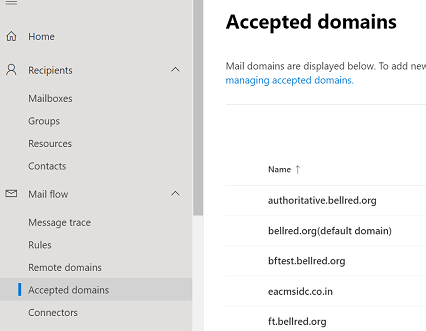
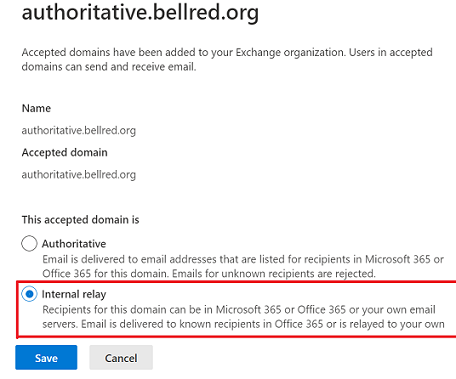
Select an accepted domain and click it. The accepted domain's details screen appears.
Verify that Internal Relay is selected. If Authoritative is selected, change it to Internal Relay.
Check the check box for Accept mail for all subdomains.
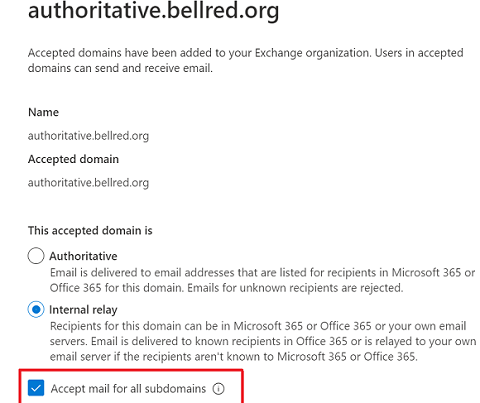
Click Save.
The accepted domain is updated successfully.
Set up match subdomains in the classic EAC
Navigate to Mail Flow > Accepted domains, and select the domain. The domain details dialog box is displayed.
In the Details pane, Verify that Internal Relay is selected.
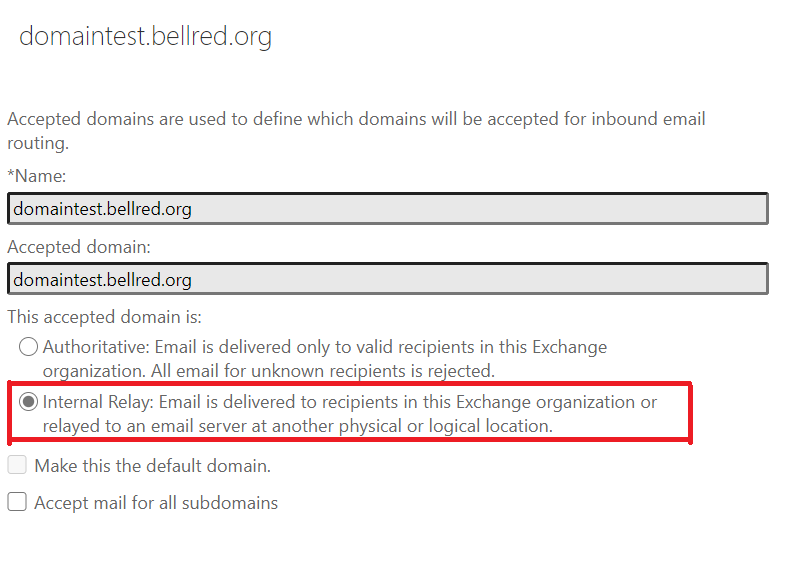
Select Accept mail for all subdomains.
Use the EAC to add the domain to the connector used for transmitting messages from Office 365 to your organization's email server
Add the domain connector in the new EAC
Navigate to Mail Flow > Connectors.
Select a connector that is used for transmitting messages from Office 365 to your organization's email server.
Click the connector. The connector properties screen appears.
In the connector properties screen that appears, under Use of connector, click Edit use.
In the Use of connector screen that appears, select Only when email messages are sent to these domains.
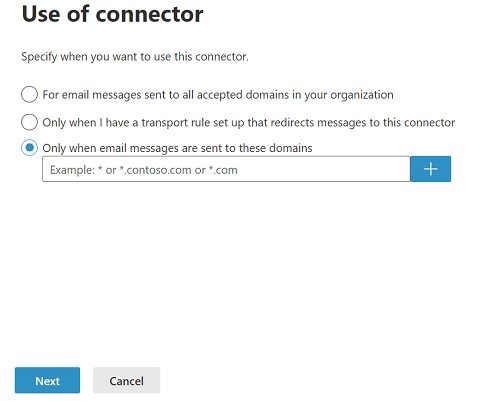
In the text box, enter the name of the domain to which you want to apply the connector. For example, *.contoso.com.
Click +.
Click Next.
In the Validation email screen that appears, In the text box, enter the email of an active mailbox on your organization's server.
Once the validation process is completed, click Save.
Add the domain connector in the classic EAC
Navigate to Mail Flow > Connectors.
Select a connector that is used for transmitting messages from Office 365 to your organization's email server.
Click the "Edit" icon
 . The Edit Connector screen appears.
Click Next. The When do you want to use this connector section appears.
Select the radio button for Only when email messages are sent to these domains.
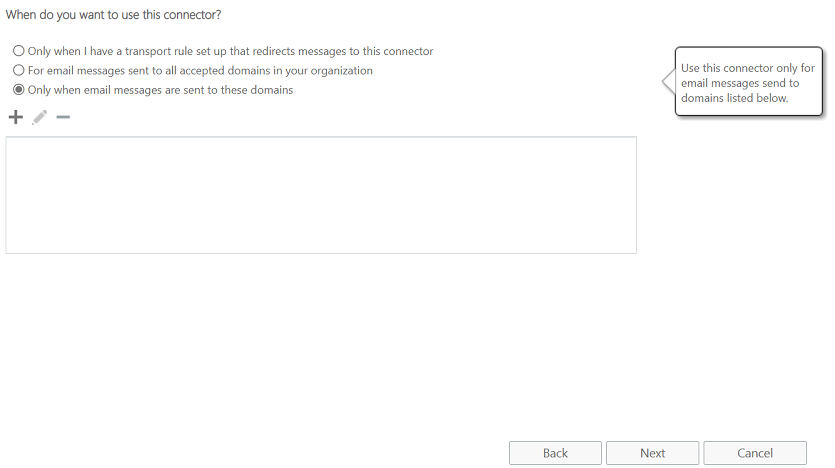
Click the "Add" icon
 . The add domain screen appears.
In the text box, enter the name of the domain to which you want to apply the connector. For example, *.contoso.com.
Click OK. The Edit Connector screen reappears. The value *.contoso.com is listed in the text field.
Click Next and navigate through the other screens in the wizard.
Click Save on the last screen.
Click +.
Click Validate. The validation process starts.
Once the validation process is completed, click Save.
Use Exchange Online PowerShell to set up match-subdomains on a domain
To add the match subdomains to a domain that is set up as an internal relay, use this syntax:
Set-AcceptedDomain -Identity <Domain Name> -MatchSubdomains $true
This example sets up match subdomains for the contoso.com domain.
Set-AcceptedDomain -Identity contoso.com -MatchSubdomains $true
For detailed syntax and parameter information, see Set-AcceptedDomain.