Tutorial - Provision groups to Active Directory using Microsoft Entra Cloud Sync
This tutorial walks you through creating and configuring cloud sync to synchronize groups to on-premises Active Directory.
Provision Microsoft Entra ID to Active Directory - Prerequisites
The following prerequisites are required to implement provisioning groups to Active Directory.
License requirements
Using this feature requires Microsoft Entra ID P1 licenses. To find the right license for your requirements, see Compare generally available features of Microsoft Entra ID.
General requirements
- Microsoft Entra account with at least a Hybrid Identity Administrator role.
- On-premises Active Directory Domain Services environment with Windows Server 2016 operating system or later.
- Required for AD Schema attribute - msDS-ExternalDirectoryObjectId
- Provisioning agent with build version 1.1.1370.0 or later.
Note
The permissions to the service account are assigned during clean install only. In case you're upgrading from the previous version then permissions need to be assigned manually using PowerShell cmdlet:
$credential = Get-Credential

  Set-AADCloudSyncPermissions -PermissionType UserGroupCreateDelete -TargetDomain "FQDN of domain" -EACredential $credential
If the permissions are set manually, you need to ensure that Read, Write, Create, and Delete all properties for all descendent Groups and User objects.
These permissions aren't applied to AdminSDHolder objects by default Microsoft Entra provisioning agent gMSA PowerShell cmdlets
- The provisioning agent must be able to communicate with one or more domain controllers on ports TCP/389 (LDAP) and TCP/3268 (Global Catalog).
- Required for global catalog lookup to filter out invalid membership references
- Microsoft Entra Connect Sync with build version 2.2.8.0 or later
- Required to support on-premises user membership synchronized using Microsoft Entra Connect Sync
- Required to synchronize AD:user:objectGUID to AAD:user:onPremisesObjectIdentifier
Supported groups and scale limits
The following is supported:
- Only cloud created Security groups are supported
- These groups can have assigned or dynamic membership groups.
- These groups can only contain on-premises synchronized users and / or additional cloud created security groups.
- The on-premises user accounts that are synchronized and are members of this cloud created security group, can be from the same domain or cross-domain, but they all must be from the same forest.
- These groups are written back with the AD groups scope of universal. Your on-premises environment must support the universal group scope.
- Groups that are larger than 50,000 members aren't supported.
- Tenants that have more than 150,000 objects aren't supported. Meaning, if a tenant has any combination of users and groups that exceeds 150K objects, the tenant isn't supported.
- Each direct child nested group counts as one member in the referencing group
- Reconciliation of groups between Microsoft Entra ID and Active Directory isn't supported if the group is manually updated in Active Directory.
Additional information
The following is additional information on provisioning groups to Active Directory.
- Groups provisioned to AD using cloud sync can only contain on-premises synchronized users and / or additional cloud created security groups.
- These users must have the onPremisesObjectIdentifier attribute set on their account.
- The onPremisesObjectIdentifier must match a corresponding objectGUID in the target AD environment.
- An on-premises users objectGUID attribute to a cloud users onPremisesObjectIdentifier attribute can be synchronized using either Microsoft Entra Cloud Sync (1.1.1370.0) or Microsoft Entra Connect Sync (2.2.8.0)
- If you're using Microsoft Entra Connect Sync (2.2.8.0) to synchronize users, instead of Microsoft Entra Cloud Sync, and want to use Provisioning to AD, it must be 2.2.8.0 or later.
- Only regular Microsoft Entra ID tenants are supported for provisioning from Microsoft Entra ID to Active Directory. Tenants such as B2C aren't supported.
- The group provisioning job is scheduled to run every 20 minutes.
Assumptions
This tutorial assumes the following:
- You have an Active Directory on-premises environment
- You have cloud sync setup to synchronize users to Microsoft Entra ID.
- You have two users that are synchronized. Britta Simon and Lola Jacobson. These users exist on-premises and in Microsoft Entra ID.
- Three Organizational Units have been created in Active Directory - Groups, Sales, and Marketing. They have the following distinguishedNames:
- OU=Marketing,DC=contoso,DC=com
- OU=Sales,DC=contoso,DC=com
- OU=Groups,DC=contoso,DC=com
Create two groups in Microsoft Entra ID.
To begin, we create two groups in Microsoft Entra ID. One group is Sales and the other is Marketing.
To create two groups, follow these steps.
- Sign in to the Microsoft Entra admin center as at least a Hybrid Identity Administrator.
- Browse to Identity > Groups > All groups.
- At the top, click New group.
- Make sure the Group type is set to security.
- For the Group Name enter Sales
- For Membership type keep it at assigned.
- Click Create.
- Repeat this process using Marketing as the Group Name.
Add users to the newly created groups
- Sign in to the Microsoft Entra admin center as at least a Hybrid Identity Administrator.
- Browse to Identity > Groups > All groups.
- At the top, in the search box, enter Sales.
- Click on the new Sales group.
- On the left, click Members
- At the top, click Add members.
- At the top, in the search box, enter Britta Simon.
- Put a check next to Britta Simon and click Select
- It should successfully add her to the group.
- On the far left, click All groups and repeat this process using the Sales group and adding Lola Jacobson to that group.
Configure provisioning
To configure provisioning, follow these steps.
- Sign in to the Microsoft Entra admin center as at least a Hybrid Administrator.
- Browse to Identity > Hybrid management > Microsoft Entra Connect > Cloud sync.
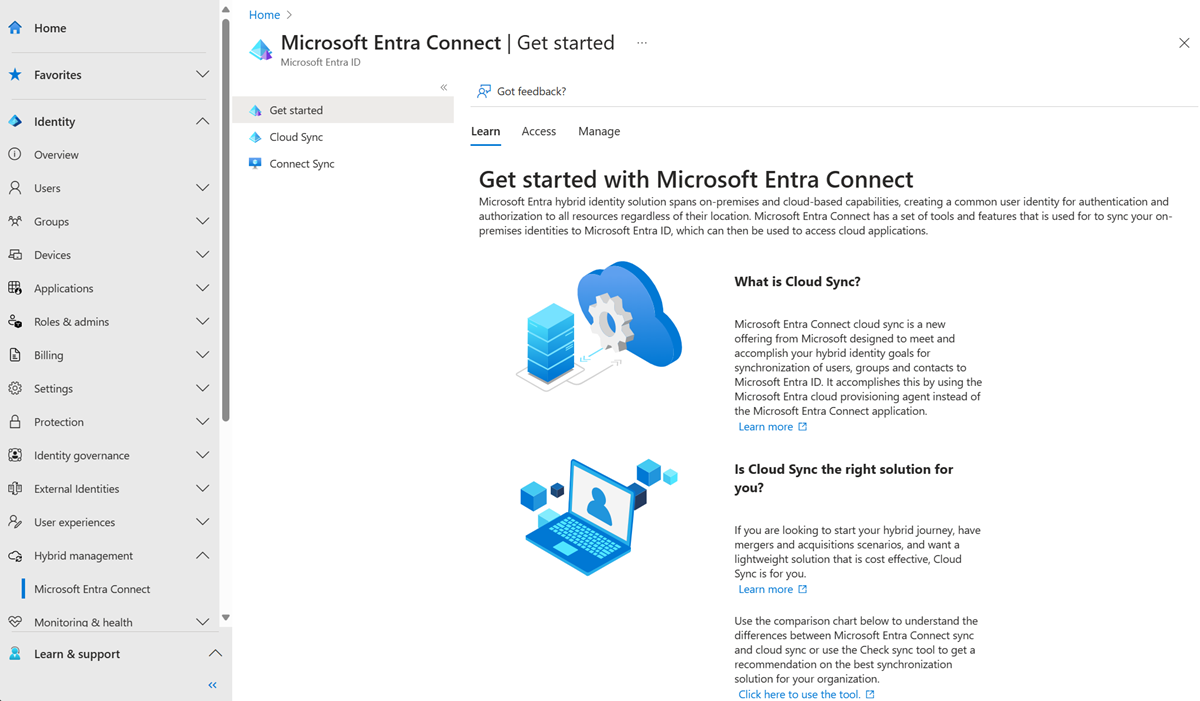
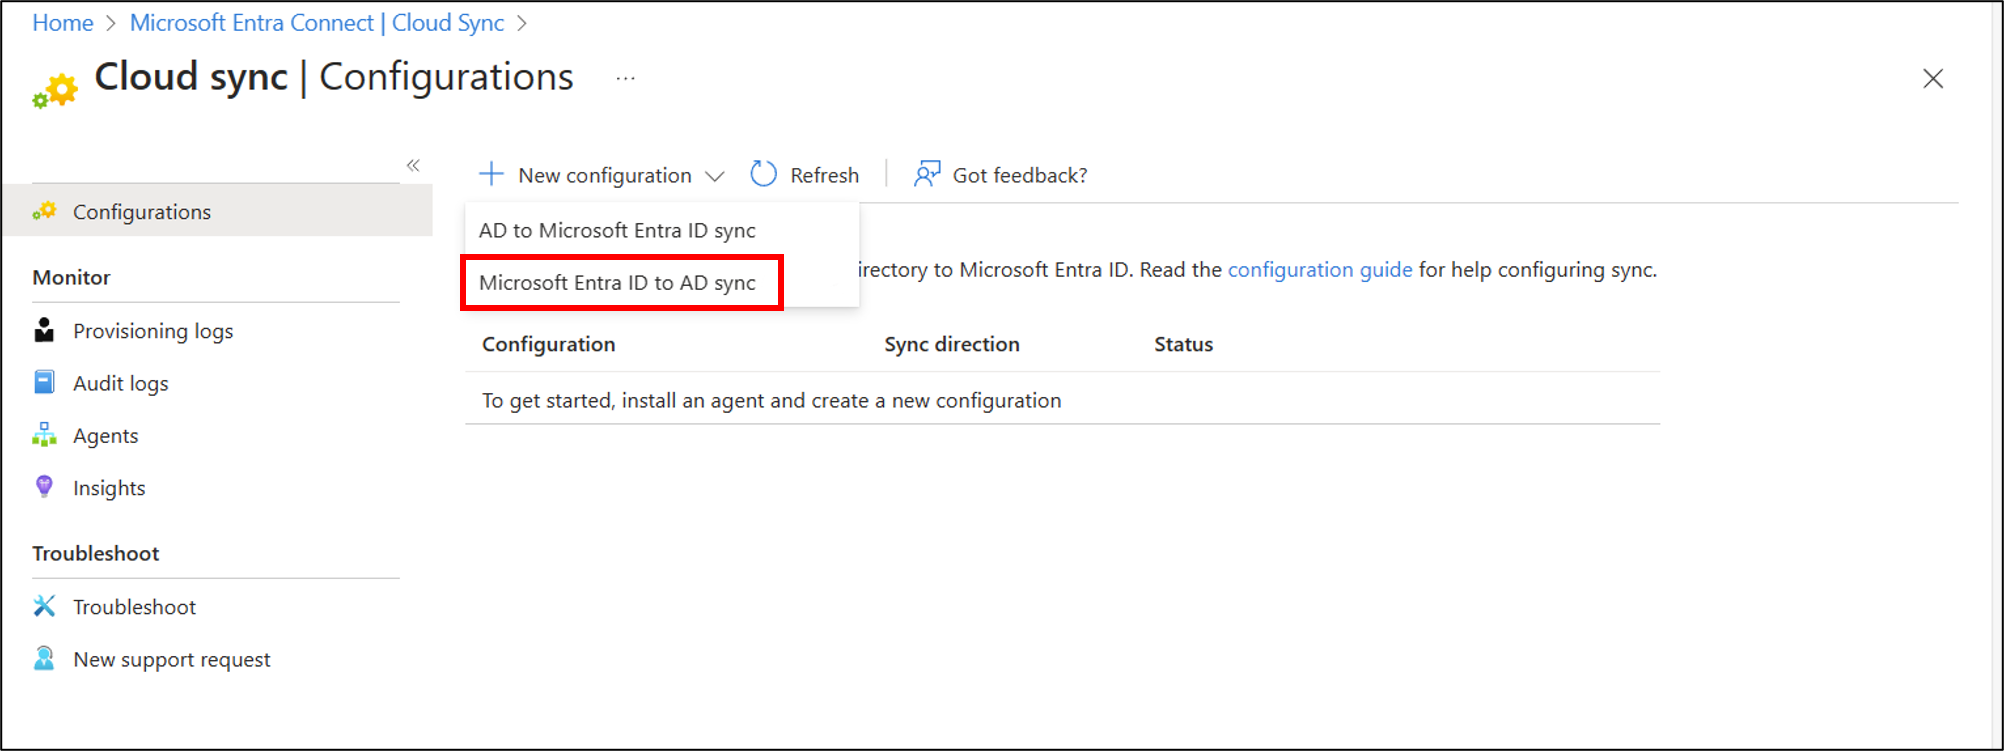
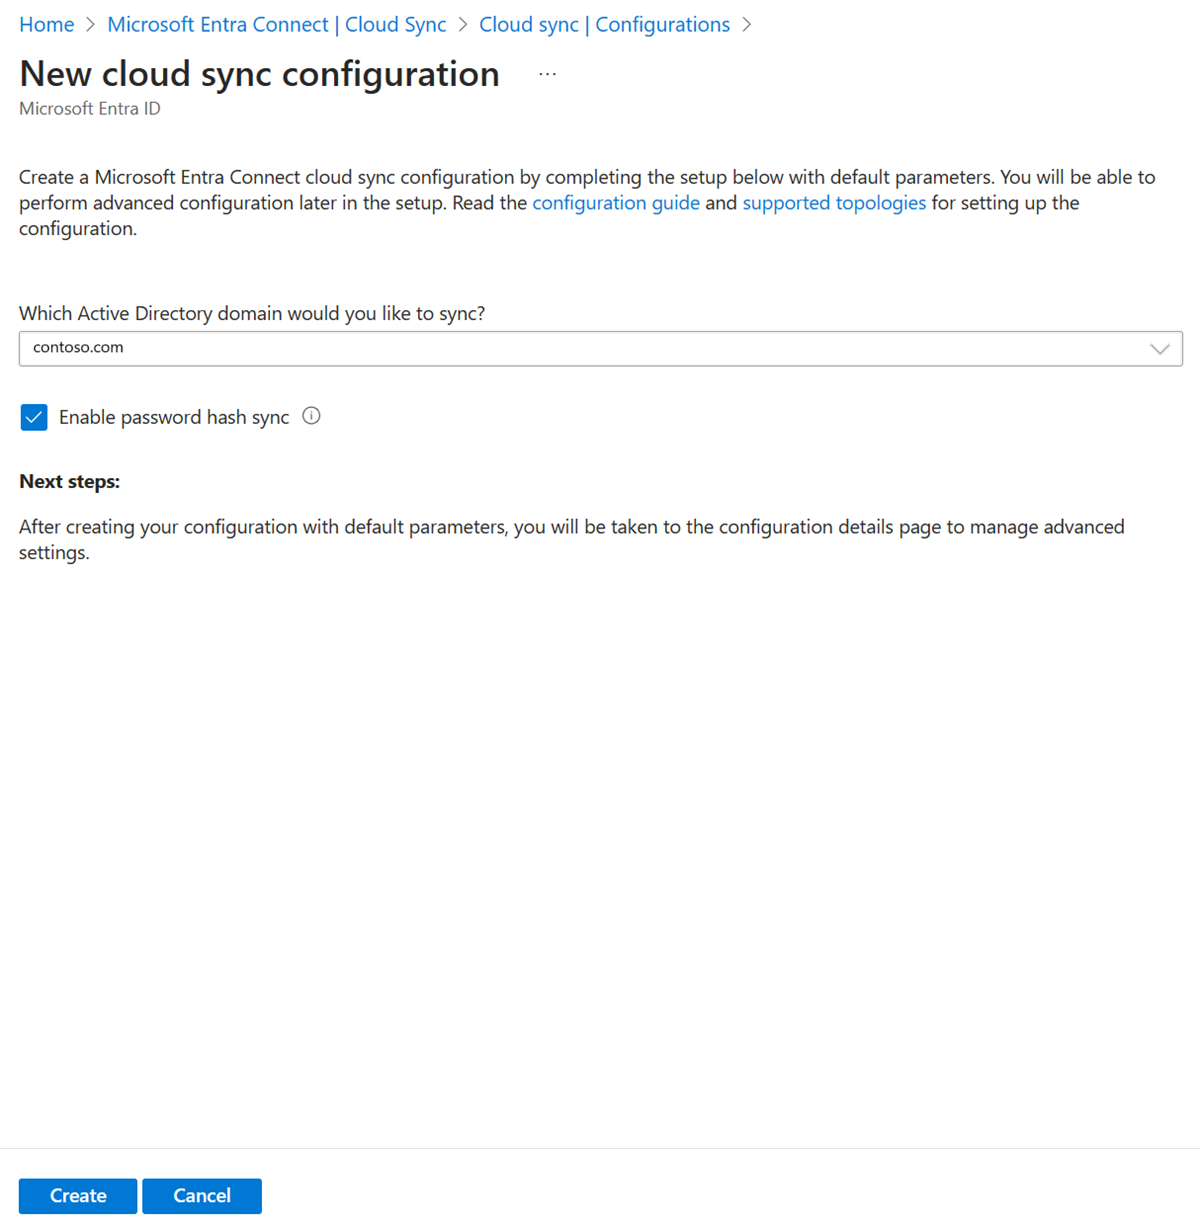
Select New configuration.
On the configuration screen, select your domain and whether to enable password hash sync. Click Create.
The Get started screen opens. From here, you can continue configuring cloud sync
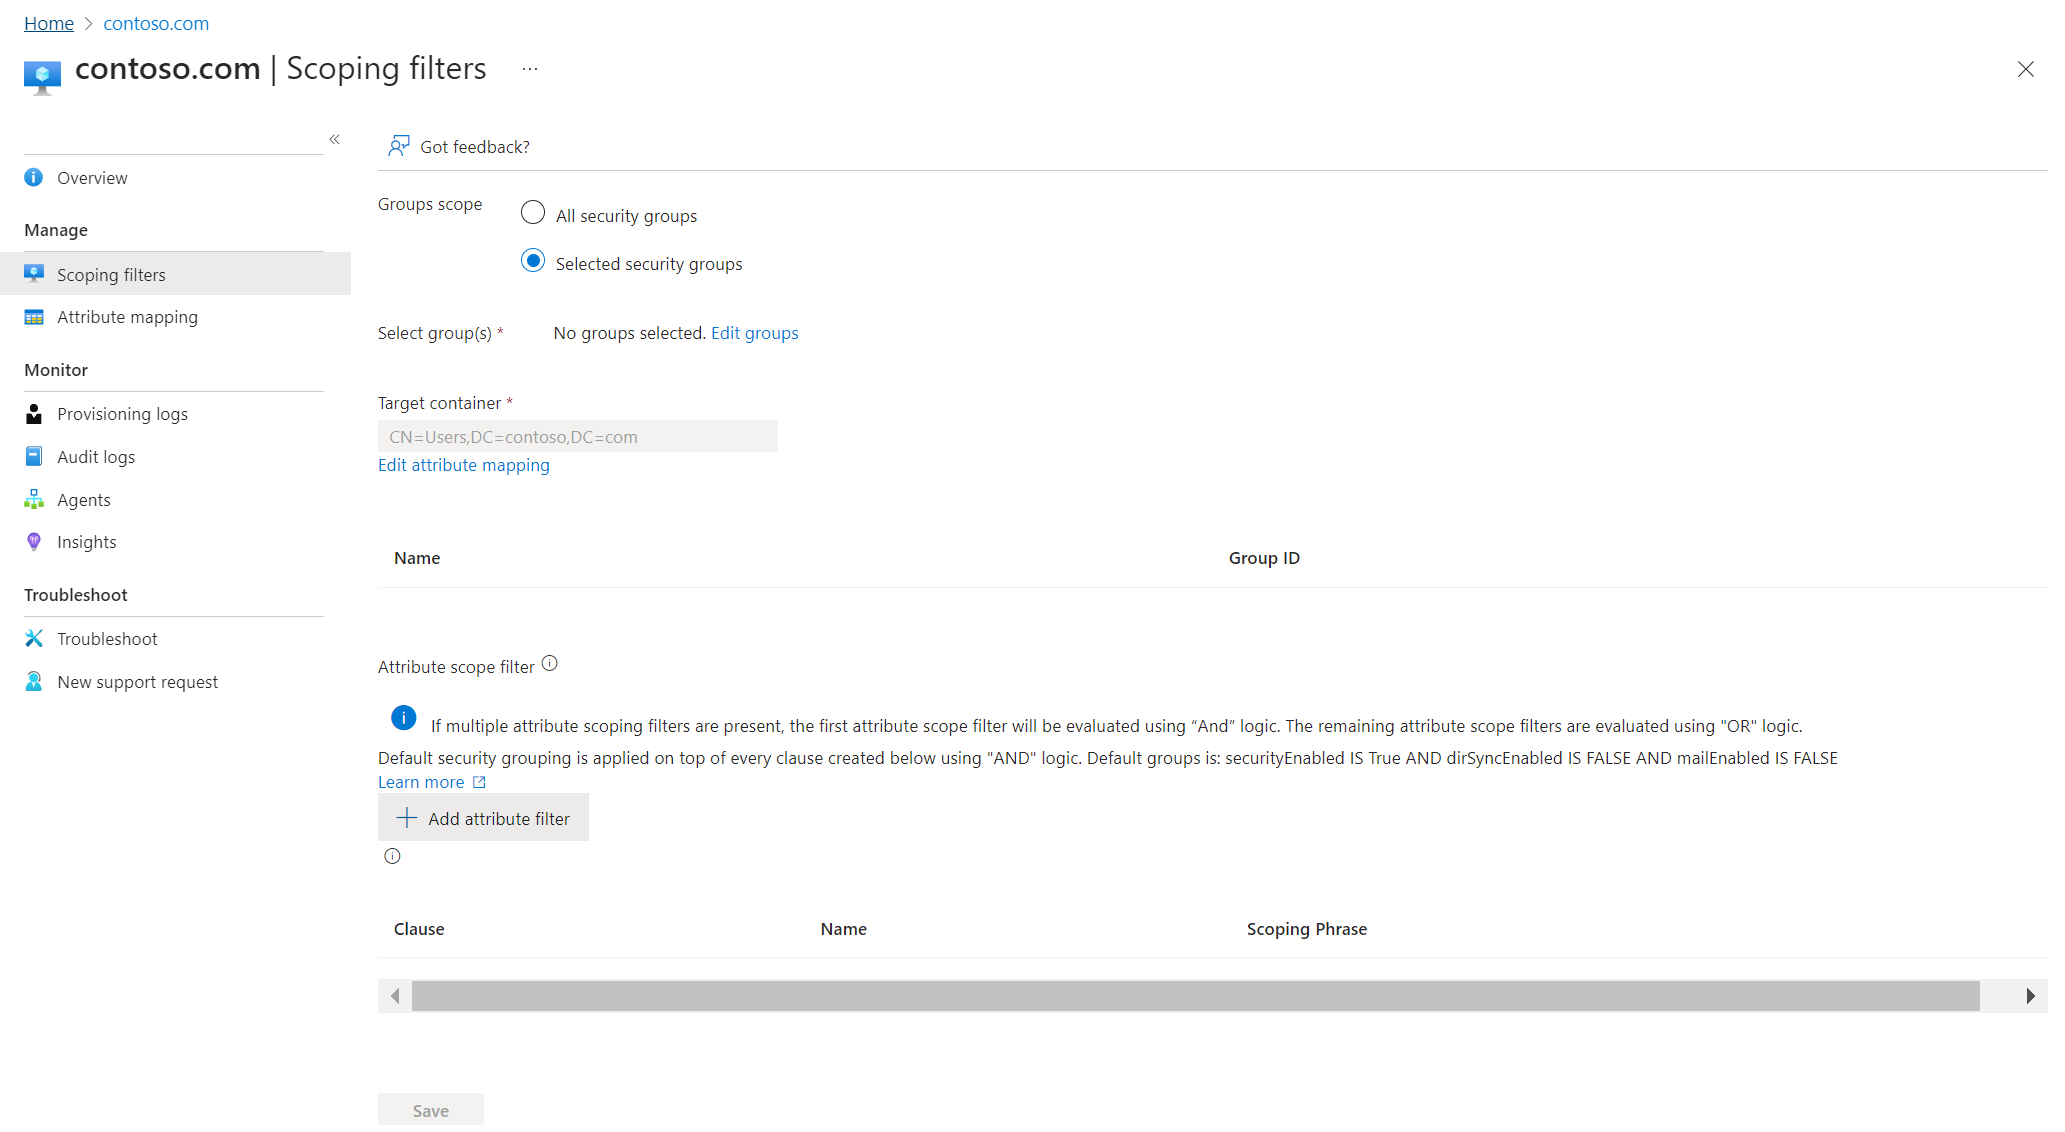
On the left, click Scoping filters.
Under Group scope set it to All Security groups
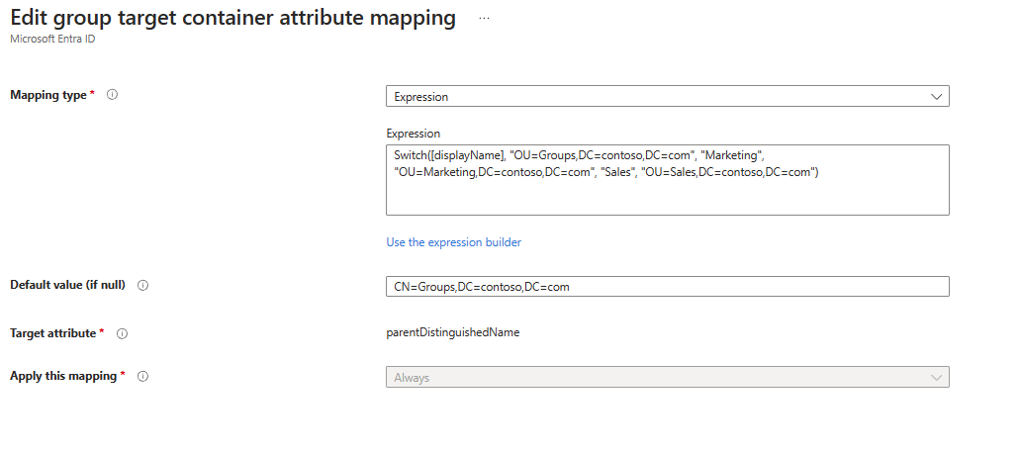
Change Mapping type to Expression
In the expression box, enter the following:
Switch([displayName],"OU=Groups,DC=contoso,DC=com","Marketing","OU=Marketing,DC=contoso,DC=com","Sales","OU=Sales,DC=contoso,DC=com")Click Apply - This changes the target container depending on the group displayName attribute.
Click Save
On the left, click Overview
At the top, click Review and enable
On the right, click Enable configuration
Test configuration
Note
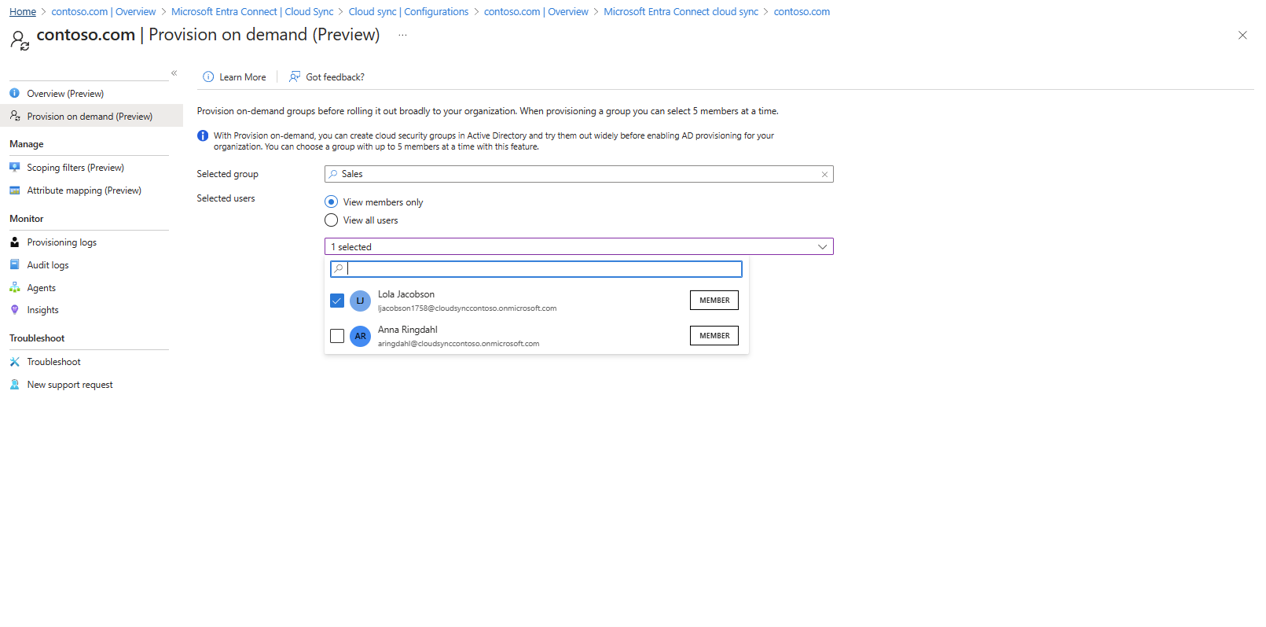
When using on-demand provisioning, members aren't automatically provsisioned. You need to select which members you wish to test on and there's a 5 member limit.
- Sign in to the Microsoft Entra admin center as at least a Hybrid Administrator.
- Browse to Identity > Hybrid management > Microsoft Entra Connect > Cloud sync.

Under Configuration, select your configuration.
On the left, select Provision on demand.
Enter Sales in the Selected group box
Click Provision.
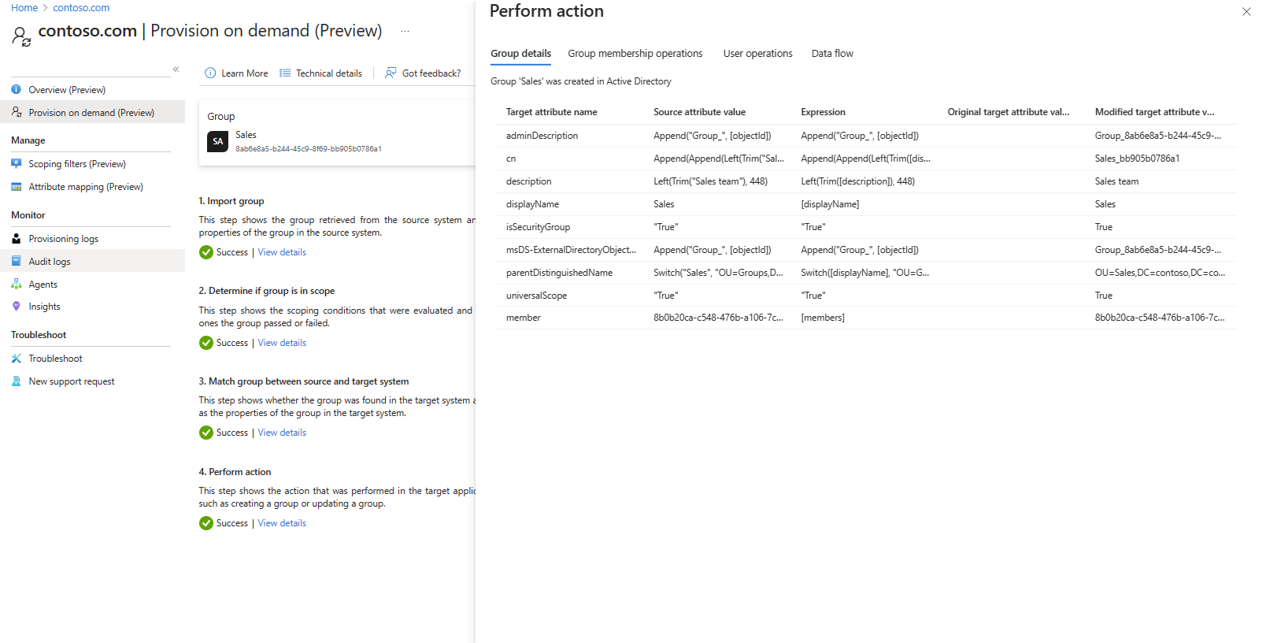
You should see the group provisioned.
Verify in Active Directory
Now you can make sure the group is provisioned to Active Directory.
Do the following:
- Sign-in to your on-premises environment.
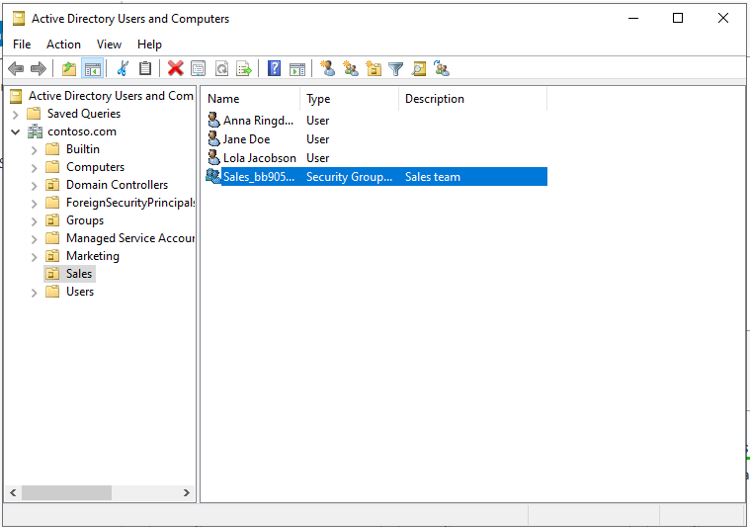
- Launch Active Directory Users and Computers
- Verify the new group is provisioned.
