Before you begin, use the Choose a tenant type selector at the top of this page to select tenant type. Microsoft Entra ID provides two tenant configurations, workforce and external. A workforce tenant configuration is for your employees, internal apps, and other organizational resources. An external tenant is for your customer-facing apps.
In this quickstart, you download and run a code sample that demonstrates how an Android application can sign in users and get an access token to call the Microsoft Graph API.
Applications must be represented by an app object in Microsoft Entra ID so that the Microsoft identity platform can provide tokens to your application.
In this quickstart, you download and run a code sample that demonstrates how a native iOS or macOS application can sign in users and get an access token to call the Microsoft Graph API.
The quickstart applies to both iOS and macOS apps. Some steps are needed only for iOS apps and will be indicated as such.
If you have access to multiple tenants, use the Settings icon
in the top menu to switch to the tenant in which you want to register the application from the Directories + subscriptions menu.
Browse to Identity > Applications > App registrations.
Select New registration.
Enter a Name for your application. Users of your app might see this name, and you can change it later.
For Supported account types, select Accounts in any organizational directory (Any Microsoft Entra directory - Multitenant) and personal Microsoft accounts (e.g. Skype, Xbox). For information on different account types, select the Help me choose option.
Select Register.
Under Manage, select Authentication > Add a platform > Android.
Enter your project's Package Name based on the sample type you downloaded above.
In the Signature hash section of the Configure your Android app pane, select Generating a development Signature Hash. and copy the KeyTool command to your command line.
KeyTool.exe is installed as part of the Java Development Kit (JDK). You must also install the OpenSSL tool to execute the KeyTool command. For more information, see Android documentation on generating a key for more information.
Enter the Signature hash generated by KeyTool.
Select Configure and save the MSAL Configuration that appears in the Android configuration pane so you can enter it when you configure your app later.
If you have access to multiple tenants, use the Settings icon
in the top menu to switch to the tenant in which you want to register the application from the Directories + subscriptions menu.
Browse to Identity > Applications > App registrations.
Select New registration.
Enter a Name for your application. Users of your app might see this name, and you can change it later.
Select Register.
Under Manage, select Authentication > Add Platform > iOS.
Enter the Bundle Identifier for your application. The bundle identifier is a unique string that uniquely identifies your application, for example com.<yourname>.identitysample.MSALMacOS. Make a note of the value you use. Note that the iOS configuration is also applicable to macOS applications.
Select Configure and save the MSAL Configuration details for later in this quickstart.
Select your emulator, or physical device, from Android Studio's available devices dropdown and run the app.
The sample app starts on the Single Account Mode screen. A default scope, user.read, is provided by default, which is used when reading your own profile data during the Microsoft Graph API call. The URL for the Microsoft Graph API call is provided by default. You can change both of these if you wish.
Use the app menu to change between single and multiple account modes.
In single account mode, sign in using a work or home account:
Select Get graph data interactively to prompt the user for their credentials. You'll see the output from the call to the Microsoft Graph API in the bottom of the screen.
Once signed in, select Get graph data silently to make a call to the Microsoft Graph API without prompting the user for credentials again. You'll see the output from the call to the Microsoft Graph API in the bottom of the screen.
In multiple account mode, you can repeat the same steps. Additionally, you can remove the signed-in account, which also removes the cached tokens for that account.
If you selected Option 1 above, you can skip these steps.
Open the project in XCode.
Edit ViewController.swift and replace the line starting with 'let kClientID' with the following code snippet. Remember to update the value for kClientID with the clientID that you saved when you registered your app earlier in this quickstart:
let kClientID = "Enter_the_Application_Id_Here"
If you're building an app for Microsoft Entra national clouds, replace the line starting with 'let kGraphEndpoint' and 'let kAuthority' with correct endpoints. For global access, use default values:
let kGraphEndpoint = "https://graph.microsoft.com/"
let kAuthority = "https://login.microsoftonline.com/common"
Other endpoints are documented here. For example, to run the quickstart with Microsoft Entra Germany, use following:
let kGraphEndpoint = "https://graph.microsoft.de/"
let kAuthority = "https://login.microsoftonline.de/common"
Open the project settings. In the Identity section, enter the Bundle Identifier.
Right-click Info.plist and select Open As > Source Code.
Under the dict root node, replace Enter_the_bundle_Id_Here with the Bundle Id that you used in the portal. Notice the msauth. prefix in the string.
Move on to the Android tutorial in which you build an Android app that gets an access token from the Microsoft identity platform and uses it to call the Microsoft Graph API.
Move on to the step-by-step tutorial in which you build an iOS or macOS app that gets an access token from the Microsoft identity platform and uses it to call the Microsoft Graph API.
The quickstart guides you in configuring sample Android, .NET MAUI Android, and iOS/macOS apps to sign in users by registering applications, setting up redirect URLs, updating configurations, and testing the app.
To enable your application to sign in users with Microsoft Entra, Microsoft Entra External ID must be made aware of the application you create. The app registration establishes a trust relationship between the app and Microsoft Entra. When you register an application, External ID generates a unique identifier known as an Application (client) ID, a value used to identify your app when creating authentication requests.
The following steps show you how to register your app in the Microsoft Entra admin center:
If you have access to multiple tenants, use the Settings icon
in the top menu to switch to your external tenant from the Directories + subscriptions menu.
Browse to Identity >Applications > App registrations.
Select + New registration.
In the Register an application page that appears;
Enter a meaningful application Name that is displayed to users of the app, for example ciam-client-app.
Under Supported account types, select Accounts in this organizational directory only.
Select Register.
The application's Overview pane displays upon successful registration. Record the Application (client) ID to be used in your application source code.
To specify your app type to your app registration, follow these steps:
Under Manage, select Authentication.
On the Platform configurations page, select Add a platform, and then select Android option.
Enter your project's Package Name. If you downloaded the sample code, this value is com.azuresamples.msaldelegatedandroidkotlinsampleapp.
In the Signature hash section of the Configure your Android app pane, select Generating a development Signature Hash. This will change for each development environment. Copy and run the KeyTool command for your operating system in your Terminal.
Enter the Signature hash generated by KeyTool.
Select Configure.
Copy the MSAL Configuration from the Android configuration pane and save it for later app configuration.
Select Done.
Enable public client flow
To identify your app as a public client, follow these steps:
Under Manage, select Authentication.
Under Advanced settings, for Allow public client flows, select Yes.
Select Save to save your changes.
To specify your app type to your app registration, follow these steps:
Under Manage, select Authentication.
On the Platform configurations page, select Add a platform, and then select Mobile and Desktop applications option.
For the Redirect URIs enter msalEnter_the_Application_Id_Here://auth, replace Enter_the_Application_Id_Here with the Application (client) ID that you copied earlier, then select Configure.
Select Save to save the changes.
To specify your app type to your app registration, follow these steps:
Under Manage, select Authentication.
On the Platform configurations page, select Add a platform, and then select iOS / macOS option.
Enter your project's Bundle ID. If you downloaded the sample code, this value is com.microsoft.identitysample.ciam.MSALiOS.
Select Configure and save the MSAL Configuration that appears in the iOS / macOS configuration pane so you can enter it when you configure your app later.
Select Done.
Enable public client flow
To identify your app as a public client, follow these steps:
Under Manage, select Authentication.
Under Advanced settings, for Allow public client flows, select Yes.
Once you register your application, it gets assigned the User.Read permission. However, since the tenant is an external tenant, the customer users themselves can't consent to this permission. You as the tenant administrator must consent to this permission on behalf of all the users in the tenant:
From the App registrations page, select the application that you created (such as ciam-client-app) to open its Overview page.
Under Manage, select API permissions.
Select Grant admin consent for <your tenant name>, then select Yes.
Select Refresh, then verify that Granted for <your tenant name> appears under Status for the permission.
Create a user flow
Follow these steps to create a user flow a customer can use to sign in or sign up for an application.
If you have access to multiple tenants, use the Settings icon
in the top menu to switch to your external tenant from the Directories + subscriptions menu.
Browse to Identity > External Identities > User flows.
Select + New user flow.
On the Create page:
Enter a Name for the user flow, such as SignInSignUpSample.
In the Identity providers list, select Email Accounts. This identity provider allows users to sign-in or sign-up using their email address.
Note
Additional identity providers will be listed here only after you set up federation with them. For example, if you set up federation with Google, Facebook, Apple or an OIDC identity provider, you'll be able to select those additional identity providers here.
Under Email accounts, you can select one of the two options. For this tutorial, select Email with password.
Email with password: Allows new users to sign up and sign in using an email address as the sign-in name and a password as their first factor credential.
Email one-time-passcode: Allows new users to sign up and sign in using an email address as the sign-in name and email one-time passcode as their first factor credential. Email one-time passcode must be enabled at the tenant level (All Identity Providers > Email One-time-passcode) for this option to be available at the user flow level.
Under User attributes, choose the attributes you want to collect from the user upon sign-up. By selecting Show more, you can choose attributes and claims for Country/Region, Display Name, and Postal Code. Select OK. (Users are only prompted for attributes when they sign up for the first time.)
Select Create. The new user flow appears in the User flows list. If necessary, refresh the page.
Associate the .NET MAUI Android application with the user flow
For the customer users to see the sign-up or sign-in experience when they use your app, you need to associate your app with a user flow. Although many applications can be associated with your user flow, a single application can only be associated with one user flow.
On the sidebar menu, select Identity.
Select External Identities, then User flows.
In the User flows page, select the User flow name you created earlier, for example, SignInSignUpSample.
Under Use, select Applications.
Select Add application.
Select the application from the list such as ciam-client-app or use the search box to find the application, and then select it.
Choose Select.
Once you associate your app with a user flow, you can test your user flow by simulating a user’s sign-up or sign-in experience with your application from within the Microsoft Entra admin center. To do so, use the steps in Test your sign-up and sign-in user flow.
Once you register your application, it gets assigned the User.Read permission. However, since the tenant is an external tenant, the customer users themselves can't consent to this permission. You as the tenant administrator must consent to this permission on behalf of all the users in the tenant:
From the App registrations page, select the application that you created (such as ciam-client-app) to open its Overview page.
Under Manage, select API permissions.
Select Grant admin consent for <your tenant name>, then select Yes.
Select Refresh, then verify that Granted for <your tenant name> appears under Status for the permission.
To get the .NET MAUI Android application sample code, download the .zip file or clone the sample .NET MAUI Android application from GitHub by running the following command:
To enable authentication and access to Microsoft Graph resources, configure the sample by following these steps:
In Android Studio, open the project that you cloned.
Open /app/src/main/res/raw/auth_config_ciam.json file.
Find the placeholder:
Enter_the_Application_Id_Here and replace it with the Application (client) ID of the app you registered earlier.
Enter_the_Redirect_Uri_Here and replace it with the value of redirect_uri in the Microsoft Authentication Library (MSAL) configuration file you downloaded earlier when you added the platform redirect URL.
Enter_the_Tenant_Subdomain_Here and replace it with the Directory (tenant) subdomain. For example, if your tenant primary domain is contoso.onmicrosoft.com, use contoso. If you don't know your tenant subdomain, learn how to read your tenant details.
Open /app/src/main/AndroidManifest.xml file.
Find the placeholder:
ENTER_YOUR_SIGNATURE_HASH_HERE and replace it with the Signature Hash that you generated earlier when you added the platform redirect URL.
Open /app/src/main/java/com/azuresamples/msaldelegatedandroidkotlinsampleapp/MainActivity.kt file.
Find property named scopes and set the scopes recorded in Grant admin consent. If you haven't recorded any scopes, you can leave this scope list empty.
private const val scopes = "" // Developers should set the respective scopes of their Microsoft Graph resources here. For example, private const val scopes = "api://{clientId}/{ToDoList.Read} api://{clientId}/{ToDoList.ReadWrite}"
You've configured the app and it's ready to run.
In Visual Studio, open ms-identity-ciam-dotnet-tutorial-main/1-Authentication/2-sign-in-maui/appsettings.json file.
Find the placeholder:
Enter_the_Tenant_Subdomain_Here and replace it with the Directory (tenant) subdomain. For example, if your tenant primary domain is contoso.onmicrosoft.com, use contoso. If you don't have your tenant name, learn how to read your tenant details.
Enter_the_Application_Id_Here and replace it with the Application (client) ID of the app you registered earlier.
In Visual Studio, open ms-identity-ciam-dotnet-tutorial-main/1-Authentication/2-sign-in-maui/Platforms/Android/AndroidManifest.xml file.
Find the placeholder:
Enter_the_Application_Id_Here and replace it with the Application (client) ID of the app you registered earlier.
To enable authentication and access to Microsoft Graph resources, configure the sample by following these steps:
In Xcode, open the project that you cloned.
Open /MSALiOS/Configuration.swift file.
Find the placeholder:
Enter_the_Application_Id_Here and replace it with the Application (client) ID of the app you registered earlier.
Enter_the_Redirect_URI_Here and replace it with the value of kRedirectUri in the Microsoft Authentication Library (MSAL) configuration file you downloaded earlier when you added the platform redirect URL.
Enter_the_Protected_API_Scopes_Here and replace it with the scopes recorded in Grant admin consent. If you haven't recorded any scopes, you can leave this scope list empty.
Enter_the_Tenant_Subdomain_Here and replace it with the Directory (tenant) subdomain. For example, if your tenant primary domain is contoso.onmicrosoft.com, use contoso. If you don't know your tenant subdomain, learn how to read your tenant details.
In the toolbar, select your app from the run configurations menu.
In the target device menu, select the device that you want to run your app on.
If you don't have any devices configured, you need to either create an Android Virtual Device to use the Android Emulator or connect a physical Android device.
Select the Run button.
Select Acquire Token Interactively to request an access token.
If you select API - Perform GET to call a protected ASP.NET Core web API, you will get an error.
For more information about calling a protected web API, see our next steps
.NET MAUI apps are designed to run on multiple operating systems and devices. You'll need to select which target you want to test and debug your app with.
Set the Debug Target in the Visual Studio toolbar to the device you want to debug and test with. The following steps demonstrate setting the Debug Target to Android:
Select Debug Target drop-down.
Select Android Emulators.
Select emulator device.
Run the app by pressing F5 or select the play button at the top of Visual Studio.
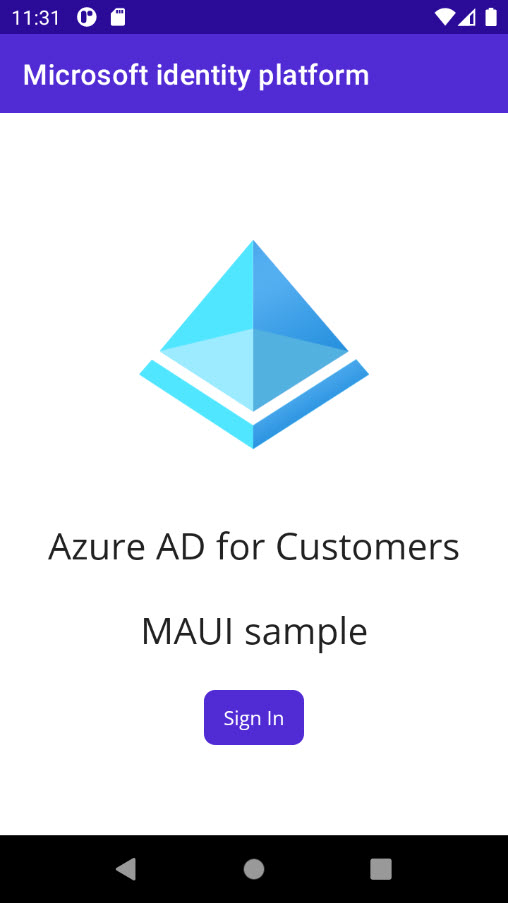
You can now test the sample .NET MAUI Android app. After you run the app, the Android app window appears in an emulator:
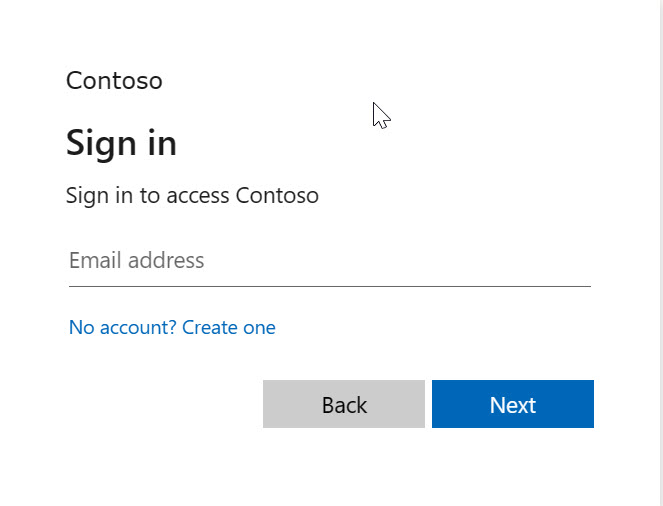
On the Android window that appears, select the Sign In button. A browser window opens, and you're prompted to sign in.
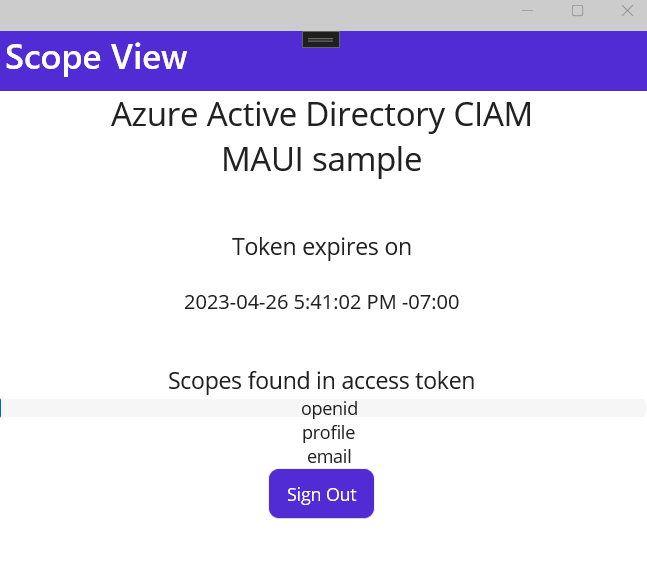
During the sign in process, you're prompted to grant various permissions (to allow the application to access your data). Upon successful sign in and consent, the application screen displays the main page.
To build and run your app, follow these steps:
To build and run your code, select Run from the Product menu in Xcode. After a successful build, Xcode will launch the sample app in the Simulator.
Select Acquire Token Interactively to request an access token.
If you select API - Perform GET to call a protected ASP.NET Core web API, you will get an error.
For more information about calling a protected web API, see our Next steps
 in the top menu to switch to the tenant in which you want to register the application from the Directories + subscriptions menu.
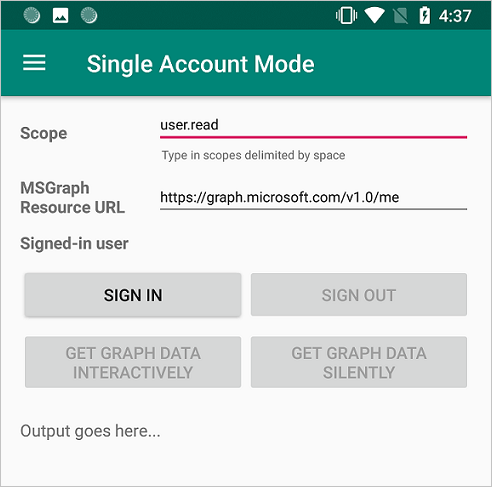


 in the top menu to switch to your external tenant from the Directories + subscriptions menu.