Discover Azure resources to manage in Privileged Identity Management
You can use Privileged Identity Management (PIM) in Microsoft Entra ID, to improve the protection of your Azure resources. This helps:
- Organizations that already use Privileged Identity Management to protect Microsoft Entra roles
- Management group and subscription owners who are trying to secure production resources
When you first set up Privileged Identity Management for Azure resources, you need to discover and select the resources you want to protect with Privileged Identity Management. When you discover resources through Privileged Identity Management, PIM creates the PIM service principal (MS-PIM) assigned as User Access Administrator on the resource. There's no limit to the number of resources that you can manage with Privileged Identity Management. However, we recommend starting with your most critical production resources.
Note
PIM can now automatically manage Azure resources in a tenant with no onboarding required. The updated user experience uses the latest PIM ARM API, allowing for improved performance and granularity in choosing the correct scope you want to manage.
Required permissions
You can view and manage the management groups or subscriptions to which you have Microsoft.Authorization/roleAssignments/write permissions, such as User Access Administrator or Owner roles. If you aren't a subscription owner, but are a Global Administrator and don't see any Azure subscriptions or management groups to manage, then you can elevate access to manage your resources.
Discover resources
Sign in to the Microsoft Entra admin center as at least a Privileged Role Administrator.
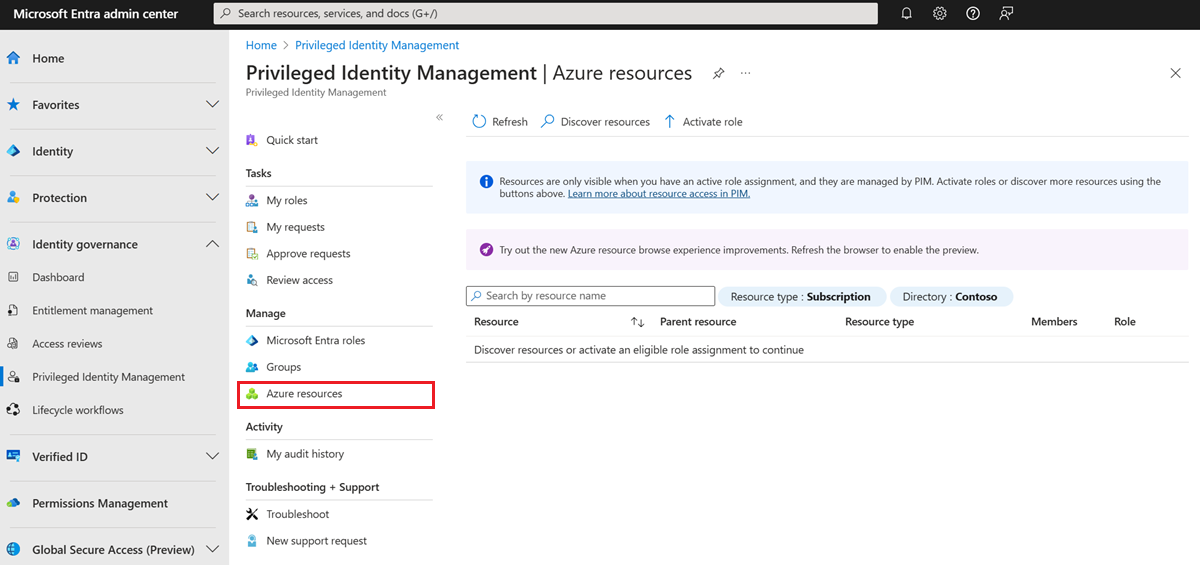
Browse to Identity governance > Privileged Identity Management > Azure Resources.
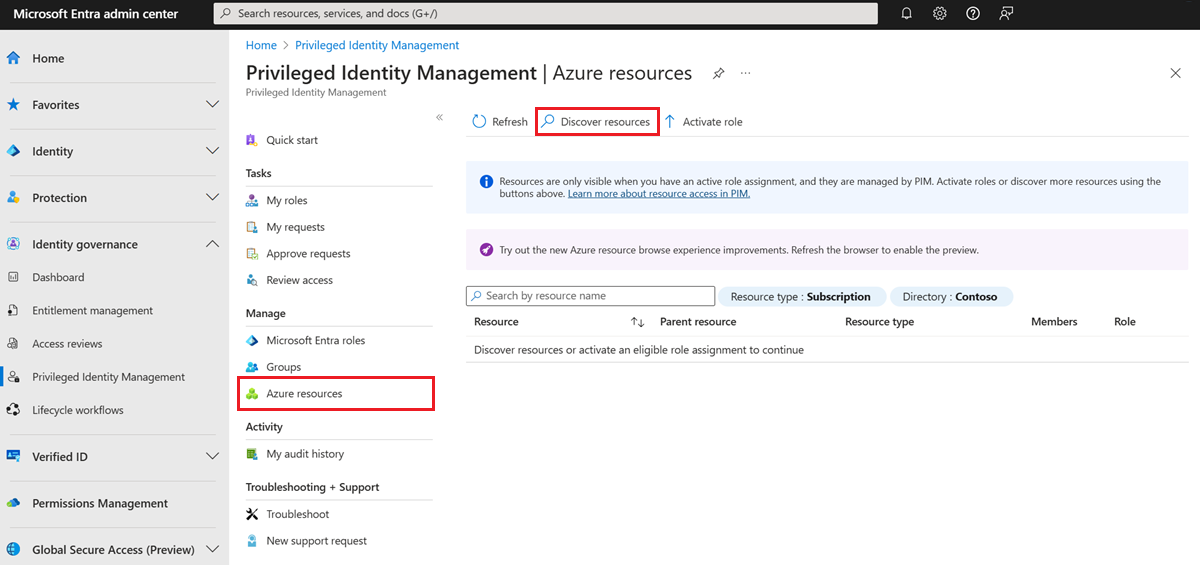
If it is your first time using Privileged Identity Management for Azure resources, you see a Discover resources page.

If another administrator in your organization is already managing Azure resources in Privileged Identity Management, you see a list of the resources that are currently being managed.

Select Discover resources to launch the discovery experience.

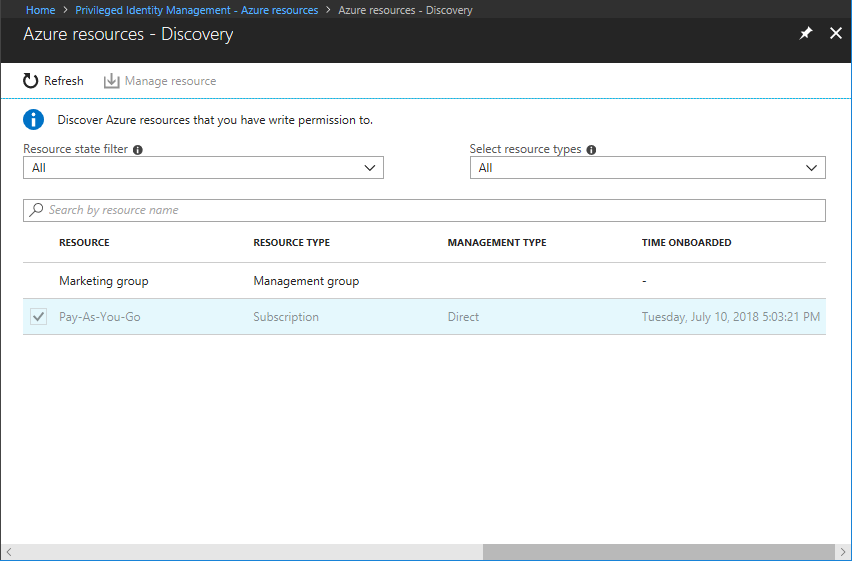
On the Discovery page, use Resource state filter and Select resource type to filter the management groups or subscriptions you have write permission to. It's probably easiest to start with All initially.
You can search for and select management group or subscription resources to manage in Privileged Identity Management. When you manage a management group or a subscription in Privileged Identity Management, you can also manage its child resources.
Note
When you add a new child Azure resource to a PIM-managed management group, you can bring the child resource under management by searching for it in PIM.
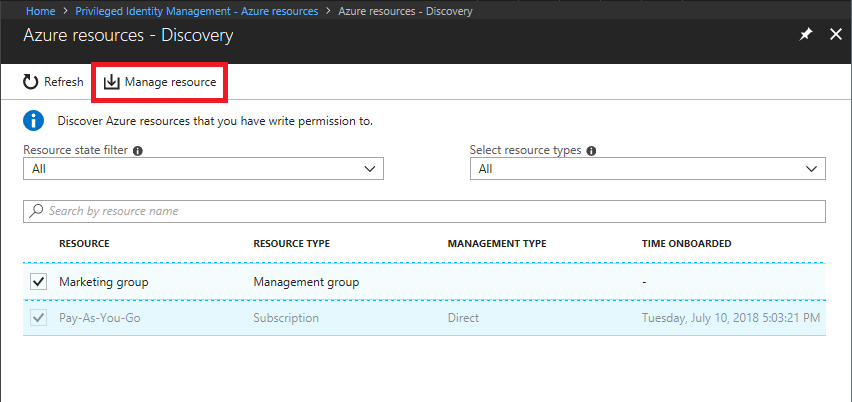
Select any unmanaged resources that you want to manage.
Select Manage resource to start managing the selected resources. The PIM service principal (MS-PIM) is assigned as User Access Administrator on the resource.
Note
Once a management group or subscription is managed, it can't be unmanaged. This prevents another resource administrator from removing Privileged Identity Management settings.

If you see a message to confirm the onboarding of the selected resource for management, select Yes. PIM will then be configured to manage all the new and existing child objects under the resource.
