Auditing Lifecycle Workflows
Workflows created using Lifecycle Workflows allow for the automation of lifecycle task for users no matter where they fall in the Joiner-Mover-Leaver (JML) model of their identity lifecycle in your organization. Making sure workflows are processed correctly is an important part of an organization's lifecycle management process. Workflows that aren't processed correctly can lead to many issues in terms of security and compliance. With audit logs, every action that Lifecycle Workflows complete over a time-frame up to 30 days are recorded.
Audit Logs
Every time a workflow is processed, an event is logged. These events are stored in the Audit Logs section, and can be used to gain information about workflows for historical, and auditing, purposes. Audit log services, categories, and activities may change frequently.

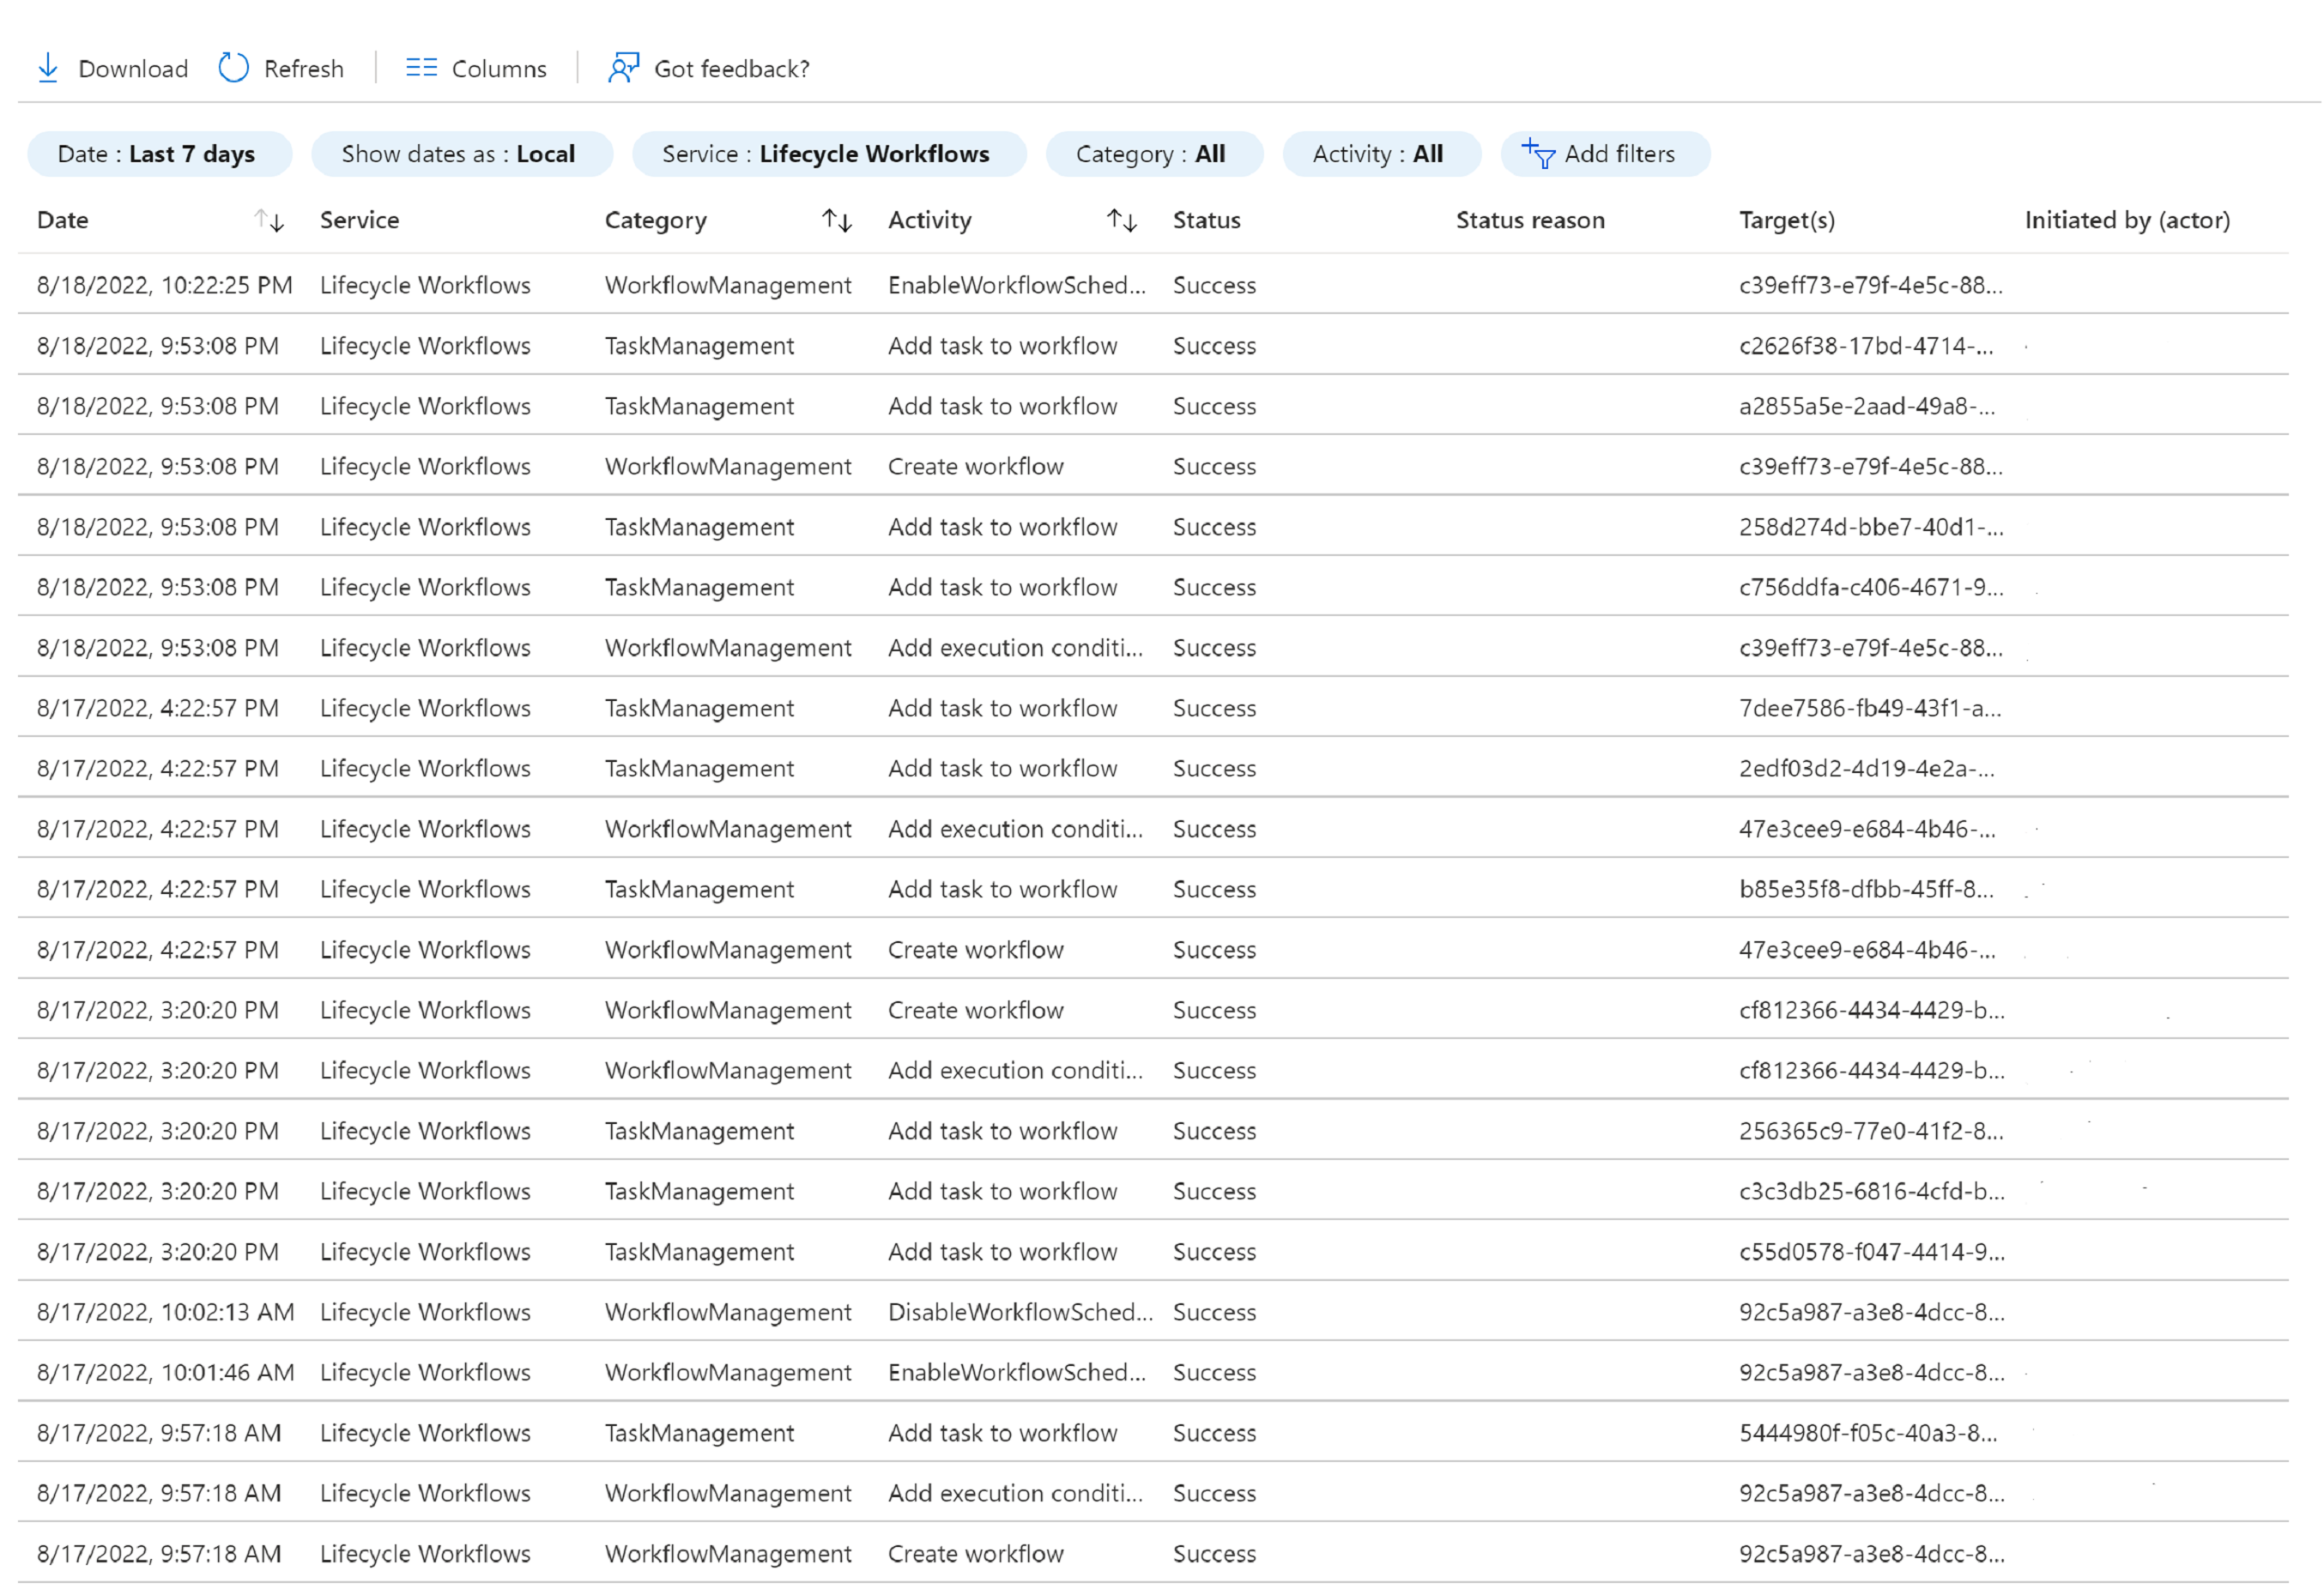
On the Audit Log page you're presented a sequential list, by date, of every action Lifecycle Workflows has taken. From this information you're able to filter based on the following parameters:
| Filter | Description |
|---|---|
| Date | You can filter a specific range for the audit logs from as short as 24 hours up to 30 days. |
| Date option | You can filter by your tenant's local time, or by UTC. |
| Service | The Lifecycle Workflow service. |
| Category | Categories of the event being logged. Separated into: Other- Events related to custom tasks. TaskManagement- Task related events logged by Lifecycle Workflows. WorkflowManagement- Events dealing with the workflow itself. |
| Activity | You can filter based on specific activities, which are based on categories. |
After filtering this information, you're also able to see other information in the log such as:
- Status: Whether or not the logged event was successful or not.
- Status Reason: If the event failed, a reason is given why.
- Target(s): Who the logged event ran for. Information given as their Microsoft Entra object ID.
- Initiated by (actor): Who did the event being logged. Information given by the user name.