Global Secure Access client for iOS (Preview)
Important
The Global Secure Access client for iOS is currently in PREVIEW. This information relates to a prerelease product that may be substantially modified before it's released. Microsoft makes no warranties, expressed or implied, with respect to the information provided here.
This article explains how to set up and deploy the Global Secure Access client app onto iOS and iPadOS devices. For simplicity, this article refers to both iOS and iPadOS as iOS.
Caution
Running other third-party endpoint protection products alongside Defender for Endpoint on iOS is likely to cause performance problems and unpredictable system errors.
Note
- The Global Secure Access client is deployed via Microsoft Defender for Endpoint on iOS.
- The Global Secure Access client on iOS uses a VPN. This VPN is not a regular VPN. Instead, it's a local/self-looping VPN.
Prerequisites
- To use the Global Secure Access iOS client, configure the iOS endpoint device as a Microsoft Entra registered device.
- To enable Global Secure Access for your tenant, refer to the Licensing requirements. If needed, you can purchase licenses or get trial licenses.
- Onboard the tenant to Global Secure Access and configure one or more traffic forwarding profiles. For more information, see Access the Global Secure Access area of the Microsoft Entra admin center.
Requirements
Network requirements
For Microsoft Defender for Endpoint on iOS (available in the Apple App Store) to function when connected to a network, you must configure the firewall/proxy to Enable access to Microsoft Defender for Endpoint service URLs.
Note
Microsoft Defender for Endpoint on iOS isn't supported on userless or shared devices.
System requirements
The iOS device (phone or tablet) must meet the following requirements:
- The device has iOS 15.0 or newer installed.
- The device has the Microsoft Authenticator app or the Intune Company Portal app installed.
- The device is enrolled to enforce Intune device compliance policies.
Supported modes
The Global Secure Access client for iOS supports installation on both modes of enrolled devices: supervised and unsupervised devices.
Supported traffic forwarding profiles
The Global Secure Access client for iOS supports the Microsoft traffic forwarding profile and the Private Access traffic forwarding profile. For more information, see Global Secure Access traffic forwarding profiles.
Known limitations
- Tunneling Quick User Datagram Protocol (UDP) Internet Connections (QUIC) traffic (except for Exchange Online) isn't supported.
- Global Secure Access (GSA) coexistence with Microsoft Tunnel isn't currently supported. For more information, see Prerequisites for the Microsoft Tunnel in Intune.
Installation Steps
Deploy on Device Administrator enrolled devices with Microsoft Intune
In the Microsoft Intune admin center, go to Apps > iOS/iPadOS > Add > iOS store app and select Select.
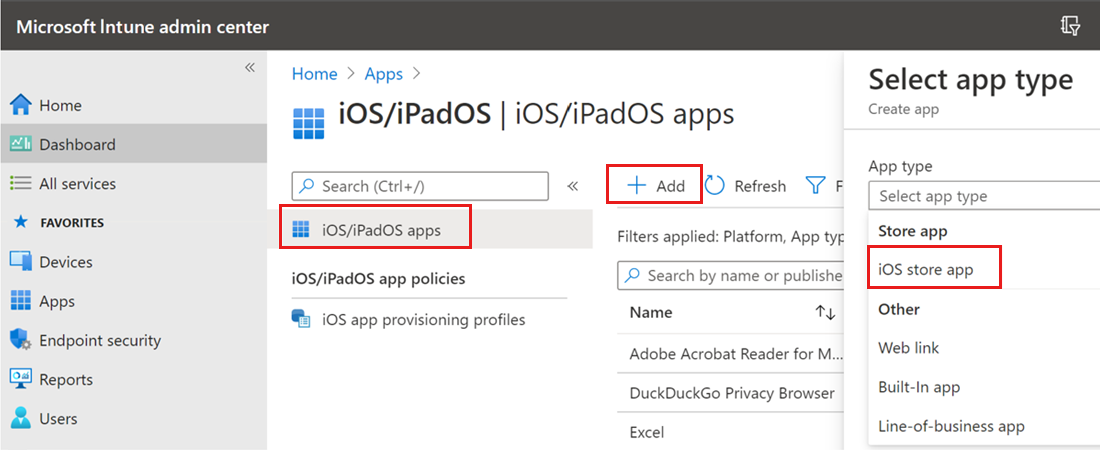
On the Add app page, select Search the App Store and type Microsoft Defender in the search bar.
In the search results, select Microsoft Defender and select Select.
Select iOS 15.0 as the minimum operating system. Review the rest of information about the app and select Next.
In the Assignments section, go to the Required section and select Add group.
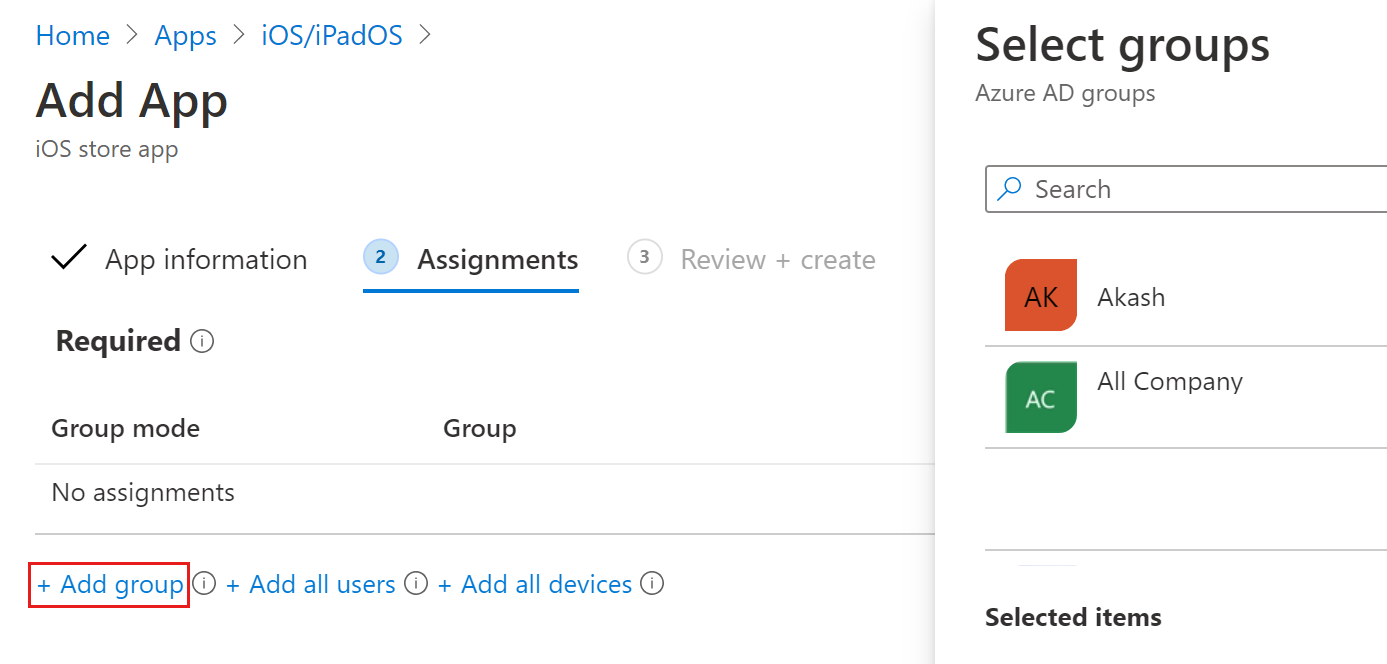
Choose the user groups that you would like to target with the Defender for Endpoint on iOS app.
Note
The selected user group should consist of Microsoft Intune enrolled users.
- Select Select and then Next.
- In the Review + Create section, verify that all the information entered is correct and then select Create. After a few moments, the Defender for Endpoint app is created successfully, and a notification appears at the top-right corner of the page.
- On the app information page, in the Monitor section, select Device install status to verify that the device installation is completed successfully.
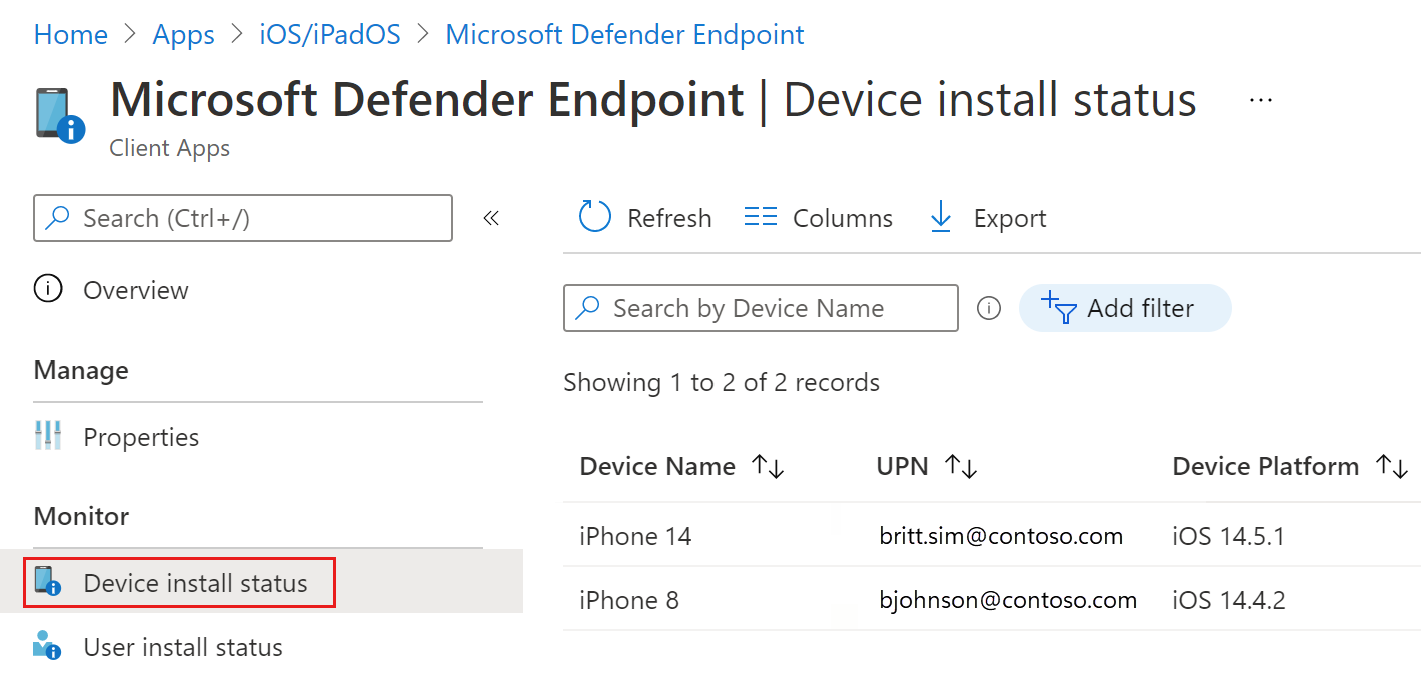
Create a VPN profile and configure Global Secure Access for Microsoft Defender for Endpoint
In the Microsoft Intune admin center, go to Devices > Configuration Profiles > Create Profile.
Set the Platform to iOS/iPadOS, the Profile type to Templates, and the Template name to VPN.
Select Create.
Type a name for the profile and select Next.
Set the Connection Type to Custom VPN.
In the Base VPN section, enter the following:
- Connection Name: Microsoft Defender for Endpoint
- VPN server address: 127.0.0.1
- Auth method: "Username and password"
- Split Tunneling: Disable
- VPN identifier: com.microsoft.scmx
In the key-value pairs fields:
Add the key SilentOnboard and set the value to True.
Add the key EnableGSA and set the appropriate value from the following table:
Key Value Details EnableGSA No value Global Secure Access isn't enabled and tile isn't visible. 0 Global Secure Access in not enabled and tile isn't visible. 1 The tile is visible and defaults to false (disabled state). User can enable or disable Global Secure Access using the toggle from the app. 2 The tile is visible and defaults to true (enabled state). User can override. User can enable or disable Global Secure Access using the toggle from the app. 3 The tile is visible and defaults to true (enabled state). User cannot disable Global Secure Access. Add more key-value pairs as required (optional):
Key Value Details EnableGSAPrivateChannel No value Global Secure Access is enabled by default. User can enable or disable. 0 Global Secure Access isn't enabled and toggle isn't visible to user. 1 Toggle is visible and defaults to false (disabled state). User can enable or disable. 2 Tile is visible and defaults to true (enabled state). User can enable or disable. 3 Toggle is visible and grayed out and defaults to true (enabled state). User cannot disable Global Secure Access.
Continue filling out the VPN form:
- Type of Automatic VPN: On-demand VPN
- On Demand Rules: select Add and then:
- Set I want to do the following to Connect VPN.
- Set I want to restrict to All domains.
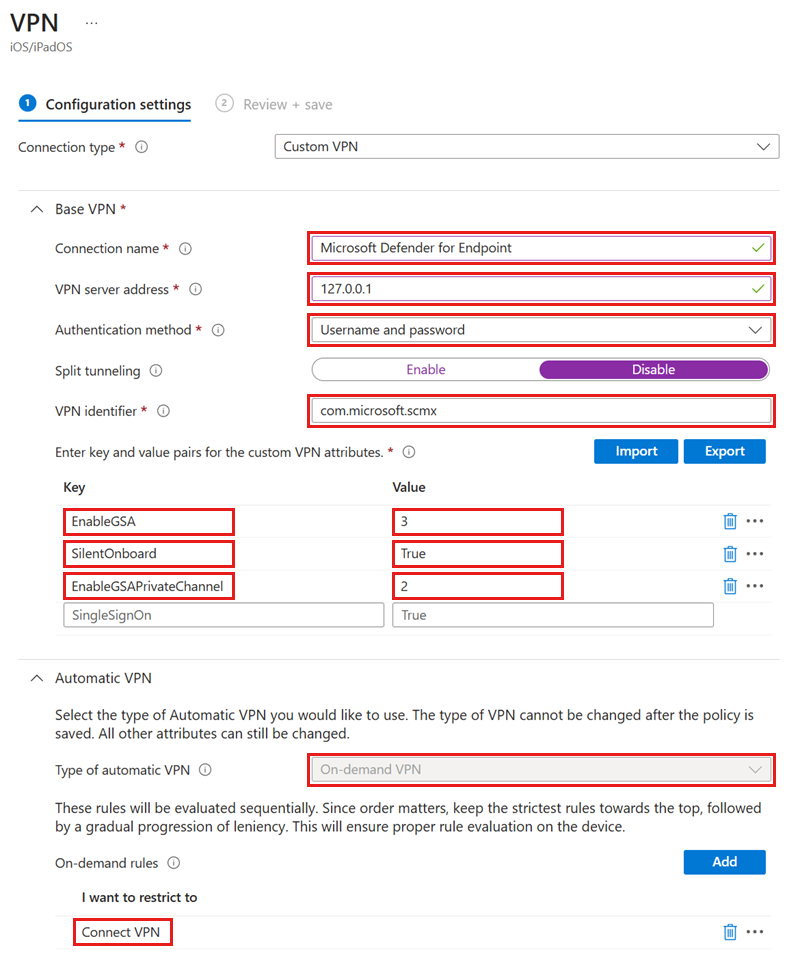
To prevent end users from disabling VPN, set Block users from disabling automatic VPN to Yes. By default, this setting isn't configured and users can disable VPN only in the Settings.
To allow users to use the VPN toggle from within the app, add the key-value pair EnableVPNToggleInApp = TRUE. By default, users can't change the toggle from within the app.
Select Next and assign the profile to targeted users.
In the Review + Create section, verify that all the information is correct and then select Create.
Once the configuration is complete and synced with the device, the following actions take place on the targeted iOS devices:
- Microsoft Defender for Endpoint is deployed and silently onboarded.
- The device is listed in the Defender for Endpoint portal.
- A provisional notification is sent to the user device.
- Global Secure Access and other Microsoft Defender for Endpoint (MDE)-configured features are activated.
Confirm Global Secure Access appears in Defender app
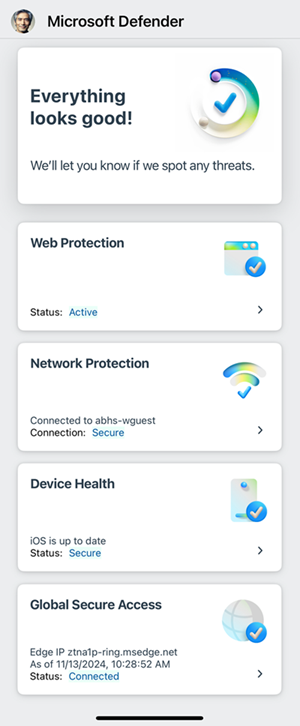
Because the Global Secure Access client for iOS is integrated with Microsoft Defender for Endpoint, it's helpful to understand the end user experience. The client appears in the Defender dashboard after onboarding to Global Secure Access.
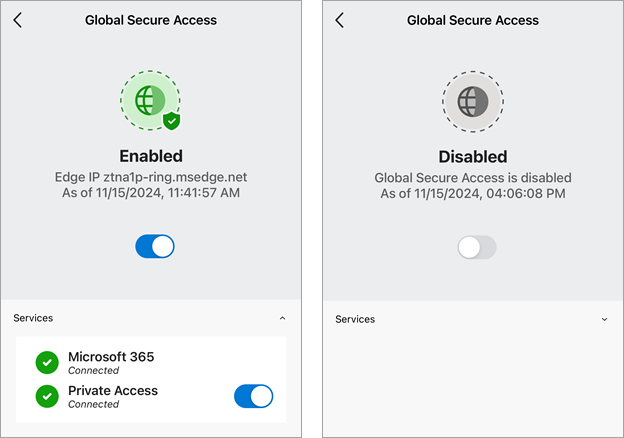
You can enable or disable the Global Secure Access client for iOS by setting the EnableGSA key in the VPN profile. Depending on the configuration settings, end users can enable or disable individual Services or the client itself using the appropriate toggles.
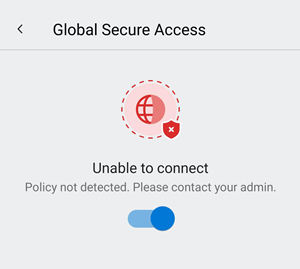
If the client is unable to connect, a toggle appears to disable the service. Users can come back later to try enabling the client.
Troubleshooting
- The Global Secure Access tile doesn't appear in the Defender app after onboarding the tenant:
- Force stop the Defender app and relaunch it.
- Access to the Private Access application shows a connection time-out error after a successful interactive sign-in.
- Reload the application (or refresh the web browser).