Publish a .NET MAUI app for Windows with Visual Studio
This article describes how to use Visual Studio to publish your .NET MAUI app for Windows. .NET MAUI apps can be packaged into an MSIX package, which is used for installing in Windows or for submission to the Microsoft Store. For more information about the benefits of MSIX, see What is MSIX?.
Set the build target
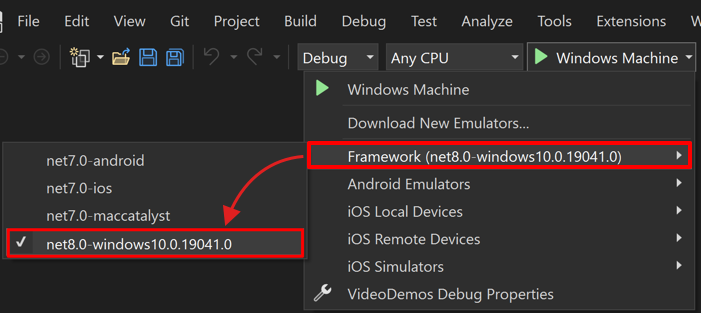
In Visual Studio, you can only publish to one platform at a time. The target platform is selected with the Debug Target drop-down in the Visual Studio toolbar. Set the target to Windows Machine or to Framework > net8.0-windows, as illustrated in the following image:
Publish the project
After the build target is set to Windows, you can publish your project. Perform the following steps:
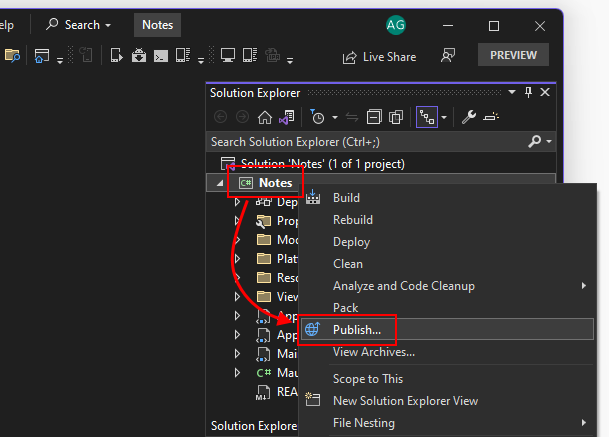
In the Solution Explorer pane, right-click the project and select Publish.
In the Create App Packages dialog, select Sideloading, and then select Next.
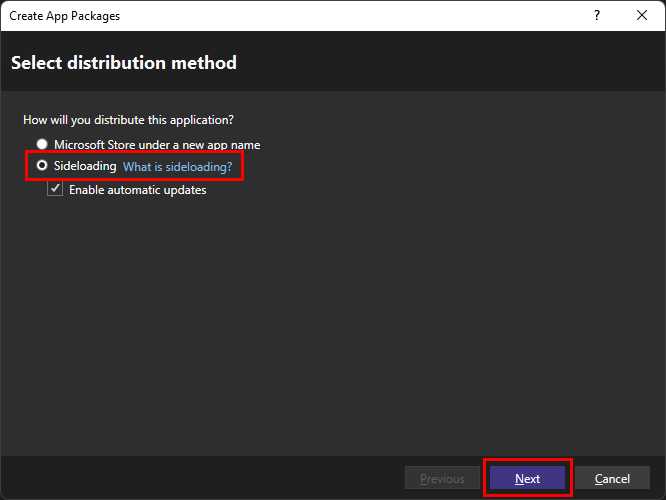
The Enable automatic updates checkbox is optional.
In the Select Signing Method dialog, select Yes, select a certificate. You can choose a certificate from a variety of sources. This article will create a temporary self-signed certificate for testing.
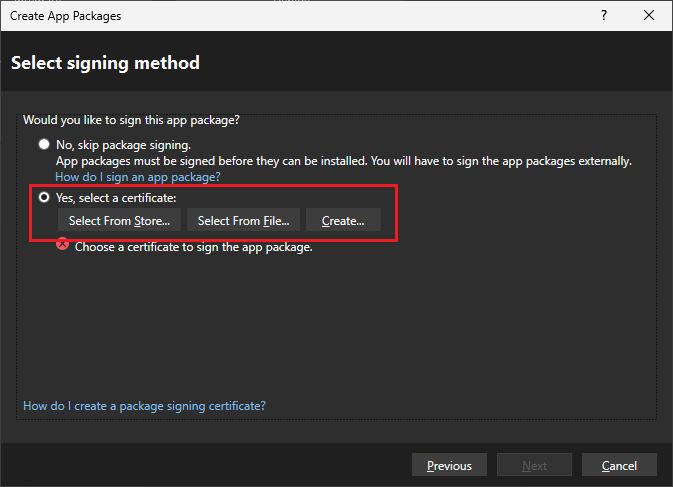
Select Create.
You can create a temporary self-signed certificate for testing. This certificate shouldn't be used to distribute your app package, it should only be used for testing your app's installation process.
In the Create a self-signed test certificate dialog box, enter a company name used to represent the publisher of your app. Next, type in a password for the certificate, and enter the same password into the Confirm your password box.
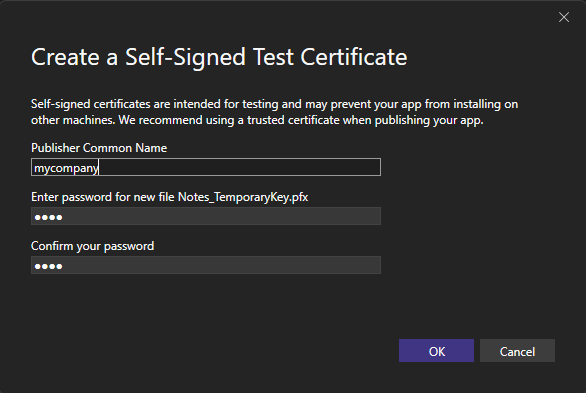
Select OK to return to the previous dialog.
Once you've selected a certificate, you should see the certificate's information displayed in the dialog box. Select the Next button to move on to the next dialog.
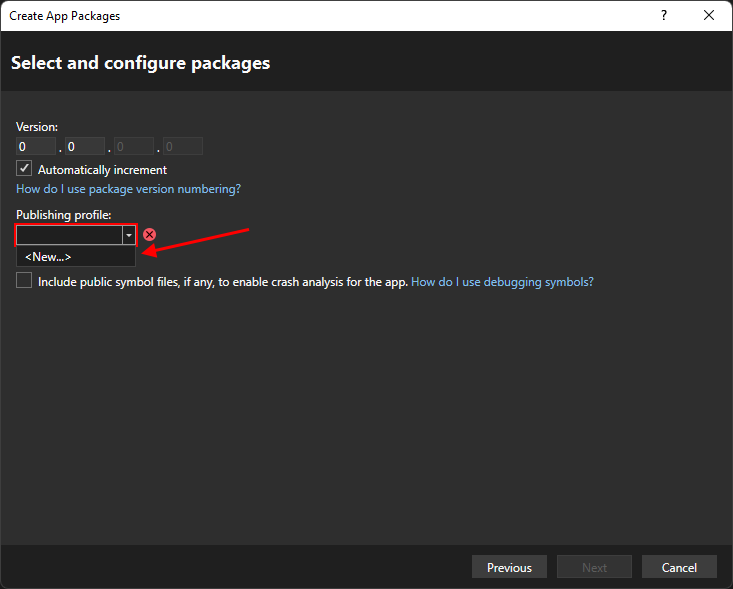
In the Select and configure packages dialog, you can select a version for the app package or leave it at its default of
0.0.0.0. The Automatically increment checkbox determines if the version of the package is increased everytime it's published.Select the Publishing profile drop-down and select <New...>
In the Create a new MSIX Publish Profile dialog, the default options should be what you want selected.
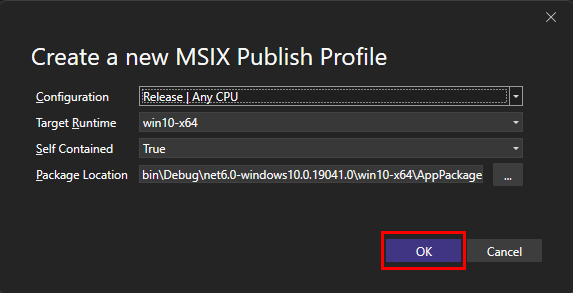
Select OK to return to the previous dialog.
The publishing profile you created is now selected.
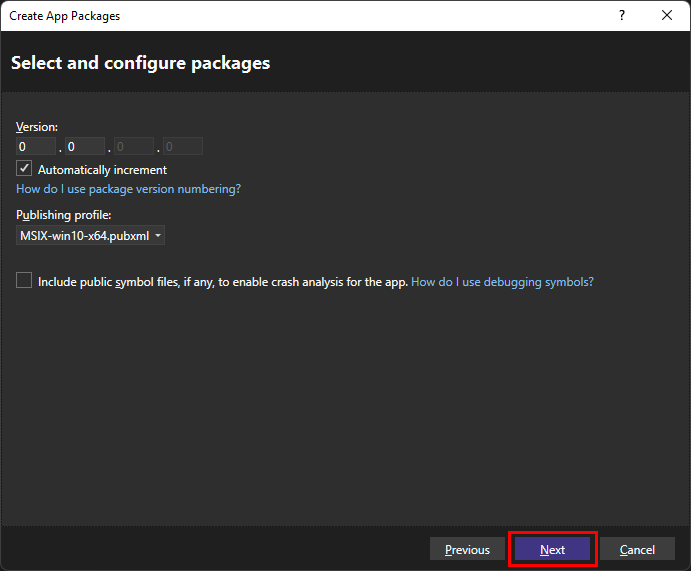
If you chose the option to enable automatic updates for your package, then select the Next button. If you didn't select automatic updates, the button reads Create, select it, and skip the next step.
The next dialog displayed is the Configure update settings dialog. This is where you configure the installer location for your app, and how often the app should check for updates.
Whenever you publish an updated version of the app, it overwrites the previous version of the app at the Installer location. When users run your app, and based on how often your app checks for updates, the app checks this location for an updated version, and if found, installs it.
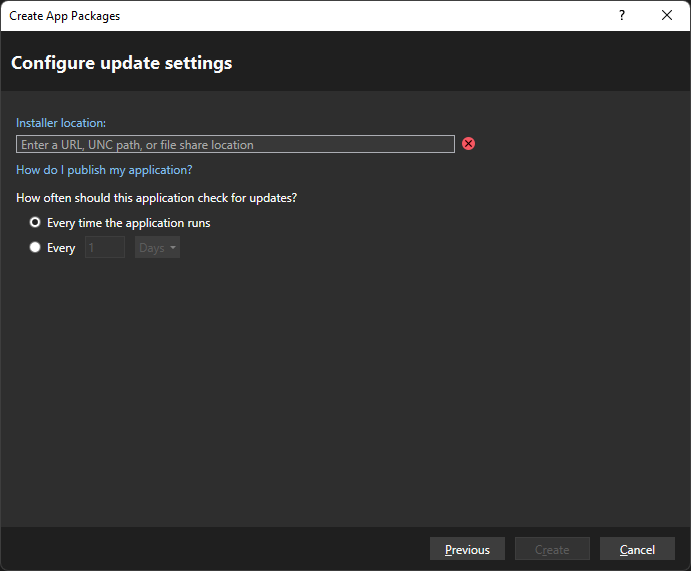
Once you select an Installer location, select Create.
After pressing Create, the installer is created and the Finished creating package dialog is displayed, which summarizes your package.
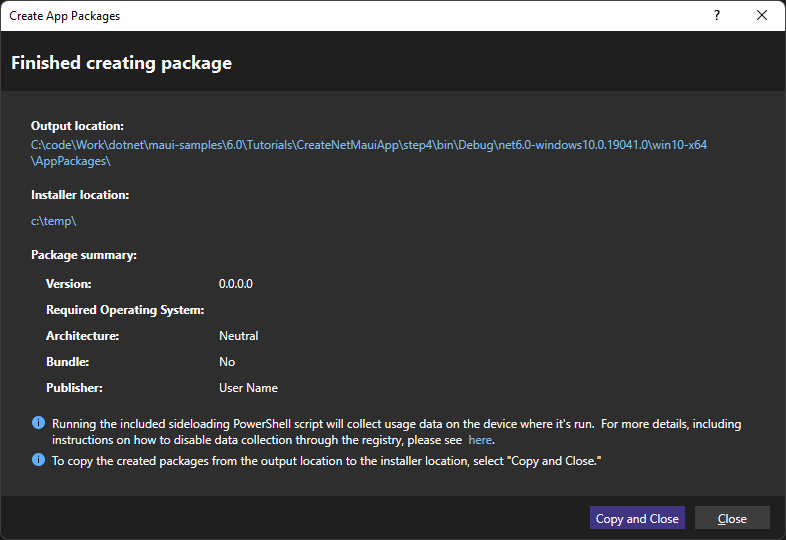
There may be two options to close the dialog box. If you have the Copy and close button, select it to copy the package to the Installer location you selected during the Configure update settings step. Otherwise, select Close to close the dialog box.
Current limitations
The following list describes the current limitations with publishing and packaging:
- The published app doesn't work if you try to run it directly with the executable file out of the publish folder.
- The way to run the app is to first install it through the packaged MSIX file.
