Remote iOS Simulator for Windows
The remote iOS Simulator for Windows allows you to test your apps on an iOS simulator displayed in Windows alongside Visual Studio 2022.
Get started
The remote iOS Simulator for Windows is installed automatically as part of the .NET Multi-platform App UI development workload in Visual Studio 2022. To use it, follow these steps:
Launch Visual Studio 2022 and create or load a .NET MAUI app project.
In Visual Studio 2022, pair the IDE to a Mac Build host if you haven't previously. For more information, see Pair to Mac for iOS development.
In the Visual Studio toolbar, use the Debug Target drop-down to select iOS Simulators and then a specific iOS simulator:
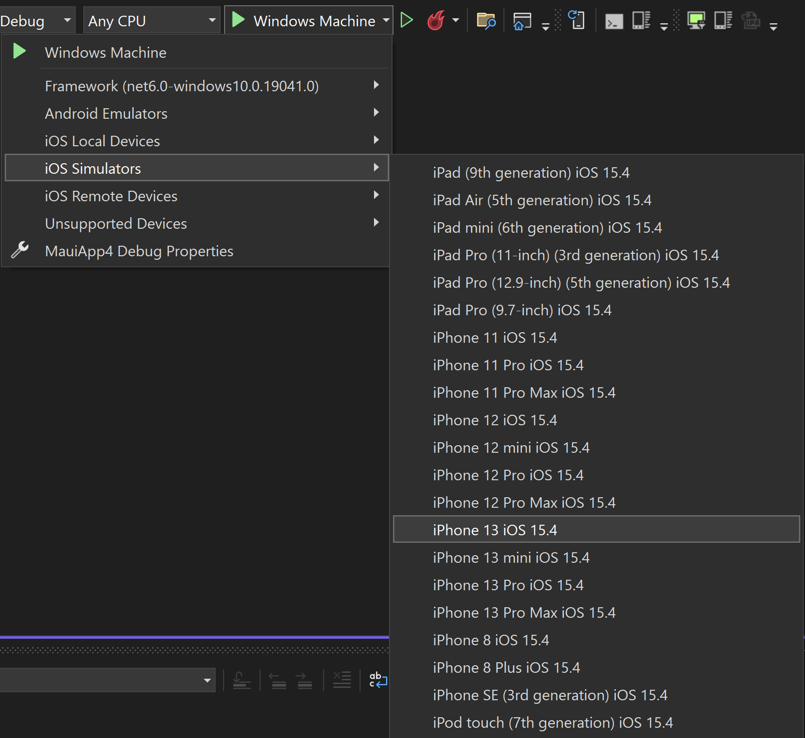
In the Visual Studio toolbar, press the green Start button for your chosen iOS simulator:

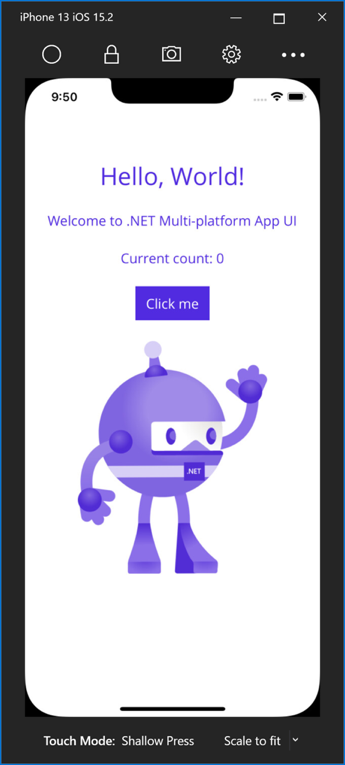
Visual Studio will build the app, start the remote iOS simulator for Windows, and deploy the app to the simulator:
Enable the remote iOS simulator for Windows
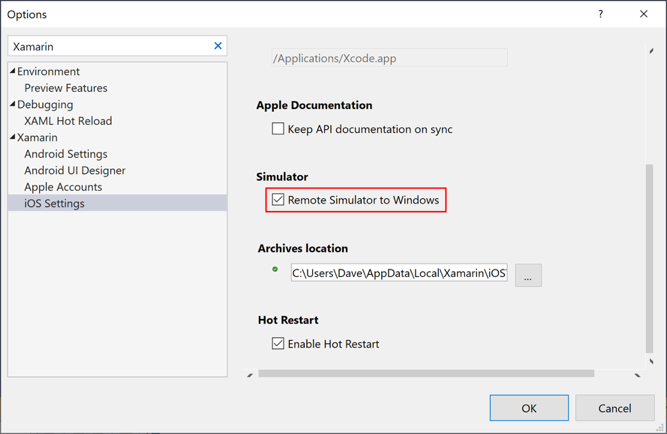
The remote iOS simulator for Windows is enabled by default. However, if it's been previously disabled it can be enabled in Visual Studio by navigating to Tools > Options > Xamarin > iOS Settings and ensuring that Remote Simulator to Windows is checked:
Note
When the remote simulator is disabled in Visual Studio, debugging a .NET MAUI iOS app will open the iOS Simulator on the connected Mac build host.
Simulator window toolbar
The toolbar at the top of the simulator's window displays five buttons:

The buttons are as follows:
- Home – simulates the home button on an iOS device.
- Lock – locks the simulator (swipe to unlock).
- Take Screenshot – saves a screenshot of the simulator to \Users\{User}\Pictures\Xamarin\iOS Simulator.
- Settings – displays keyboard and other settings.
- Other options – displays various simulator options such as rotation, and shake gesture.
Clicking the toolbar's Settings button (the gear icon) opens the Settings window:
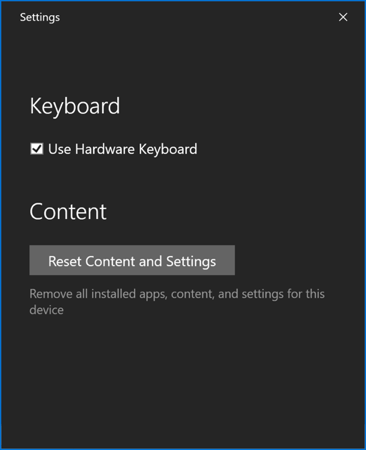
These settings allow you to enable the hardware keyboard and reset the content and settings for the simulator.
Clicking the toolbar's Other options button (the ellipsis icon) reveals additional buttons such as rotation, shake gestures, and rebooting:
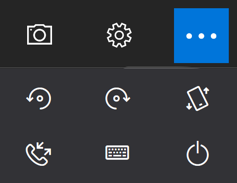
Note
Right-clicking anywhere in the remote iOS simulator window will display all the toolbar buttons as a context menu.
Touchscreen support
Many Windows computers have touch screens. Since the remote iOS Simulator for Windows supports touch interactions, you can test your app with the same pinch, swipe, and multi-finger touch gestures that you use with physical iOS devices.
Similarly, the remote iOS Simulator for Windows treats Windows Stylus input as Apple Pencil input.
Sound handling
Sounds played by the simulator will come from the host Mac's speakers. iOS sounds are not heard on Windows.
Troubleshooting
In some circumstances, an Xcode configuration problem can result in the remote iOS Simulator for Windows getting stuck in a Connecting to Mac...Checking Server...Connected... loop. When this occurs, you need to remove and reset the Simulators on your Mac build host:
- Ensure that Xamarin Mac Agent (XMA) and Xcode aren't running.
- Delete your ~/Library/Developer/CoreSimulator/Devices folder.
- Run
killall -9 com.apple.CoreSimulator.CoreSimulatorService. - Run
xcrun simctl list devices.
In some cases, Xcode may have generated simulator devices that can also cause the remote iOS Simulator for Windows to be unable to read its properties correctly as it attempts to verify which ones can be deployed to, causing a boot loop.
You can work around this by removing and creating new simulators which you can deploy to:
- Ensure that Xamarin Mac Agent (XMA) and Xcode aren't running.
- Run
xcrun simctl list | grep -w "Shutdown" | grep -o "([-A-Z0-9]*)" | sed 's/[\(\)]//g' | xargs -I uuid xcrun simctl delete uuid. - Run
xcrun simctl list devices. You should see no devices listed. - Open Xcode on your connected Mac.
- Open Windows > Devices & Simulators.
- Select Simulators.
- Create a new simulator you wish to deploy to.
Logs
If you experience issues with the remote iOS Simulator, you can view the logs in the following locations:
- Mac –
~/Library/Logs/Xamarin/Simulator.Server - Windows –
%LOCALAPPDATA%\Xamarin\Logs\Xamarin.Simulator
