Publish an Android app for ad-hoc distribution
When distributing Android apps outside Google Play, and other marketplaces, ad-hoc distribution enables you to make the app available for download on a website or server. Android requires that apps created for ad-hoc distribution use the Android Package (APK) format.
To distribute a .NET Multi-platform App UI (.NET MAUI) Android app, you'll need to sign it with a key from your keystore. Keystores are binary files that serve as repositories of certificates and private keys.
The process for publishing a .NET MAUI Android app for ad-hoc distribution is as follows:
- Ensure your app uses the correct package format. For more information, see Ensure correct package format.
- Build and sign your app in Visual Studio. For more information, see Distribute your app through Visual Studio.
Ensure correct package format
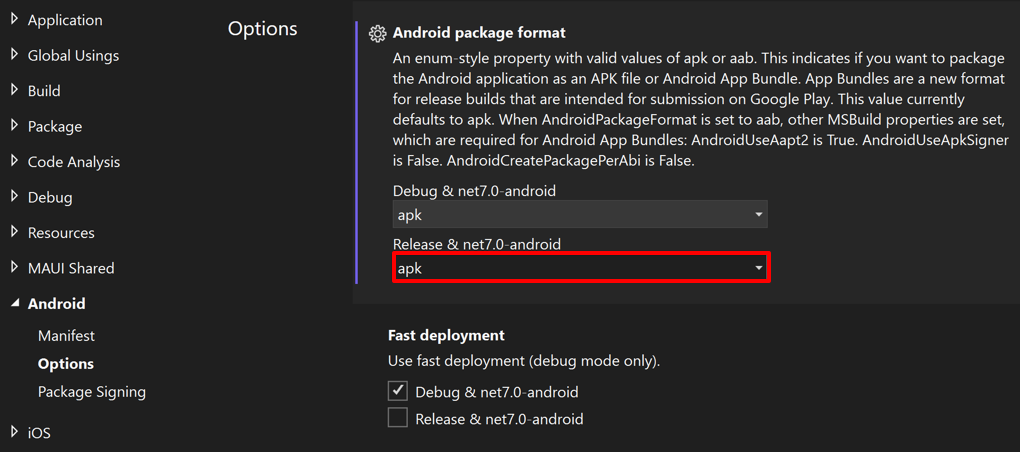
By default, the package format for .NET MAUI Android release builds is AAB. To publish a .NET MAUI Android app for ad-hoc distribution requires that you first change the package format to APK:
In Solution Explorer right-click on your .NET MAUI app project and select Properties. Then, navigate to the Android > Options tab and ensure that the value of the Release field is set to apk:
Distribute your app through Visual Studio
To build and sign your app in Visual Studio:
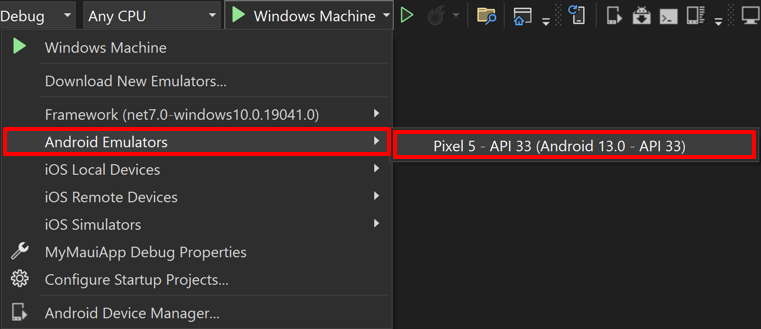
In the Visual Studio toolbar, use the Debug Target drop-down to select Android Emulators and then your chosen emulator:
In the Visual Studio toolbar, use the Solutions Configuration drop-down to change from the debug configuration to the release configuration:

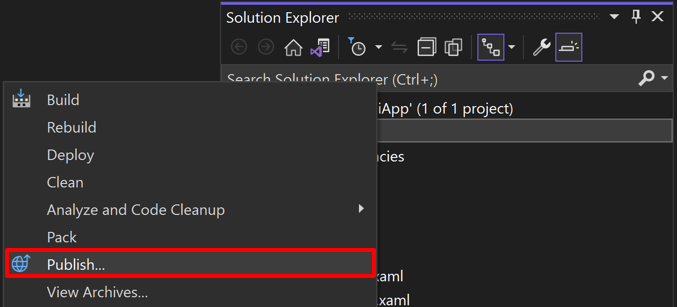
In Solution Explorer, right-click on your .NET MAUI app project and select Publish...:
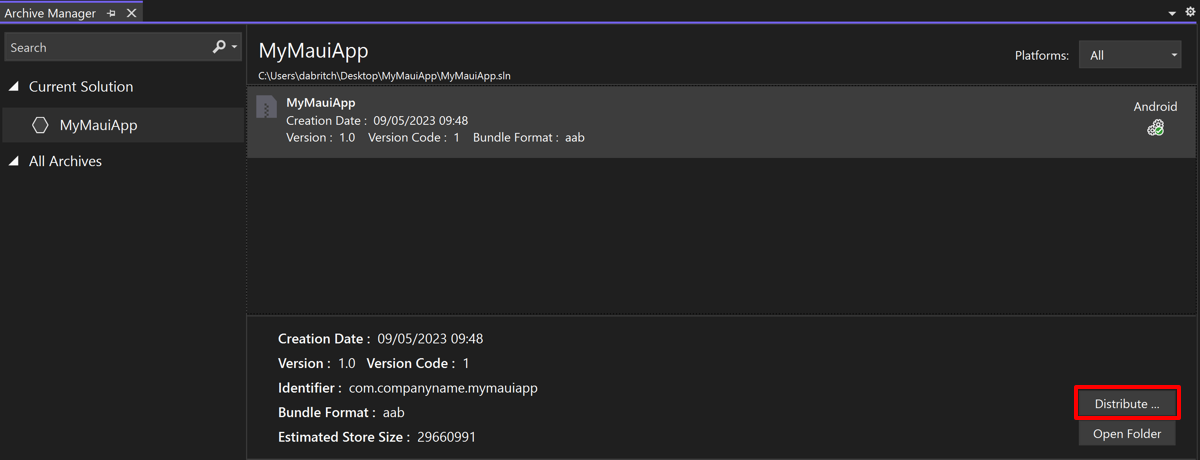
The Archive Manager will open and Visual Studio will begin to archive your app bundle:

In the Archive Manager, once archiving has successfully completed, ensure your archive is selected and then select the Distribute ... button to begin the process of distributing your app:
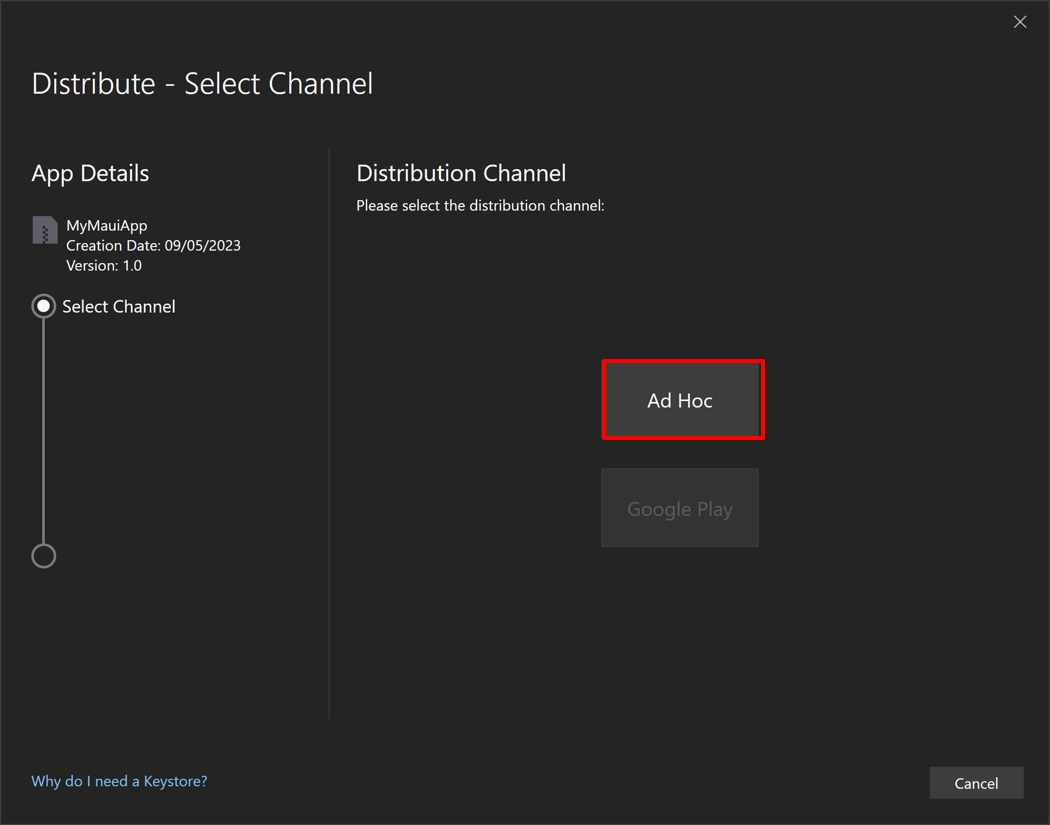
The Distribute - Select Channel dialog will appear.
In the Distribute - Select Channel dialog, select the Ad Hoc button:
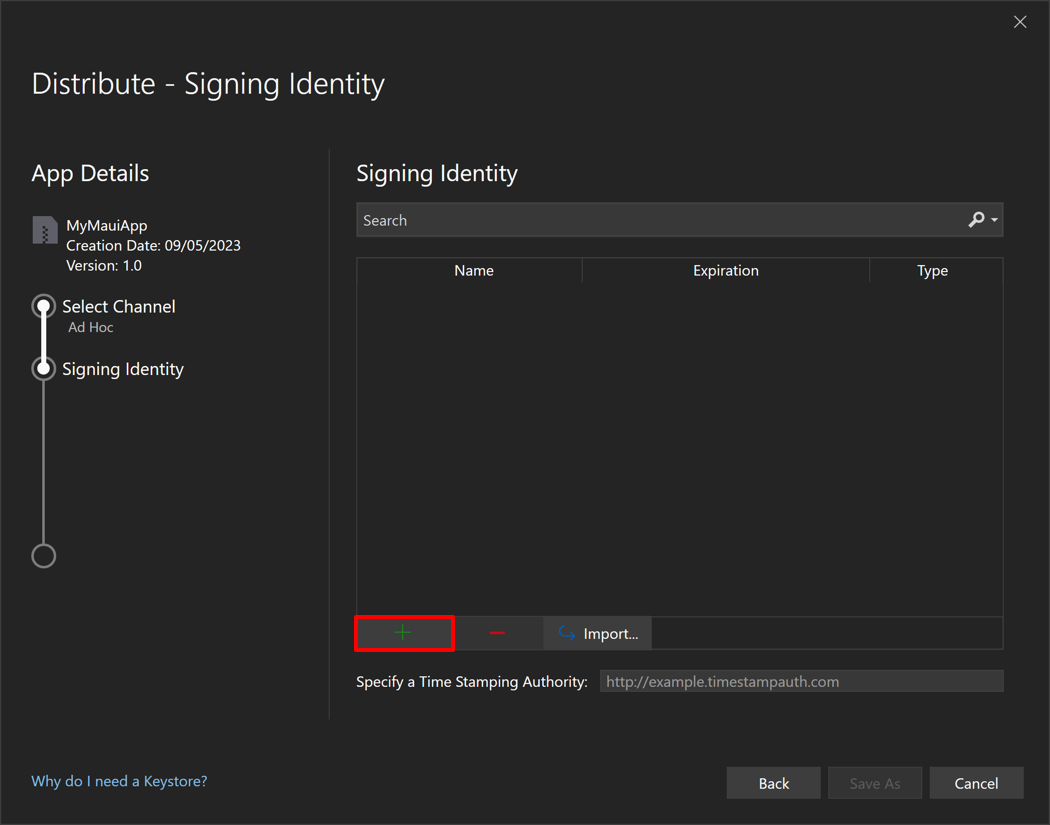
In the Distribute - Signing Identity dialog, select the + button to create a new signing identity:
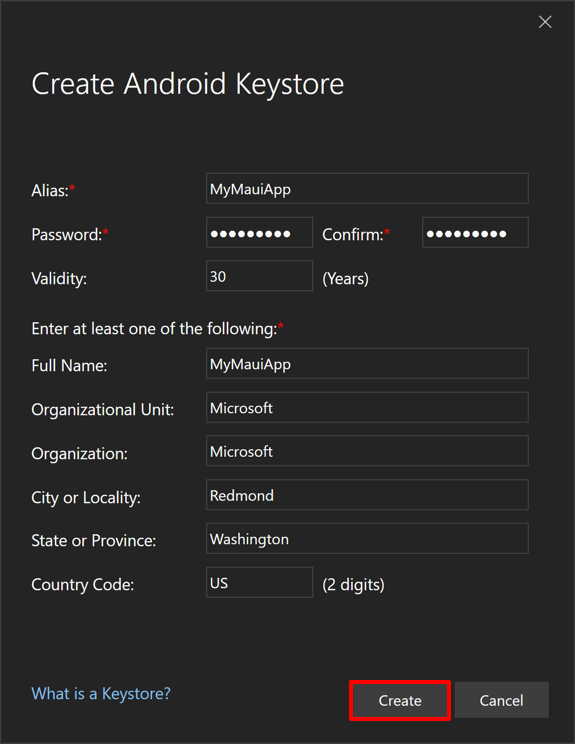
The Create Android Keystore dialog will appear.
Note
Alternatively, an existing signing identity can be used by selecting the Import button.
In the Create Android Keystore dialog, enter the required information to create a new signing identity, known as a keystore, and then select the Create button:
- Alias. Enter an identifying name for your key.
- Password. Create and confirm a secure password for your key.
- Validity. Set the length of time, in years, that your key will be valid.
- Full name, organization unit, organization, city or locality, state or province, and country code. This information is not displayed in your app, but is included in your certificate.
A new keystore, which contains a new certificate, will be saved to C:\Users{Username}\AppData\Local\Xamarin\Mono for Android\Keystore{Alias}{Alias}.keystore.
Important
The keystore and password isn't saved to your Visual Studio solution. Therefore, ensure you back up this data. If you lose it you'll be unable to sign your app with the same signing identity.
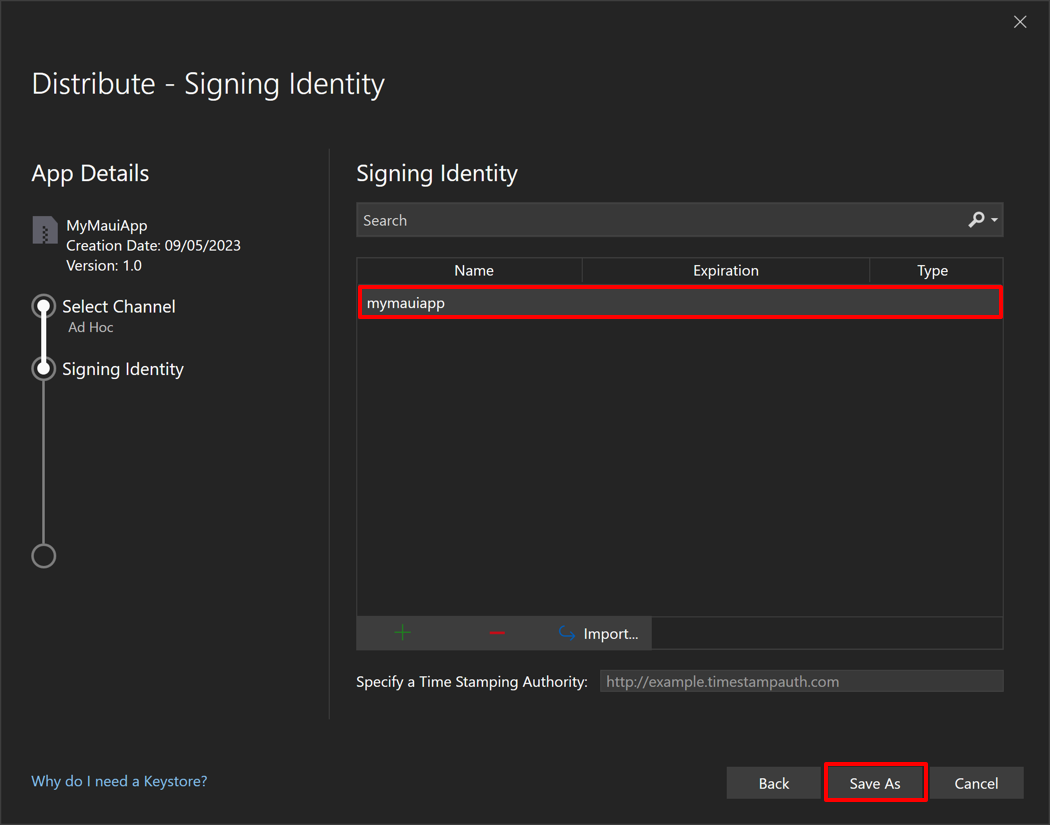
In the Distribute - Signing Identity dialog, select your newly created signing identity and select the Save As button:
The Archive Manager displays the publishing process.
In the Save As dialog, confirm the location and file name for your package is correct and select the Save button.
In the Signing Password dialog, enter your signing identity password and select the OK button:

In the Archive Manager, select the Open Distribution button once the publishing process completes:
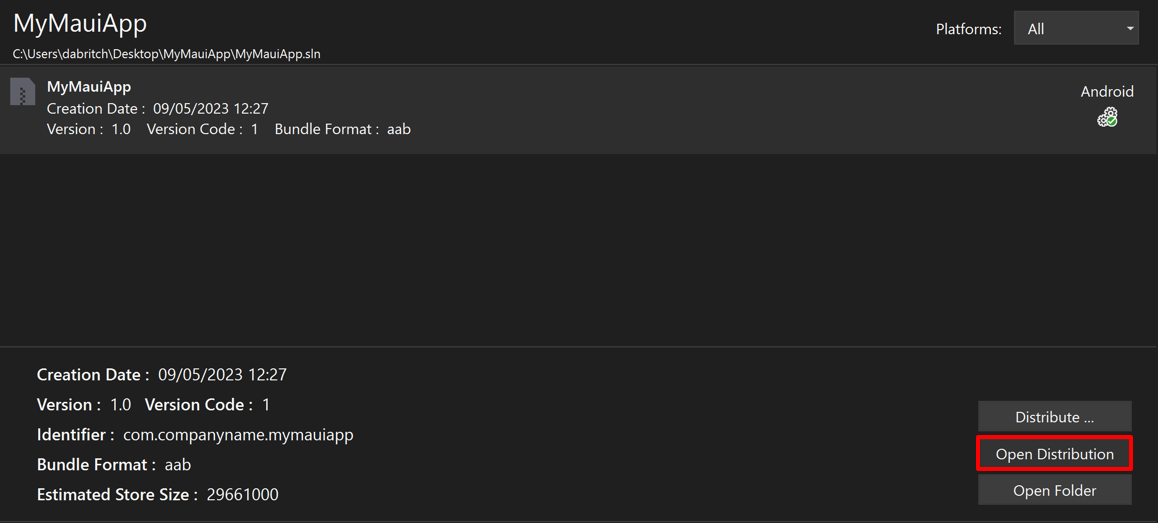
Visual Studio will open the folder containing the published app.
The app can then be distributed to Android devices through a website or server. When users browse to a download link from their Android device, the file is downloaded. Android will automatically start installing it on the device, provided that the user has configured their settings to allow the installation of apps from unknown sources. For more information about opting into allowing apps from unknown sources, see User opt-in for unknown apps and sources on developer.android.com.
