Manage hotpatches (preview) on Arc-enabled machines
Applies to: ✔️ Windows VMs ✔️ Linux VMs ✔️ On-premises environment ✔️ Azure Arc-enabled servers.
Azure Update Manager enables you to install hotpatches (preview) on Windows Server Azure Editions and Arc-enabled machines. For more information, see Hotpatch for virtual machines.
This article explains how to install hotpatches (preview) on compatible Arc-enabled machines. For hotpatches (preview) being non-intrusive on availability, you can create faster schedules and update your services immediately after release, with less planning to maintain reliability of your machines at-scale.
Supported operating systems
- Windows Server 2025 Standard Edition
- Windows Server 2025 Datacenter Edition
Prerequisites
- Verify that the machine has a supported OS SKU. Learn more.
- Ensure that Virtualization Based Security (VBS) is enabled. Learn more.
- Ensure the machine is Arc-enabled.
Manage Hotpatches (preview)
Enroll hotpatch (preview) license
To enroll hotpatch (preview) license, follow these steps:
Sign in to the Azure portal and go to Azure Update Manager.
Under Resources, select Machines and then select the specific Arc-enabled server.
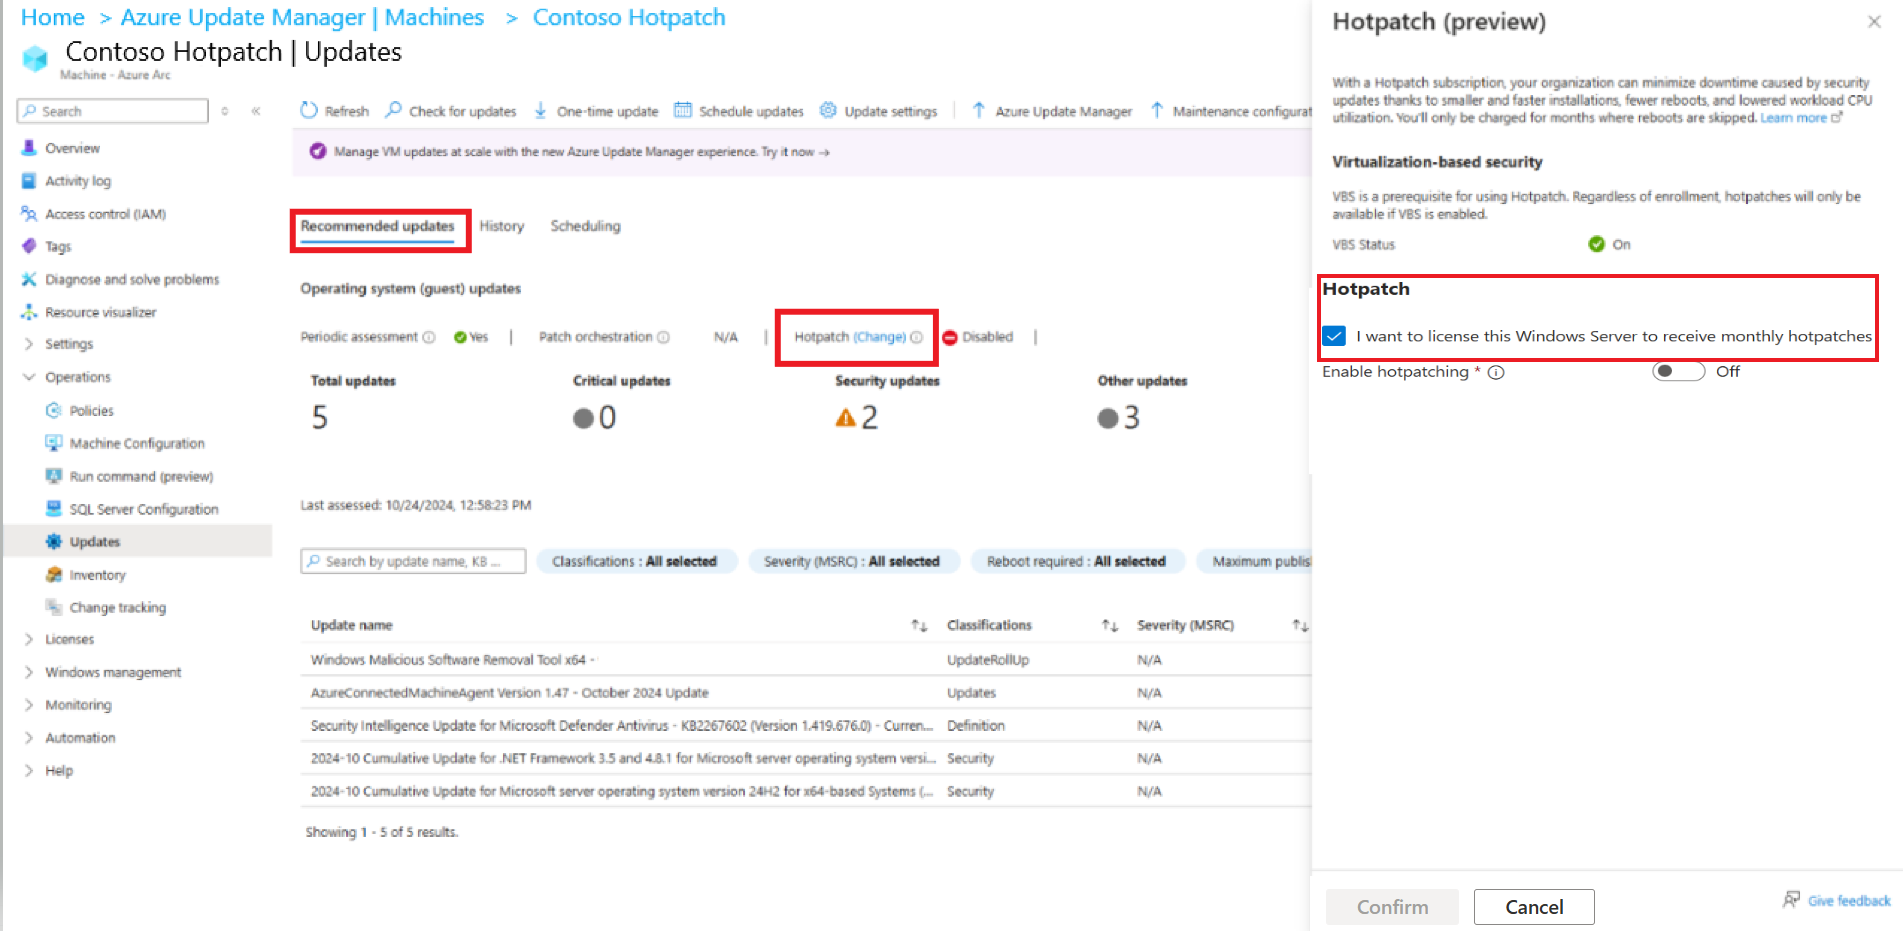
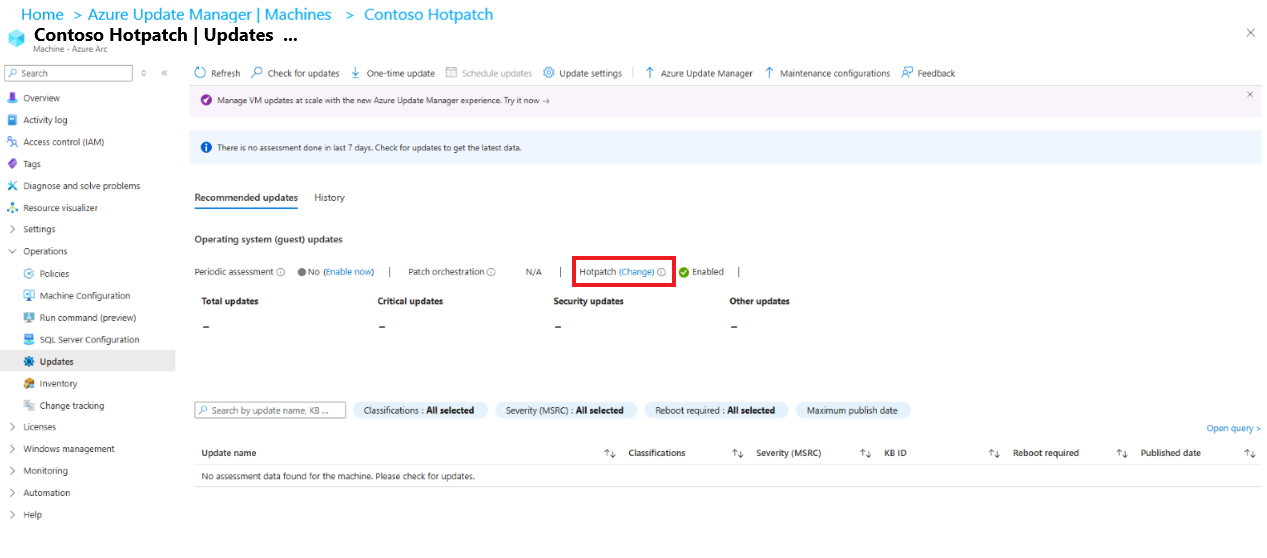
Under the Recommended updates section, in Hotpatch, select Change.
In the Hotpatch (preview), select I want to license this Windows Server to receive monthly patches option.
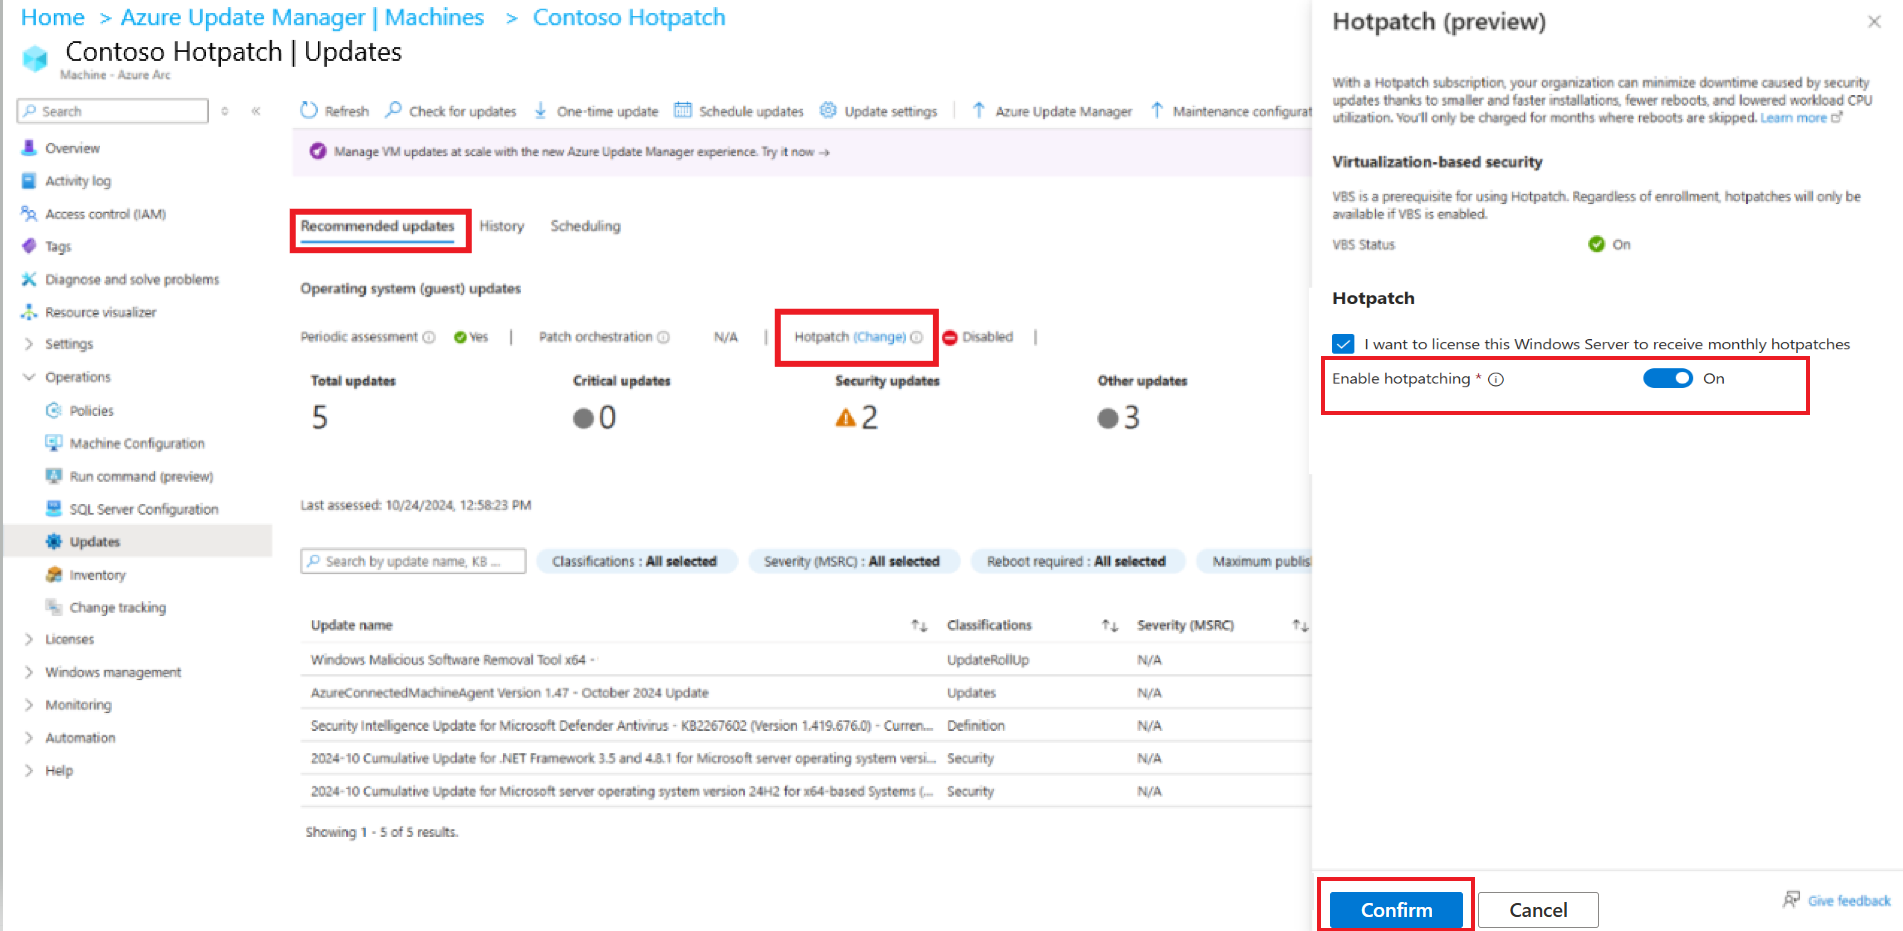
Select Enable Hotpatching and then select Confirm.
Manage hotpatch (preview) updates
After you enroll to hotpatch (preview) license, your machine automatically receives hotpatch updates.
To enable or disable hotpatching at scale, follow these steps:
Sign in to the Azure portal and go to Azure Update Manager.
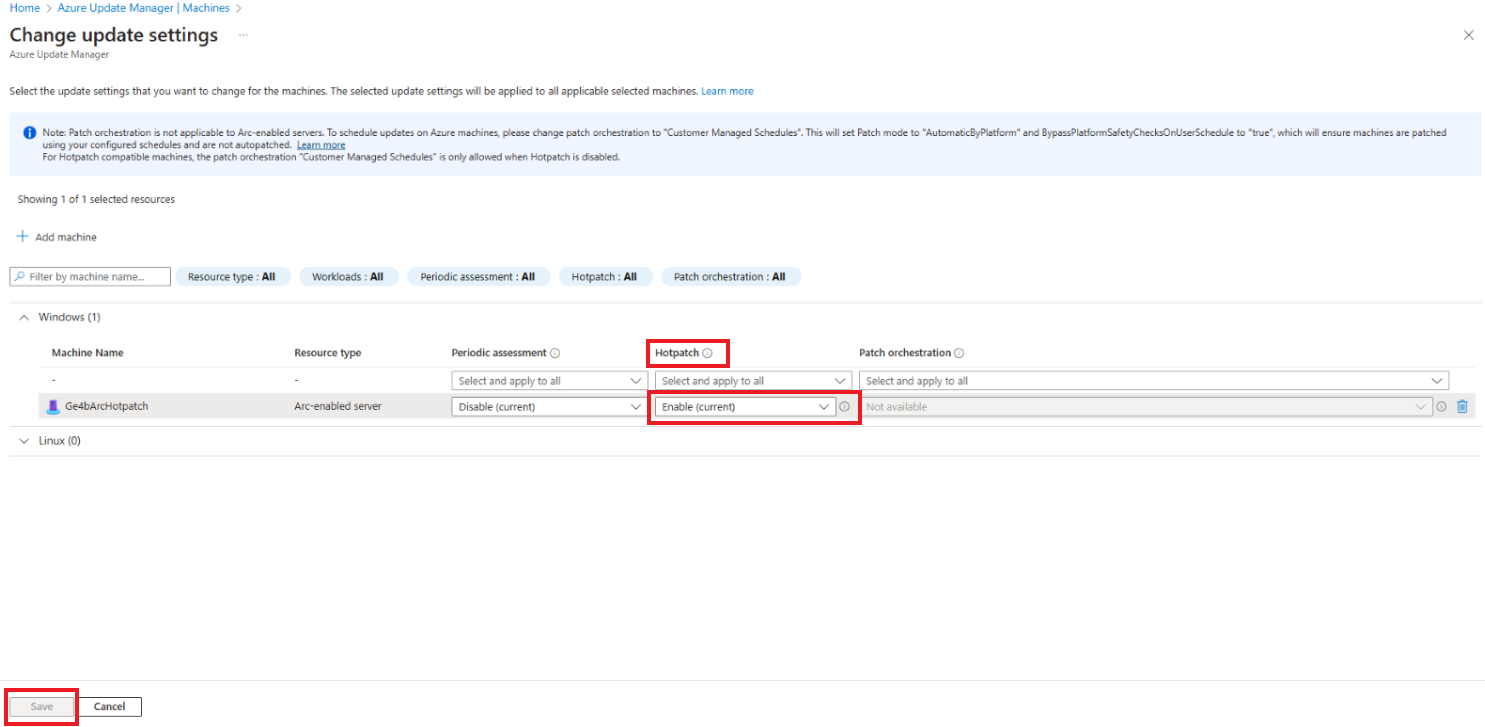
Under Resources, select Machines and in the Azure Update Manager | Machines page, under Settings, select Update settings.
In Change update settings page, select +Add machine, to select the machine to which you want to change the update settings.
In Select resources page, select the machines and then select Add to view the machines in Change update settings page.
In the Hotpatch (preview) dropdown, select Enable (current) and then select Save.
View hotpatch (preview) status
To view the hotpatch (preview) status at scale on your machines, follow these steps:
Sign in to the Azure portal and go to Azure Update Manager.
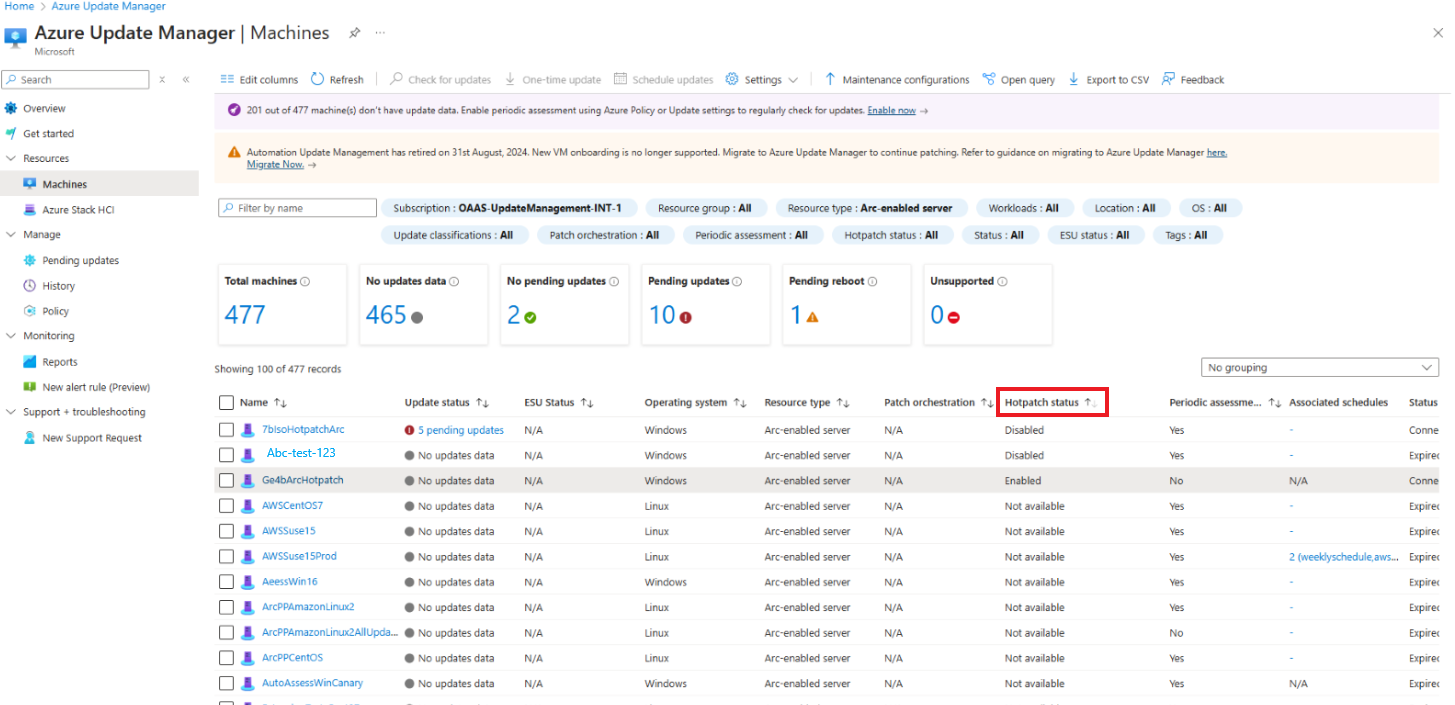
Under Resources, select Machines and then select Edit columns.
In Choose columns pane, select Hotpatch status and then select Save.
The Hotpatch status column appears in the machines grid and displays the status for all Azure machines and Arc-enabled machines. To view only Arc related details, you can filter Resource Type as Arc-enabled server.
Hotpatch (preview) statuses
| Status | Meaning |
|---|---|
| Not enrolled | License is available but not enrolled on this machine. |
| Enabled | License is enrolled and machine is enabled for receiving hotpatch updates. |
| Canceled | License has been canceled on the machine. |
| Disabled | License is enrolled but the machine is disabled for receiving hotpatch updates. |
| Pending | Interim status while enrollment is in progress. |
Check hotpatch (preview) updates
For latest hotpatch updates, enable either periodic assessment or a one-time update.
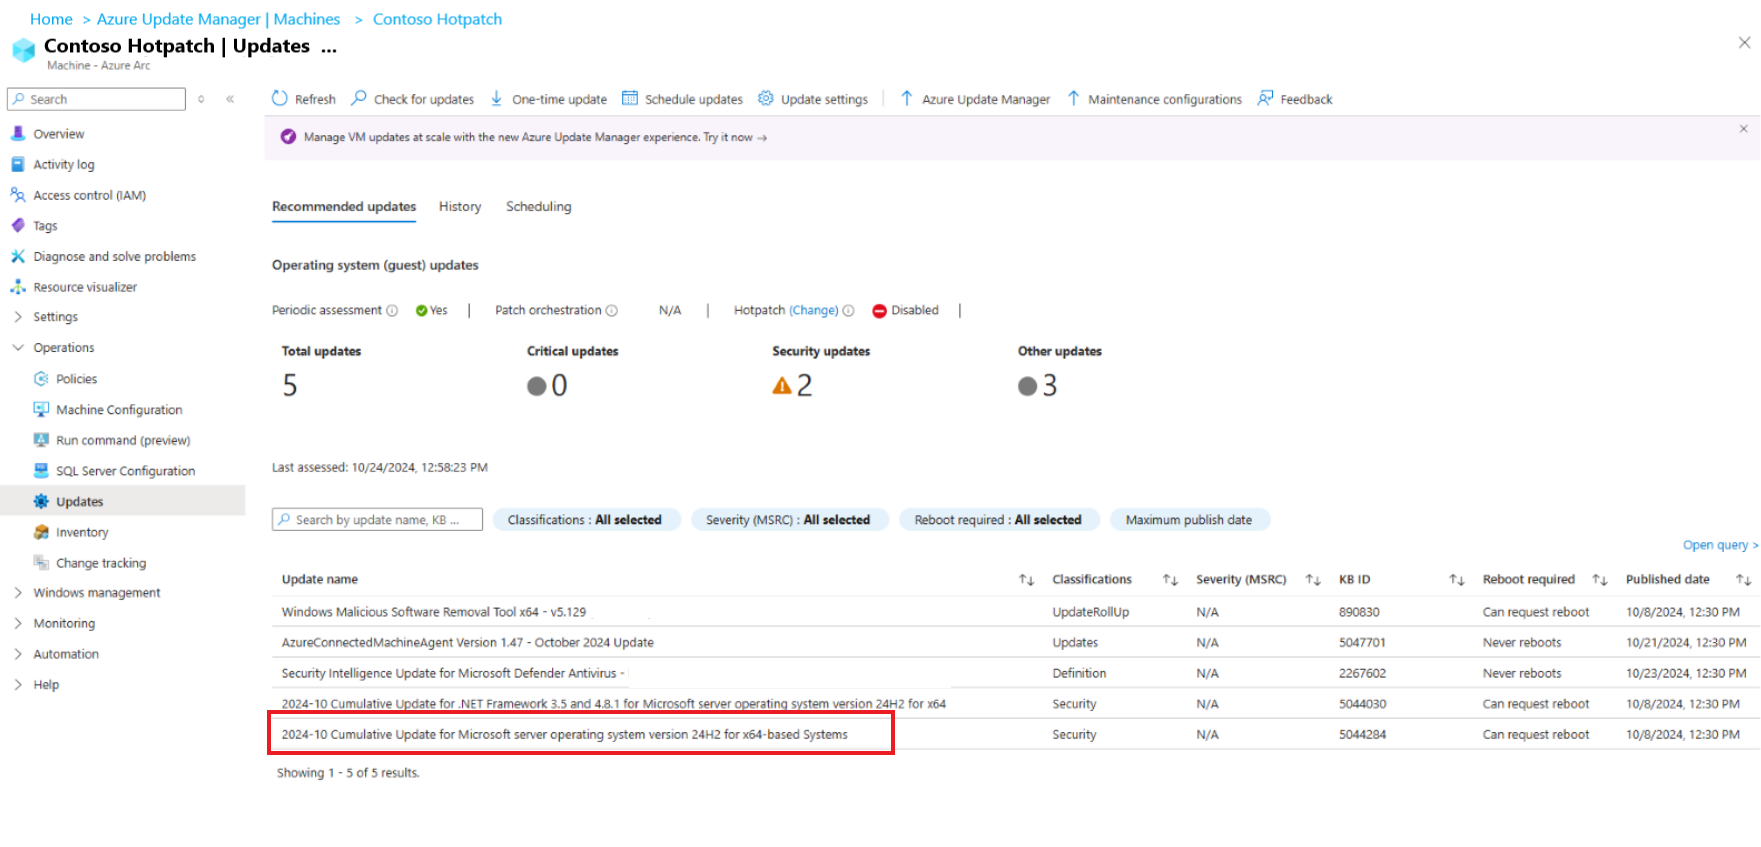
Periodic assessment automatically assesses for available updates and ensures that available patches are detected. You can view the results of the assessment on the Recommended updates tab, including the time of the last assessment.
You can also choose to trigger an on-demand patch assessment for your VM at any time using the Check for updates option and review the results after assessment completes. In this assessment result, you can view the reboot status of the given update under Reboot required column.
Install hotpatch (preview) updates
To install, you can create a user-defined schedule or one-time update. You can install it immediately after it's available, allowing your machine to get secure faster.
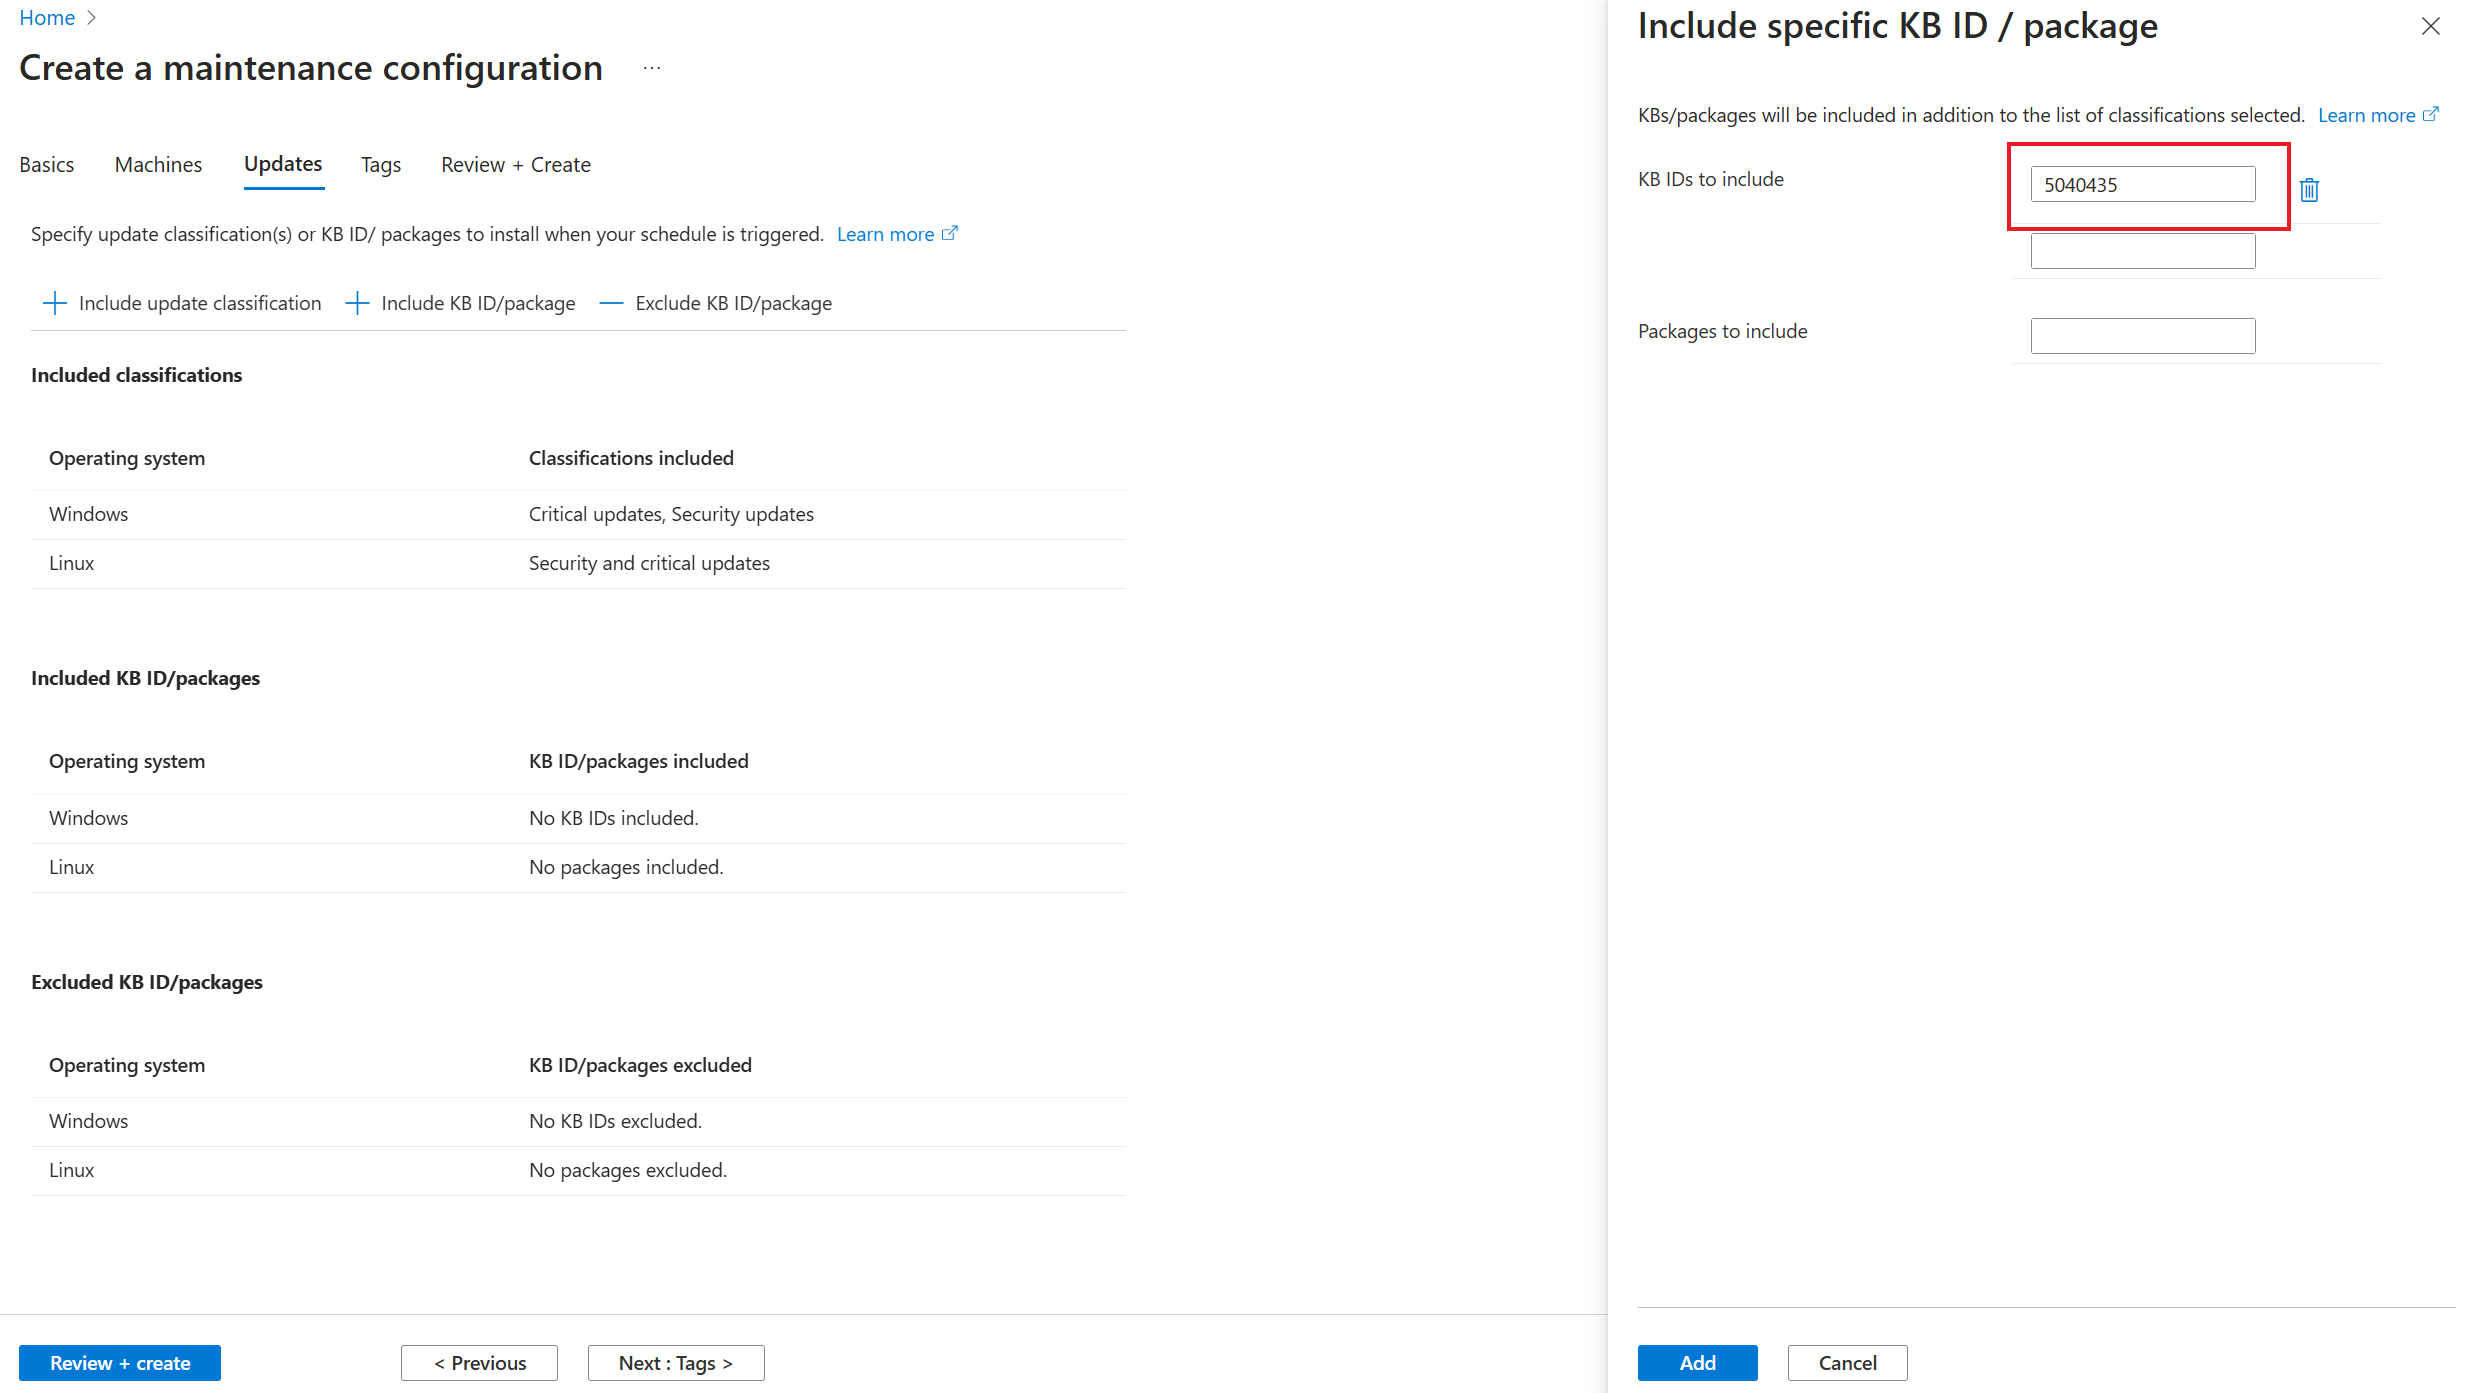
Using either of these options you can choose to install all available update classifications or only security updates. You can also specify updates to include or exclude by providing the individual hotpatch (preview) knowledge base IDs. You can enter more than one knowledge base ID in this flow.
This ensures that the hotpatch (preview) update which doesn't require reboots is installed in the same schedule or one-time update schedule, making patch installation window predictable.
View history
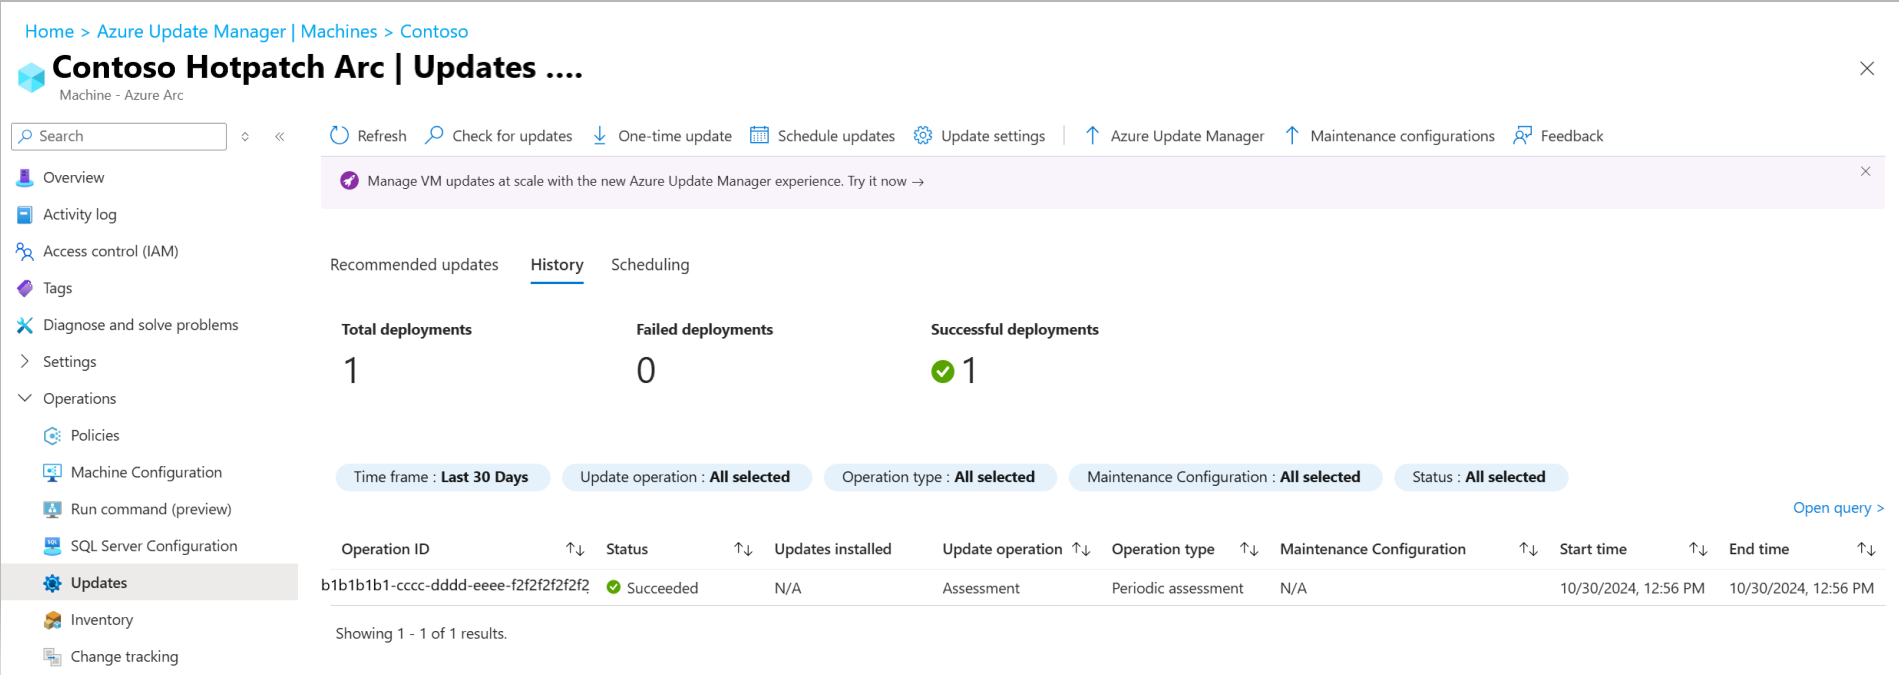
You can view the history of update deployments on your VM through the history option.
Update history displays the history for the past 30 days, along with patch installation details such as reboot status.
Next steps
- Learn more about hotpatching on Azure VMs.
- Learn more about configure update settings on your machines.
- Learn more on how to perform an on-demand update.
