Work with threat indicators in Microsoft Sentinel
Integrate threat intelligence into Microsoft Sentinel through the following activities:
- Import threat intelligence into Microsoft Sentinel by enabling data connectors to various threat intelligence platforms and feeds.
- View and manage the imported threat intelligence in Logs and on the Microsoft Sentinel Threat intelligence page.
- Detect threats and generate security alerts and incidents by using the built-in Analytics rule templates based on your imported threat intelligence.
- Visualize key information about your imported threat intelligence in Microsoft Sentinel with the Threat Intelligence workbook.
Important
Microsoft Sentinel is generally available within Microsoft's unified security operations platform in the Microsoft Defender portal. For preview, Microsoft Sentinel is available in the Defender portal without Microsoft Defender XDR or an E5 license. For more information, see Microsoft Sentinel in the Microsoft Defender portal.
View your threat indicators in Microsoft Sentinel
Learn how to work with threat intelligence indicators throughout Microsoft Sentinel.
Find and view your indicators on the Threat intelligence page
This procedure describes how to view and manage your indicators on the Threat intelligence page, which you can access from the main Microsoft Sentinel menu. Use the Threat intelligence page to sort, filter, and search your imported threat indicators without writing a Log Analytics query.
To view your threat intelligence indicators on the Threat intelligence page:
For Microsoft Sentinel in the Azure portal, under Threat management, select Threat intelligence.
For Microsoft Sentinel in the Defender portal, select Microsoft Sentinel > Threat management > Threat intelligence.
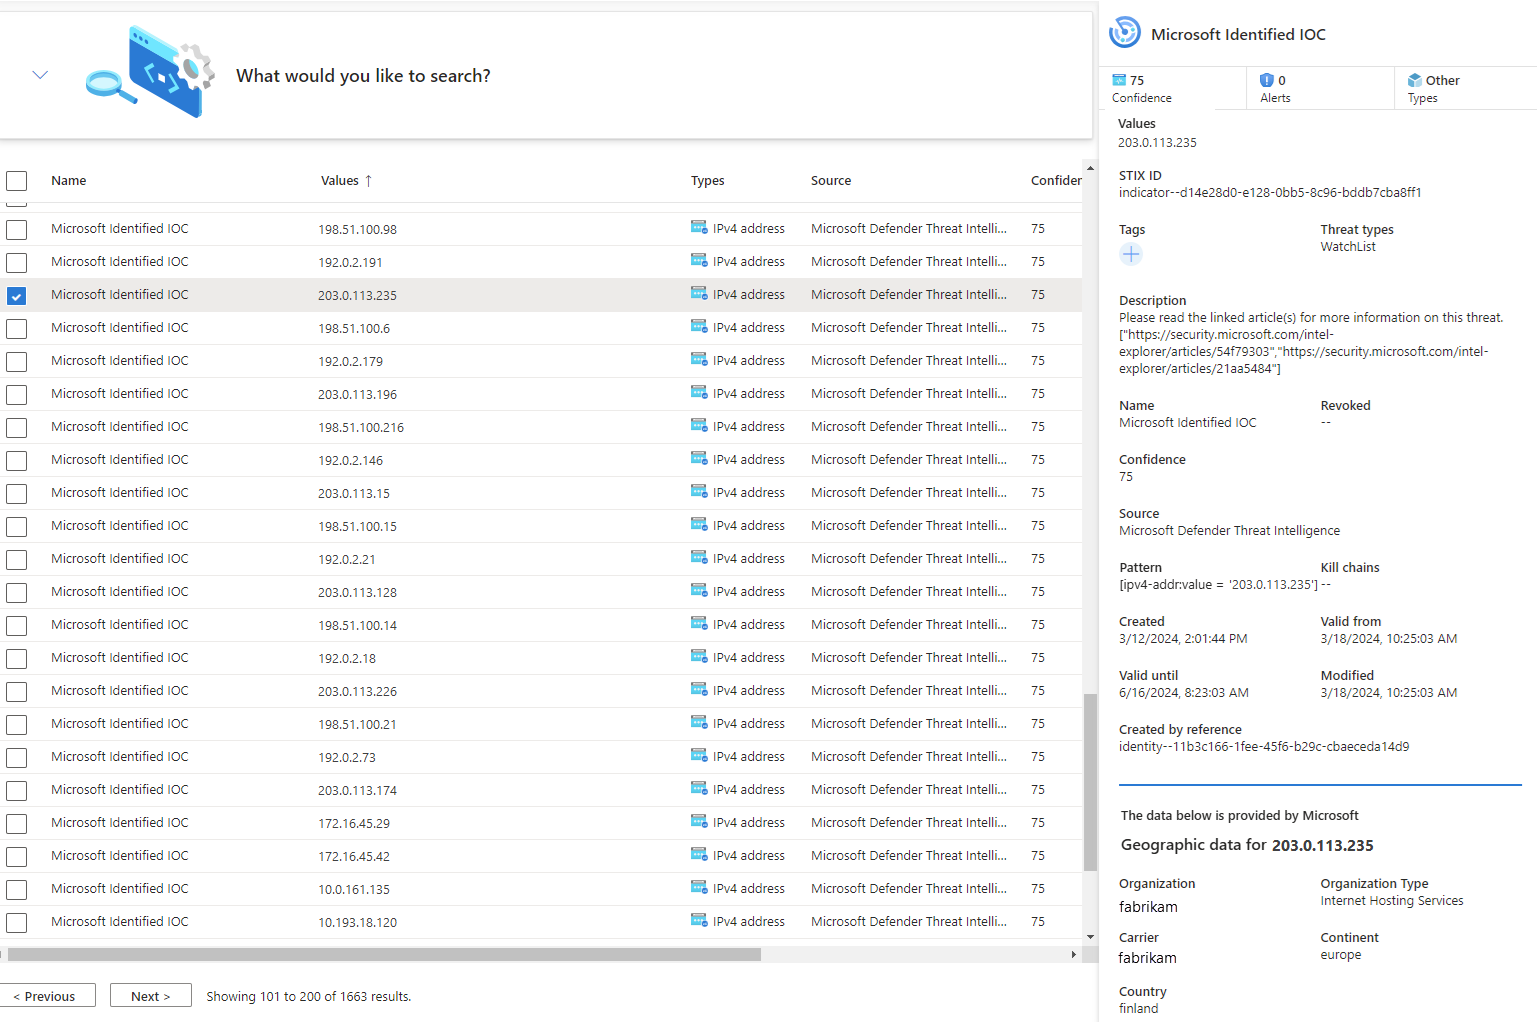
From the grid, select the indicator for which you want to view more information. The indicator's information includes confidence levels, tags, and threat types.
Microsoft Sentinel only displays the most current version of indicators in this view. For more information on how indicators are updated, see Understand threat intelligence.
IP and domain name indicators are enriched with extra GeoLocation and WhoIs data. This data provides more context for investigations where the selected indicator is found.
Here's an example.
Important
GeoLocation and WhoIs enrichment is currently in preview. The Azure Preview Supplemental Terms include more legal terms that apply to Azure features that are in beta, preview, or otherwise not yet released into general availability.
Find and view your indicators in Logs
This procedure describes how to view your imported threat indicators in the Microsoft Sentinel Logs area, together with other Microsoft Sentinel event data, regardless of the source feed or the connector that you used.
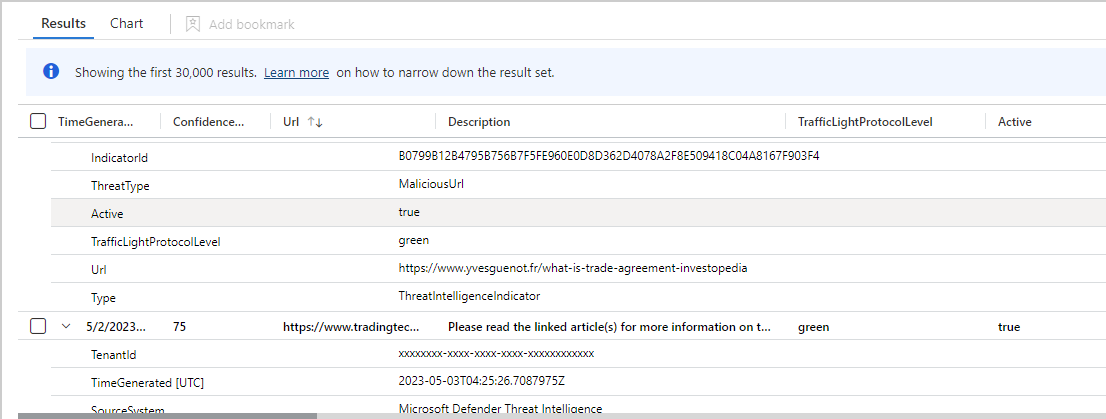
Imported threat indicators are listed in the Microsoft Sentinel ThreatIntelligenceIndicator table. This table is the basis for threat intelligence queries run elsewhere in Microsoft Sentinel, such as in Analytics or Workbooks.
To view your threat intelligence indicators in Logs:
For Microsoft Sentinel in the Azure portal, under General, select Logs.
For Microsoft Sentinel in the Defender portal, select Investigation & response > Hunting > Advanced hunting.
The
ThreatIntelligenceIndicatortable is located under the Microsoft Sentinel group.Select the Preview data icon (the eye) next to the table name. Select See in query editor to run a query that shows records from this table.
Your results should look similar to the sample threat indicator shown here.
Create and tag indicators
Use the Threat Intelligence page to create threat indicators directly within the Microsoft Sentinel interface and perform two common threat intelligence administrative tasks: indicator tagging and creating new indicators related to security investigations.
Create a new indicator
For Microsoft Sentinel in the Azure portal, under Threat management, select Threat intelligence.
For Microsoft Sentinel in the Defender portal, select Microsoft Sentinel > Threat management > Threat intelligence.
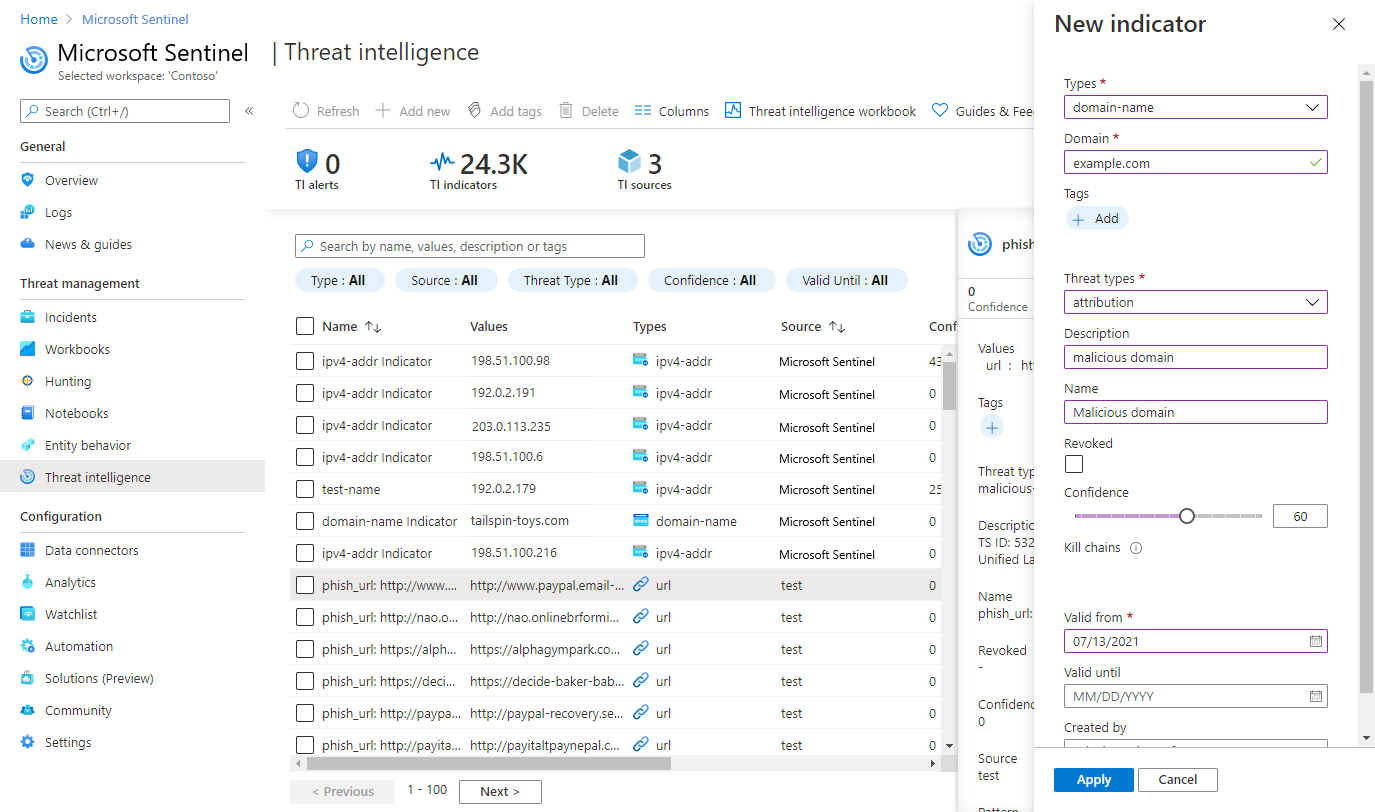
On the menu bar at the top of the page, select Add new.
Choose the indicator type, and then fill in the form on the New indicator pane. The required fields are marked with an asterisk (*).
Select Apply. The indicator is added to the indicators list and is also sent to the
ThreatIntelligenceIndicatortable in Logs.
Tag and edit threat indicators
Tagging threat indicators is an easy way to group them together to make them easier to find. Typically, you might apply tags to an indicator related to a particular incident, or if the indicator represents threats from a particular known actor or well-known attack campaign. After you search for the indicators you want to work with, tag them individually. Multiselect indicators and tag them all at once with one or more tags. Because tagging is free-form, we recommend that you create standard naming conventions for threat indicator tags.
With Microsoft Sentinel, you can also edit indicators, whether they were created directly in Microsoft Sentinel or come from partner sources, like TIP and TAXII servers. For indicators created in Microsoft Sentinel, all fields are editable. For indicators that come from partner sources, only specific fields are editable, including tags, Expiration date, Confidence, and Revoked. Either way, only the latest version of the indicator appears on the Threat Intelligence page. For more information on how indicators are updated, see Understand threat intelligence.
Gain insights about your threat intelligence with workbooks
Use a purpose-built Microsoft Sentinel workbook to visualize key information about your threat intelligence in Microsoft Sentinel, and customize the workbook according to your business needs.
Here's how to find the threat intelligence workbook provided in Microsoft Sentinel, and an example of how to make edits to the workbook to customize it.
From the Azure portal, go to Microsoft Sentinel.
Choose the workspace to which you imported threat indicators by using either threat intelligence data connector.
Under the Threat management section of the Microsoft Sentinel menu, select Workbooks.
Find the workbook titled Threat Intelligence. Verify that you have data in the
ThreatIntelligenceIndicatortable.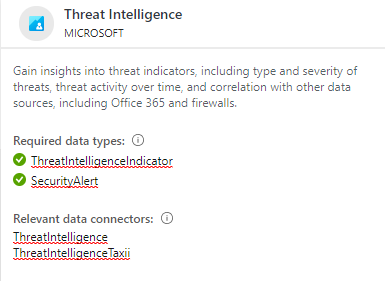
Select Save, and choose an Azure location in which to store the workbook. This step is required if you intend to modify the workbook in any way and save your changes.
Now select View saved workbook to open the workbook for viewing and editing.
You should now see the default charts provided by the template. To modify a chart, select Edit at the top of the page to start the editing mode for the workbook.
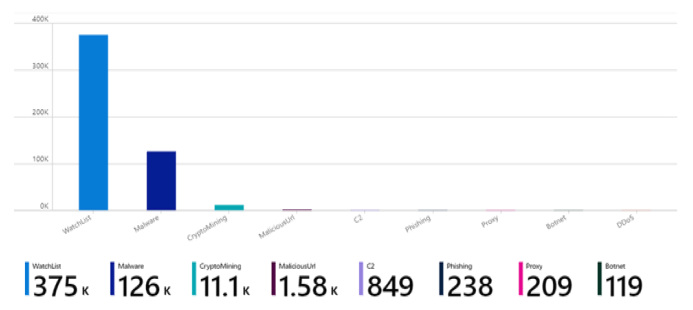
Add a new chart of threat indicators by threat type. Scroll to the bottom of the page and select Add Query.
Add the following text to the Log Analytics workspace Log Query text box:
ThreatIntelligenceIndicator
| summarize count() by ThreatType
On the Visualization dropdown menu, select Bar chart.
Select Done editing, and view the new chart for your workbook.
Workbooks provide powerful interactive dashboards that give you insights into all aspects of Microsoft Sentinel. You can do many tasks with workbooks, and the provided templates are a great starting point. Customize the templates or create new dashboards by combining many data sources so that you can visualize your data in unique ways.
Microsoft Sentinel workbooks are based on Azure Monitor workbooks, so extensive documentation and many more templates are available. For more information, see Create interactive reports with Azure Monitor workbooks.
There's also a rich resource for Azure Monitor workbooks on GitHub, where you can download more templates and contribute your own templates.
Related content
In this article, you learned how to work with threat intelligence indicators throughout Microsoft Sentinel. For more about threat intelligence in Microsoft Sentinel, see the following articles:
- Understand threat intelligence in Microsoft Sentinel.
- Connect Microsoft Sentinel to STIX/TAXII threat intelligence feeds.
- See which TIPs, TAXII feeds, and enrichments can be readily integrated with Microsoft Sentinel.
