Configure customer-managed keys for data encryption in Azure AI Search
Azure AI Search automatically encrypts data at rest with Microsoft-managed keys. If you need another layer of encryption or the ability to revoke keys and shut down access to content, you can use keys that you create and manage in Azure Key Vault. This article explains how to set up customer-managed key (CMK) encryption.
You can store keys using either Azure Key Vault or Azure Key Vault Managed HSM (Hardware Security Module). An Azure Key Vault Managed HSM is an FIPS 140-2 Level 3 validated HSM. HSM support is new in Azure AI Search. To migrate to HSM, rotate your keys and choose Managed HSM for storage.
Important
CMK encryption is irreversible. You can rotate keys and change CMK configuration, but index encryption lasts for the lifetime of the index. Post-CMK encryption, an index is only accessible if the search service has access to the key. If you revoke access to the key by deleting or changing role assignment, the index is unusable and the service can't be scaled until the index is deleted or access to the key is restored. If you delete or rotate keys, the most recent key is cached for up to 60 minutes.
CMK encrypted objects
CMK encryption applies to individual objects when they're created. This means you can't encrypt objects that already exist. CMK encryption occurs each time an object is saved to disk, for both data at rest (long-term storage) or temporary cached data (short-term storage). With CMK, the disk never sees unencrypted data.
Objects that can be encrypted include indexes, synonym lists, indexers, data sources, and skillsets. Encryption is computationally expensive to decrypt so only sensitive content is encrypted.
Encryption is performed over the following content:
All content within indexes and synonym lists.
Sensitive content in indexers, data sources, skillsets, and vectorizers. Sensitive content refers to connection strings, descriptions, identities, keys, and user inputs. For example, skillsets have Azure AI services keys, and some skills accept user inputs, such as custom entities. In both cases, keys and user inputs are encrypted. Any references to external resources (such as Azure data sources or Azure OpenAI models) are also encrypted.
If you require CMK across your search service, set an enforcement policy.
Prerequisites
Azure AI Search on a billable tier (Basic or higher, in any region).
Azure Key Vault and a key vault with soft-delete and purge protection enabled. Or, Azure Key Vault Managed HSM. This resource can be in any subscription, but it must be in the same tenant as Azure AI Search.
Ability to set up permissions for key access and to assign roles. To create keys, you must be Key Vault Crypto Officer in Azure Key Vault or Managed HSM Crypto Officer in Azure Key Vault Managed HSM.
To assign roles, you must be subscription Owner, User Access Administrator, Role-based Access Control Administrator, or be assigned to a custom role with Microsoft.Authorization/roleAssignments/write permissions.
Step 1: Create an encryption key
Use either Azure Key Vault or Azure Key Vault Managed HSM to create a key. Azure AI Search encryption supports RSA keys of sizes 2048, 3072 and 4096. For more information about supported key types, see About keys.
We recommend reviewing these tips before you start.
Required operations are Wrap, Unwrap, Encrypt, and Decrypt.
You can create a key vault using the Azure portal, Azure CLI, or Azure PowerShell.
Sign in to the Azure portal and open your key vault overview page.
Select Objects > Keys on the left, and then select Generate/Import.
In the Create a key pane, from the list of Options, choose Generate to create a new key.
Enter a Name for your key, and accept the defaults for other key properties.
Optionally, set a key rotation policy to enable auto rotation.
Select Create to start the deployment.
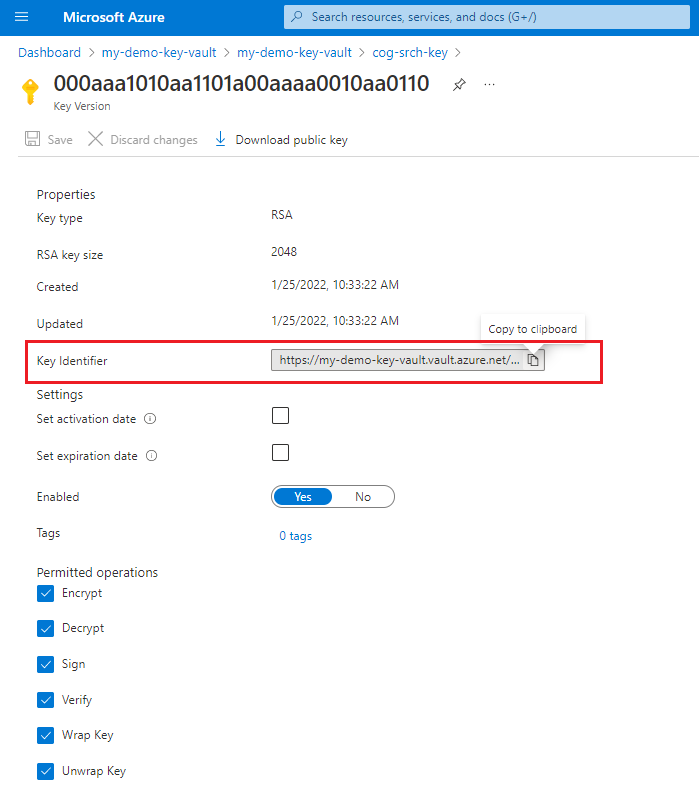
After the key is created, get its key identifier. Select the key, select the current version, and then copy the key identifier. It's composed of the key value Uri, the key name, and the key version. You need the identifier to define an encrypted index in Azure AI Search. Recall that required operations are Wrap, Unwrap, Encrypt, and Decrypt.
Step 2: Create a security principal
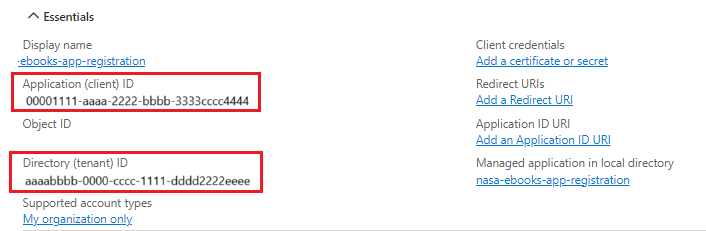
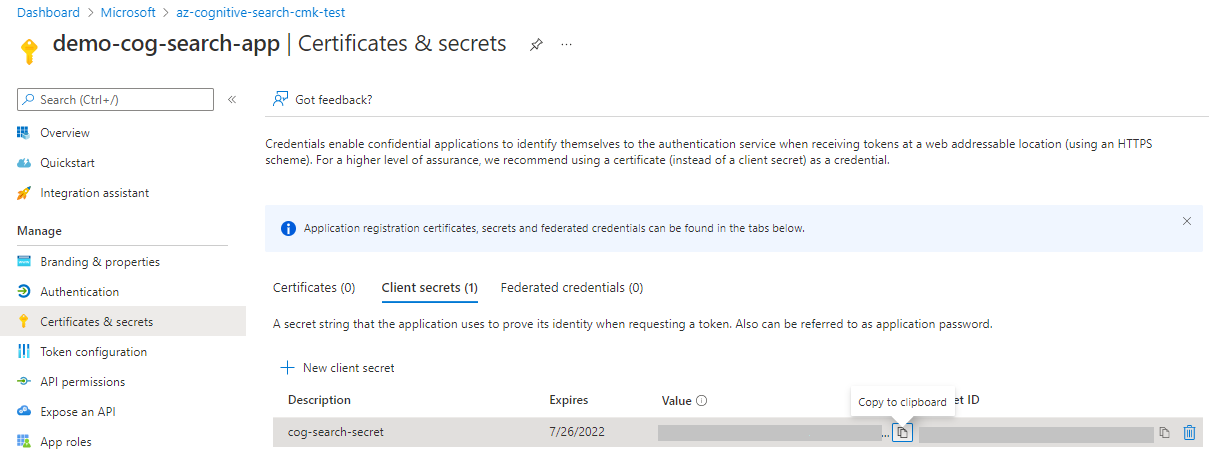
Create a security principal that your search service uses to access to the encryption key. You can use a managed identity and role assignment, or you can register an application and have the search service provide the application ID on requests.
We recommend using a managed identity and roles. You can use either a system-managed identity or user-managed identity. A managed identity enables your search service to authenticate through Microsoft Entra ID, without storing credentials (ApplicationID or ApplicationSecret) in code. The lifecycle of this type of managed identity is tied to the lifecycle of your search service, which can only have one system assigned managed identity. For more information about how managed identities work, see What are managed identities for Azure resources.
Enable the system assigned managed identity for your search service. It's a two-click operation, enable and save.

Step 3: Grant permissions
If you configured your search service to use a managed identity, assign roles that give it access to the encryption key.
Role-based access control is recommended over the Access Policy permission model. For more information or migration steps, start with Azure role-based access control (Azure RBAC) vs. access policies (legacy).
Sign in to the Azure portal and find your key vault.
Select Access control (IAM) and select Add role assignment.
Select a role:
- On Azure Key Vault, select Key Vault Crypto Service Encryption User.
- On Managed HSM, select Managed HSM Crypto Service Encryption User.
Select managed identities, select members, and then select the managed identity of your search service. If you're testing locally, assign this role to yourself as well.
Select Review + Assign.
Wait a few minutes for the role assignment to become operational.
Step 4: Encrypt content
Encryption occurs when you create or update an object. You can use the Azure portal for selected objects. For any object, use the Search REST API or an Azure SDK. Review the Python example in this article to see how content is encrypted programmatically.
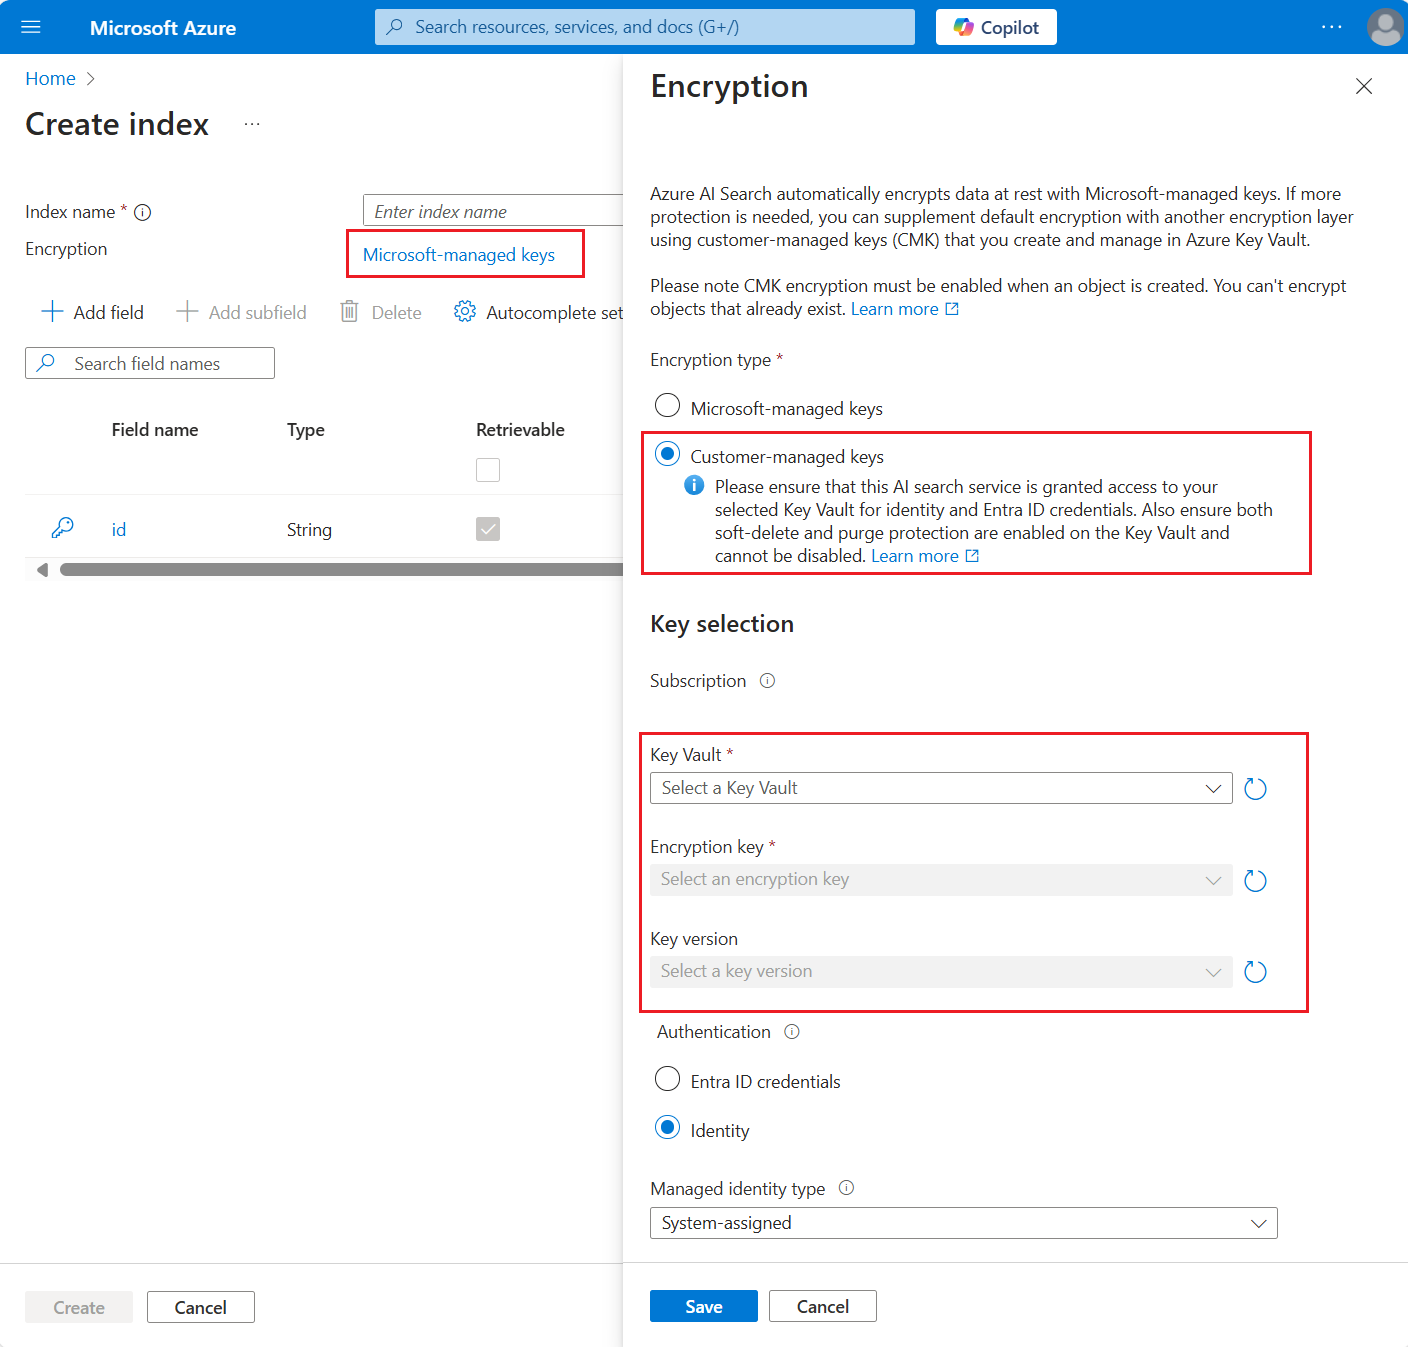
When you create a new object in the Azure portal, you can specify a predefined customer-managed key in a key vault. The Azure portal lets you enable CMK encryption for:
- Indexes
- Data sources
- Indexers
Requirements for using the Azure portal are that the key vault and key must exist, and you completed the previous steps for authorized access to the key.
In the Azure portal, skillsets are defined in JSON view. Use the JSON shown in the REST API examples to provide a customer-managed key on a skillset.
Sign in to the Azure portal and open your search service page.
Under Search management, select Indexes, Indexers, or Data Sources.
Add a new object. In the object definition, select Microsoft-managed encryption.
Select Customer-managed keys and use the pickers to select the vault, key, and version.
Step 5: Test encryption
To verify encryption is working, revoke the encryption key, query the index (it should be unusable), and then reinstate the encryption key.
Use the Azure portal for this task. Make sure you have a role assignment that grants read access to the key.
On the Azure Key Vault page, select Objects > Keys.
Select the key you created, and then select Delete.
On the Azure AI Search page, select Search management > Indexes.
Select your index and use Search Explorer to run a query. You should get an error.
Return to the Azure Key Vault Objects > Keys page.
Select Manage deleted keys.
Select your key, and then select Recover.
Return to your index in Azure AI Search and rerun the query. You should see search results. If you don't see immediate results, wait a minute and try again.
Set up a policy to enforce CMK compliance
Azure policies help to enforce organizational standards and to assess compliance at-scale. Azure AI Search has two optional built-in policies related to CMK. These policies apply to new and existing search services.
| Effect | Effect if enabled |
|---|---|
| AuditIfNotExists | Checks for policy compliance: do objects have a customer-managed key defined, and is the content encrypted. This effect applies to existing services with content. It's evaluated each time an object is created or updated, or per the evaluation schedule. Learn more... |
| Deny | Checks for policy enforcement: does the search service have SearchEncryptionWithCmk set to Enabled. This effect applies to new services only, which must be created with encryption enabled. Existing services remain operational but you can't update them unless you patch the service. None of the tools used for provisioning services expose this property, so be aware that setting the policy limits you to programmatic set up. |
Assign a policy
In the Azure portal, navigate to a built-in policy and then select Assign.
Here's an example of the AuditIfExists policy in the Azure portal:

Set policy scope by selecting the subscription and resource group. Exclude any search services for which the policy shouldn't apply.
Accept or modify the defaults. Select Review +create, followed by Create.
Enable CMK policy enforcement
A policy that's assigned to a resource group in your subscription is effective immediately. Audit policies flag non-compliant resources, but Deny policies prevent the creation and update of non-compliant search services. This section explains how to create a compliant search service or update a service to make it compliant. To bring objects into compliance, start at step one of this article.
Create a compliant search service
For new search services, create them with SearchEncryptionWithCmk set to Enabled.
Neither the Azure portal nor the command line tools (the Azure CLI and Azure PowerShell) provide this property natively, but you can use Management REST API to provision a search service with a CMK policy definition.
This example is from Manage your Azure AI Search service with REST APIs, modified to include the SearchEncryptionWithCmk property.
### Create a search service (provide an existing resource group)
@resource-group = my-rg
@search-service-name = my-search
PUT https://management.azure.com/subscriptions/{{subscriptionId}}/resourceGroups/{{resource-group}}/providers/Microsoft.Search/searchServices/{{search-service-name}}?api-version=2023-11-01 HTTP/1.1
     Content-type: application/json
     Authorization: Bearer {{token}}

    {
        "location": "North Central US",
        "sku": {
            "name": "basic"
        },
        "properties": {
            "replicaCount": 1,
            "partitionCount": 1,
            "hostingMode": "default",
            "encryptionWithCmk": {
                "enforcement": "Enabled"
        }
      }
    }
Update an existing search service
For existing search services that are now non-compliant, patch them using Services - Update API or the Azure CLI az resource update command. Patching the services restores the ability to update search service properties.
PATCH https://management.azure.com/subscriptions/<your-subscription-Id>/resourceGroups/<your-resource-group-name>/providers/Microsoft.Search/searchServices/<your-search-service-name>?api-version=2023-11-01

{
  "properties": {
      "encryptionWithCmk": {
          "enforcement": "Enabled"
      }
  }
}
Rotate or update encryption keys
Use the following instructions to rotate keys or to migrate from Azure Key Vault to the Hardware Security Model (HSM).
For key rotation, we recommend using the autorotation capabilities of Azure Key Vault. If you use autorotation, omit the key version in object definitions. The latest key is used, rather than a specific version.
When you change a key or its version, any object that uses the key must first be updated to use the new values before you delete the old values. Otherwise, the object becomes unusable because it can't be decrypted.
Recall that keys are cached for 60 minutes. Remember this when testing and rotating keys.
Create a new key in key vault, but leave the original key available. In this step, you can switch from key vault to HSM.
Update the encryptionKey properties on an index or synonym map to use the new values. Only objects that were originally created with this property can be updated to use a different value.
Disable or delete the previous key in the key vault. Monitor key access to verify the new key is being used.
For performance reasons, the search service caches the key for up to several hours. If you disable or delete the key without providing a new one, queries continue to work on a temporary basis until the cache expires. However, once the search service can no longer decrypt content, you get this message: "Access forbidden. The query key used might have been revoked - please retry."
Key Vault tips
If you're new to Azure Key Vault, review this quickstart to learn about basic tasks: Set and retrieve a secret from Azure Key Vault using PowerShell.
Use as many key vaults as you need. Managed keys can be in different key vaults. A search service can have multiple encrypted objects, each one encrypted with a different customer-managed encryption key, stored in different key vaults.
Use the same Azure tenant so that you can retrieve your managed key through role assignments and by connecting through a system or user-managed identity. For more information about creating a tenant, see Set up a new tenant.
Enable purge protection and soft-delete on a key vault. Due to the nature of encryption with customer-managed keys, no one can retrieve your data if your Azure Key Vault key is deleted. To prevent data loss caused by accidental Key Vault key deletions, soft-delete and purge protection must be enabled on the key vault. Soft-delete is enabled by default, so you'll only encounter issues if you purposely disable it. Purge protection isn't enabled by default, but it's required for CMK encryption in Azure AI Search.
Enable logging on the key vault so that you can monitor key usage.
Enable autorotation of keys or follow strict procedures during routine rotation of key vault keys and application secrets and registration. Always update all encrypted content to use new secrets and keys before deleting the old ones. If you miss this step, your content can't be decrypted.
Work with encrypted content
With CMK encryption, you might notice latency for both indexing and queries due to the extra encrypt/decrypt work. Azure AI Search doesn't log encryption activity, but you can monitor key access through key vault logging.
We recommend that you enable logging as part of key vault configuration.
Add a diagnostic setting in key vault that uses the workspace for data retention.
Select audit or allLogs for the category, give the diagnostic setting a name, and then save it.
Python example of an encryption key configuration
This section shows the Python representation of an encryptionKey in an object definition. The same definition applies to indexes, data sources, skillets, indexers, and synonym maps. To try this example on your search service and key vault, download the notebook from azure-search-python-samples.
Install some packages.
! pip install python-dotenv
! pip install azure-core
! pip install azure-search-documents==11.5.1
! pip install azure-identity
Create an index that has an encryption key.
from azure.search.documents.indexes import SearchIndexClient
from azure.search.documents.indexes.models import (
    SimpleField,
    SearchFieldDataType,
    SearchableField,
    SearchIndex,
    SearchResourceEncryptionKey
)
from azure.identity import DefaultAzureCredential

endpoint="<PUT YOUR AZURE SEARCH SERVICE ENDPOINT HERE>"
credential = DefaultAzureCredential()

index_name = "test-cmk-index"
index_client = SearchIndexClient(endpoint=endpoint, credential=credential)
fields = [
        SimpleField(name="Id", type=SearchFieldDataType.String, key=True),
        SearchableField(name="Description", type=SearchFieldDataType.String)
    ]

scoring_profiles = []
suggester = []
encryption_key = SearchResourceEncryptionKey(
    key_name="<PUT YOUR KEY VAULT NAME HERE>",
    key_version="<PUT YOUR ALPHANUMERIC KEY VERSION HERE>",
    vault_uri="<PUT YOUR KEY VAULT ENDPOINT HERE>"
)

index = SearchIndex(name=index_name, fields=fields, encryption_key=encryption_key)
result = index_client.create_or_update_index(index)
print(f' {result.name} created')
Get the index definition to verify encryption key configuration exists.
index_name = "test-cmk-index-qs"
index_client = SearchIndexClient(endpoint=AZURE_SEARCH_SERVICE, credential=credential)

result = index_client.get_index(index_name)
print(f"{result}")
Load the index with a few documents. All field content is considered sensitive and is encrypted on disk using your customer managed key.
from azure.search.documents import SearchClient

# Create a documents payload
documents = [
    {
    "@search.action": "upload",
    "Id": "1",
    "Description": "The hotel is ideally located on the main commercial artery of the city in the heart of New York. A few minutes away is Time's Square and the historic centre of the city, as well as other places of interest that make New York one of America's most attractive and cosmopolitan cities."
    },
    {
    "@search.action": "upload",
    "Id": "2",
    "Description": "The hotel is situated in a  nineteenth century plaza, which has been expanded and renovated to the highest architectural standards to create a modern, functional and first-class hotel in which art and unique historical elements coexist with the most modern comforts."
    },
    {
    "@search.action": "upload",
    "Id": "3",
    "Description": "The hotel stands out for its gastronomic excellence under the management of William Dough, who advises on and oversees all of the Hotel's restaurant services."
    },
    {
    "@search.action": "upload",
    "Id": "4",
    "Description": "The hotel is located in the heart of the historic center of Sublime in an extremely vibrant and lively area within short walking distance to the sites and landmarks of the city and is surrounded by the extraordinary beauty of churches, buildings, shops and monuments. Sublime Palace is part of a lovingly restored 1800 palace."
    }
]

search_client = SearchClient(endpoint=AZURE_SEARCH_SERVICE, index_name=index_name, credential=credential)
try:
    result = search_client.upload_documents(documents=documents)
    print("Upload of new document succeeded: {}".format(result[0].succeeded))
except Exception as ex:
    print (ex.message)

    index_client = SearchClient(endpoint=AZURE_SEARCH_SERVICE, credential=credential)
Run a query to confirm the index is operational.
from azure.search.documents import SearchClient

query = "historic"

search_client = SearchClient(endpoint=AZURE_SEARCH_SERVICE, credential=credential, index_name=index_name)

results = search_client.search(
    query_type='simple',
    search_text=query,
    select=["Id", "Description"],
    include_total_count=True
    )

for result in results:
    print(f"Score: {result['@search.score']}")
    print(f"Id: {result['Id']}")
    print(f"Description: {result['Description']}")
Output from the query should produce results similar to the following example.
Score: 0.6130029
Id: 4
Description: The hotel is located in the heart of the historic center of Sublime in an extremely vibrant and lively area within short walking distance to the sites and landmarks of the city and is surrounded by the extraordinary beauty of churches, buildings, shops and monuments. Sublime Palace is part of a lovingly restored 1800 palace.
Score: 0.26286605
Id: 1
Description: The hotel is ideally located on the main commercial artery of the city in the heart of New York. A few minutes away is Time's Square and the historic centre of the city, as well as other places of interest that make New York one of America's most attractive and cosmopolitan cities.
Since encrypted content is decrypted prior to data refresh or queries, you won't see visual evidence of encryption. To verify encryption is working, check the resource logs.
Next steps
If you're unfamiliar with Azure security architecture, review the Azure Security documentation, and in particular, this article: