Create a slice using an ARM template
Network slices allow you to host multiple independent logical networks in the same Azure Private 5G Core deployment. Slices are assigned to SIM policies and static IP addresses, providing isolated end-to-end networks that can be customized for different bandwidth and latency requirements.
In this how-to guide, you'll learn how to create a slice in your private mobile network using an Azure Resource Manager template (ARM template). You can configure a slice/service type (SST) and slice differentiator (SD) for slices associated with SIMs that will be provisioned on a 5G site. If a SIM is provisioned on a 4G site, the slice associated with its SIM policy must contain an empty SD and a value of 1 for the SST.
An Azure Resource Manager template is a JavaScript Object Notation (JSON) file that defines the infrastructure and configuration for your project. The template uses declarative syntax. You describe your intended deployment without writing the sequence of programming commands to create the deployment.
If your environment meets the prerequisites and you're familiar with using ARM templates, select the Deploy to Azure button. The template will open in the Azure portal.
Prerequisites
- Identify the name of the Mobile Network resource corresponding to your private mobile network.
- Collect the information in Collect the required information for a network slice. If the slice will be used by 4G UEs, you don't need to collect SST and SD values.
- Ensure you can sign in to the Azure portal using an account with access to the active subscription you used to create your private mobile network. This account must have the built-in Contributor or Owner role at the subscription scope.
- Navigate to your Packet Core Control Plane resource and make sure that the Packet core installation state field contains Succeeded. This to avoid errors when managing your network slices by ensuring no other processes are running. If you just finished running a process, it may take a few minutes for the Packet core installation state field to update.
Review the template
The template used in this how-to guide is from Azure Quickstart Templates.
{
  "$schema": "https://schema.management.azure.com/schemas/2019-04-01/deploymentTemplate.json#",
  "contentVersion": "1.0.0.0",
  "metadata": {
    "_generator": {
      "name": "bicep",
      "version": "0.25.53.49325",
      "templateHash": "16508206863263740493"
    }
  },
  "parameters": {
    "location": {
      "type": "string",
      "metadata": {
        "description": "Region where the Mobile Network will be deployed (must match the resource group region)"
      }
    },
    "existingMobileNetworkName": {
      "type": "string",
      "metadata": {
        "description": "Name of the Mobile Network to add a Slice to"
      }
    },
    "sliceName": {
      "type": "string",
      "metadata": {
        "description": "The name of the Slice"
      }
    },
    "sst": {
      "type": "int",
      "minValue": 0,
      "maxValue": 255,
      "metadata": {
        "description": "The SST value for the slice being deployed."
      }
    },
    "sd": {
      "type": "string",
      "defaultValue": "",
      "metadata": {
        "description": "The SD value for the slice being deployed."
      }
    }
  },
  "resources": [
    {
      "type": "Microsoft.MobileNetwork/mobileNetworks/slices",
      "apiVersion": "2024-02-01",
      "name": "[format('{0}/{1}', parameters('existingMobileNetworkName'), parameters('sliceName'))]",
      "location": "[parameters('location')]",
      "properties": {
        "snssai": {
          "sst": "[parameters('sst')]",
          "sd": "[if(empty(parameters('sd')), null(), parameters('sd'))]"
        }
      }
    }
  ]
}
The following Azure resource is defined in the template.
- Microsoft.MobileNetwork/mobileNetworks/slices: a resource representing a network slice.
Deploy the template
Select the following link to sign in to Azure and open the template.
Select or enter the following values, using the information you retrieved in Prerequisites.
Field Value Subscription Select the Azure subscription you used to create your private mobile network. Resource group Select the resource group containing the mobile network resource representing your private mobile network. Region Select the region in which you deployed the private mobile network. Location Enter the code name of the region in which you deployed the private mobile network. Existing Mobile Network Name Enter the name of the Mobile Network resource representing your private mobile network. Slice Name Enter the name of the network slice. Sst Enter the slice/service type (SST) value. If the slice will be used by 4G UEs, enter a value of 1. Sd Enter the slice differentiator (SD) value. If the slice will be used by 4G UEs, leave this field blank. Select Review + create.
Azure will now validate the configuration values you've entered. You should see a message indicating that your values have passed validation.
If the validation fails, you'll see an error message and the Configuration tab(s) containing the invalid configuration will be flagged. Select the flagged tab(s) and use the error messages to correct invalid configuration before returning to the Review + create tab.
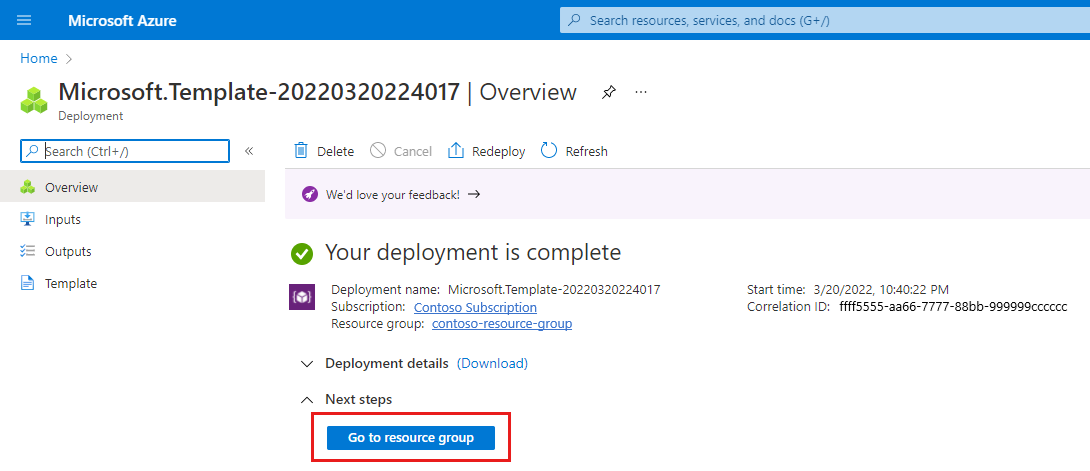
Once your configuration has been validated, you can select Create to create the slice. The Azure portal will display a confirmation screen when the slice has been created.
Review deployed resources
On the confirmation screen, select Go to resource group.

Confirm that the resource group contains a new Slice resource representing the network slice.
Next steps
- See Collect the required information for a site for the information you need to collect to provision a site.
- See Policy control to learn more about designing the policy control configuration for your private mobile network.
