Set up the Defender for Cloud security environment on your Operator Nexus subscription
This guide provides you with instructions on how to enable Microsoft Defender for Cloud and activate and configure some of its enhanced security plan options that can be used to secure your Operator Nexus bare metal compute servers and workloads.
Before you begin
To aid your understanding of Defender for Cloud and its many security features, there's a wide variety of material available on the Microsoft Defender for Cloud documentation site that you might find helpful.
Prerequisites
To successfully complete the actions in this guide:
- You must have an Azure Operator Nexus subscription.
- You must have a deployed Azure Arc-connected Operator Nexus instance running in your on-premises environment.
- You must use an Azure portal user account in your subscription with Owner, Contributor, or Reader role.
Enable Defender for Cloud
Enabling Microsoft Defender for Cloud on your Operator Nexus subscription is simple and immediately gives you access to its free included security features. To turn on Defender for Cloud:
- Sign in to Azure portal.
- In the search box at the top, enter “Defender for Cloud.”
- Select Microsoft Defender for Cloud under Services.
When the Defender for Cloud overview page opens, you have successfully activated Defender for Cloud on your subscription. The overview page is an interactive dashboard user experience that provides a comprehensive view of your Operator Nexus security posture. It displays security alerts, coverage information, and much more. Using this dashboard, you can assess the security of your workloads and identify and mitigate risks.
After activating Defender for Cloud, you have the option to enable Defender for Cloud’s enhanced security features that provide important server and workload protections:
- Defender for Servers
- Defender for Endpoint – made available through Defender for Servers
- Defender for Containers
Set up a Defender for Servers plan to protect your bare metal servers
To take advantage of the added security protection of your on-premises bare metal machine (BMM) compute servers that's provided by Microsoft Defender for Endpoint, you can enable and configure a Defender for Servers plan on your Operator Nexus subscription.
Prerequisites
- Defender for Cloud must be enabled on your subscription.
To set up a Defender for Servers plan:
- Turn on the Defender for Servers plan feature under Defender for Cloud.
- Select one of the Defender for Servers plans.
- While on the Defender plans page, click the Settings link for Servers under the “Monitoring coverage” column. The Settings & monitoring page will open.
- Ensure that Log Analytics agent/Azure Monitor agent is set to Off.
- Ensure that Endpoint protection is set to Off.
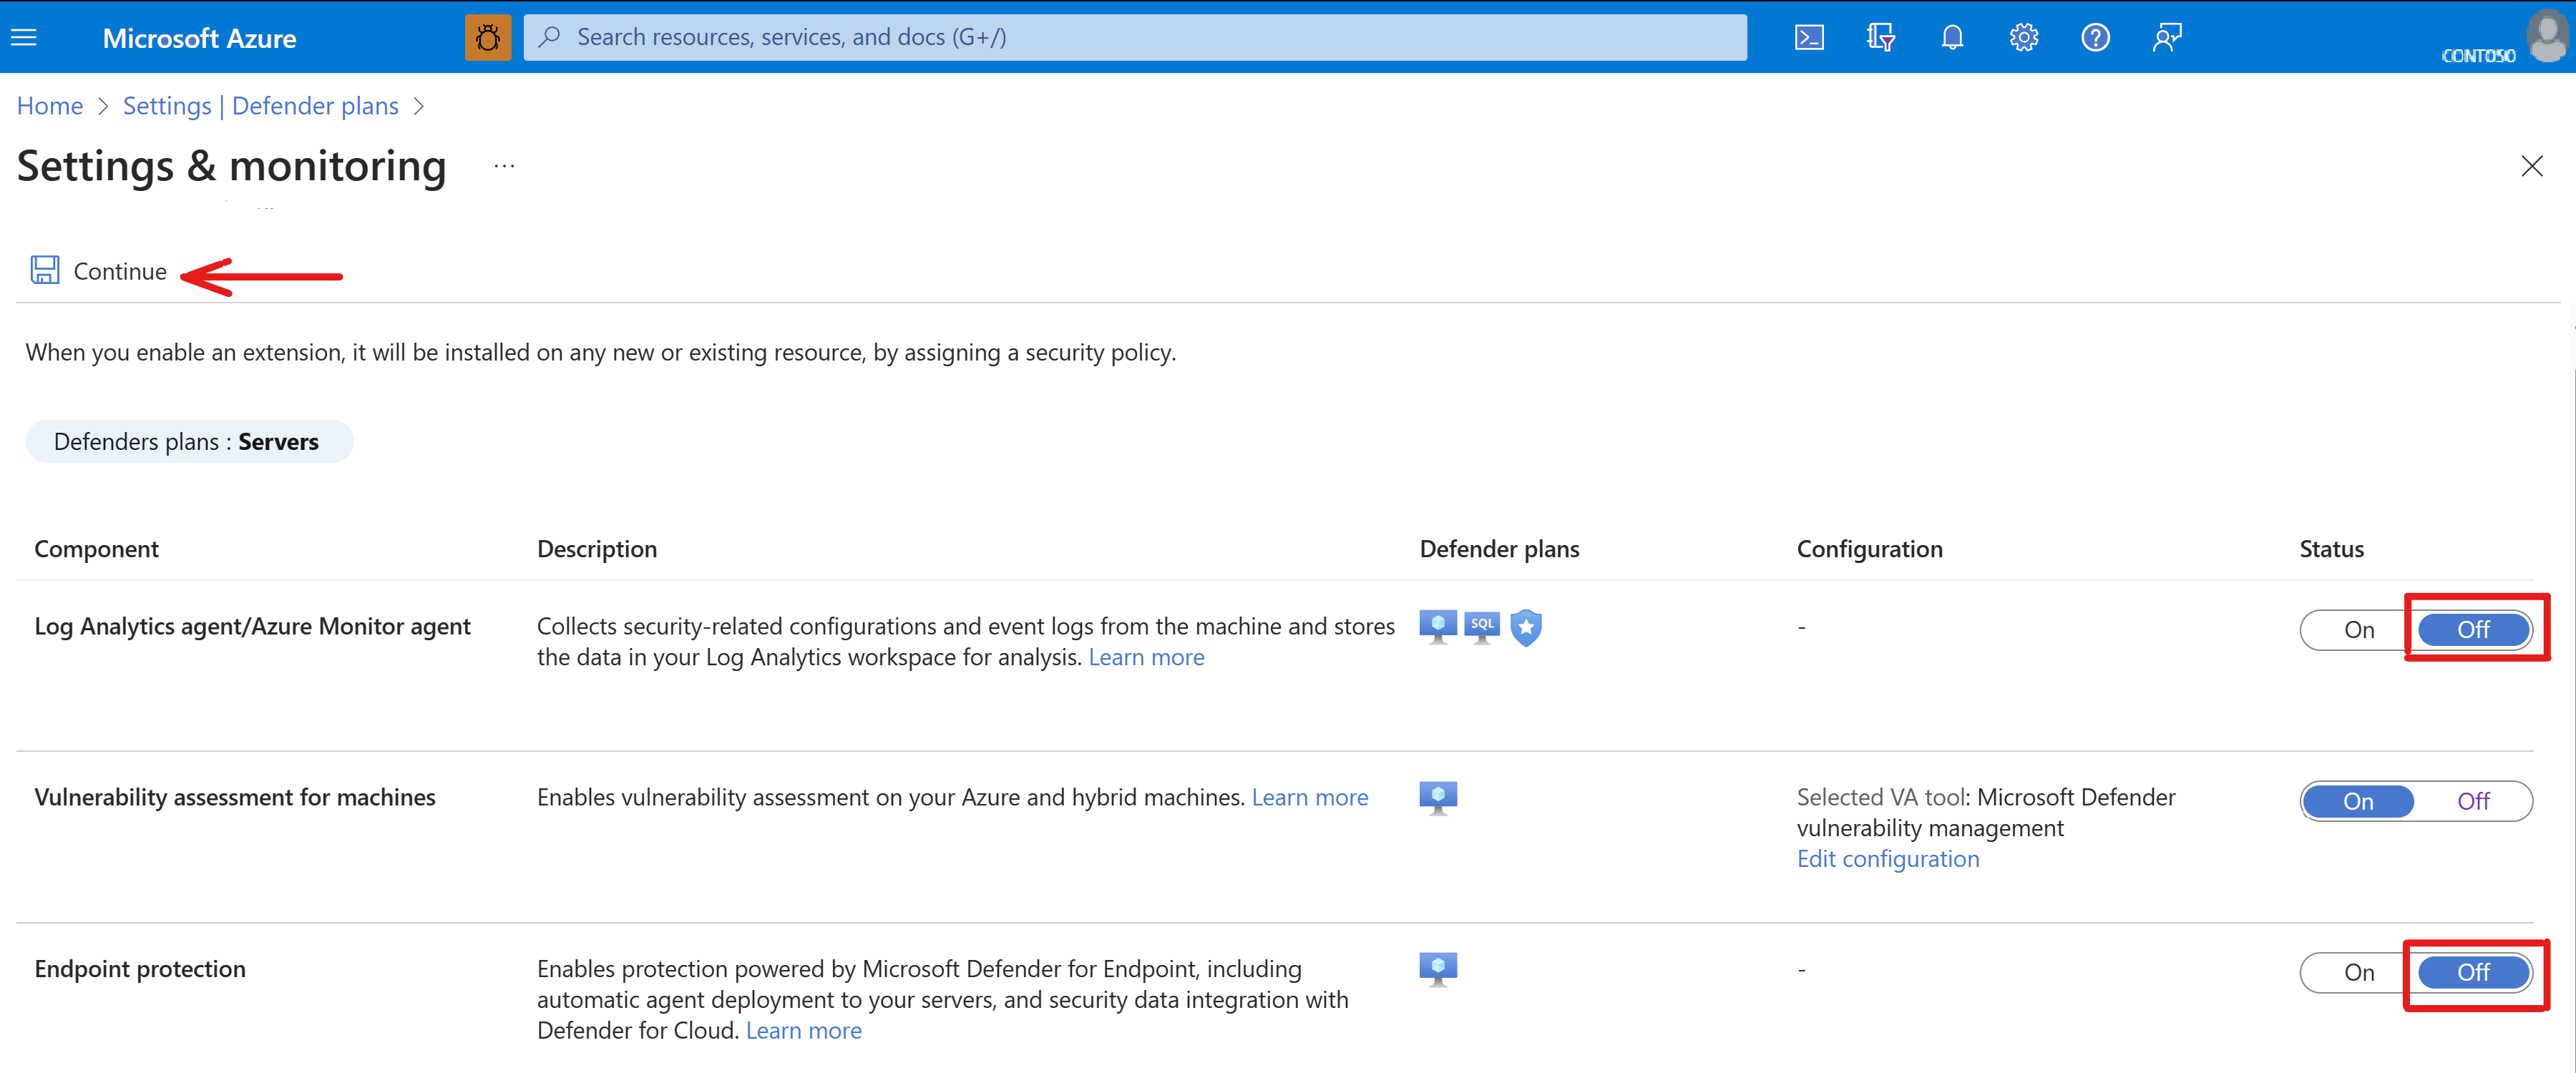
- Click Continue to save any changed settings.

Grant MDE Onboarding Permissions
To enable the Microsoft Defender for Endpoint (MDE) agent on bare metal machines within your Nexus Cluster, you must grant the nc-platform-extension identity of the cluster permission to onboard the MDE agent on your behalf.
The nc-platform-extension identity does not exist prior to deploying the Operator Nexus cluster. The following example must be performed after the Cluster is deployed.
The required permission is Microsoft.Security/mdeOnboardings/read. Assign this permission to the nc-platform-extension identity using the built-in role Security Reader or a custom role with the same permission.
Important
The user or identity creating the role assignment must have the Microsoft.Authorization/roleAssignments/write permission at the subscription level.
Below is an example bash script using the Azure CLI for granting the nc-platform-extension identity permission to onboard the MDE agent on your behalf.
#!/usr/bin/env bash

# Usage: ./script.sh /subscriptions/<subID>/resourceGroups/<rgName>/providers/Microsoft.NetworkCloud/clusters/<clusterName>

CLUSTER_ID="$1"

if [ -z "$CLUSTER_ID" ]; then
  echo "Usage: $0 <Full Azure Network Cloud Cluster Resource ID>"
  exit 1
fi

# 1. Extract Subscription ID by splitting on '/' and taking the 3rd field:
SUBSCRIPTION_ID=$(echo "$CLUSTER_ID" | cut -d'/' -f3)
echo "Subscription ID: $SUBSCRIPTION_ID"

# 2. Extract the actual cluster name from the last segment in the resource ID
CLUSTER_NAME=$(basename "$CLUSTER_ID")
echo "Cluster name: $CLUSTER_NAME"

# 3. Retrieve the Managed Resource Group name
MRG_NAME=$(az networkcloud cluster show \
  --ids "$CLUSTER_ID" \
  --query "managedResourceGroupConfiguration.name" \
  --output tsv)
echo "Managed Resource Group name: $MRG_NAME"

# 4. Retrieve the extension's principal ID
PRINCIPAL_ID=$(az k8s-extension show \
  --name nc-platform-extension \
  --cluster-name "$CLUSTER_NAME" \
  --resource-group "$MRG_NAME" \
  --cluster-type connectedClusters \
  --query "identity.principalId" \
  --output tsv)
echo "Extension Principal ID: $PRINCIPAL_ID"

# 5. Create a Security Reader role assignment at subscription level
echo "Creating Security Reader role assignment at subscription level"
az role assignment create \
  --role "Security Reader" \
  --subscription "$SUBSCRIPTION_ID" \
  --assignee-object-id "$PRINCIPAL_ID" \
  --assignee-principal-type ServicePrincipal \
  --scope "/subscriptions/$SUBSCRIPTION_ID"

echo "Done. Security Reader role assignment created"
While the required permissions are not assigned, the MDE onboarding reconciliation logic will continue to attempt to onboard the MDE agent until the permissions are granted. After permission assignment is complete, the MDE onboarding reconciliation will complete successfully with no additional action required.
Reconciliation of the MDE onboarding status is an exponential backoff process. The first retry attempt will be made after 10 minutes, the second after 20 minutes, and the third after 40 minutes. If three failures occur, the reconciliation will wait 10 minutes before attempting to onboard the MDE agent again (which will restart the exponential backoff process).
Important
MDE Agent reconciliation runs independently on each of the bare metal machines in the cluster. As such the exact time it takes to onboard the MDE agent on all bare metal machines in the cluster will vary depending on the number of bare metal machines in the cluster and the initial time of the first onboarding attempt.
Operator Nexus-specific requirement for enabling Defender for Endpoint
Important
In Operator Nexus, Microsoft Defender for Endpoint is enabled on a per-cluster basis rather than across all clusters at once, which is the default behavior when the Endpoint protection setting is enabled in Defender for Servers. To request Endpoint protection to be turned on in one or more of your on-premises workload clusters you will need to open a Microsoft Support ticket, and the Support team will subsequently perform the enablement actions. You must have a Defender for Servers plan active in your subscription prior to opening a ticket.
Once Defender for Endpoint is enabled by Microsoft Support, its configuration is managed by the platform to ensure optimal security and performance, and to reduce the risk of misconfigurations.
Set up the Defender for Containers plan to protect your Azure Kubernetes Service cluster workloads
You can protect the on-premises Kubernetes clusters that run your operator workloads by enabling and configuring the Defender for Containers plan on your subscription.
Prerequisites
- Defender for Cloud must be enabled on your subscription.
To set up the Defender for Containers plan:
- Turn on the Defender for Containers plan feature under Defender for Cloud.
- While on the Defender plans page, click the Settings link for Containers under the “Monitoring coverage” column. The Settings & monitoring page will open.
- Ensure that DefenderDaemonSet is set to Off.
- Ensure that Azure Policy for Kubernetes is set to Off.
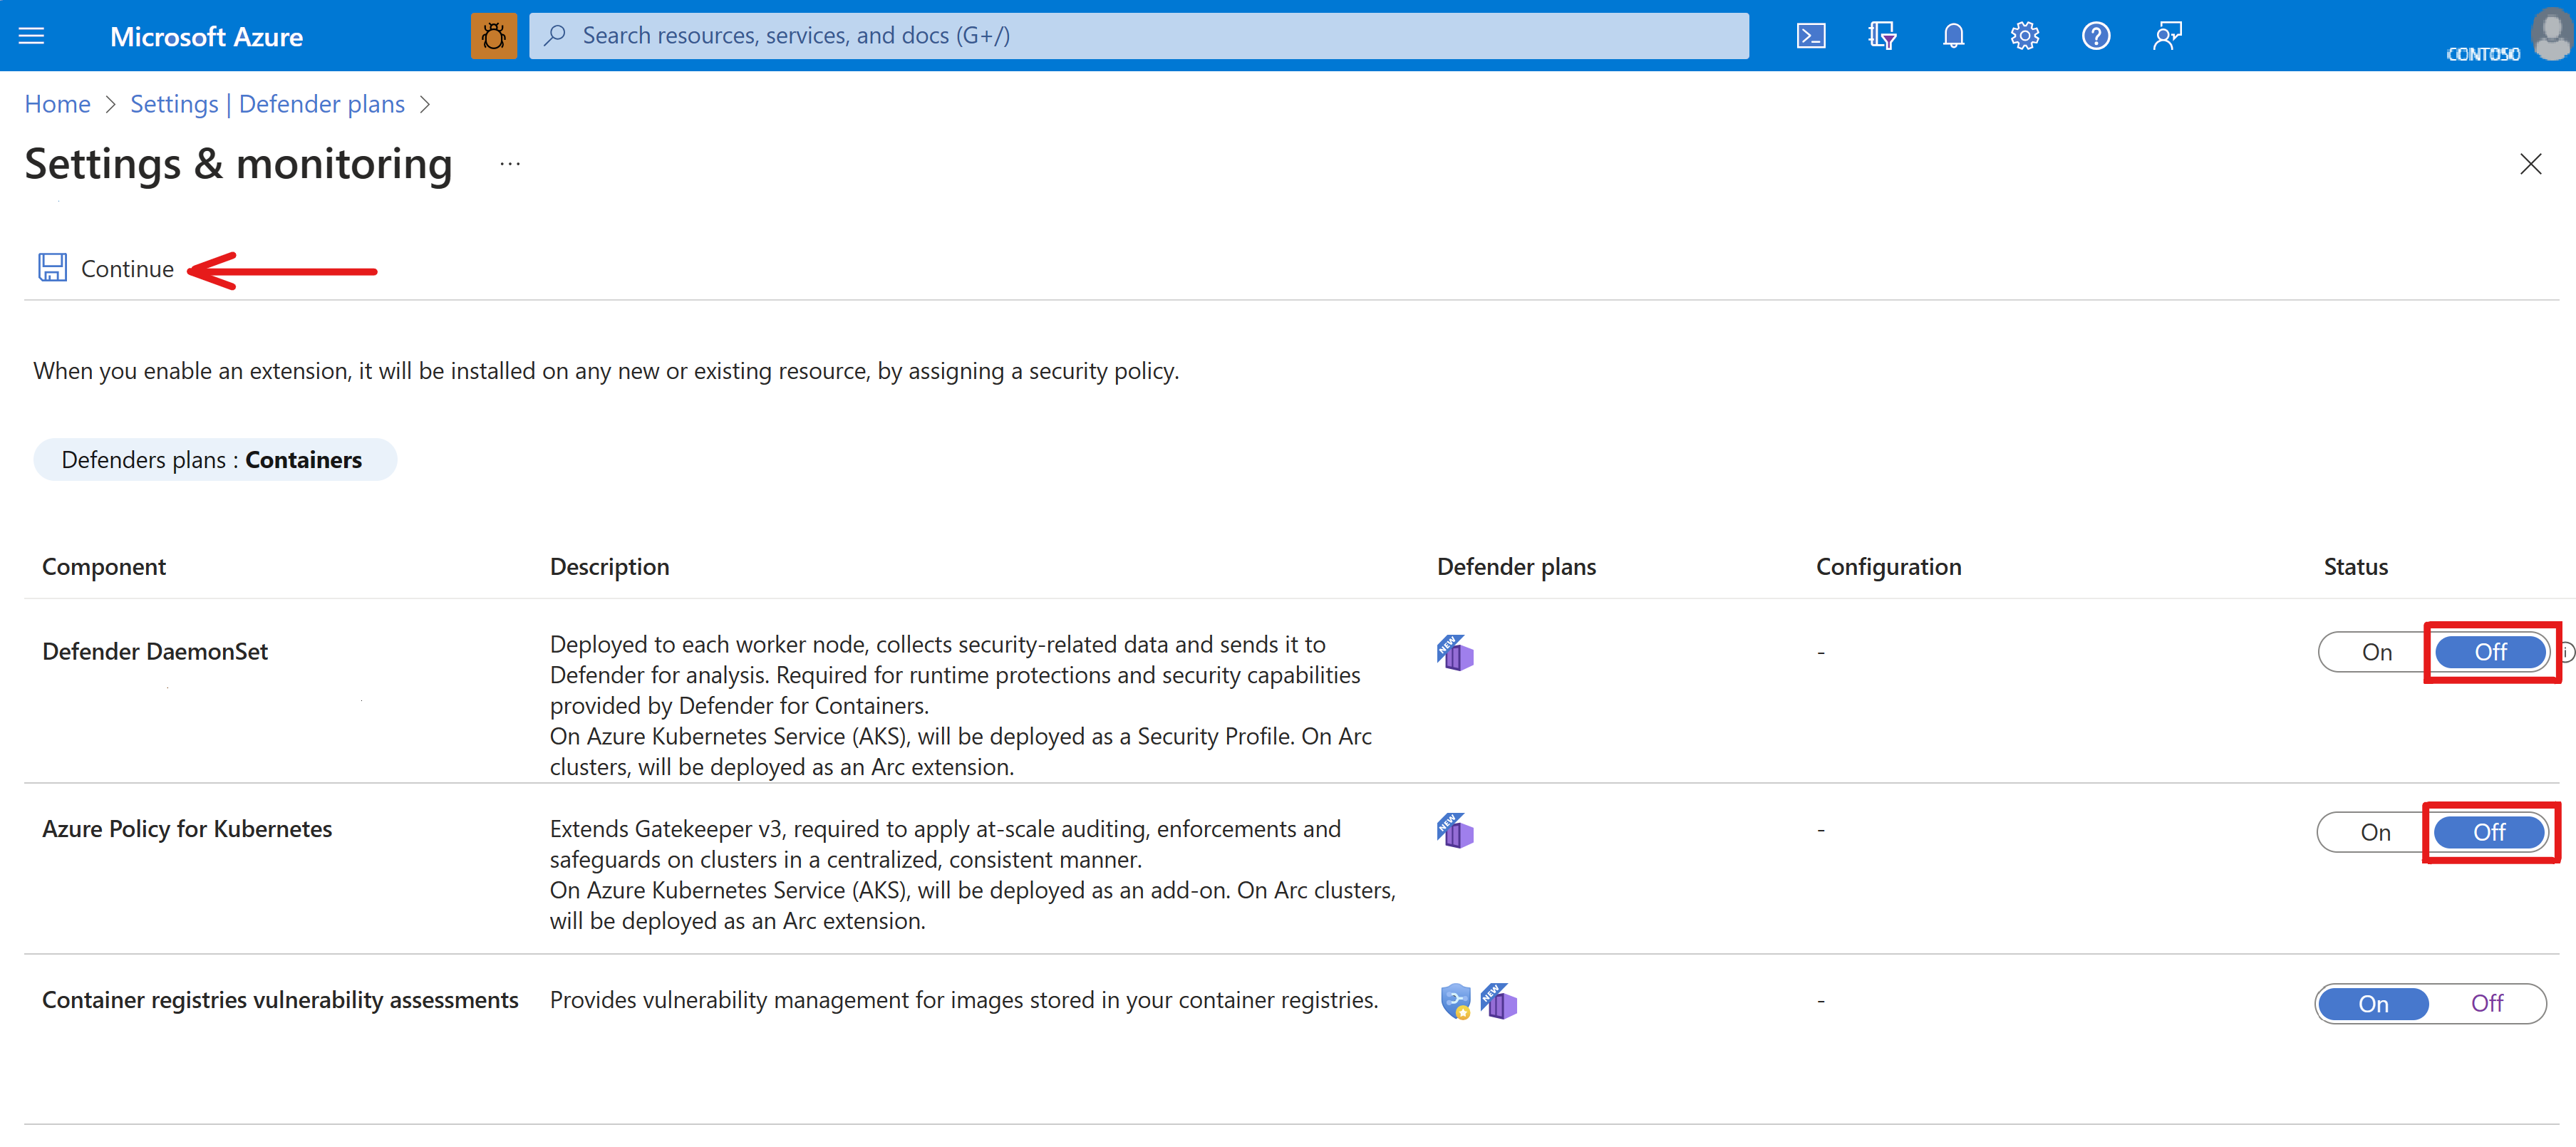
- Click Continue to save any changed settings.
