Manage traffic analytics using Azure Policy
Azure Policy helps you enforce organizational standards and to assess compliance at-scale. Common use cases for Azure Policy include implementing governance for resource consistency, regulatory compliance, security, cost, and management. To learn more about Azure policy, see What is Azure Policy? and Quickstart: Create a policy assignment to identify non-compliant resources.
In this article, you learn how to use three built-in policies available for Azure Network Watcher traffic analytics to manage your setup.
Audit flow logs using a built-in policy
The Network Watcher flow logs should have traffic analytics enabled policy audits all existing flow logs by auditing Azure Resource Manager objects of type Microsoft.Network/networkWatchers/flowLogs and checks if traffic analytics is enabled via the networkWatcherFlowAnalyticsConfiguration.enabled property of the flow logs resource. This policy then flags the flow logs resource that has the property set to false.
To audit your flow logs by using the built-in policy:
Sign in to the Azure portal.
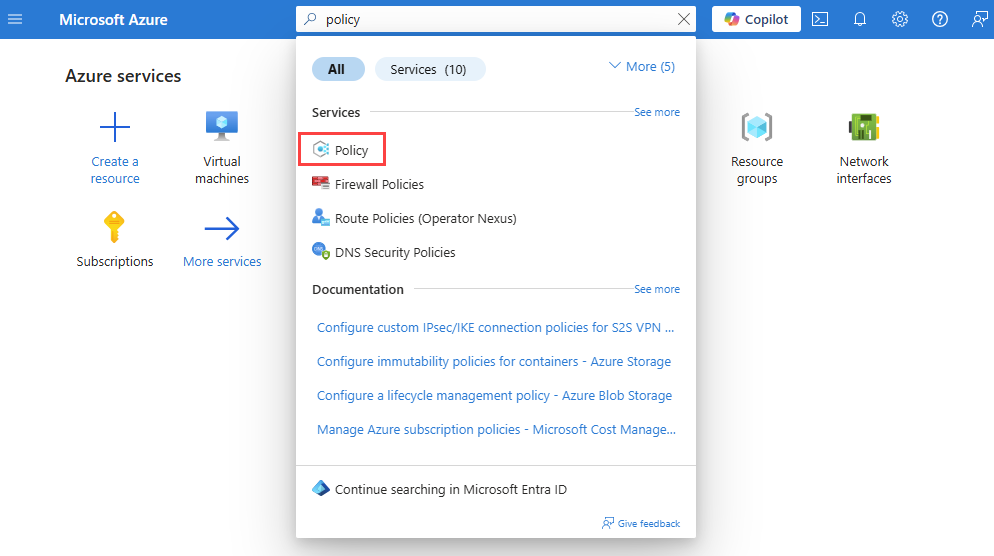
In the search box at the top of the portal, enter policy. Select Policy from the search results.
Select Assignments, then select on Assign Policy.

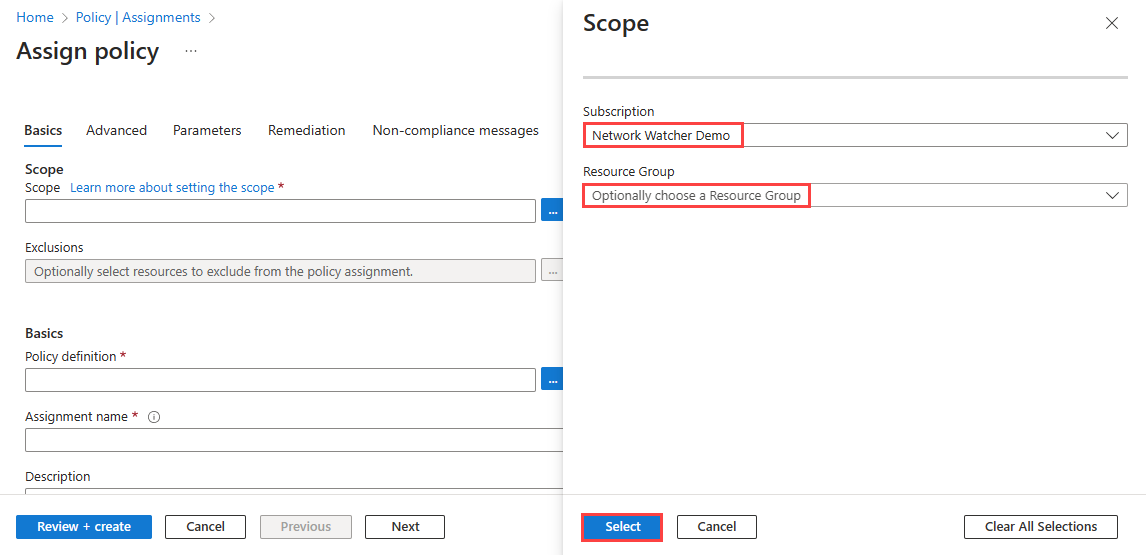
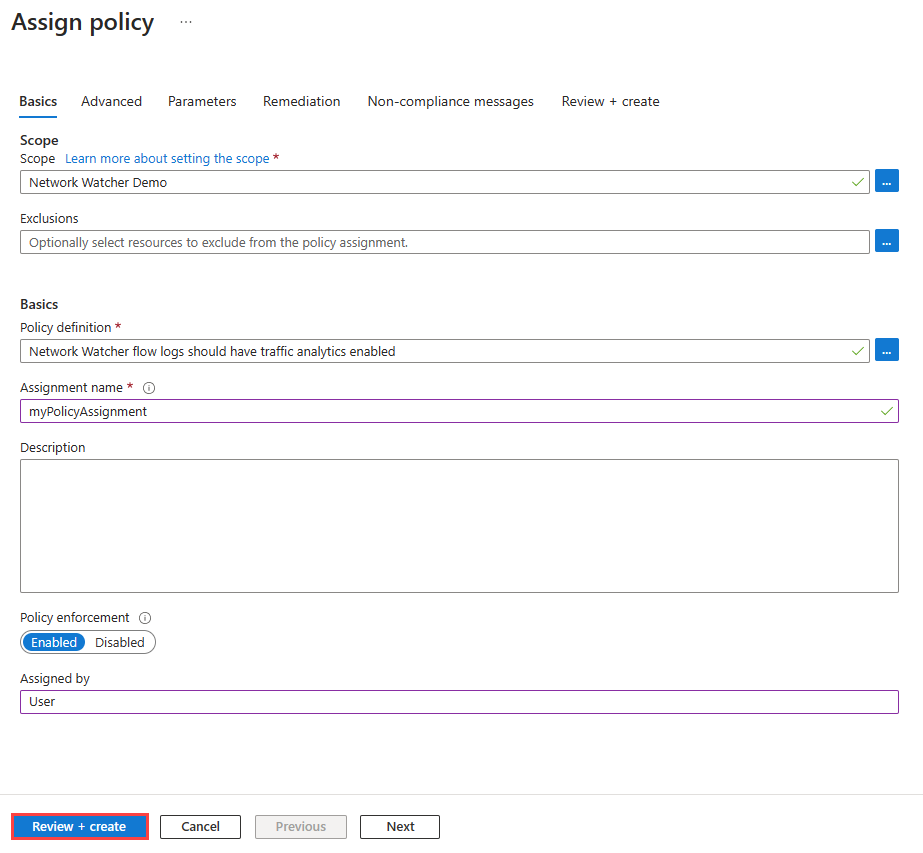
Select the ellipsis ... next to Scope to choose your Azure subscription that has the flow logs that you want the policy to audit. You can also choose the resource group that has the flow logs. After you made your selections, select Select button.
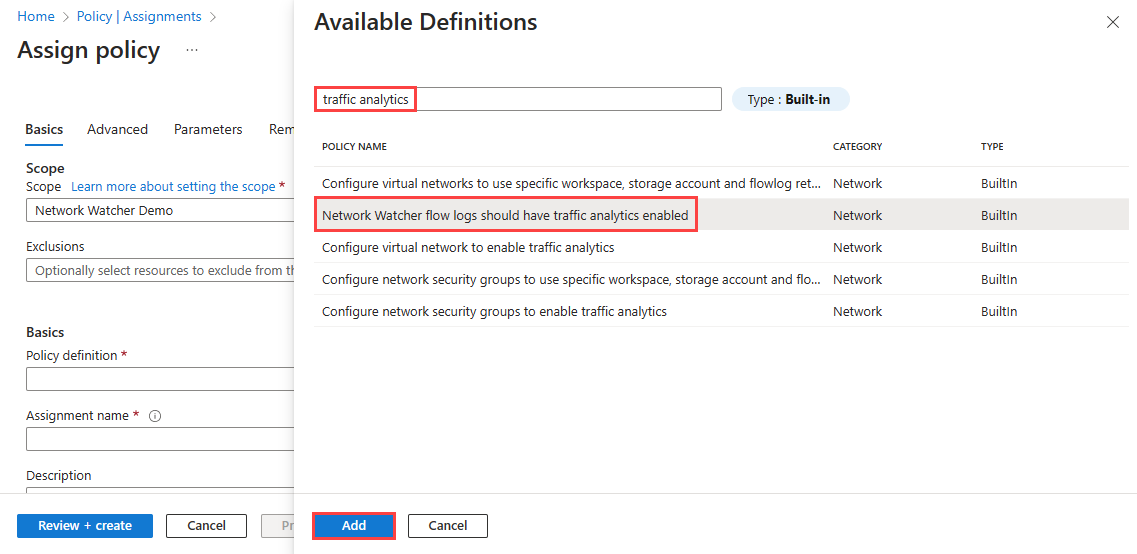
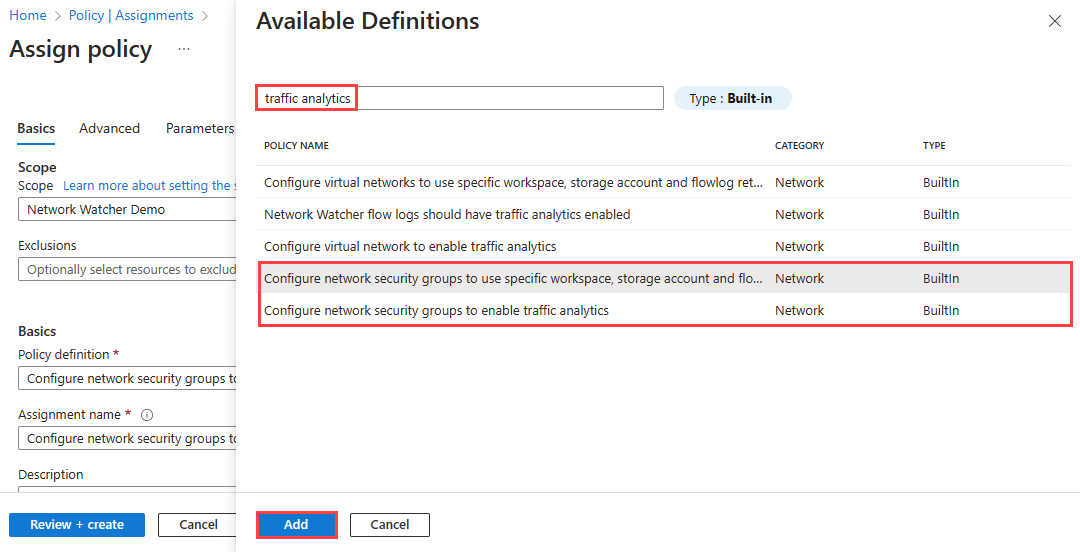
Select the ellipsis ... next to Policy definition to choose the built-in policy that you want to assign. Enter traffic analytics in the search box, and select Built-in filter. From the search results, select Network Watcher flow logs should have traffic analytics enabled and then select Add.
Enter a name in Assignment name and your name in Assigned by. This policy doesn't require any parameters.
Select Review + create and then Create.
Note
This policy doesn't require any parameters. It also doesn't contain any role definitions so you don't need create role assignments for the managed identity in the Remediation tab.
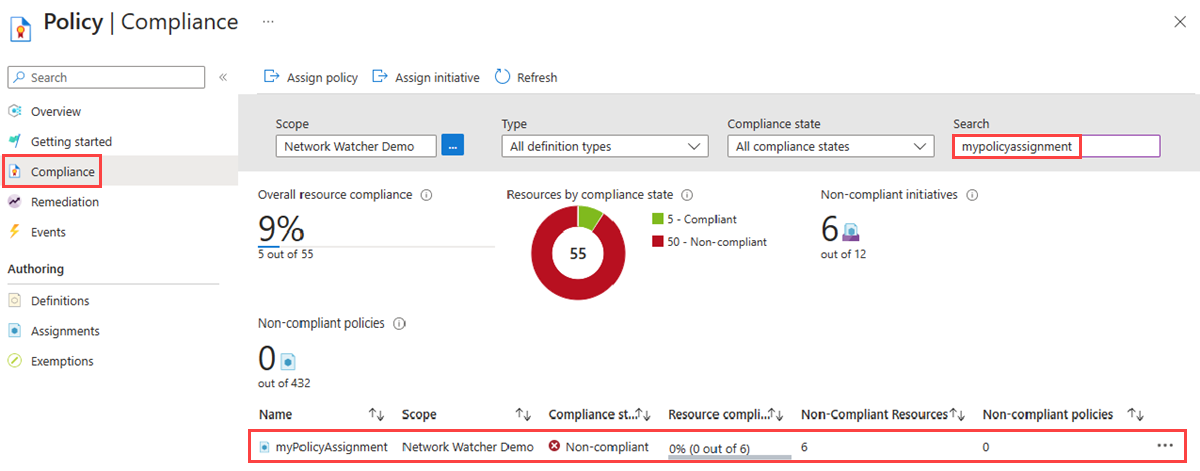
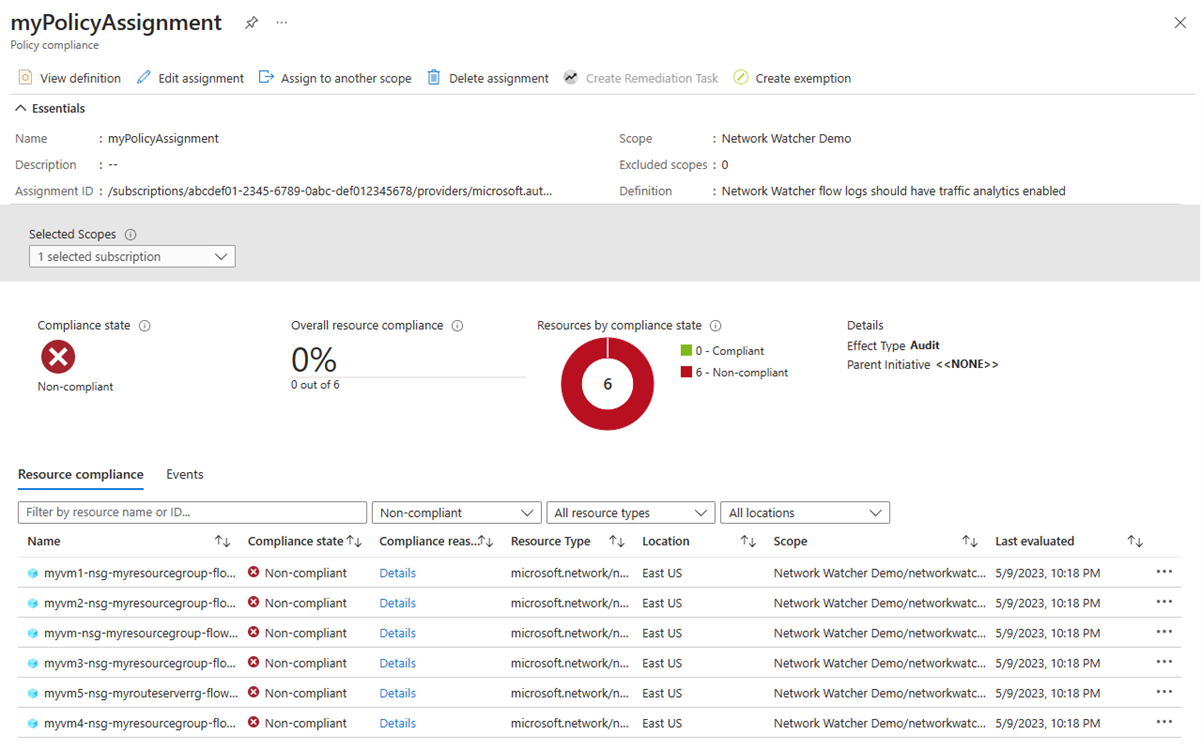
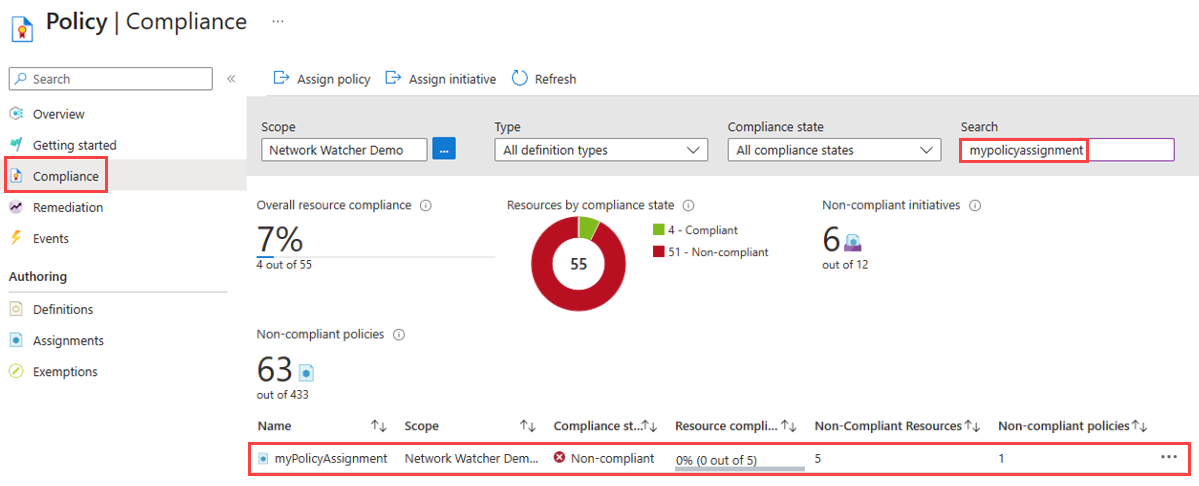
Select Compliance. Search for the name of your assignment and then select it.
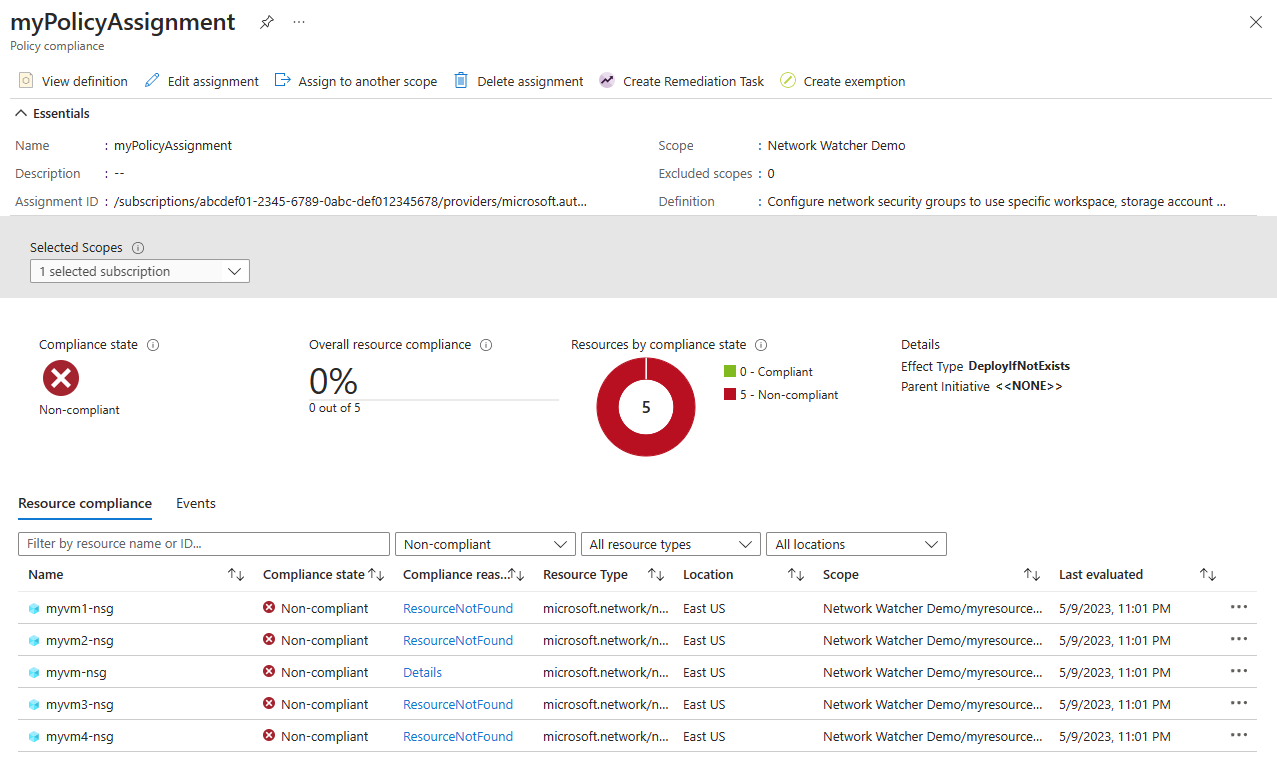
Resource compliance lists all non-compliant flow logs.
Deploy and configure traffic analytics using deployIfNotExists policies
There are two deployIfNotExists policies available to configure NSG flow logs:
Configure network security groups to use specific workspace, storage account and flow log retention policy for traffic analytics: This policy flags the network security group that doesn't have traffic analytics enabled. For a flagged network security group, either the corresponding NSG flow logs resource doesn't exist or the NSG flow logs resource exist but traffic analytics isn't enabled on it. You can create a remediation task if you want the policy to affect existing resources.
Remediation can be assigned while assigning policy or after policy is assigned and evaluated. Remediation enables traffic analytics on all the flagged resources with the provided parameters. If a network security group already has flow logs enabled into a particular storage ID but it doesn't have traffic analytics enabled, then remediation enables traffic analytics on this network security group with the provided parameters. If the storage ID provided in the parameters is different from the one enabled for flow logs, then the latter gets overwritten with the provided storage ID in the remediation task. If you don't want to overwrite, use Configure network security groups to enable traffic analytics policy.
Configure network security groups to enable traffic analytics: This policy is similar to the previous policy except that during remediation, it doesn't overwrite flow logs settings on the flagged network security groups that have flow logs enabled but traffic analytics disabled with the parameter provided in the policy assignment.
Note
Network Watcher is a regional service so the two deployIfNotExists policies will apply to network security groups that exist in a particular region. For network security groups in a different region, create another policy assignment in that region.
To assign any of the deployIfNotExists two policies, follow these steps:
Sign in to the Azure portal.
In the search box at the top of the portal, enter policy. Select Policy from the search results.
Select Assignments, and then select on Assign policy.

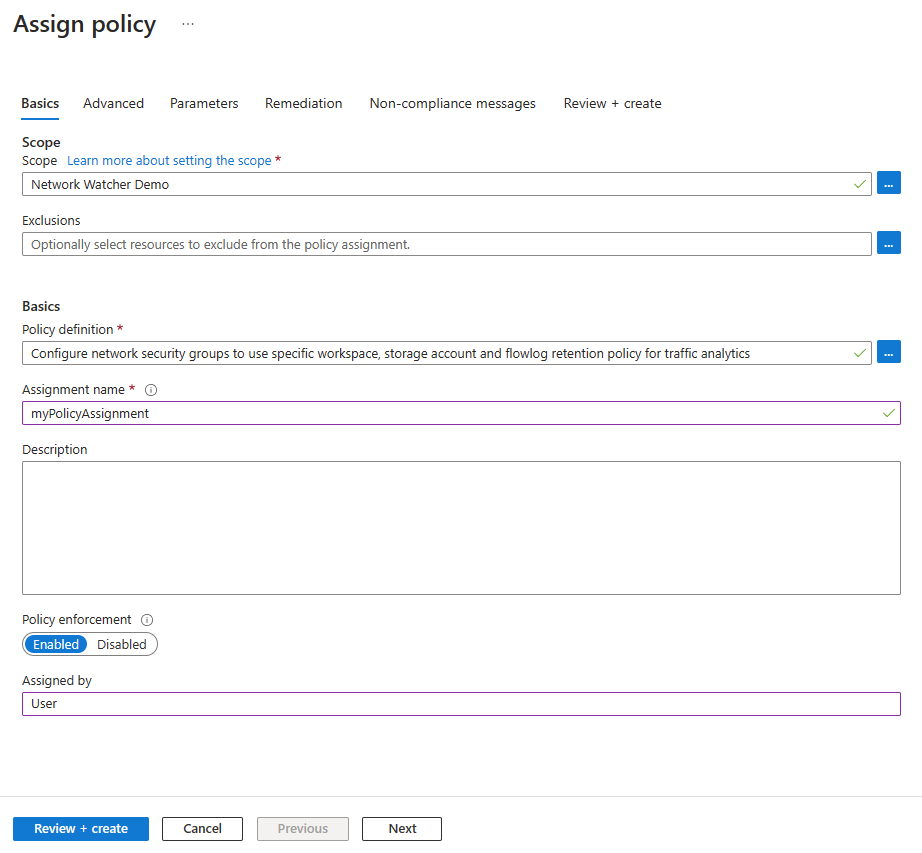
Select the ellipsis ... next to Scope to choose your Azure subscription that has the flow logs that you want the policy to audit. You can also choose the resource group that has the flow logs. After you make your selections, choose the Select button.
Select the ellipsis ... next to Policy definition to choose the built-in policy that you want to assign. Enter traffic analytics in the search box, and select the Built-in filter. From the search results, select Configure network security groups to use specific workspace, storage account and flow log retention policy for traffic analytics and then select Add.
Enter a name in Assignment name and your name in Assigned by.
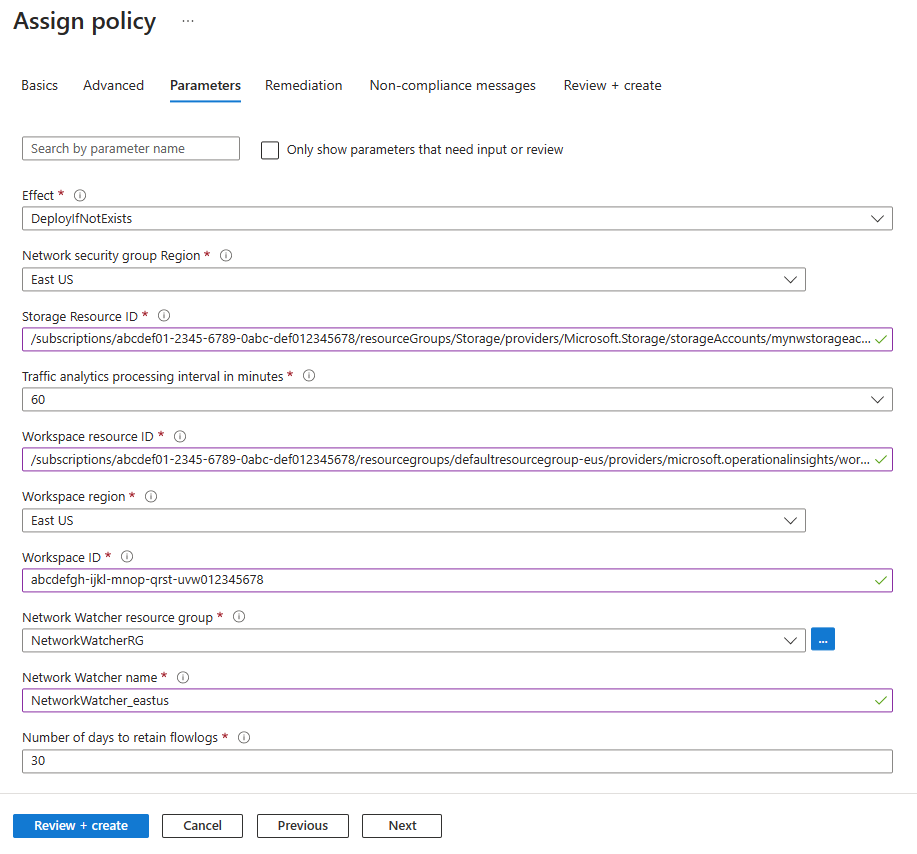
Select Next button twice, or select the Parameters tab. Then, enter or select the following values:
Setting Value Effect Select DeployIfNotExists. Network security group region Select the region of your network security group that you're targeting with the policy. Storage resource ID Enter the full resource ID of the storage account. The storage account must be in the same region as the network security group. The format of storage resource ID is: /subscriptions/<SubscriptionID>/resourceGroups/<ResourceGroupName>/providers/Microsoft.Storage/storageAccounts/<StorageAccountName>.Traffic analytics processing interval in minutes Select the frequency at which processed logs are pushed into the workspace. Currently available values are 10 and 60 minutes. Default value is 60 minutes. Workspace resource ID Enter the full resource ID of the workspace where traffic analytics has to be enabled. The format of workspace resource ID is: /subscriptions/<SubscriptionID>/resourcegroups/<ResourceGroupName>/providers/microsoft.operationalinsights/workspaces/<WorkspaceName>.Workspace region Select the region of your traffic analytics workspace. Workspace ID Enter your traffic analytics workspace ID. Network Watcher resource group Select the resource group of your Network Watcher. Network Watcher name Enter the name of your Network Watcher. Number of days to retain flow logs Enter the number of days for which you want to retain flow logs data in the storage account. If you want to retain data forever, enter 0. Note
The region of traffic analytics workspace doesn't have to be the same as the region of targeted network security group.
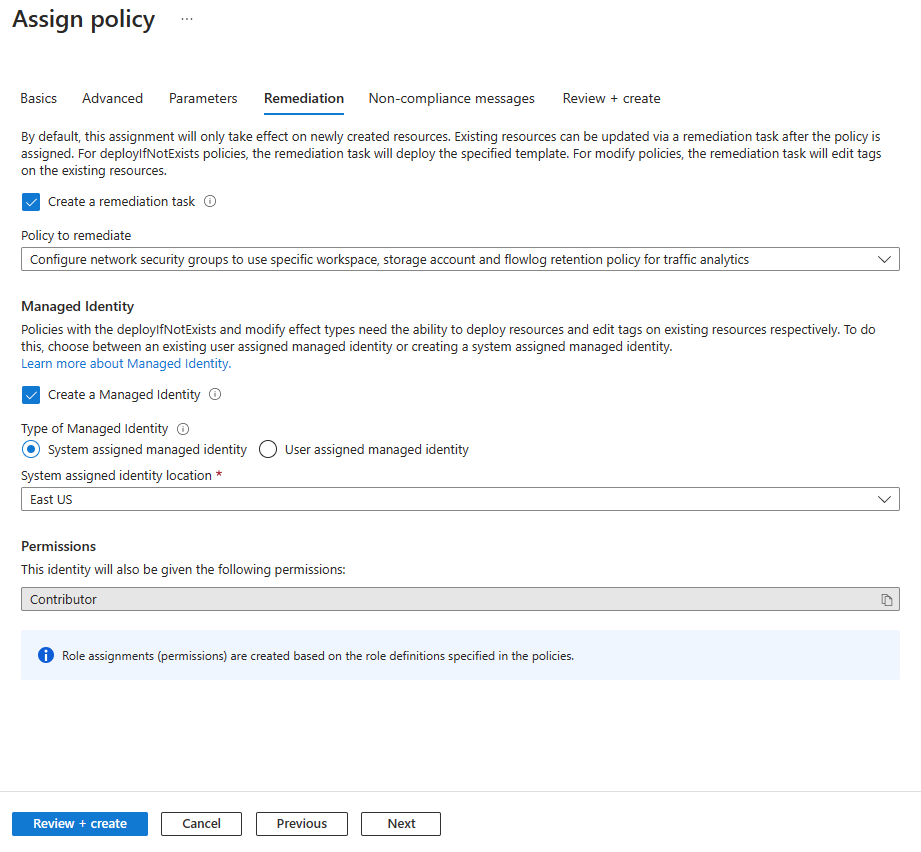
Select Next or Remediation tab. Enter or select the following values:
Setting Value Create Remediation task Check the box if you want the policy to affect existing resources. Create a Managed Identity Check the box. Type of Managed Identity Select the type of managed identity that you want to use. System assigned identity location Select the region of your system assigned identity. Scope Select the scope of your user assigned identity. Existing user assigned identities Select your user assigned identity. Note
You need Contributor or Owner permission to use this policy.
Select Review + create and then Create.
Select Compliance. Search for the name of your assignment and then select it.
Select Resource compliance to get a list of all non-compliant flow logs.
Troubleshooting
Remediation task fails with PolicyAuthorizationFailed error code: sample error example The policy assignment /subscriptions/aaaa0a0a-bb1b-cc2c-dd3d-eeeeee4e4e4e/resourceGroups/DummyRG/providers/Microsoft.Authorization/policyAssignments/b67334e8770a4afc92e7a929/ resource identity doesn't have the necessary permissions to create deployment.
In such scenario, the managed identity must be manually granted access. Go to the appropriate subscription/resource group (containing the resources provided in the policy parameters) and grant contributor access to the managed identity created by the policy.
Related content
- Learn about NSG flow logs built-in policies.
- Learn more about traffic analytics.
- Learn how to use an Azure Resource Manager (ARM) template to deploy flow logs and traffic analytics, see Configure NSG flow logs using an Azure Resource Manager template.
