How to create and manage read replicas in Azure Database for MySQL - Flexible Server by using the Azure portal
In this article, you learn how to create and manage read replicas in Azure Database for MySQL Flexible Server using the Azure portal.
Note
If GTID is enabled on a primary server (gtid_mode = ON), newly created replicas also have GTID enabled and use GTID based replication. To learn more refer to Global transaction identifier (GTID)
Prerequisites
- An Quickstart: Create an instance of Azure Database for MySQL with the Azure portal that is used as the source server.
Create a read replica
A read replica server can be created using the following steps:
Sign in to the Azure portal.
Select the existing Azure Database for MySQL Flexible Server instance that you want to use as a source. This action opens the Overview page.
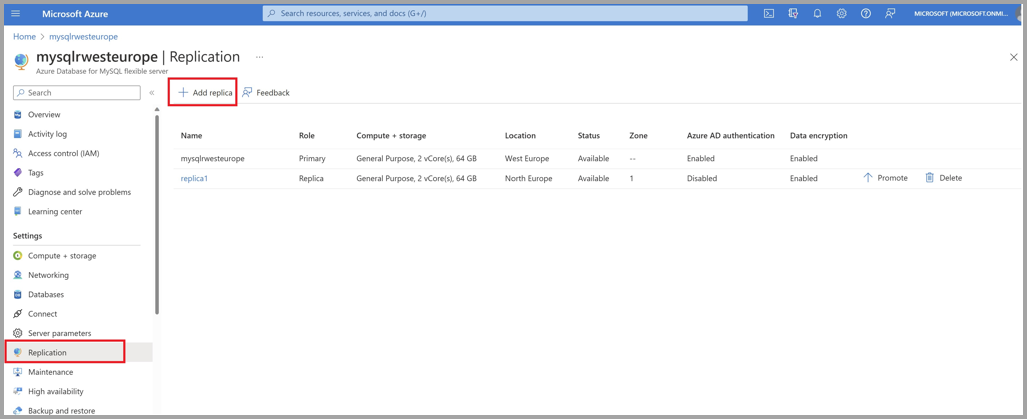
Select Replication from the menu, under SETTINGS.
Select Add Replica.
Enter a name for the replica server. If your region supports Availability Zones, you can select the Availability zone of your choice.
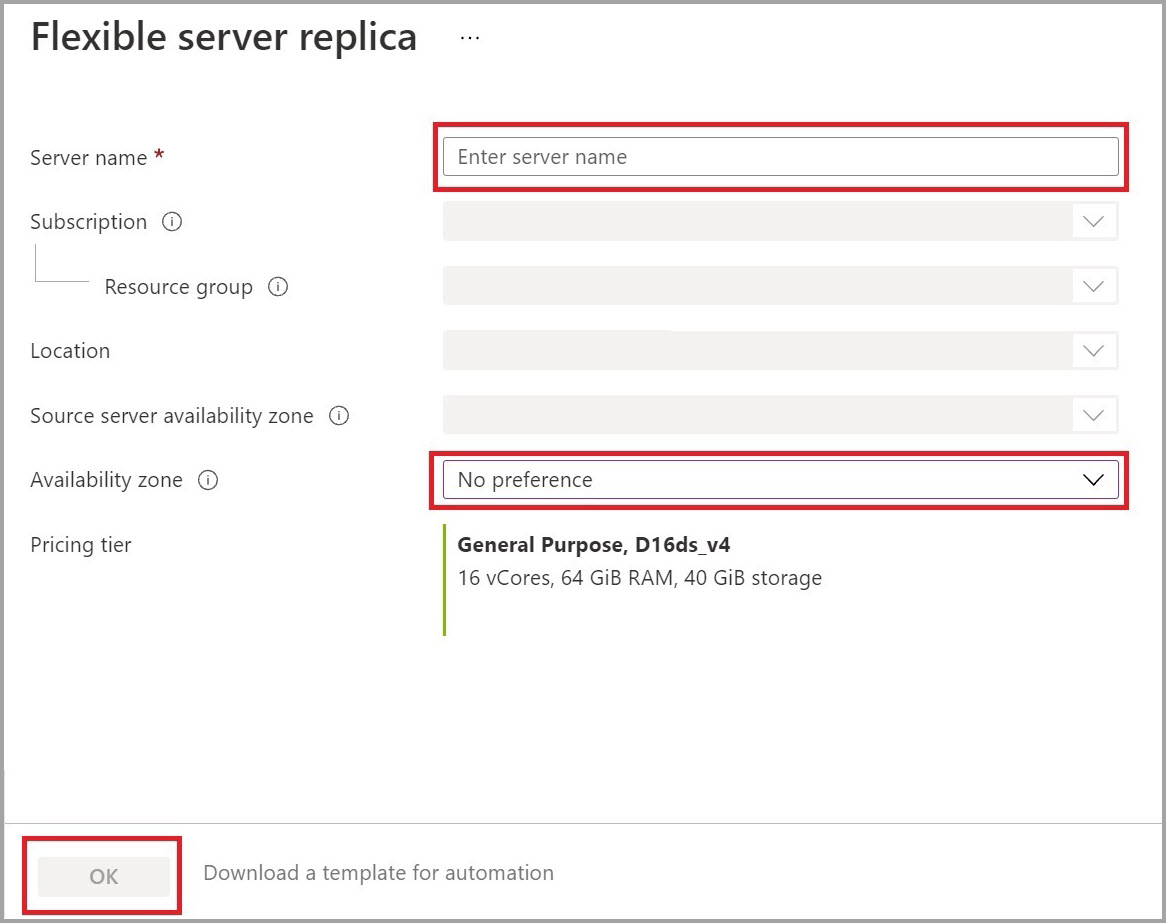
Enter location based on your need to create an in-region or universal cross-region read-replica.
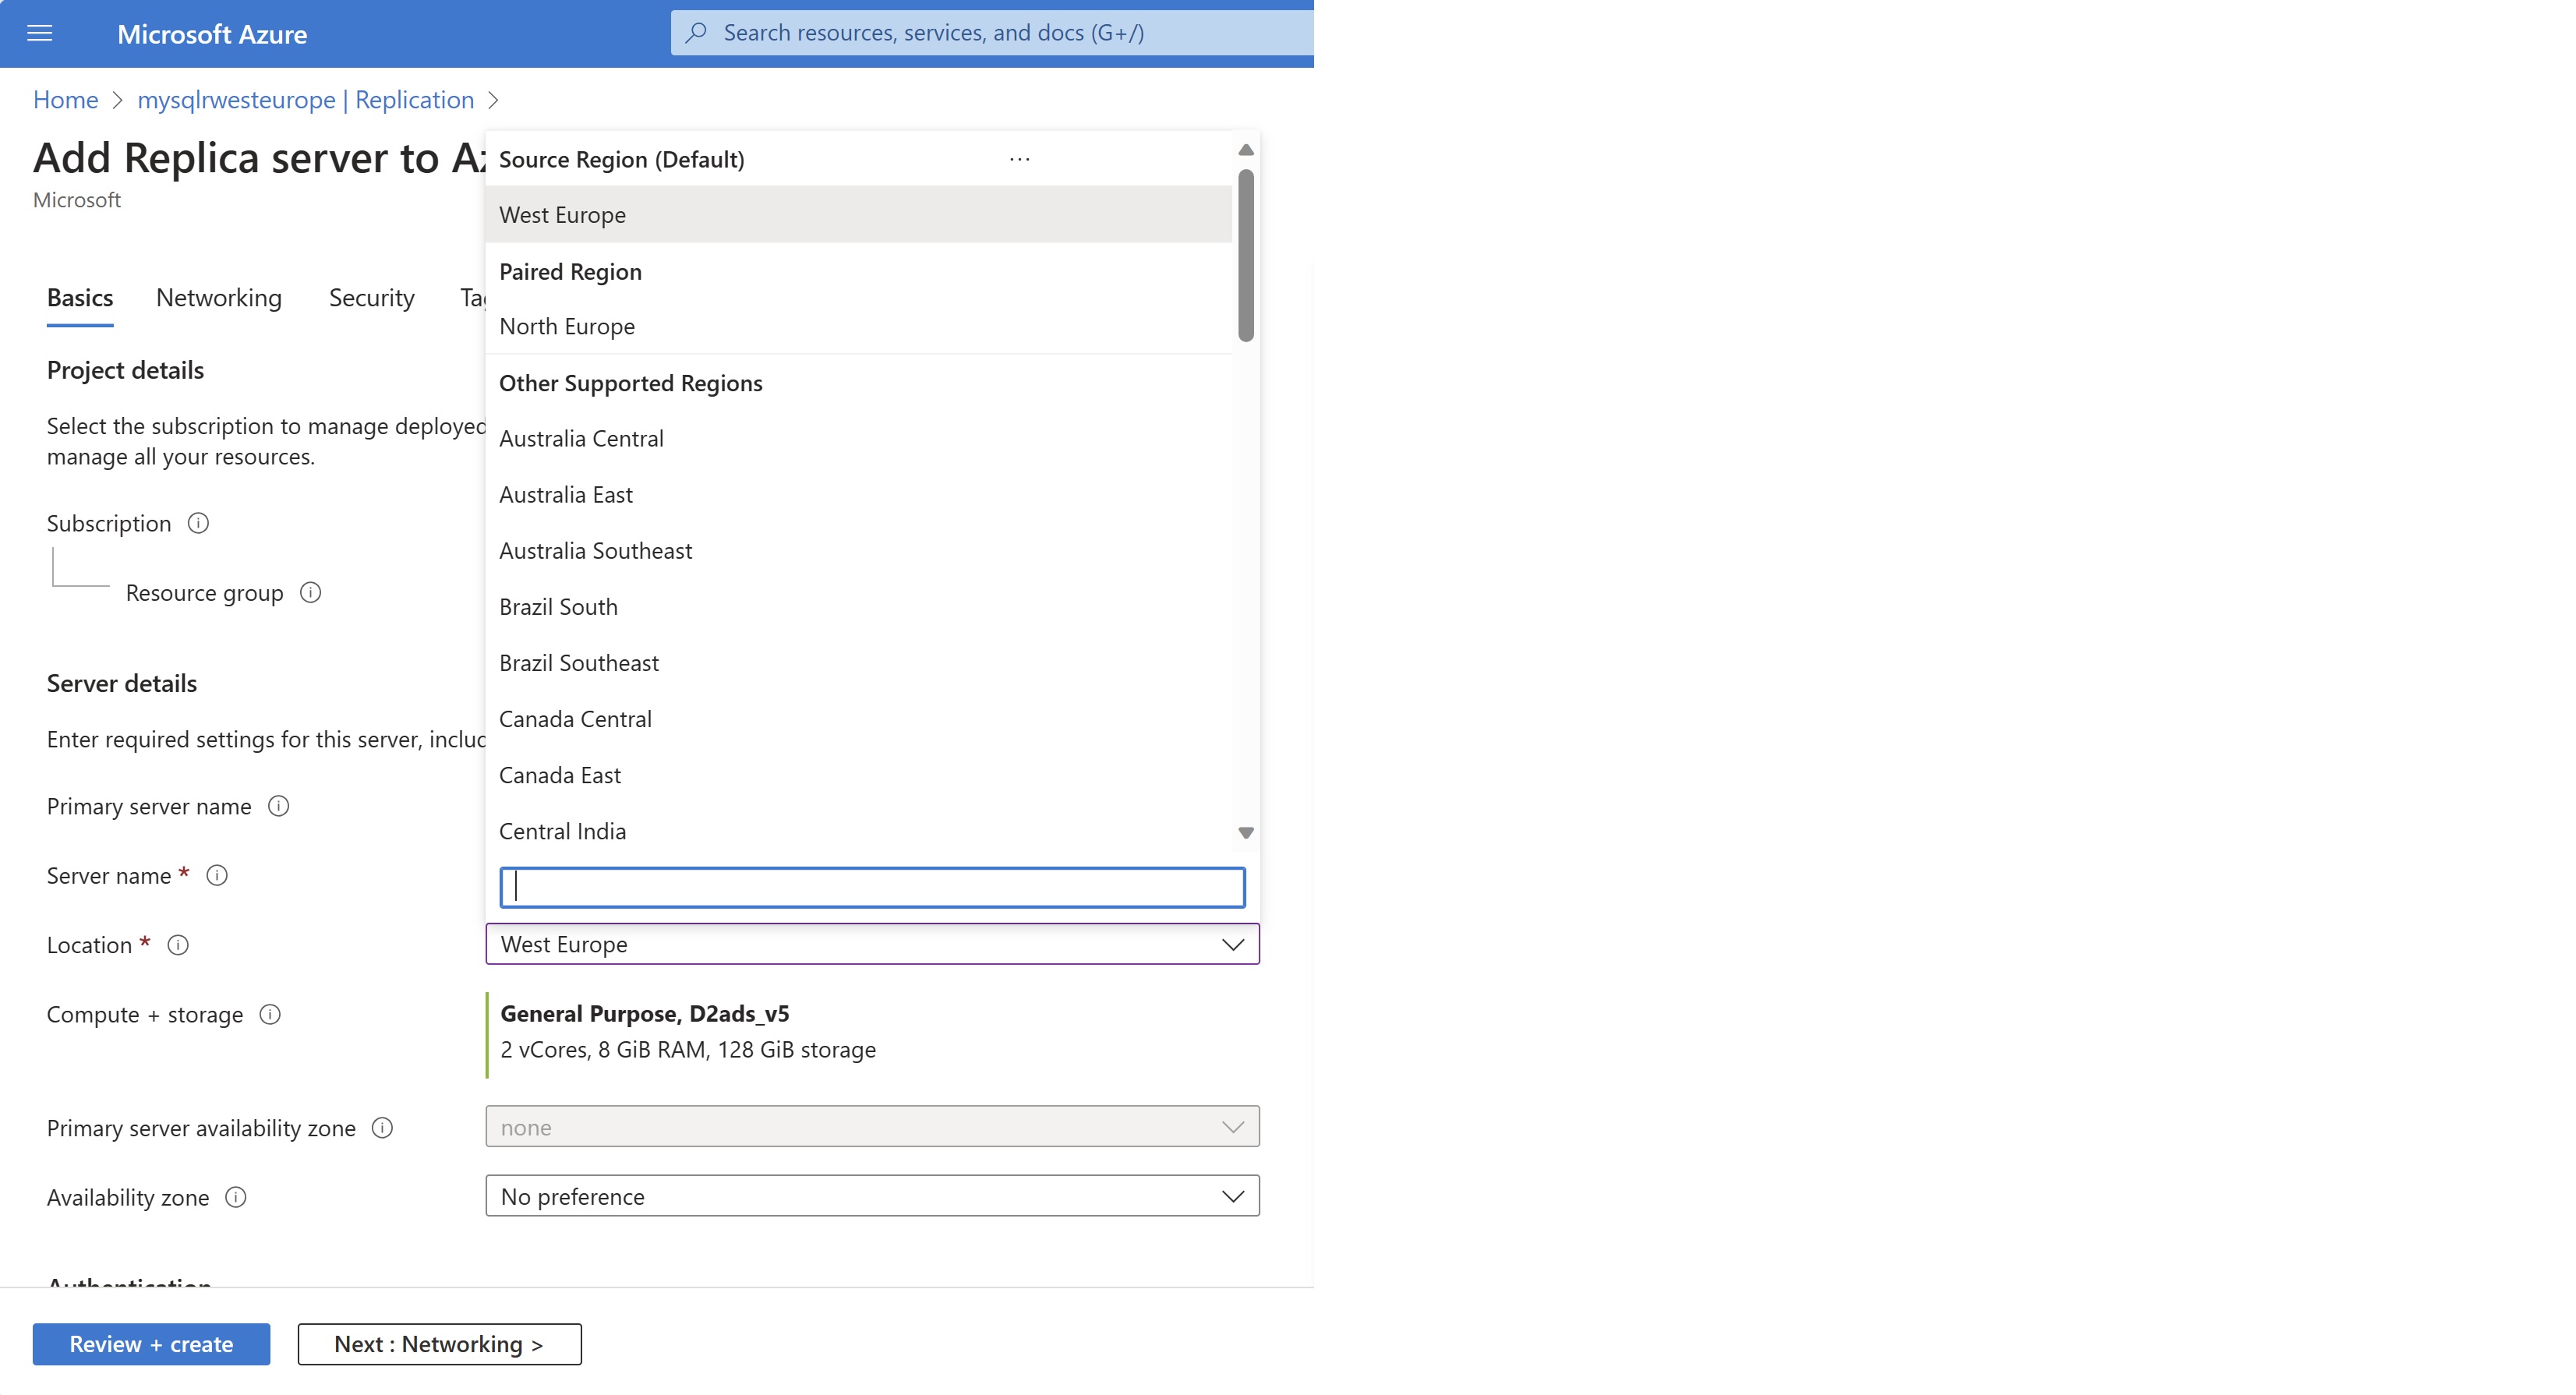
Select OK to confirm the creation of the replica.
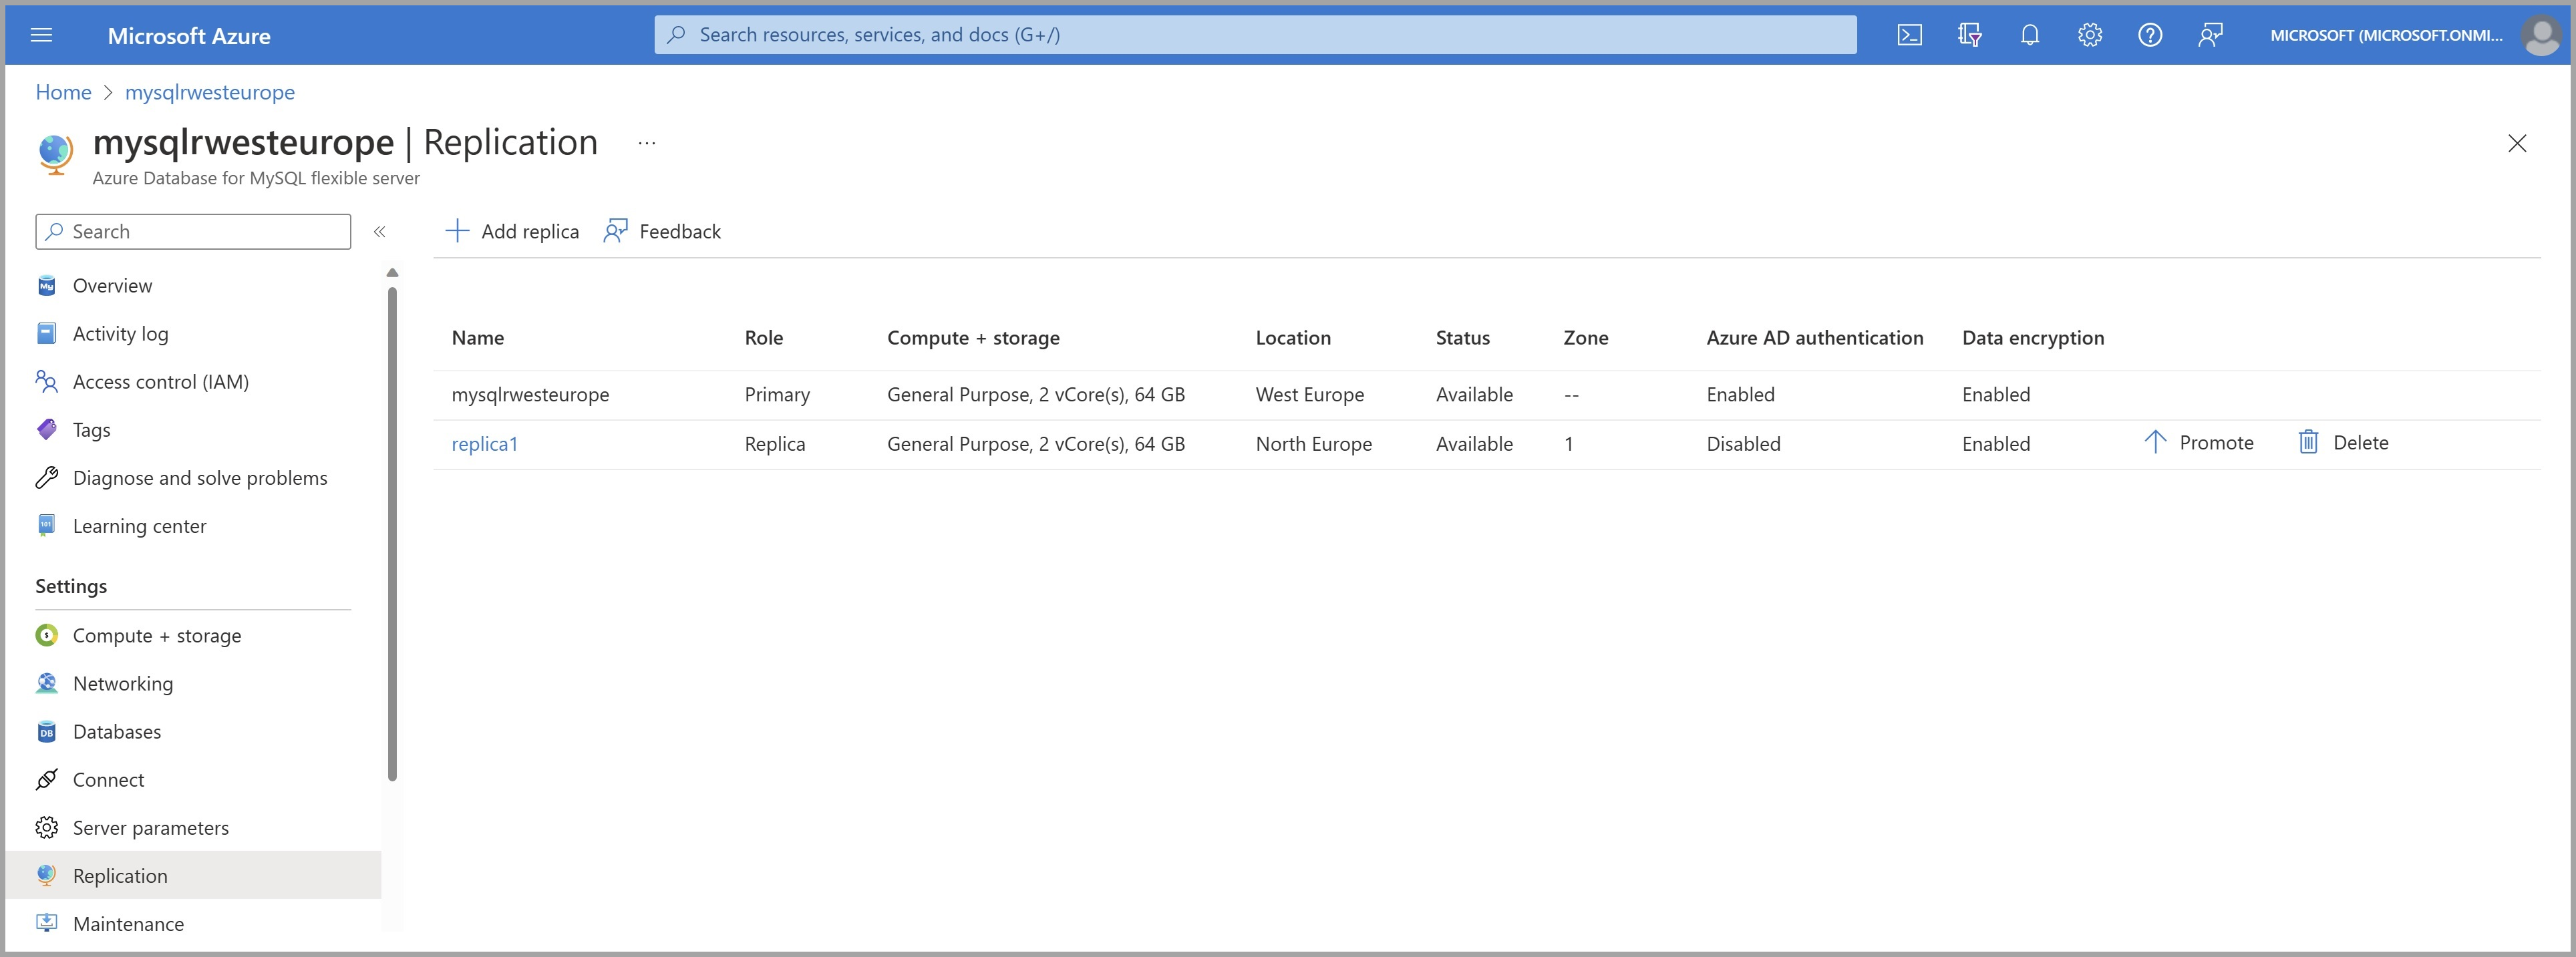
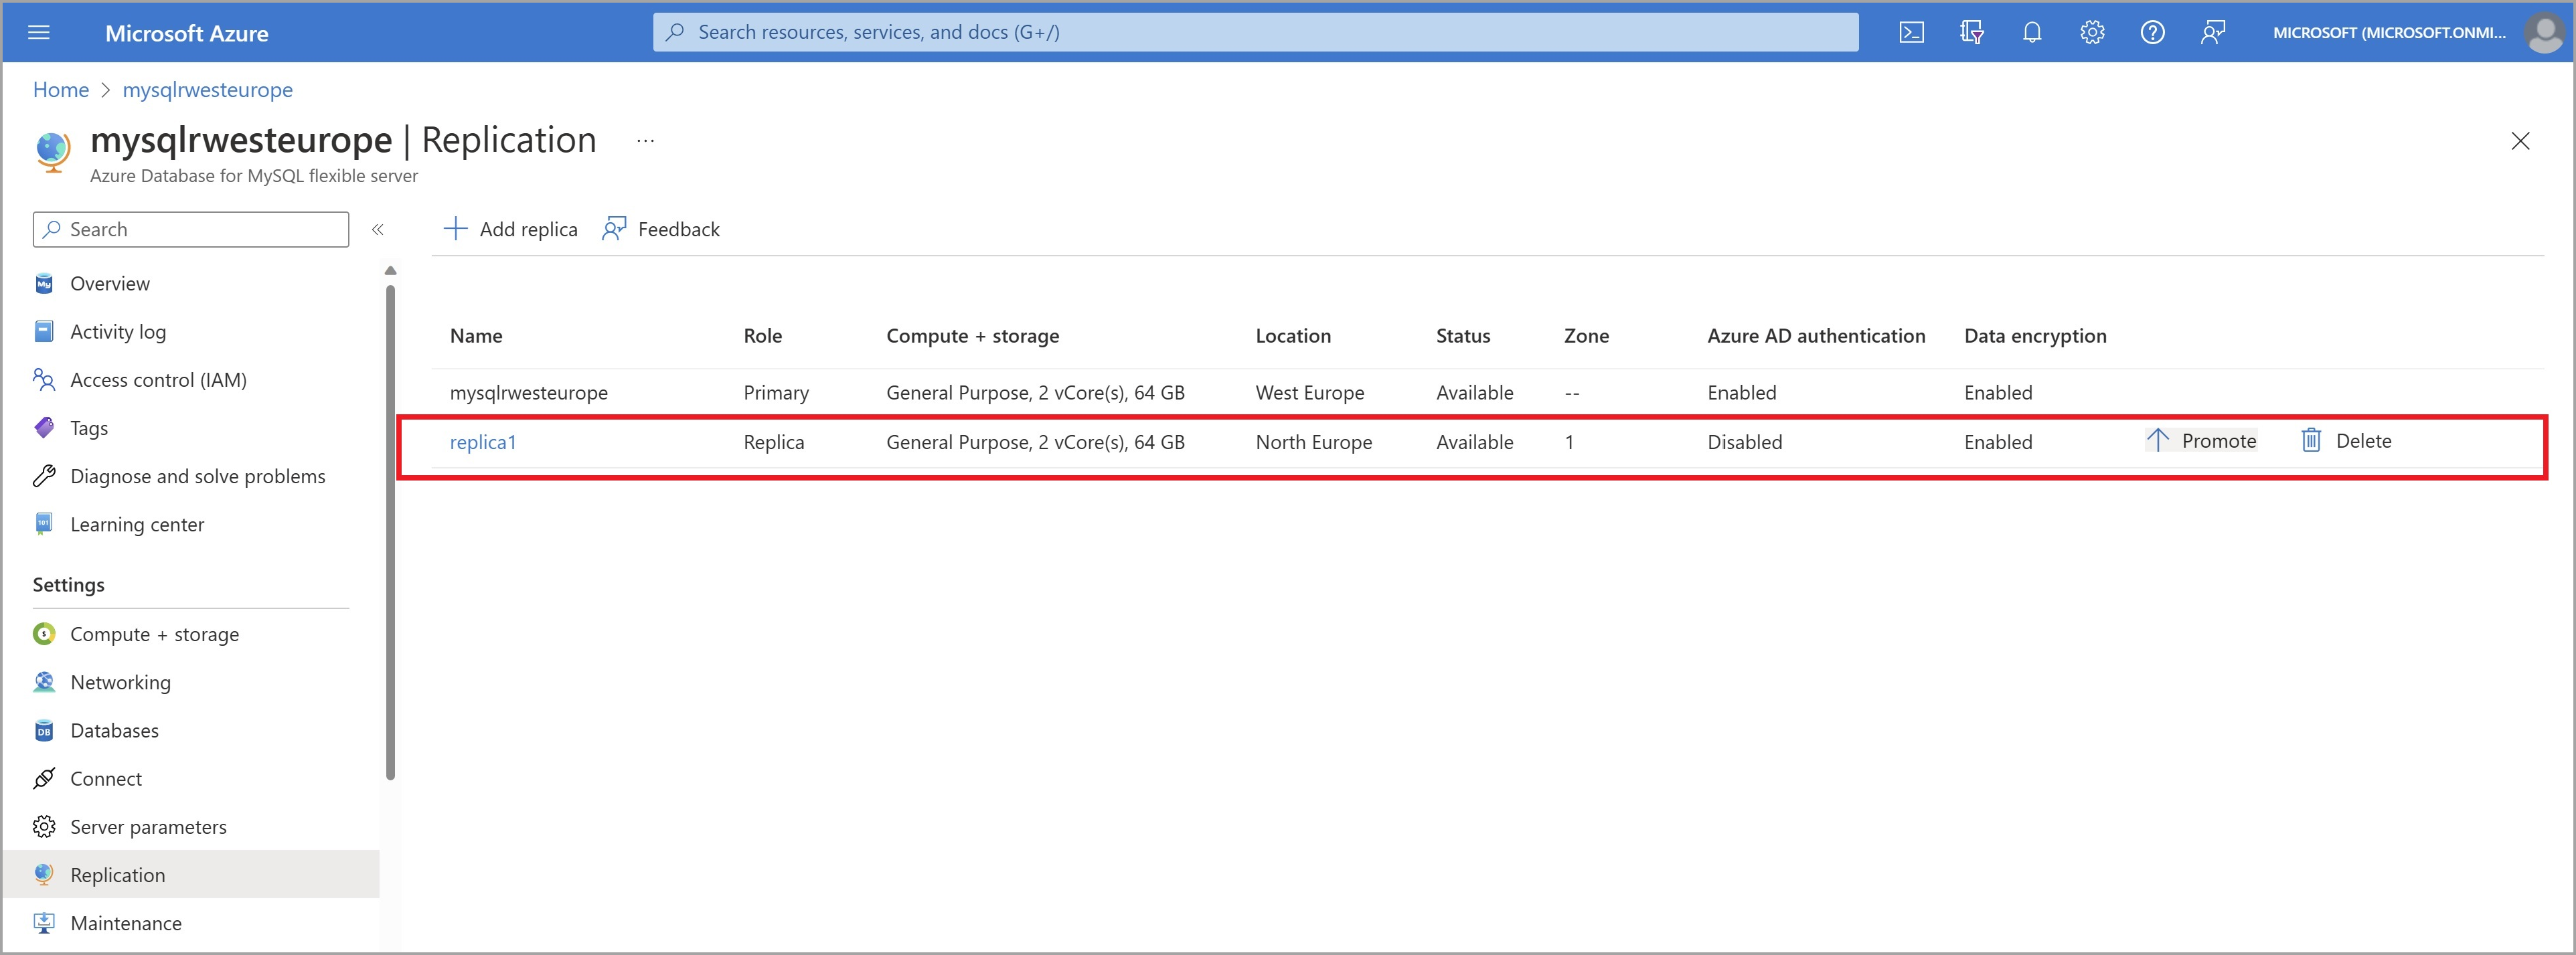
Once the replica server has been created, it can be viewed from the Replication page.
Note
Read replicas are created with the same server configuration as the source. The replica server configuration can be changed after it has been created. The replica server is always created in the same resource group and the same subscription as the source server. Suppose you want to create a replica server for a different resource group or different subscription. In that case, you can move the replica server after creation. It is recommended that the replica server's configuration should be kept at equal or greater values than the source to ensure the replica can keep up with the source.
Stop replication to a replica server
Important
Stopping replication to a server is irreversible. Once replication has stopped between a source and replica, it cannot be undone. The replica server then becomes a standalone server and now supports read and write. This server cannot be made into a replica again.
To stop replication between a source and a replica server from the Azure portal, use the following steps:
In the Azure portal, select your source Azure Database for MySQL Flexible Server instance.
Select Replication from the menu, under SETTINGS.
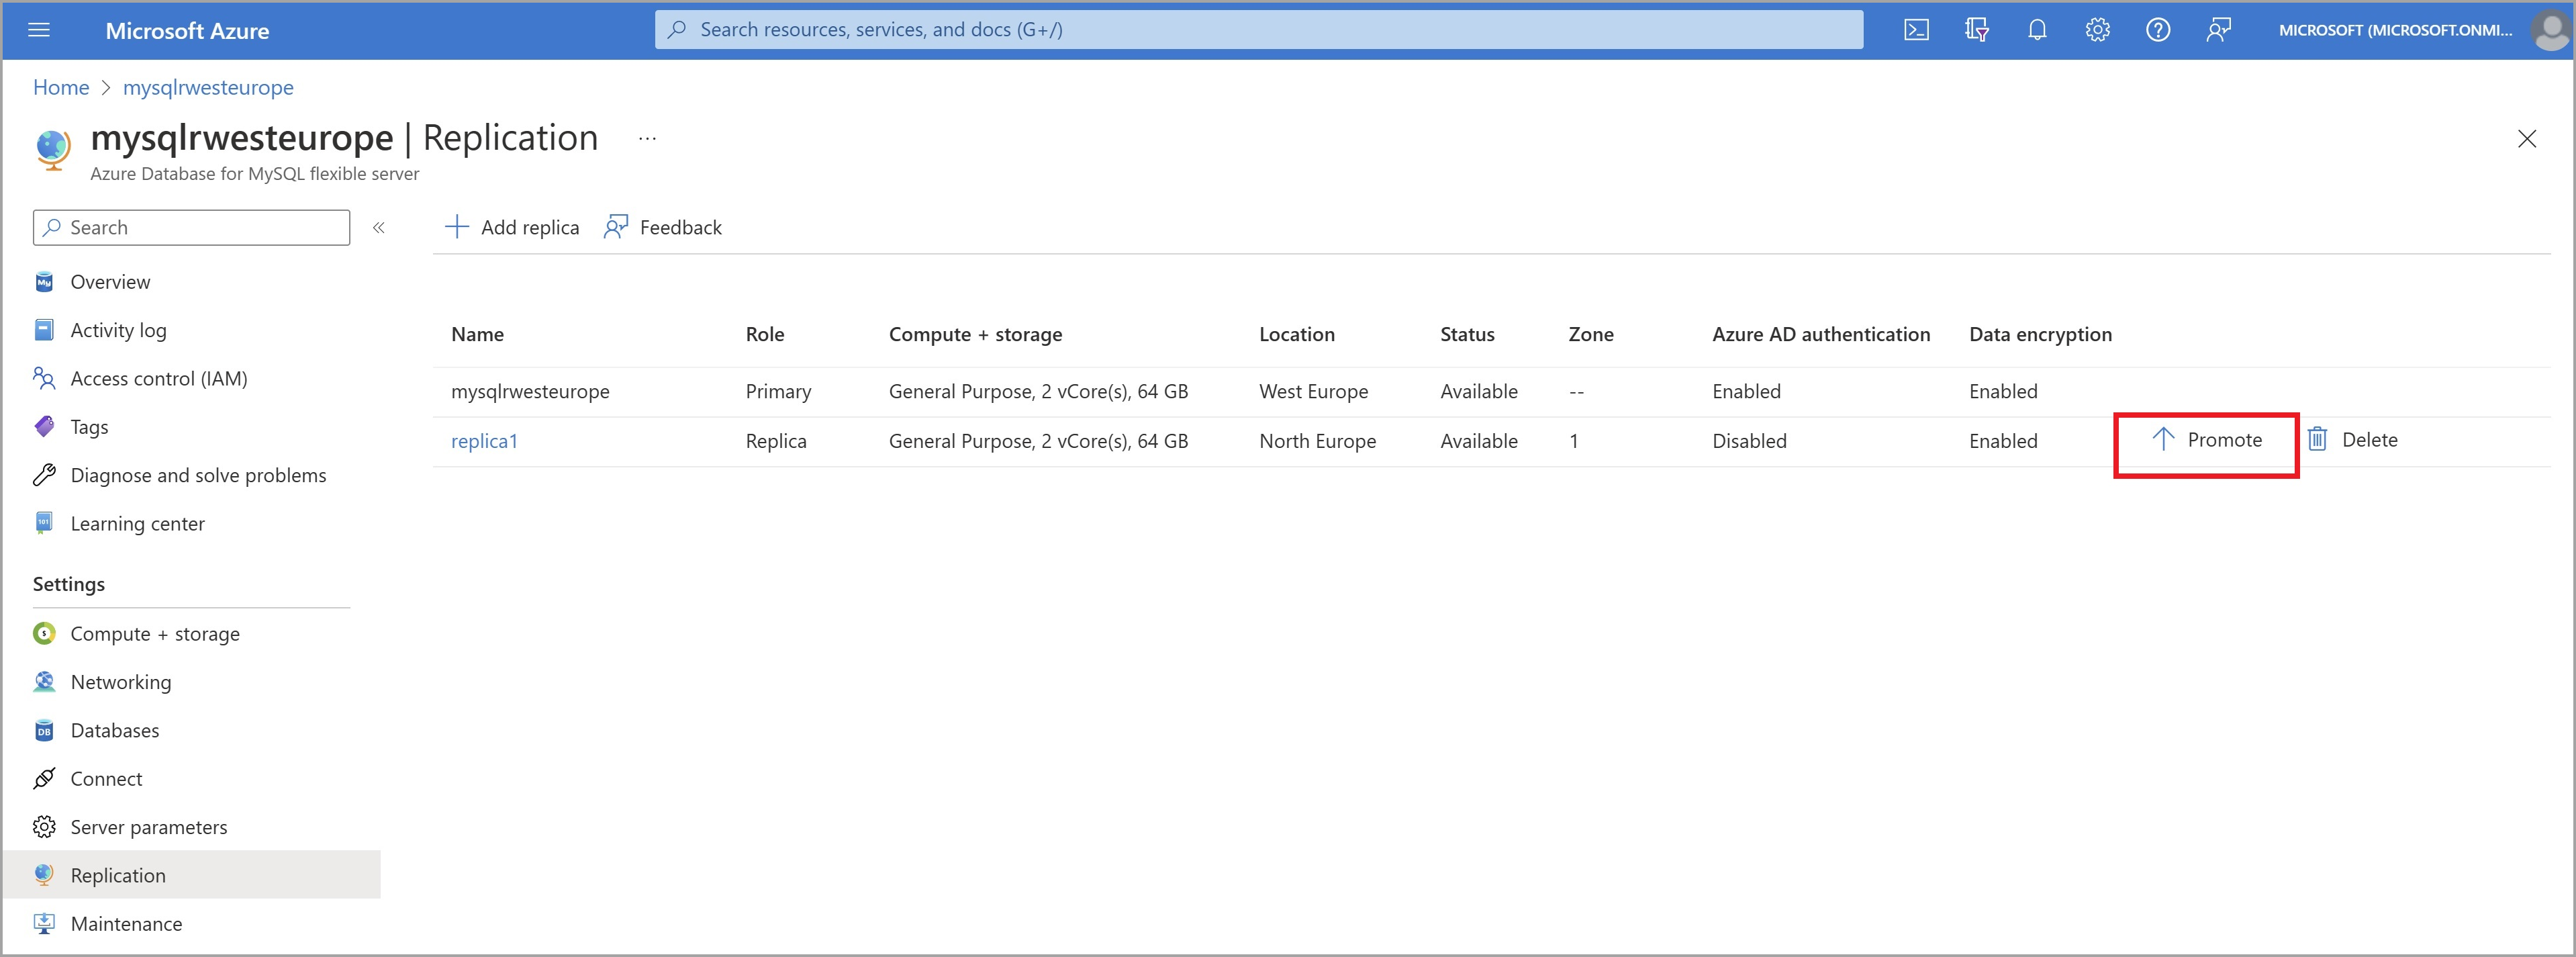
Select the replica server you wish to stop replication.
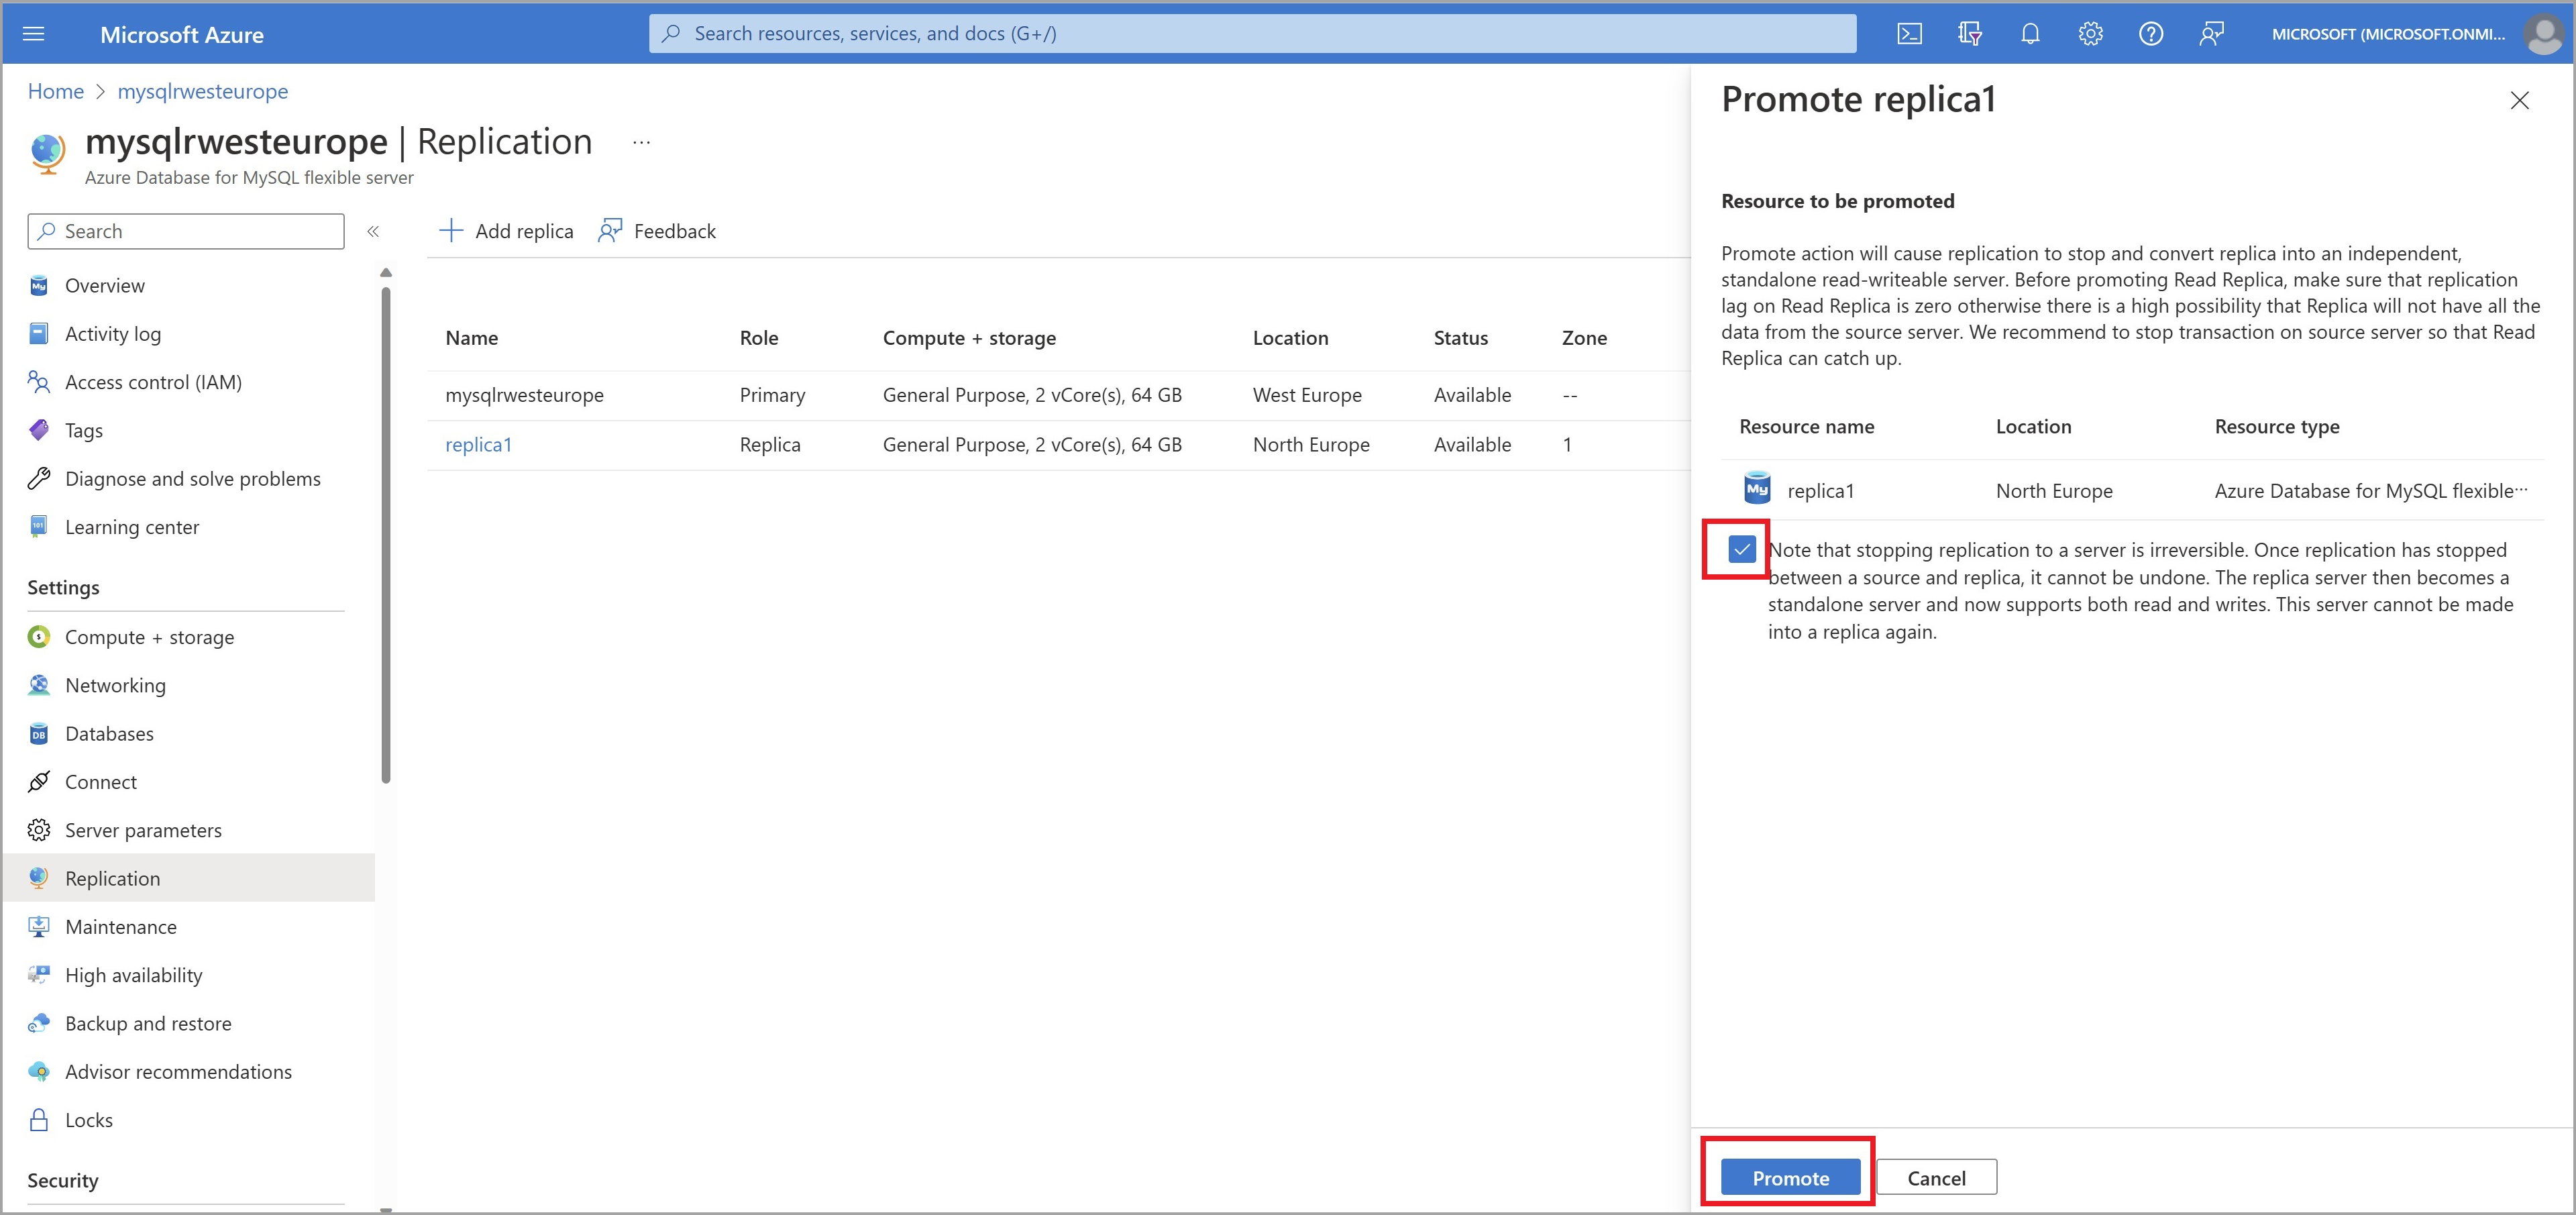
Select Promote. Promote action caused replication to stop and convert the replica into an independent, standalone read-writeable server.
Confirm you want to stop replication by selecting Promote.
Delete a replica server
To delete a read replica server from the Azure portal, use the following steps:
In the Azure portal, select your source Azure Database for MySQL Flexible Server instance.
Select Replication from the menu, under SETTINGS.
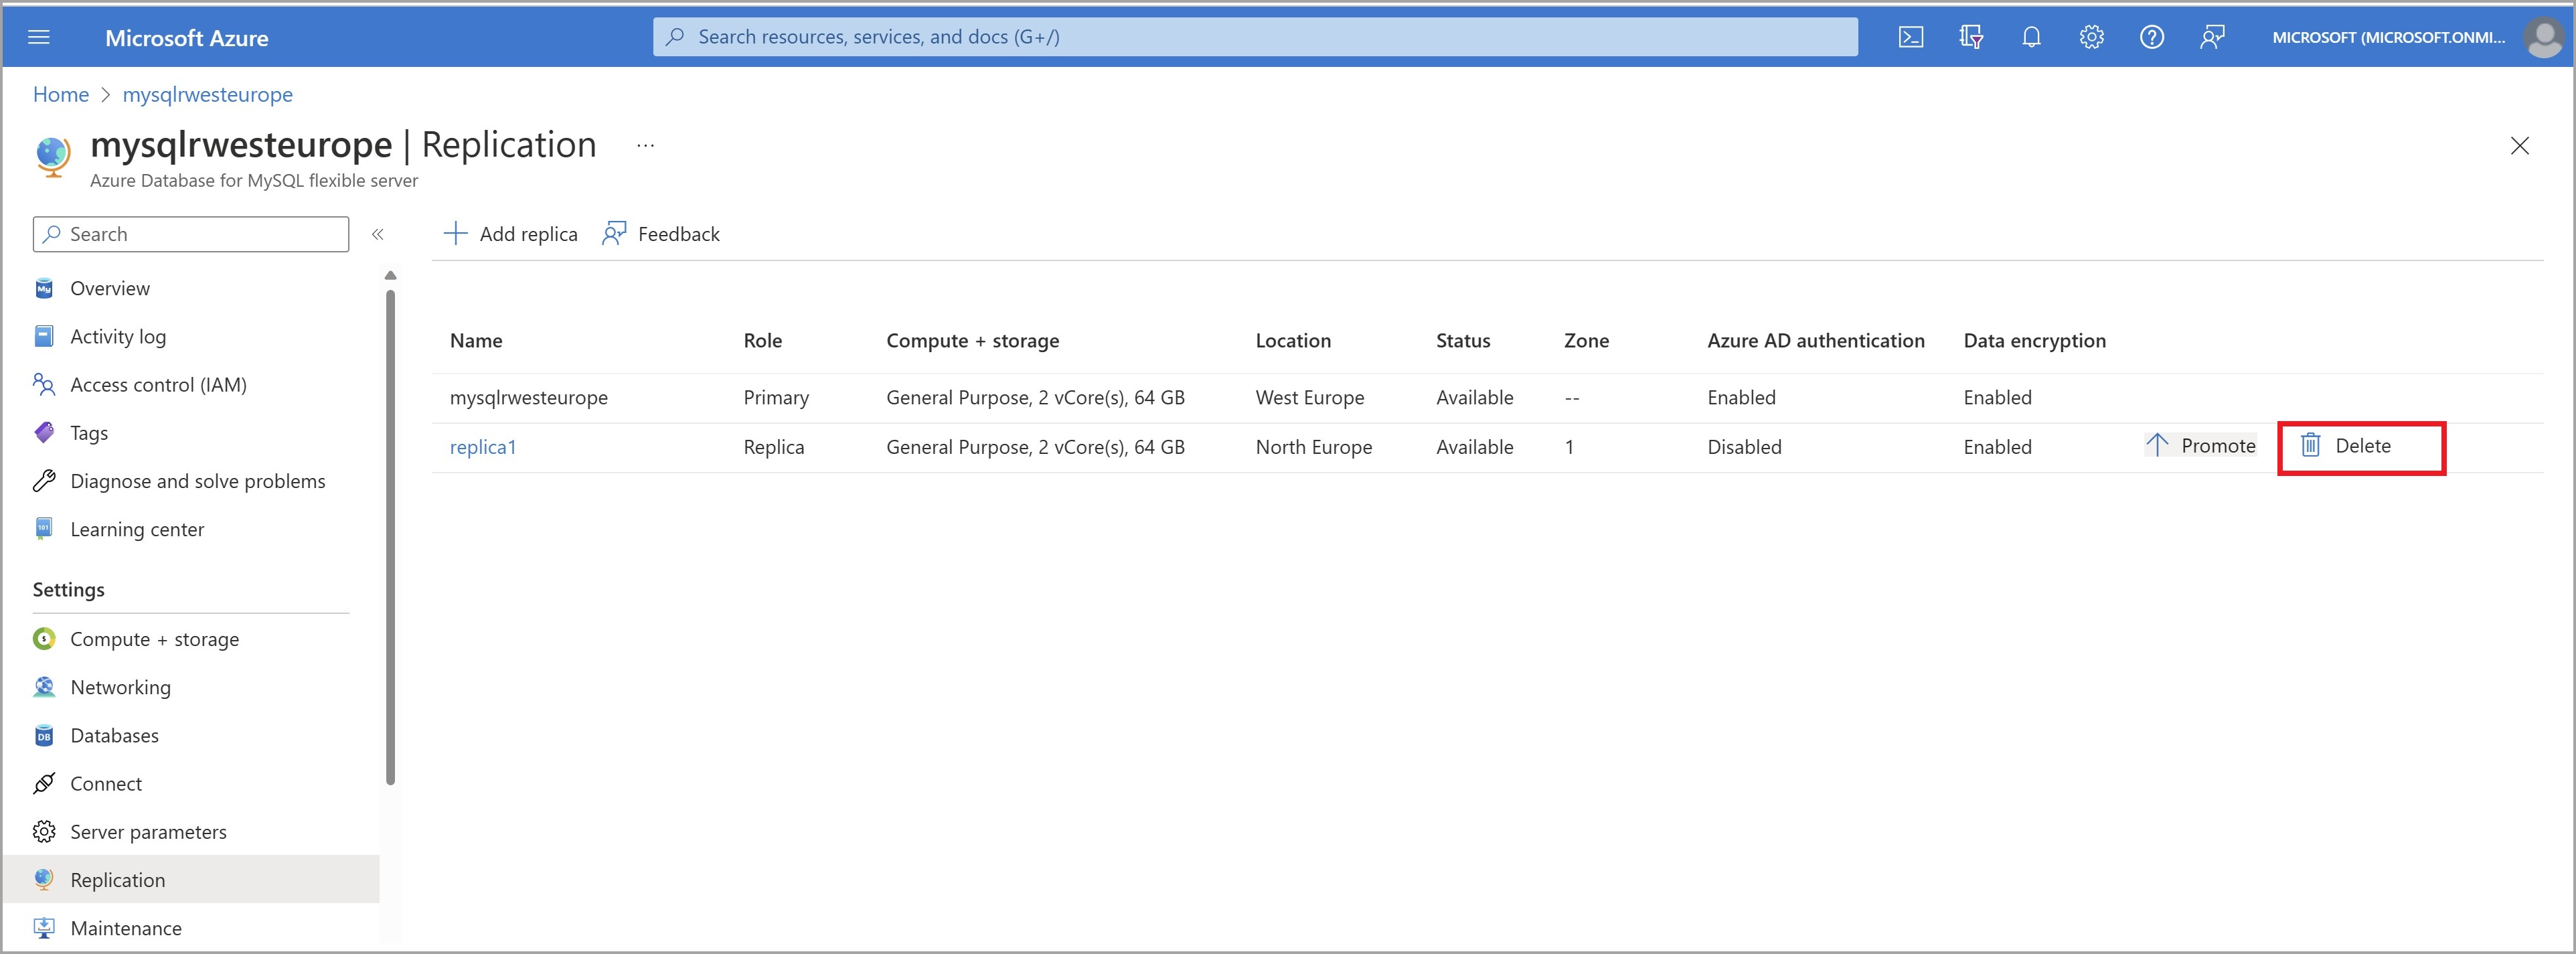
Select the replica server you wish to delete.
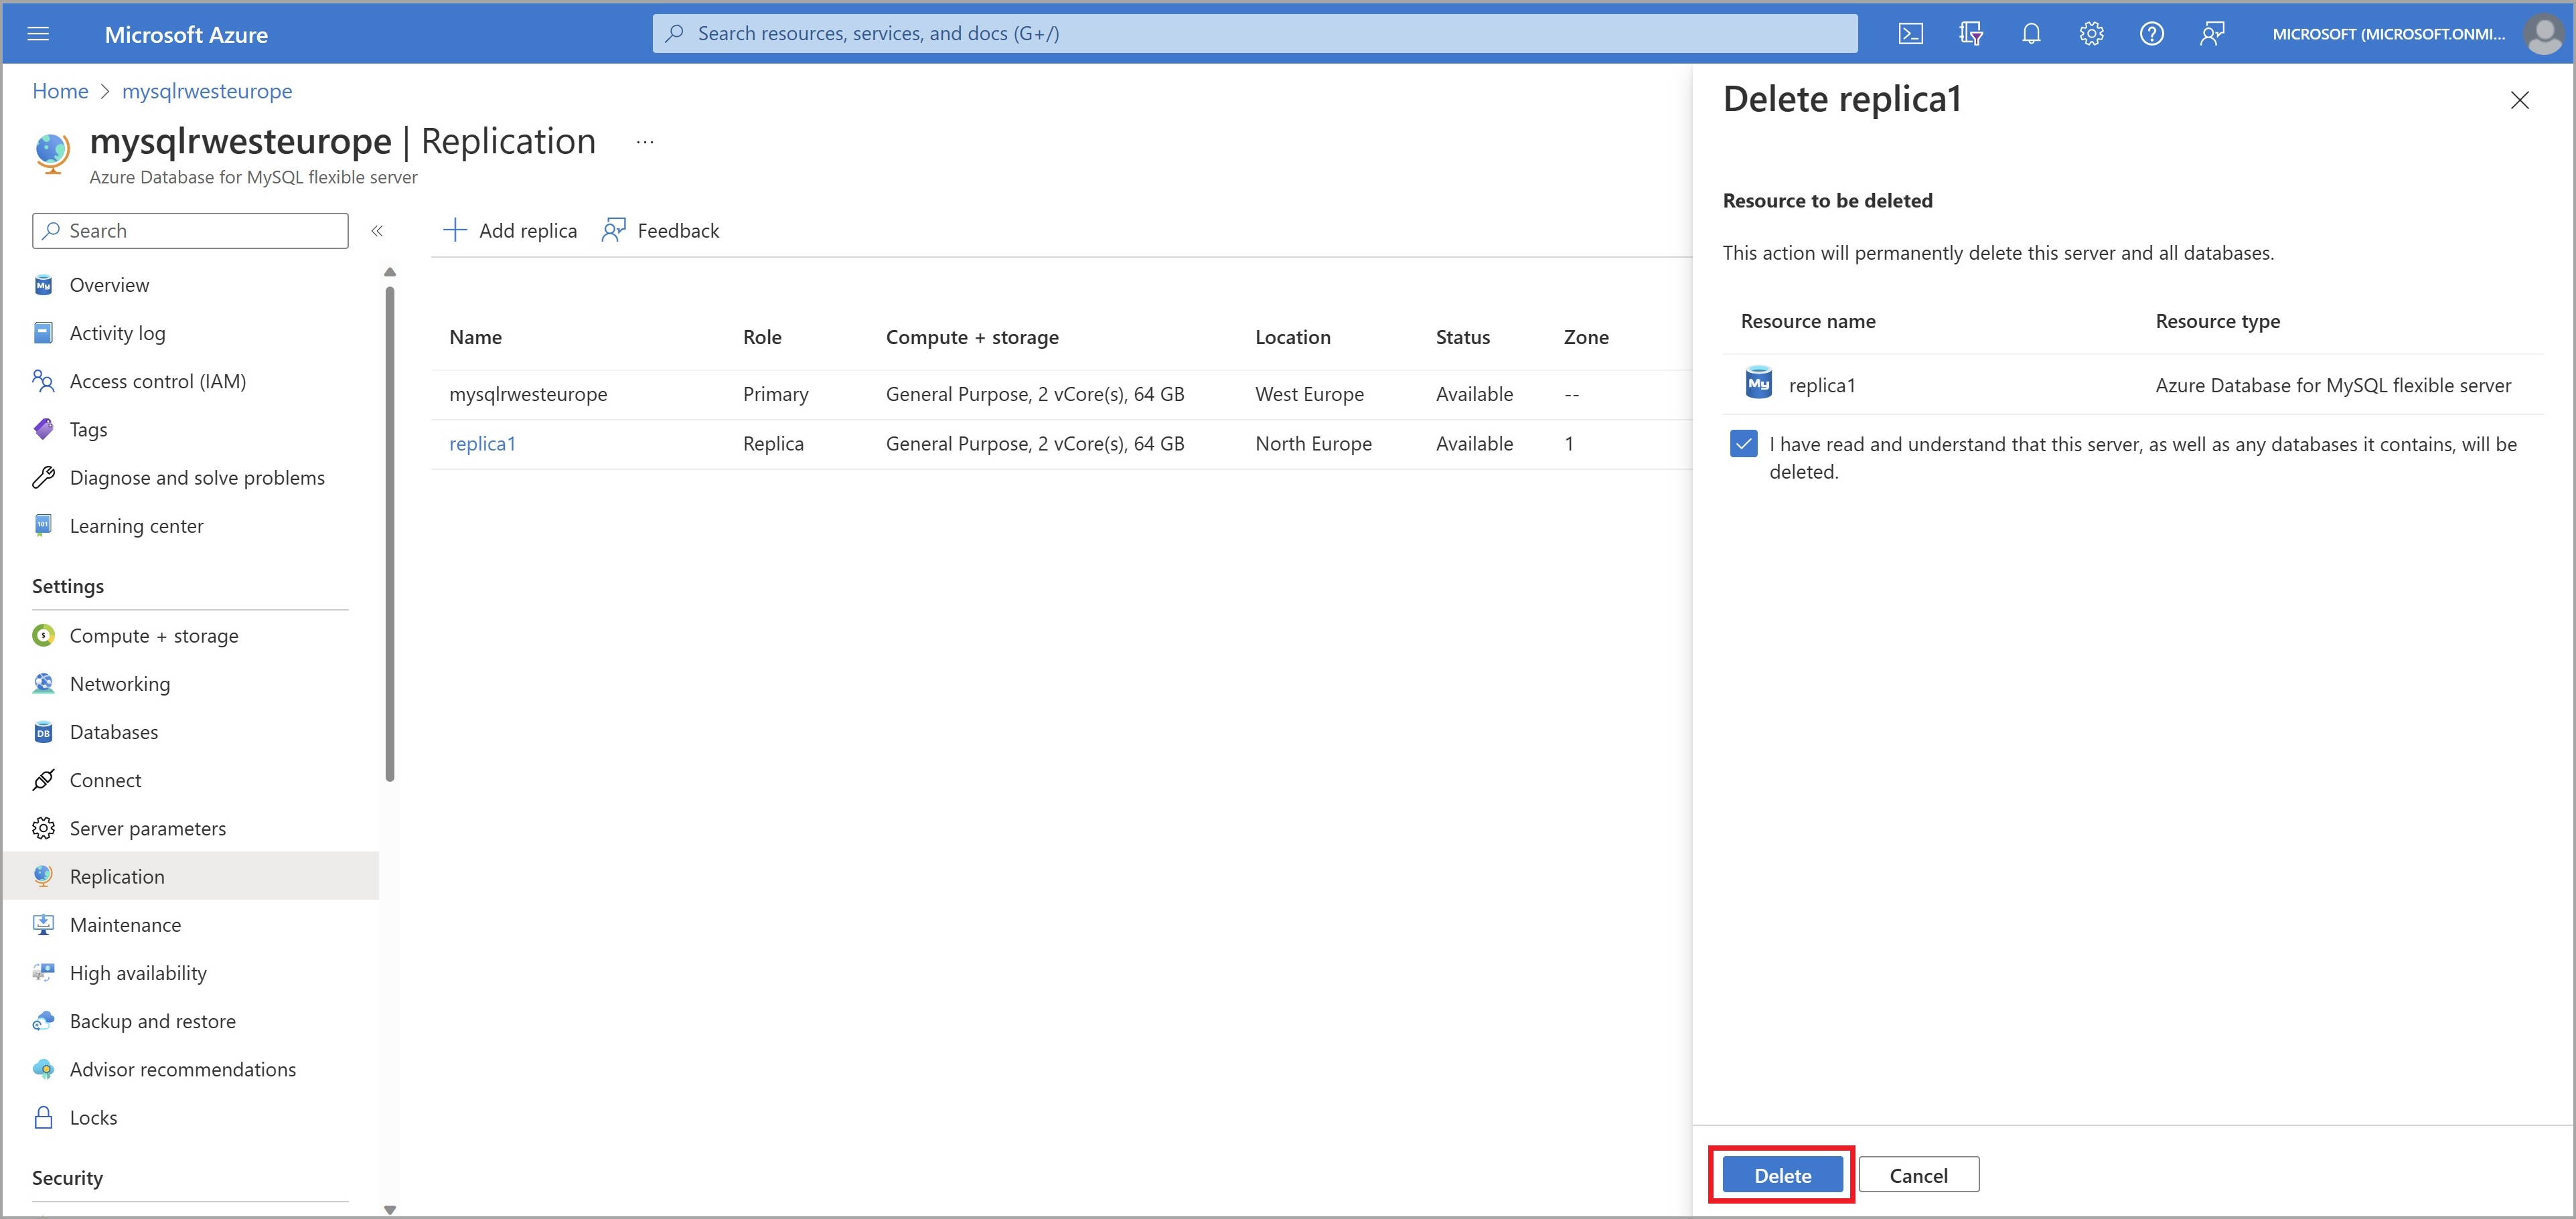
Select Delete replica
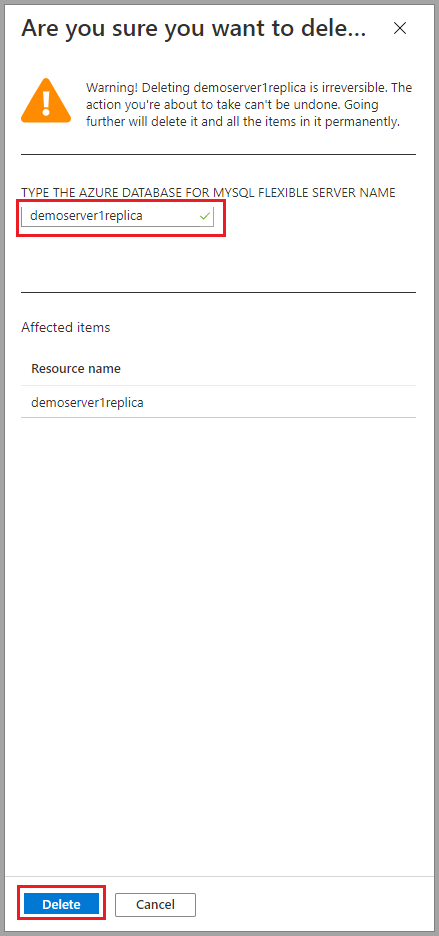
Type the name of the replica and select Delete to confirm the deletion of the replica.
Delete a source server
Important
Deleting a source server stops replication to all replica servers and deletes the source server itself. Replica servers become standalone servers that now support both read and writes.
To delete a source server from the Azure portal, use the following steps:
In the Azure portal, select your source Azure Database for MySQL Flexible Server instance.
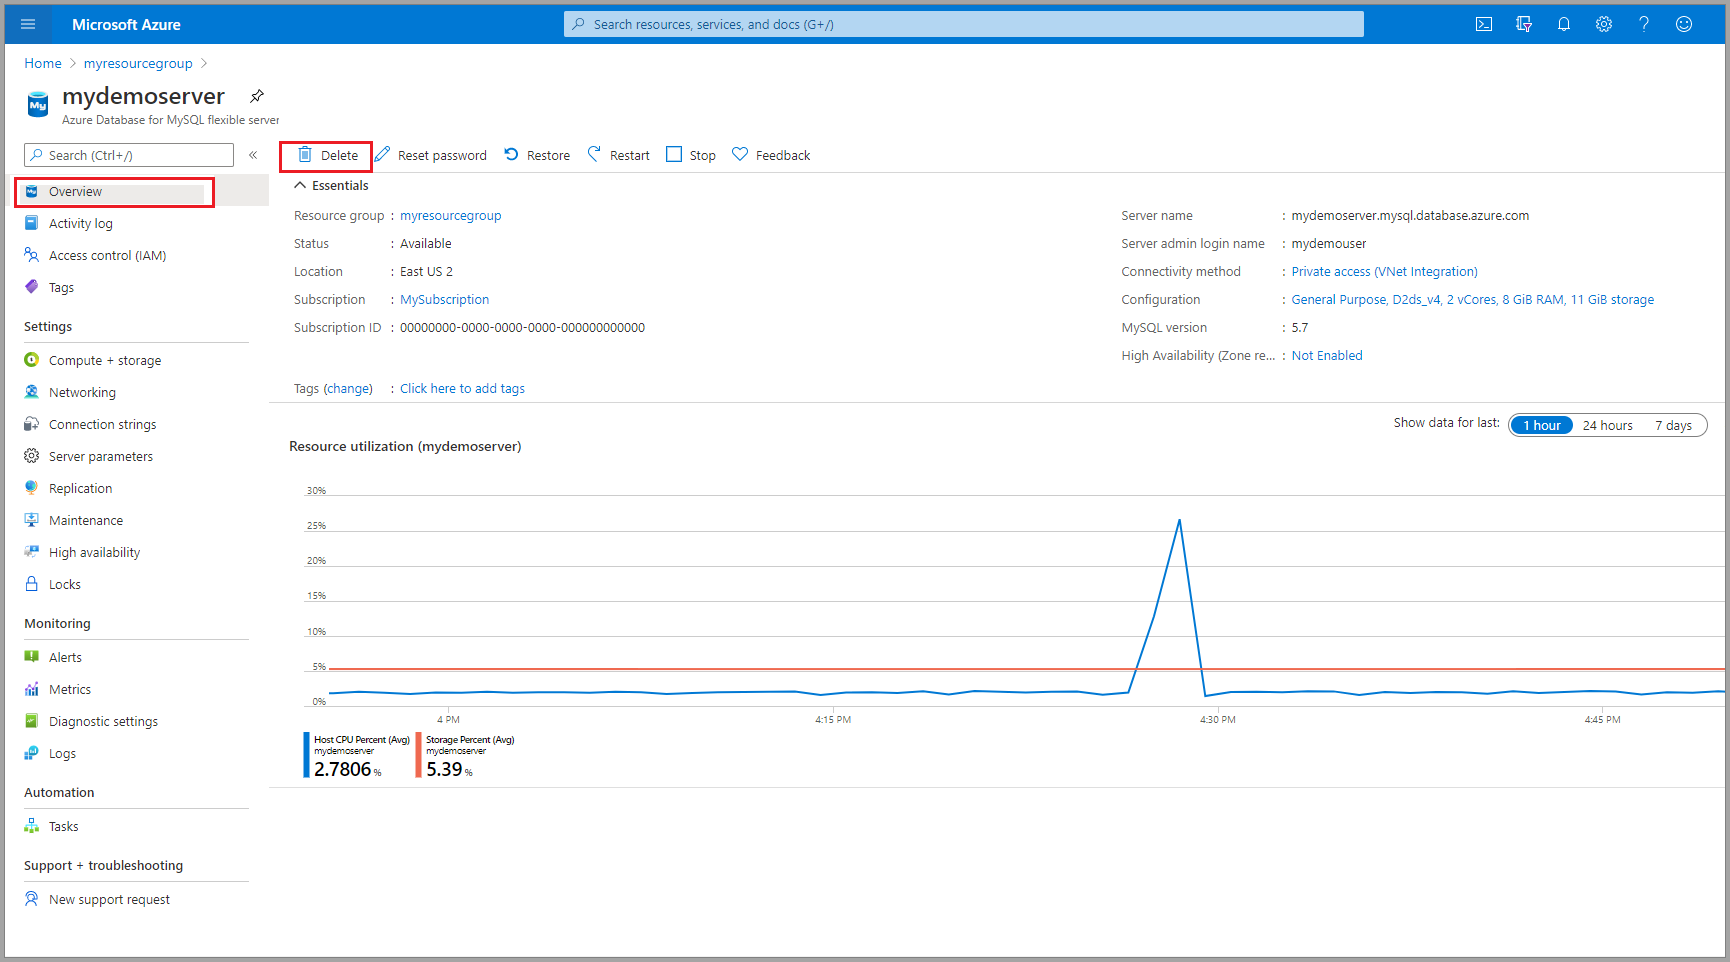
From the Overview, select Delete.
Type the name of the source server and select Delete to confirm the deletion of the source server.
Monitor replication
In the Azure portal, select the replica Azure Database for MySQL Flexible Server instance you want to monitor.
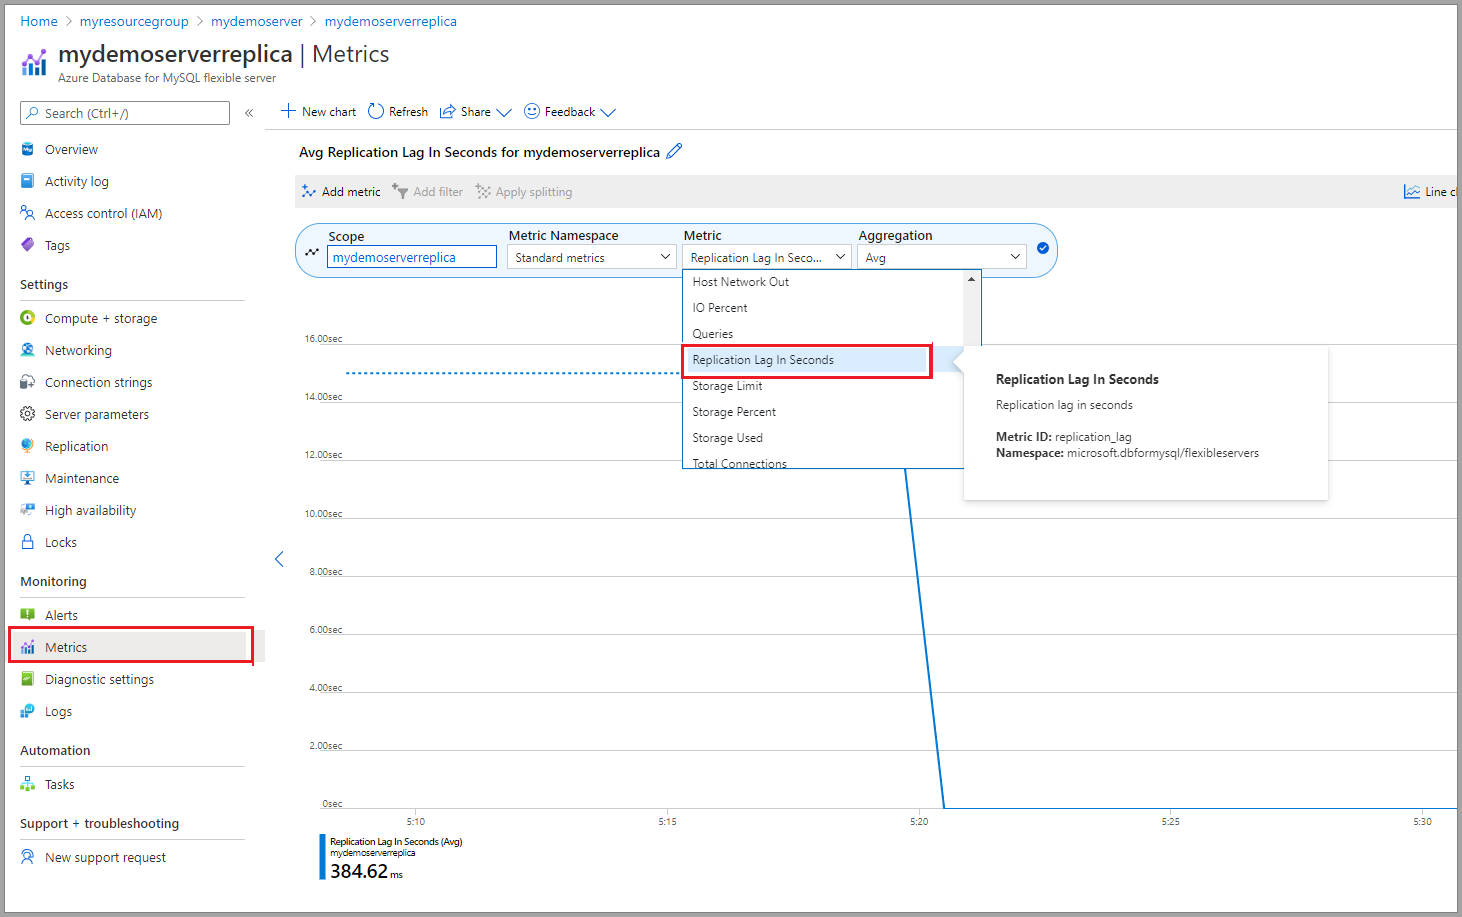
Under the Monitoring section of the sidebar, select Metrics:
Select Replication lag in seconds from the dropdown list of available metrics.
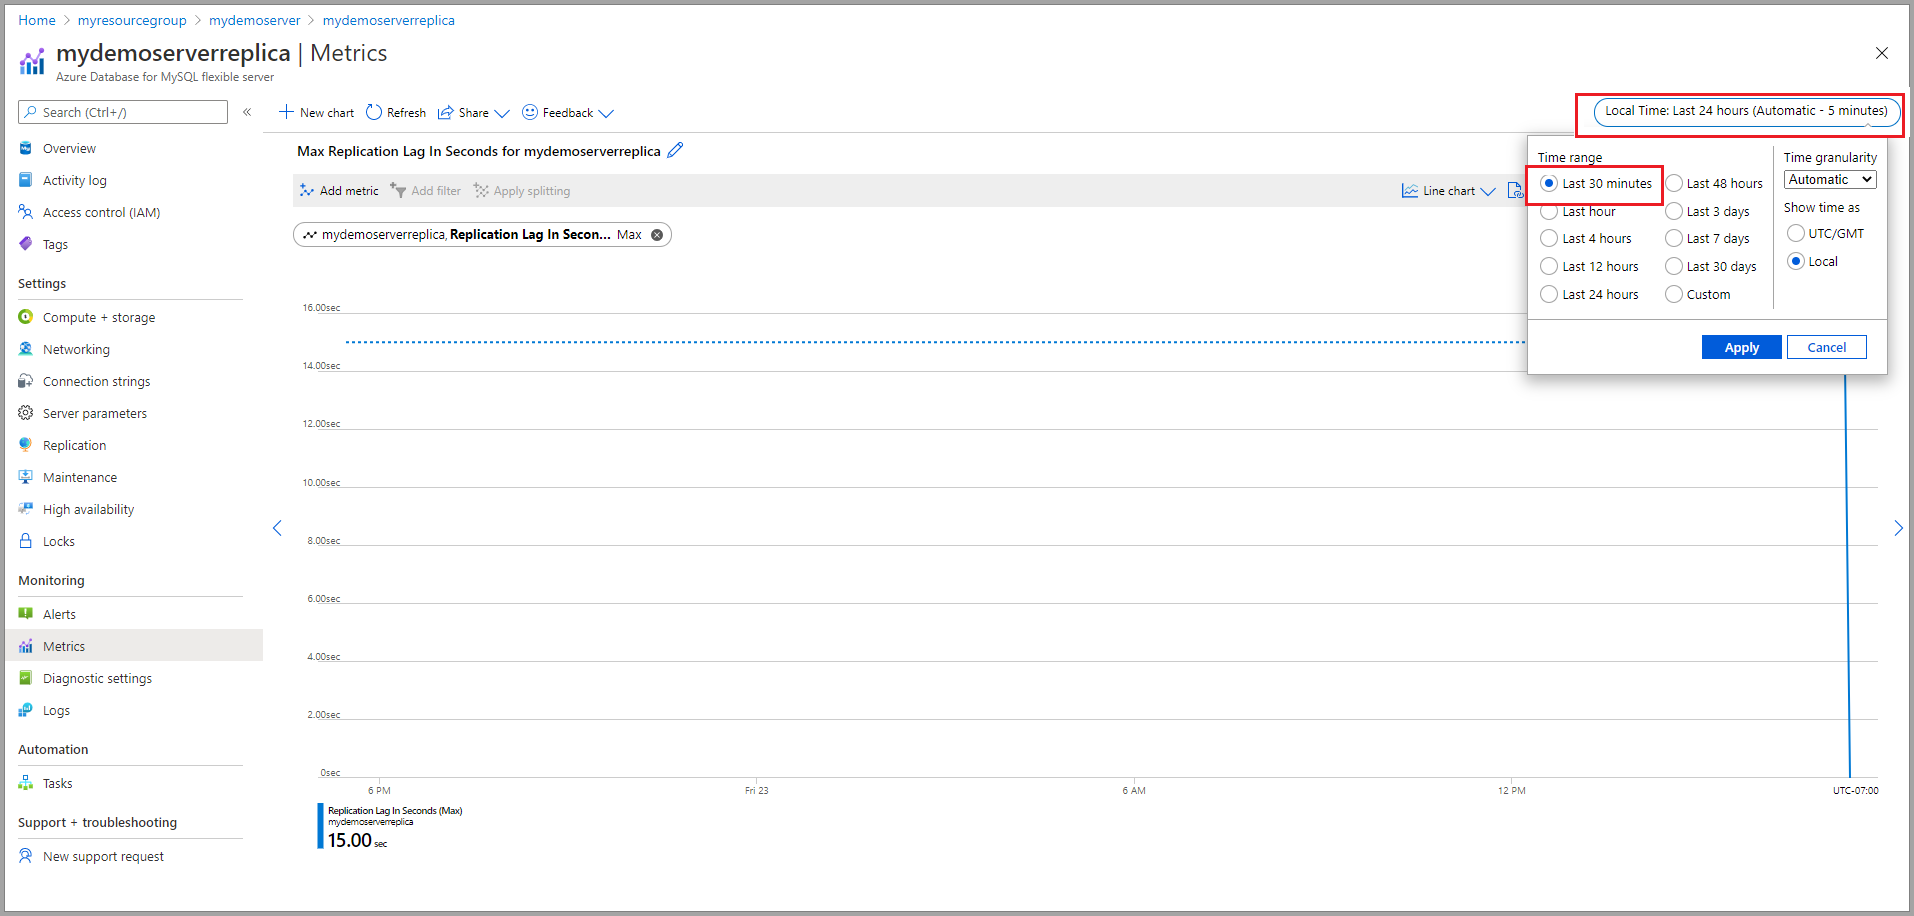
Select the time range you wish to view. The image below selects a 30-minute time range.
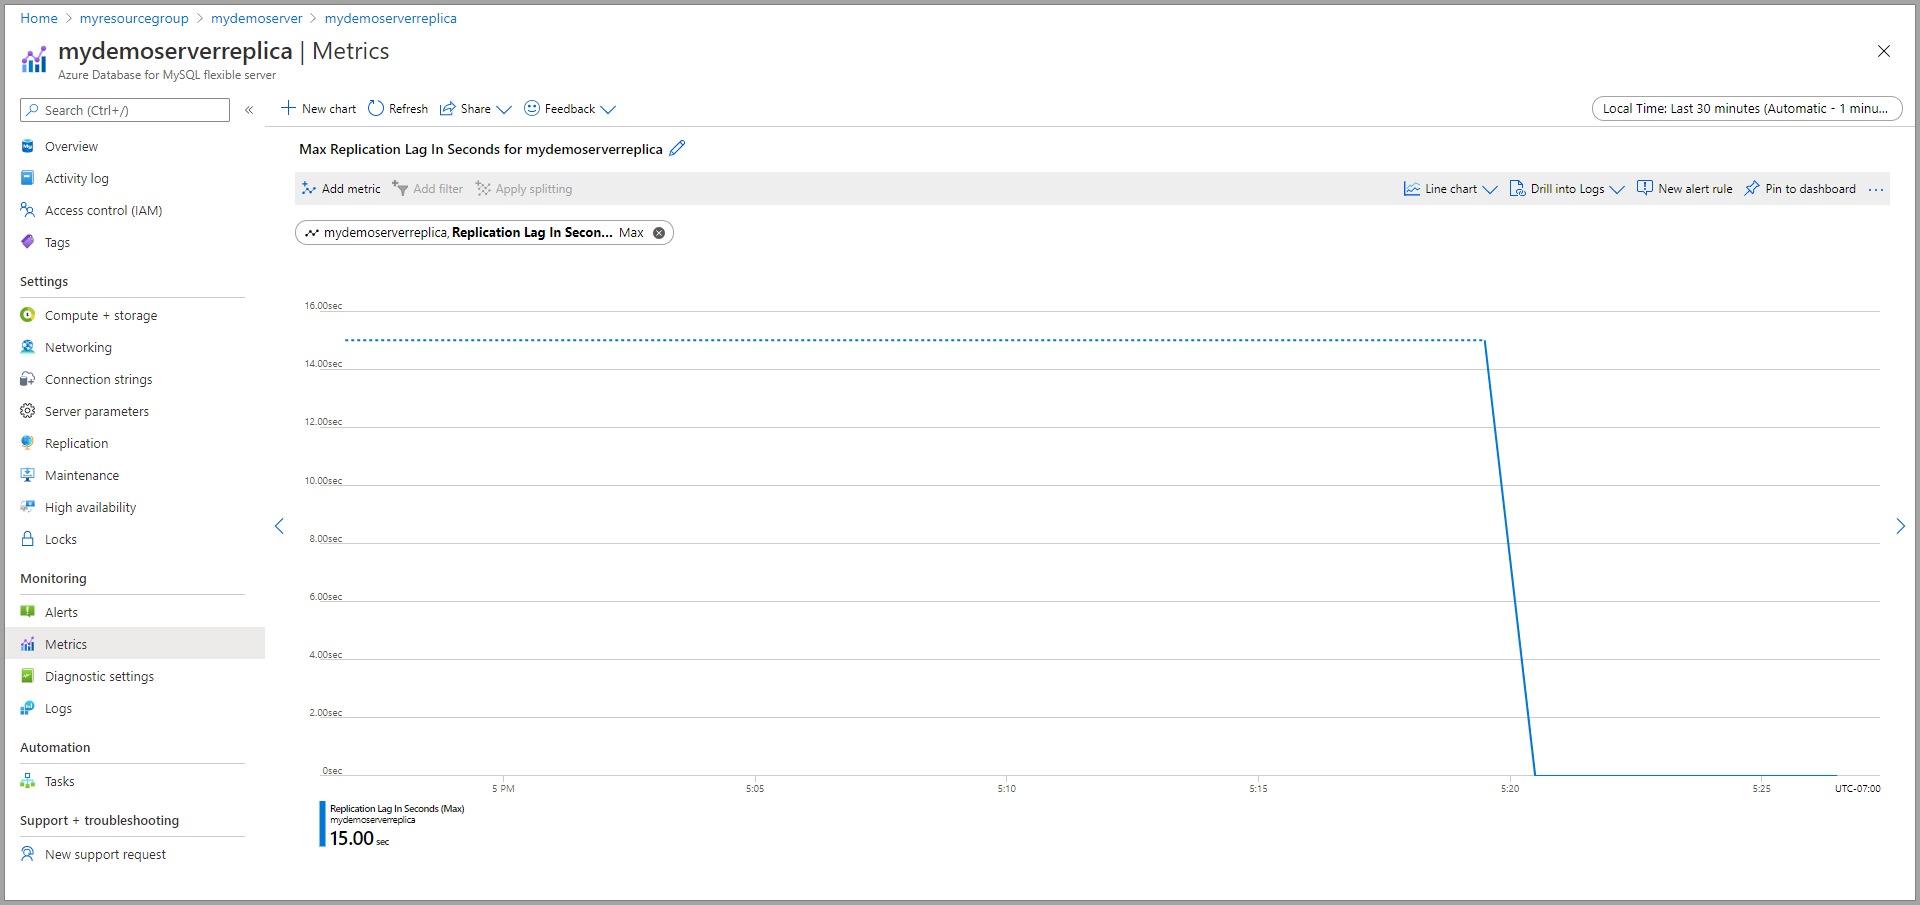
View the replication lag for the selected time range. The image below displays the last 30 minutes.
