Tutorial: Discover physical servers with Azure Migrate: Discovery and assessment
As part of your migration journey to Azure, you discover your servers for assessment and migration.
This tutorial shows you how to discover on-premises physical servers with the Azure Migrate: Discovery and assessment tool, using a lightweight Azure Migrate appliance. You deploy the appliance as a physical server, to continuously discover servers and performance metadata.
In this tutorial, you learn how to:
- Set up an Azure account.
- Prepare physical servers for discovery.
- Create a project.
- Set up the Azure Migrate appliance.
- Start continuous discovery.
Note
Tutorials show the quickest path for trying out a scenario, and use default options.
If you don't have an Azure subscription, create a free account before you begin.
Prerequisites
Before you start this tutorial, ensure you have these prerequisites in place.
| Requirement | Details |
|---|---|
| Appliance | You need a server to run the Azure Migrate appliance. The server should have: - Windows Server 2022 or 2019 installed. (The deployment of appliance is supported on Windows Server 2022 (recommended) or Windows Server 2019.) - 16-GB RAM, 8 vCPUs, around 80 GB of disk storage - A static or dynamic IP address, with internet access, either directly or through a proxy. - Outbound internet connectivity to the required URLs from the appliance. |
| Windows servers | Allow inbound connections on WinRM port 5985 (HTTP) for discovery of Windows servers. To discover ASP.NET web apps running on IIS web server, check supported Windows OS and IIS versions. |
| Linux servers | Allow inbound connections on port 22 (TCP) for discovery of Linux servers. To discover Java web apps running on Apache Tomcat web server, check supported Linux OS and Tomcat versions. |
| SQL Server access | To discover SQL Server instances and databases, the Windows or SQL Server account requires these permissions for each SQL Server instance. You can use the account provisioning utility to create custom accounts or use any existing account that is a member of the sysadmin server role for simplicity. |
Note
It is unsupported to install the Azure Migrate Appliance on a server that has the replication appliance or mobility service agent installed. Ensure that the appliance server has not been previously used to set up the replication appliance or has the mobility service agent installed on the server.
Prepare an Azure user account
To create a project and register the Azure Migrate appliance, you need an account with:
- Contributor or Owner permissions on an Azure subscription.
- Permissions to register Microsoft Entra apps.
If you just created a free Azure account, you're the owner of your subscription. If you're not the subscription owner, work with the owner to assign the permissions as follows:
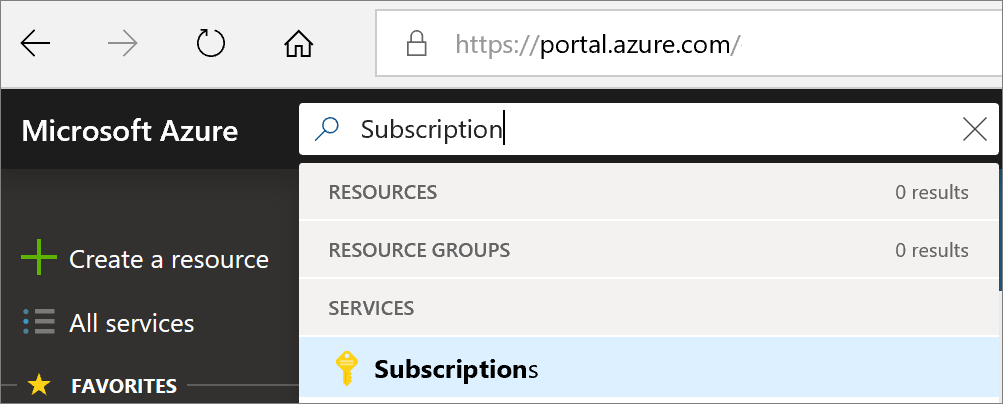
In the Azure portal, search for "subscriptions", and under Services, select Subscriptions.
Select Access control (IAM).
Select Add > Add role assignment to open the Add role assignment page.
Assign the following role. For detailed steps, see Assign Azure roles using the Azure portal.
Setting Value Role Contributor or Owner Assign access to User Members azmigrateuser 
To register the appliance, your Azure account needs permissions to register Microsoft Entra apps.
In the portal, go to Microsoft Entra ID > Users.
Request the tenant or Privileged Role Administrator to assign the Application Developer role to the account to allow Microsoft Entra app registration by users. Learn more.
Prepare Windows server
- For Windows servers, use a domain account for domain-joined servers, and a local account for servers that aren't domain-joined.
- For physical discovery, specify the username in Down level format (domain\username) and UPN format (username@domain.com) is not supported.
The user account can be created in one of the two ways:
Option 1
- Create an account that has administrator privileges on the servers. This account can be used to pull configuration and performance data through CIM connection and perform software inventory (discovery of installed applications) and enable agentless dependency analysis using PowerShell remoting.
Note
If you want to perform software inventory (discovery of installed applications) and enable agentless dependency analysis on Windows servers, it recommended to use Option 1.
Option 2
The user account should be added to these groups: Remote Management Users, Performance Monitor Users, and Performance Log Users.
If Remote management Users group isn't present, then add the user account to the group: WinRMRemoteWMIUsers_.
The account needs these permissions for the appliance to create a CIM connection with the server and pull the required configuration and performance metadata from the WMI classes listed here.
In some cases, adding the account to these groups might not return the required data from WMI classes as the account might be filtered by UAC. To overcome the UAC filtering, user account needs to have necessary permissions on CIMV2 Namespace and sub-namespaces on the target server. You can follow the steps here to enable the required permissions.
Note
For Windows Server 2008 and 2008 R2, ensure that WMF 3.0 is installed on the servers.
Note
To discover SQL Server databases on Windows Servers, both Windows and SQL Server authentication are supported. You can provide credentials of both authentication types in the appliance configuration manager. Azure Migrate requires a Windows user account that is a member of the sysadmin server role.
Prepare Linux server
For Linux servers, you can create a user account in one of two ways:
Option 1
- You need a sudo user account on the servers that you want to discover. This account can be used to pull configuration and performance metadata and perform software inventory (discovery of installed applications) and enable agentless dependency analysis using SSH connectivity.
- You need to enable sudo access for the commands listed here. In addition to these commands, the user account also needs to have permissions to execute ls and netstat commands to perform agentless dependency analysis.
- Make sure that you have enabled NOPASSWD for the account to run the required commands without prompting for a password every time sudo command is invoked.
- The Linux OS distributions that are supported for discovery by Azure Migrate using an account with sudo access are listed here.
Note
If you want to perform software inventory (discovery of installed applications) and enable agentless dependency analysis on Linux servers, it recommended to use Option 1.
Option 2: Discover using non-sudo user account
If you can't provide user account with sudo access, then you can set 'isSudo' registry key to value '0' in HKEY_LOCAL_MACHINE\SOFTWARE\Microsoft\AzureAppliance registry on the appliance server.
Provide a non-sudo user account with the required capabilities.
- Sign in as root user. Create a non-sudo user account by running the
sudo useradd <account-name>command. Set a password for the non-sudo user account using thesudo passwd <account-name>command. - Add the non-sudo user account to the wheel group using this command:
sudo usermod –aG wheel <account-name>. Users in this group have permissions to run setcap commands as detailed below. - Sign in to the non-sudo user account that was created and run the following commands:
Command Purpose setcap CAP_DAC_READ_SEARCH+eip /usr/sbin/fdisk
setcap CAP_DAC_READ_SEARCH+eip /sbin/fdisk (if /usr/sbin/fdisk is not present)To collect disk configuration data. setcap "cap_dac_override,cap_dac_read_search,cap_fowner,cap_fsetid,cap_setuid,cap_setpcap,cap_net_bind_service,cap_net_admin,cap_sys_chroot,cap_sys_admin,
cap_sys_resource,cap_audit_control,cap_setfcap=+eip" /sbin/lvmTo collect disk performance data. setcap CAP_DAC_READ_SEARCH+eip /usr/sbin/dmidecode To collect BIOS serial number. chmod a+r /sys/class/dmi/id/product_uuid To collect BIOS GUID. sudo setcap CAP_DAC_READ_SEARCH,CAP_SYS_PTRACE=ep /bin/ls
sudo setcap CAP_DAC_READ_SEARCH,CAP_SYS_PTRACE=ep /bin/netstatTo perform agentless dependency analysis on the server, set the required permissions on /bin/netstat and /bin/ls files. - Sign in as root user. Create a non-sudo user account by running the
Running all the above commands will prompt for a password. Enter the password of the non-sudo user account for each prompt.
Add the credentials of the non-sudo user account to the Azure Migrate appliance.
The non-sudo user account will execute the commands listed here periodically.
Create an account to access servers
Your user account on your servers must have the required permissions to initiate discovery of installed applications, agentless dependency analysis, and discovery of web apps, and SQL Server instances and databases. You can provide the user account information in the appliance configuration manager. The appliance doesn't install agents on the servers.
- For Windows servers and web apps discovery, create an account (local or domain) that has administrator permissions on the servers. To discover SQL Server instances and databases, the Windows or SQL Server account must be a member of the sysadmin server role or have these permissions for each SQL Server instance. Learn how to assign the required role to the user account.
- For Linux servers, provide a sudo user account with permissions to execute ls and netstat commands or create a user account that has the CAP_DAC_READ_SEARCH and CAP_SYS_PTRACE permissions on /bin/netstat and /bin/ls files. If you're providing a sudo user account, ensure that you have enabled NOPASSWD for the account to run the required commands without prompting for a password every time sudo command is invoked.
Note
You can add multiple server credentials in the Azure Migrate appliance configuration manager to initiate discovery of installed applications, agentless dependency analysis, and discovery of web apps, and SQL Server instances and databases. You can add multiple domain, Windows (non-domain), Linux (non-domain), or SQL Server authentication credentials. Learn how to add server credentials.
Set up a project
Set up a new project.
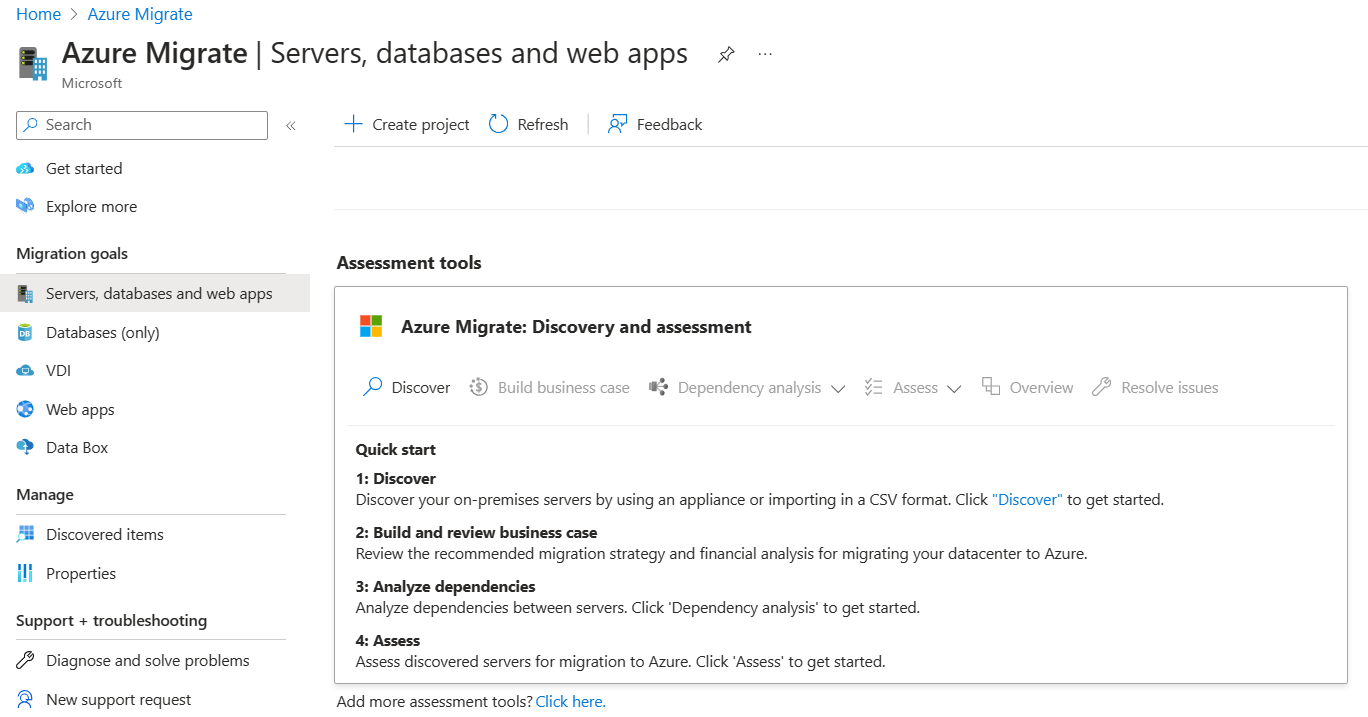
In the Azure portal > All services, search for Azure Migrate.
Under Services, select Azure Migrate.
In Get started, select Create project.
In Create project, select your Azure subscription and resource group. Create a resource group if you don't have one.
In Project Details, specify the project name and the geography in which you want to create the project. Review supported geographies for public and government clouds.
Note
Use the Advanced configuration section to create an Azure Migrate project with private endpoint connectivity. Learn more.
Select Create.
Wait a few minutes for the project to deploy. The Azure Migrate: Discovery and assessment tool is added by default to the new project.
Note
If you have already created a project, you can use the same project to register additional appliances to discover and assess more no of servers. Learn more.
Set up the appliance
Azure Migrate appliance performs server discovery and sends server configuration and performance metadata to Azure Migrate. The appliance can be set up by executing a PowerShell script that can be downloaded from the project.
To set up the appliance, you:
- Provide an appliance name and generate a project key in the portal.
- Download a zipped file with the Azure Migrate installer script from the Azure portal.
- Extract the contents from the zipped file. Launch the PowerShell console with administrative privileges.
- Execute the PowerShell script to launch the appliance configuration manager.
- Configure the appliance for the first time, and register it with the project using the project key.
1. Generate the project key
- In Servers, databases and web apps > Azure Migrate: Discovery and assessment, select Discover.
- In Discover servers > Are your servers virtualized?, select Physical or other (AWS, GCP, Xen, etc.).
- In 1:Generate project key, provide a name for the Azure Migrate appliance that you set up for discovery of physical or virtual servers. The name should be alphanumeric with 14 characters or fewer.
- Select Generate key to start the creation of the required Azure resources. Don't close the Discover servers page during the creation of resources.
- After the successful creation of the Azure resources, a project key is generated.
- Copy the key as you need it to complete the registration of the appliance during its configuration.
2. Download the installer script
In 2: Download Azure Migrate appliance, select Download.
Verify security
Check that the zipped file is secure, before you deploy it.
On the server to which you downloaded the file, open an administrator command window.
Run the following command to generate the hash for the zipped file:
C:\>CertUtil -HashFile <file_location> [Hashing Algorithm]- Example usage:
C:\>CertUtil -HashFile C:\Users\administrator\Desktop\AzureMigrateInstaller.zip SHA256
Verify the latest appliance version and hash value:
Download Hash value Latest version 07783A31D1E66BE963349B5553DC1F1E94C70AA149E11AC7D8914F4076480731
Note
The same script can be used to set up Physical appliance for either Azure public or Azure Government cloud with public or private endpoint connectivity.
3. Run the Azure Migrate installer script
Extract the zipped file to a folder on the server that will host the appliance. Make sure you don't run the script on a server with an existing Azure Migrate appliance.
Launch PowerShell on the above server with administrative (elevated) privilege.
Change the PowerShell directory to the folder where the contents have been extracted from the downloaded zipped file.
Run the script named
AzureMigrateInstaller.ps1by running the following command:PS C:\Users\administrator\Desktop\AzureMigrateInstaller> .\AzureMigrateInstaller.ps1Select from the scenario, cloud, and connectivity options to deploy an appliance with the desired configuration. For instance, the selection shown below sets up an appliance to discover and assess physical servers (or servers running on other clouds like AWS, GCP, Xen etc.) to an Azure Migrate project with default (public endpoint) connectivity on Azure public cloud.
The installer script does the following:
- Installs agents and a web application.
- Installs Windows roles, including Windows Activation Service, IIS, and PowerShell ISE.
- Downloads and installs an IIS rewritable module.
- Updates a registry key (HKLM) with persistent setting details for Azure Migrate.
- Creates the following files under the path:
- Config Files:
%ProgramData%\Microsoft Azure\Config - Log Files:
%ProgramData%\Microsoft Azure\Logs
- Config Files:
After the script has executed successfully, the appliance configuration manager will be launched automatically.
Note
If you come across any issues, you can access the script logs at C:\ProgramData\Microsoft Azure\Logs\AzureMigrateScenarioInstaller_Timestamp.log for troubleshooting.
Verify appliance access to Azure
Make sure that the appliance can connect to Azure URLs for public and government clouds.
4. Configure the appliance
Set up the appliance for the first time.
Open a browser on any server that can connect to the appliance, and open the URL of the appliance web app: https://appliance name or IP address: 44368.
Alternately, you can open the app from the desktop by selecting the app shortcut.
Accept the license terms, and read the third party information.
Set up prerequisites and register the appliance
In the configuration manager, select Set up prerequisites, and then complete these steps:
Connectivity: The appliance checks that the server has internet access. If the server uses a proxy:
Select Setup proxy to specify the proxy address (in the form
http://ProxyIPAddressorhttp://ProxyFQDN, where FQDN refers to a fully qualified domain name) and listening port.Enter credentials if the proxy needs authentication.
If you have added proxy details or disabled the proxy or authentication, select Save to trigger connectivity, and check connectivity again.
Only HTTP proxy is supported.
Time sync: Check that the time on the appliance is in sync with internet time for discovery to work properly.
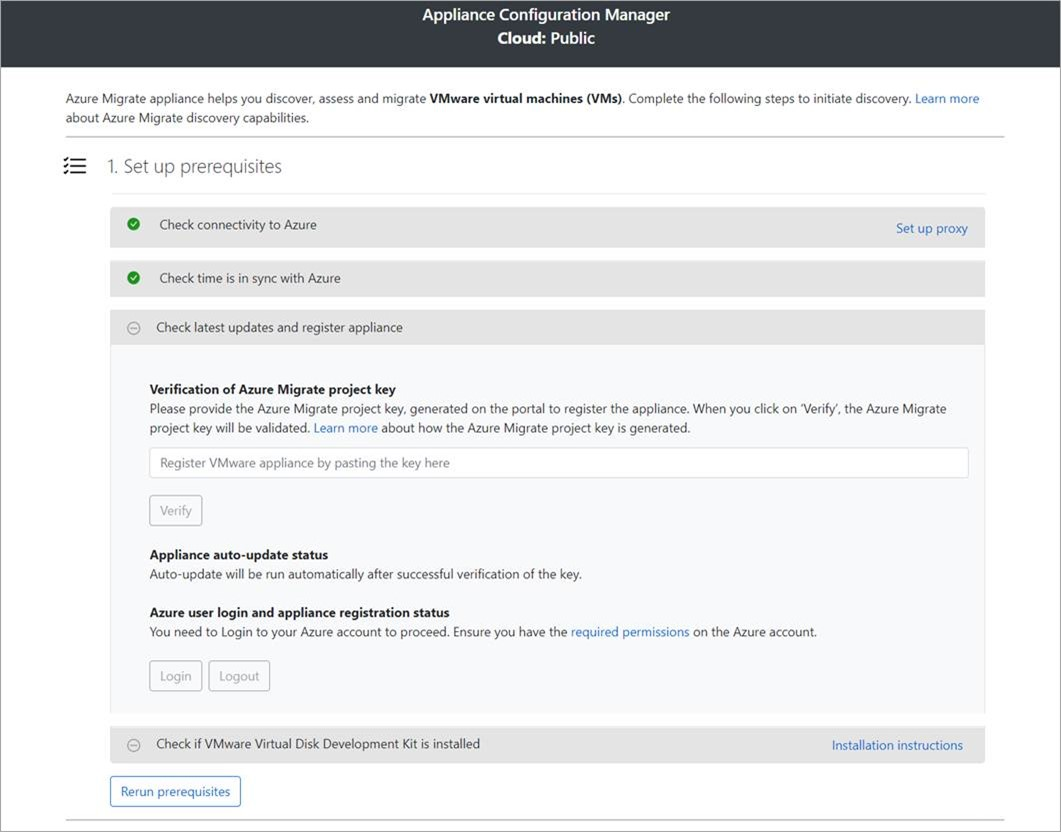
Install updates and register appliance: To run auto-update and register the appliance, follow these steps:
Note
This is a new user experience in Azure Migrate appliance which is available only if you have set up an appliance using the latest OVA/Installer script downloaded from the portal. The appliances which have already been registered continue seeing the older version of the user experience and continue to work without any issues.
For the appliance to run auto-update, paste the project key that you copied from the portal. If you don't have the key, go to Azure Migrate: Discovery and assessment > Overview > Manage existing appliances. Select the appliance name you provided when you generated the project key, and then copy the key that's shown.
The appliance verifies the key and starts the auto-update service, which updates all the services on the appliance to their latest versions. When the auto-update has run, you can select View appliance services to see the status and versions of the services running on the appliance server.
To register the appliance, you need to select Login. In Continue with Azure Login, select Copy code & Login to copy the device code (you must have a device code to authenticate with Azure) and open an Azure sign in prompt in a new browser tab. Make sure you've disabled the pop-up blocker in the browser to see the prompt.
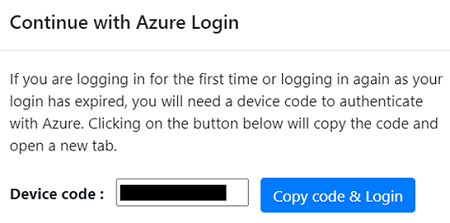
In a new tab in your browser, paste the device code and sign in by using your Azure username and password. Signing in with a PIN isn't supported.
Note
If you close the sign in tab accidentally without logging in, refresh the browser tab of the appliance configuration manager to display the device code and Copy code & Login button.
After you successfully sign in, return to the browser tab that displays the appliance configuration manager. If the Azure user account that you used to sign in has the required permissions for the Azure resources that were created during key generation, appliance registration starts.
After the appliance is successfully registered, to see the registration details, select View details.
You can rerun prerequisites at any time during appliance configuration to check whether the appliance meets all the prerequisites.
Start continuous discovery
Now, connect from the appliance to the physical servers to be discovered, and start the discovery.
In Step 1: Provide credentials for discovery of Windows and Linux physical or virtual servers, select Add credentials.
For Windows server, select the source type as Windows Server, specify a friendly name for credentials, add the username and password. Select Save.
If you're using password-based authentication for Linux server, select the source type as Linux Server (Password-based), specify a friendly name for credentials, add the username and password. Select Save.
If you're using SSH key-based authentication for Linux server, you can select source type as Linux Server (SSH key-based), specify a friendly name for credentials, add the username, browse, and select the SSH private key file. Select Save.
- Azure Migrate supports the SSH private key generated by ssh-keygen command using RSA, DSA, ECDSA, and ed25519 algorithms.
- Currently Azure Migrate doesn't support passphrase-based SSH key. Use an SSH key without a passphrase.
- Currently Azure Migrate doesn't support SSH private key file generated by PuTTY.
- The SSH key file supports CRLF to mark a line break in the text file that you upload. SSH keys created on Linux systems most commonly have LF as their newline character so you can convert them to CRLF by opening the file in vim, typing
:set textmode, and saving the file. - If your Linux servers support the older version of RSA key, you can generate the key using the
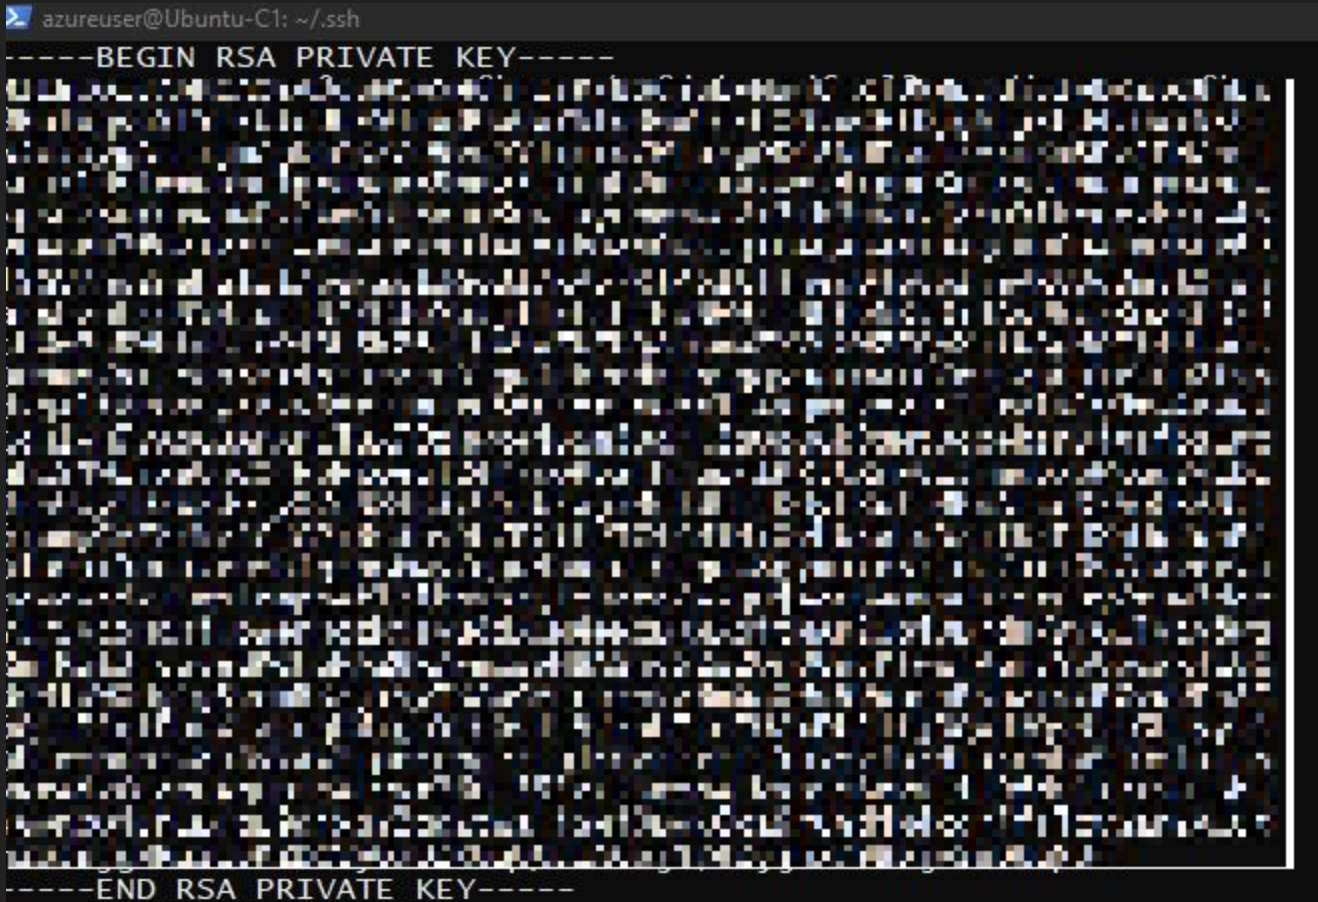
$ ssh-keygen -m PEM -t rsa -b 4096command. - Azure Migrate supports OpenSSH format of the SSH private key file as shown below:
If you want to add multiple credentials at once, select Add more to save and add more credentials. Multiple credentials are supported for physical servers discovery.
Note
By default, the credentials are used to gather data about the installed applications, roles, and features, and also to collect dependency data from Windows and Linux servers, unless you disable the slider to not perform these features (as instructed in the last step).
In Step 2:Provide physical or virtual server details, select Add discovery source to specify the server IP address/FQDN and the friendly name for credentials to connect to the server.
You can either Add single item at a time or Add multiple items in one go. There's also an option to provide server details through Import CSV.
- If you choose Add single item, you can choose the OS type, specify friendly name for credentials, add server IP address/FQDN and select Save.
- If you choose Add multiple items, you can add multiple records at once by specifying server IP address/FQDN with the friendly name for credentials in the text box. Verify the added records, and select Save.
- If you choose Import CSV (selected by default), you can download a CSV template file, populate the file with the server IP address/FQDN and friendly name for credentials. You then import the file into the appliance, verify the records in the file, and select Save.
Select Save. The appliance tries validating the connection to the servers added and shows the Validation status in the table against each server.
- If validation fails for a server, review the error by selecting on Validation failed in the Status column of the table. Fix the issue, and validate again.
- To remove a server, select Delete.
You can revalidate the connectivity to servers anytime before starting the discovery.
Before initiating discovery, you can choose to disable the slider to not perform software inventory and agentless dependency analysis on the added servers. You can change this option at any time.

To perform discovery of SQL Server instances and databases, you can add additional credentials (Windows domain/non-domain, SQL authentication credentials) and the appliance attempts to automatically map the credentials to the SQL servers. If you add domain credentials, the appliance authenticates the credentials against Active Directory of the domain to prevent any user accounts from locking out. To check validation of the domain credentials, follow these steps:
- In the configuration manager credentials table, see Validation status for domain credentials. Only the domain credentials are validated.
- If validation fails, you can select a Failed status to see the validation error. Fix the issue, and then select Revalidate credentials to reattempt validation of the credentials.
Start discovery
select Start discovery, to kick off discovery of the successfully validated servers. After the discovery has been successfully initiated, you can check the discovery status against each server in the table.
How discovery works
It takes approximately 2 minutes to complete discovery of 100 servers and their metadata to appear in the Azure portal.
Software inventory (discovery of installed applications) is automatically initiated when the discovery of servers is finished.
Software inventory identifies the SQL Server instances that are running on the servers. Using the information it collects, the appliance attempts to connect to the SQL Server instances through the Windows authentication credentials or the SQL Server authentication credentials that are provided on the appliance. Then, it gathers data on SQL Server databases and their properties. The SQL Server discovery is performed once every 24 hours.
Appliance can connect to only those SQL Server instances to which it has network line of sight, whereas software inventory by itself might not need network line of sight.
The time taken for discovery of installed applications depends on the number of discovered servers. For 500 servers, it takes approximately one hour for the discovered inventory to appear in the Azure Migrate project in the portal.
Software inventory identifies web server role existing on discovered servers. If a server is found to have web server role enabled, Azure Migrate performs web apps discovery on the server. Web apps configuration data is updated once every 24 hours.
During software inventory, the added server credentials are iterated against servers and validated for agentless dependency analysis. When the discovery of servers is finished, in the portal, you can enable agentless dependency analysis on the servers. Only the servers on which validation succeeds can be selected to enable agentless dependency analysis.
SQL Server instances and databases data begin to appear in the portal within 24 hours after you start discovery.
By default, Azure Migrate uses the most secure way of connecting to SQL instances that is, Azure Migrate encrypts communication between the Azure Migrate appliance and the source SQL Server instances by setting the TrustServerCertificate property to
true. Additionally, the transport layer uses TLS/SSL to encrypt the channel and bypass the certificate chain to validate trust. Hence, the appliance server must be set up to trust the certificate's root authority. However, you can modify the connection settings, by selecting Edit SQL Server connection properties on the appliance. Learn more to understand what to choose.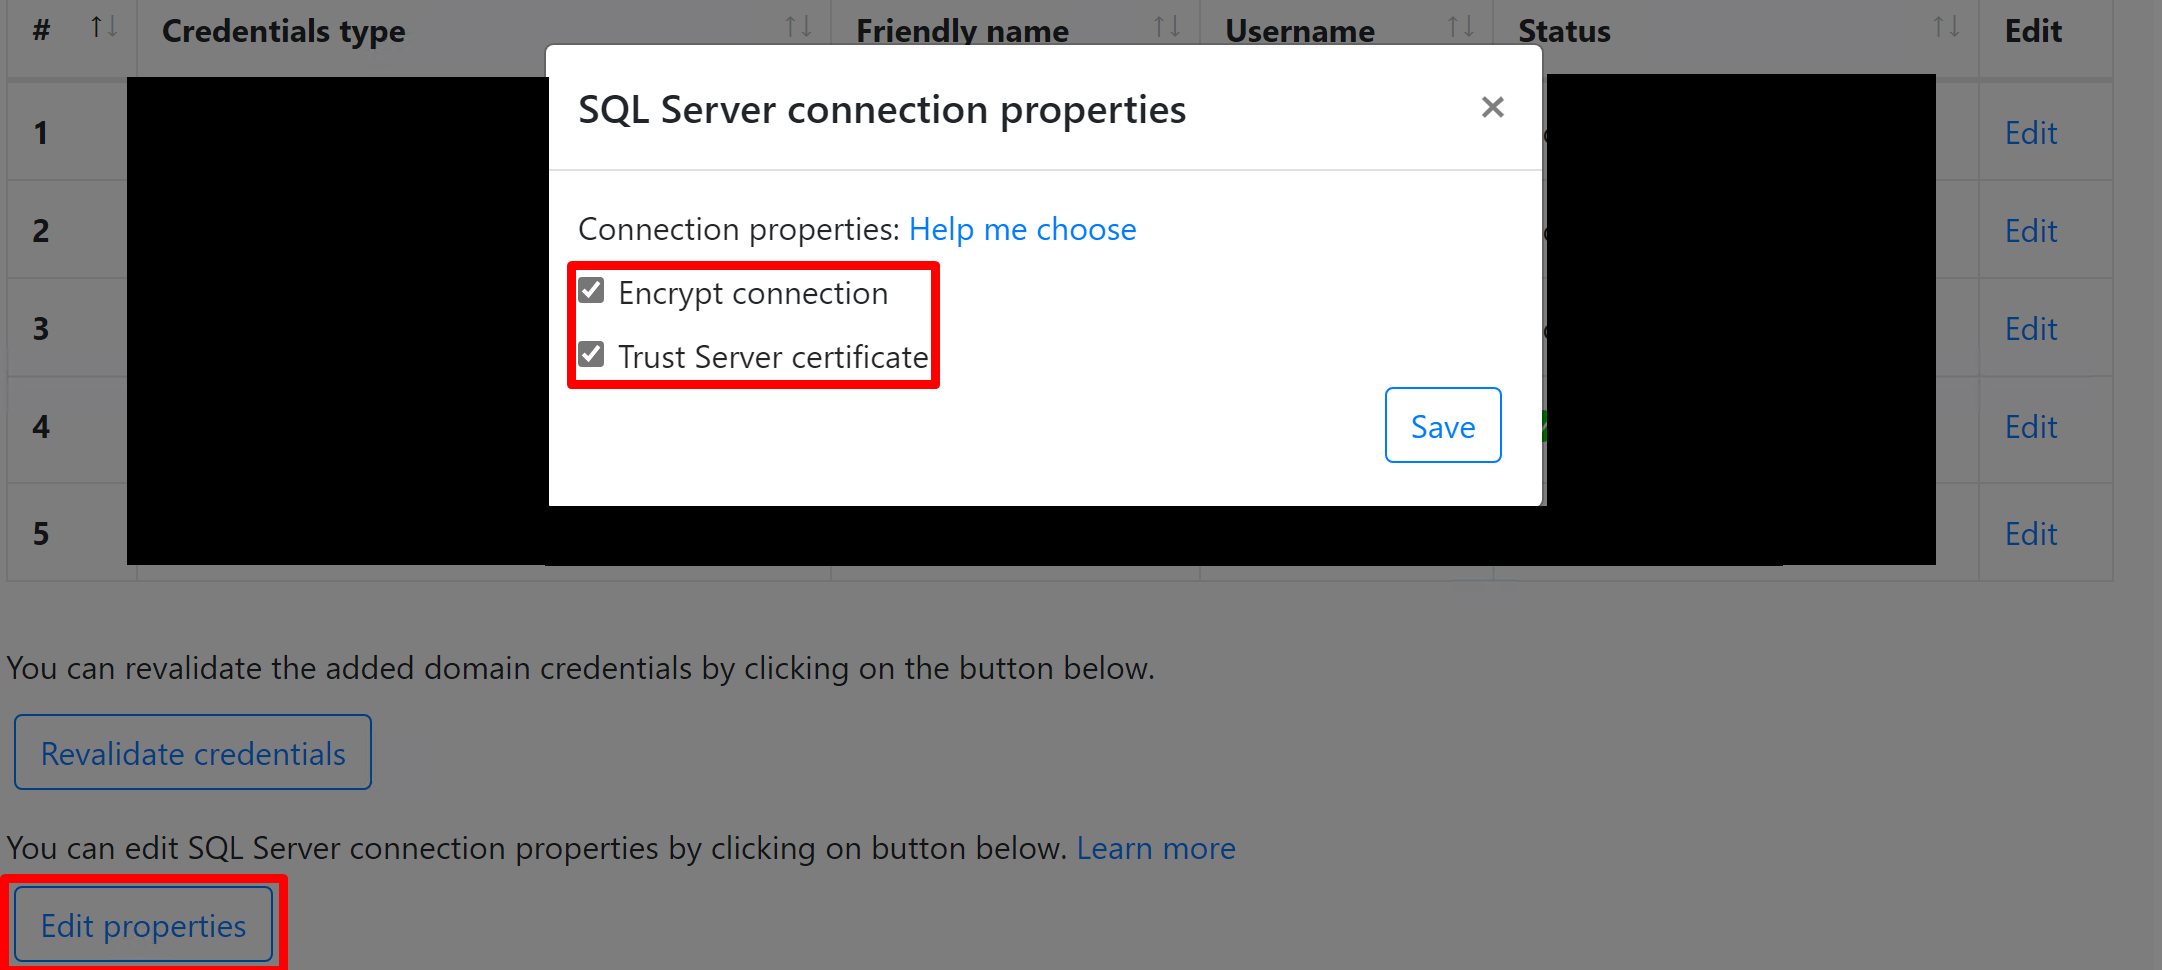
Verify servers in the portal
After discovery finishes, you can verify that the servers appear in the portal.
- Open the Azure Migrate dashboard.
- In Azure Migrate - Servers > Azure Migrate: Discovery and assessment page, select the icon that displays the count for Discovered servers.
View support status
You can gain deeper insights into the support posture of your environment from the Discovered servers and Discovered database instances sections.
The Operating system license support status column displays the support status of the Operating system, whether it is in mainstream support, extended support, or out of support. Selecting the support status opens a pane on the right which provides clear guidance regarding actionable steps that can be taken to secure servers and databases in extended support or out of support.
To view the remaining duration until end of support, that is, the number of months for which the license is valid, select Columns > Support ends in > Submit. The Support ends in column displays the duration in months.
The Database instances displays the number of instances discovered by Azure Migrate. Select the number of instances to view the database instance details. The Database instance license support status displays the support status of the database instance. Selecting the support status opens a pane on the right, which provides clear guidance regarding actionable steps that can be taken to secure servers and databases in extended support or out of support.
To view the remaining duration until end of support, that is, the number of months for which the license is valid, select Columns > Support ends in > Submit. The Support ends in column displays the duration in months.
Delete servers
After the discovery has been initiated, you can delete any of the added servers from the appliance configuration manager by searching for the server name in the Add discovery source table and by selecting Delete.
Note
If you choose to delete a server where discovery has been initiated, it stops the ongoing discovery and assessment which might impact the confidence rating of the assessment that includes this server. Learn more
Next steps
- Assess physical servers for migration to Azure VMs.
- Review the data that the appliance collects during discovery.
