Manage artifact metadata in integration accounts for Azure Logic Apps
Applies to: Azure Logic Apps (Consumption)
You can define custom metadata for artifacts in integration accounts and get that metadata during runtime for your logic app workflow to use. For example, you can provide metadata for artifacts, such as partners, agreements, schemas, and maps. All these artifact types store metadata as key-value pairs.
This how-to guide shows how to add metadata to an integration account artifact. You can then use actions in your workflow to retrieve and use the metadata values.
Prerequisites
An Azure account and subscription. If you don't have a subscription, create a free account.
An integration account that has the artifacts where you want to add metadata. The artifacts can be the following types:
The logic app workflow where you want to use the artifact metadata. Make sure that your workflow has at least a trigger, such as the Request or HTTP trigger, and the action that you want to use for working with artifact metadata. The example in this article uses the Request trigger named When a HTTP request is received.
For more information, see the following documentation:
Make sure to link your integration account to your Consumption logic app resource or to your Standard logic app workflow.
Add metadata to artifacts
In the Azure portal, go to your integration account.
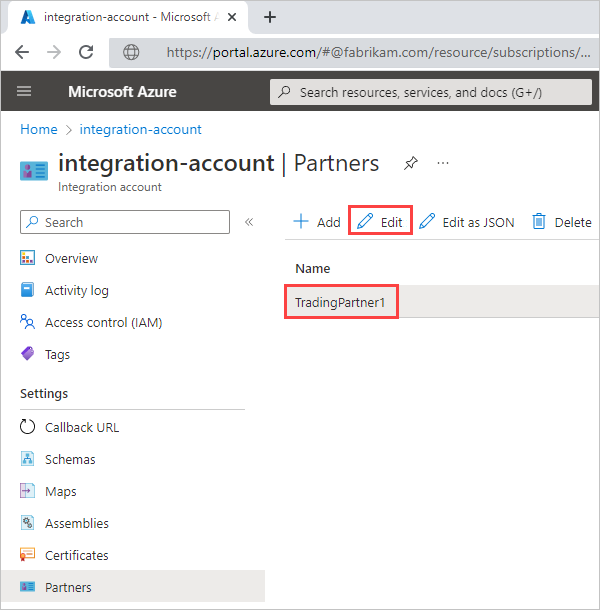
Select the artifact where you want to add metadata, and then select Edit.
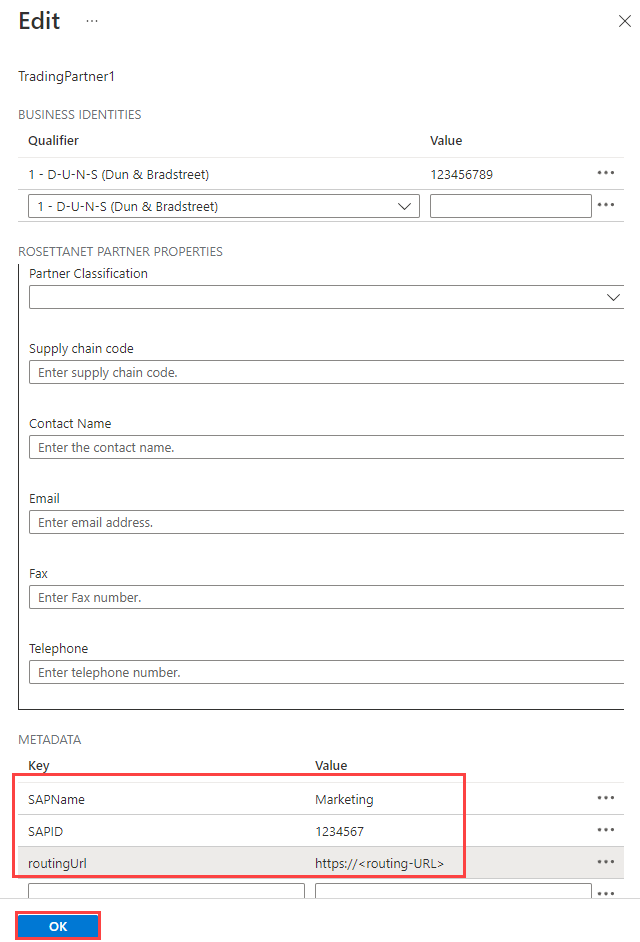
On the Edit pane, enter the metadata details for that artifact, and then select OK. The following screenshot shows three metadata key-value pairs:
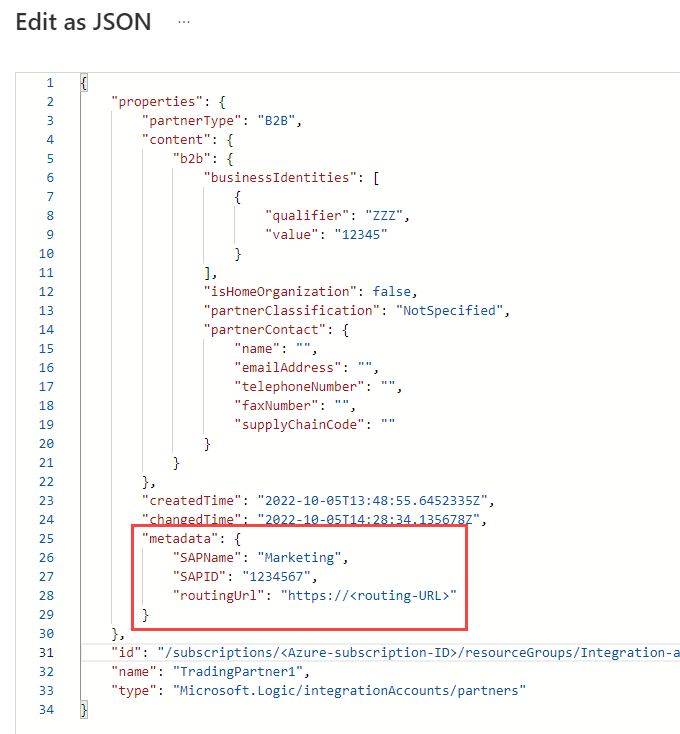
To view this metadata in the integration account's JavaScript Object Notation (JSON) definition, select Edit as JSON, which opens the JSON editor.
Get artifact metadata
In the Azure portal, open the logic app resource that's linked to your integration account.
On the logic app navigation menu, select Logic app designer.
In the designer, add the Integration Account Artifact Lookup action to get the metadata.
Under the trigger or an existing action, select New step.
Under the Choose an operation search box, select Built-in. In the search box, enter integration account.
From the actions list, select the action named Integration Account Artifact Lookup.
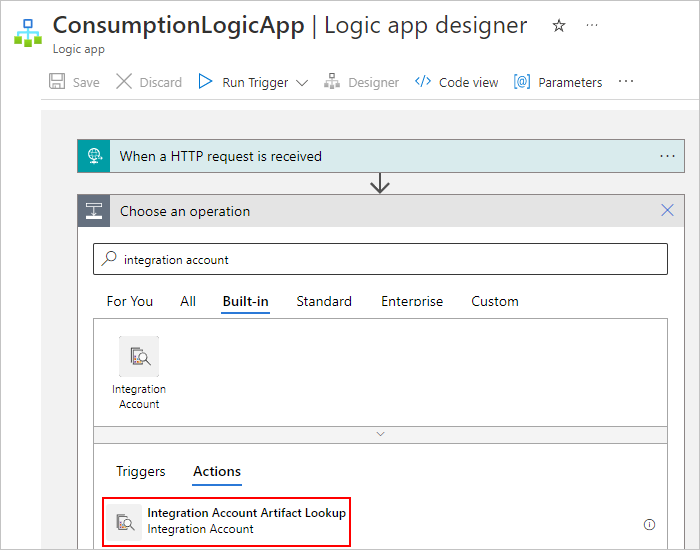
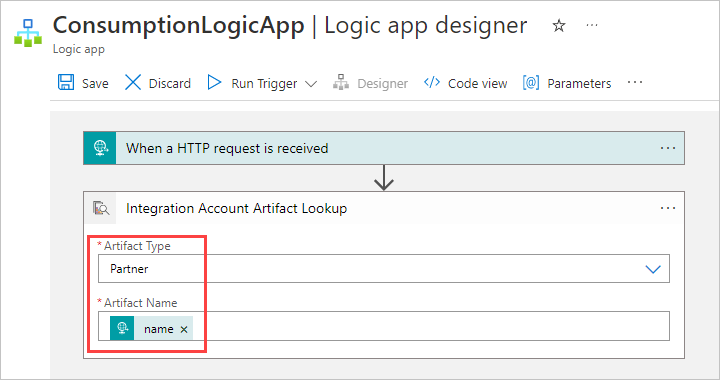
Provide the following information for the artifact that you want to find:
Property Required Value Description Artifact Type Yes Schema, Map, Partner, Agreement, or a custom type The type for the artifact you want to get Artifact Name Yes <artifact-name> The name for the artifact you want to get This example gets the metadata for a trading partner artifact by following these steps:
For Artifact Type, select Partner.
For Artifact Name, click inside the edit box. When the dynamic content list appears, select the name output from the trigger.
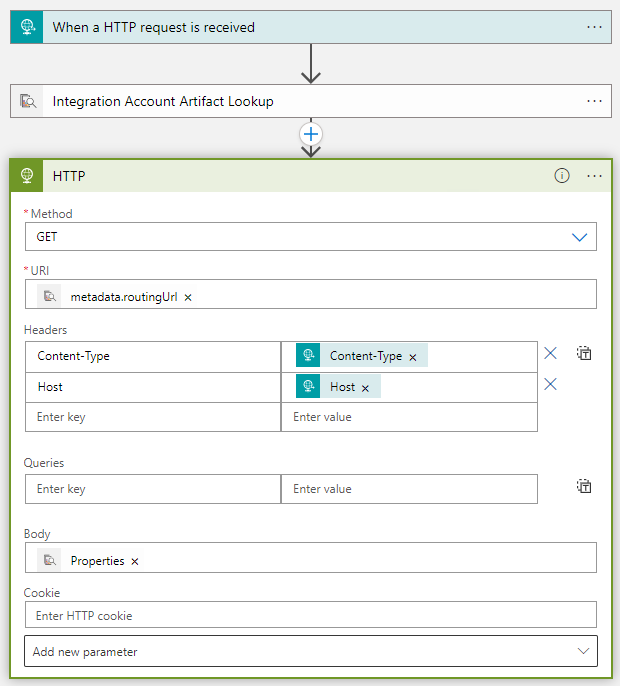
Now, add the action that you want to use for using the metadata. This example continues with the built-in HTTP action.
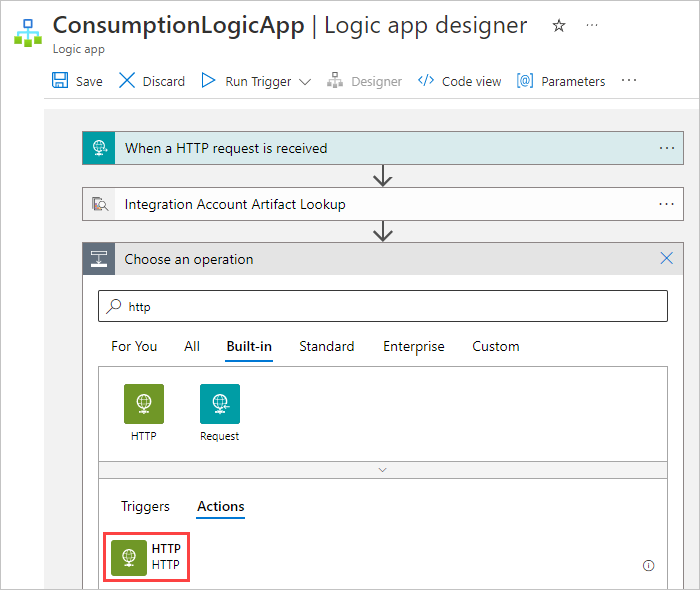
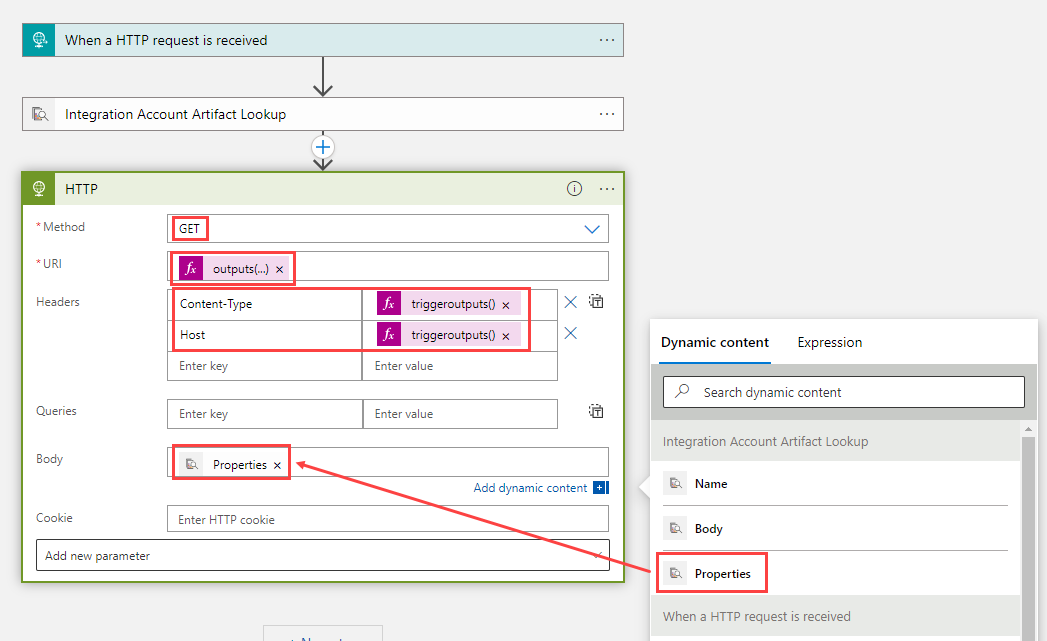
Provide the following information for the artifact metadata that you want the HTTP action to use.
For example, suppose you want to get the
routingUrlmetadata that you added earlier. Here are the property values that you might specify:Property Required Value Description Example value Method Yes <operation-to-run> The HTTP operation to run on the artifact. Use the GET method for this HTTP action. URI Yes <metadata-location> The endpoint where you want to send the outgoing request. To reference the routingUrlmetadata value from the artifact that you retrieved, follow these steps:
1. Click inside the URI box.
2. In the dynamic content list that opens, select Expression.
3. In the expression editor, enter an expression like the following example:outputs('Integration_Account_Artifact_Lookup')['properties']['metadata']['routingUrl']
4. When you're done, select OK.Headers No <header-values> Any header outputs from the trigger that you want to pass to the HTTP action. To pass in the Content-Typevalue from the trigger header, follow these steps for the first row under Headers:
1. In the first column, enterContent-Typeas the header name.
2. In the second column, use the expression editor to enter the following expression as the header value:triggeroutputs()['headers']['Content-Type']
To pass in theHostvalue from the trigger header, follow these steps for the second row under Headers:
1. In the first column, enterHostas the header name.
2. In the second column, use the expression editor to enter the following expression as the header value:triggeroutputs()['headers']['Host']Body No <body-content> Any other content that you want to pass through the HTTP action's bodyproperty.To pass the artifact's propertiesvalues to the HTTP action:
1. Click inside the Body box to open the dynamic content list. If no properties appear, select See more.
2. From the dynamic content list, under Integration Account Artifact Lookup, select Properties.The following screenshot shows the example values:
To check the information that you provided for the HTTP action, you can view your workflow's JSON definition. On the designer toolbar, select Code view.
The workflow's JSON definition appears, as shown in the following example:
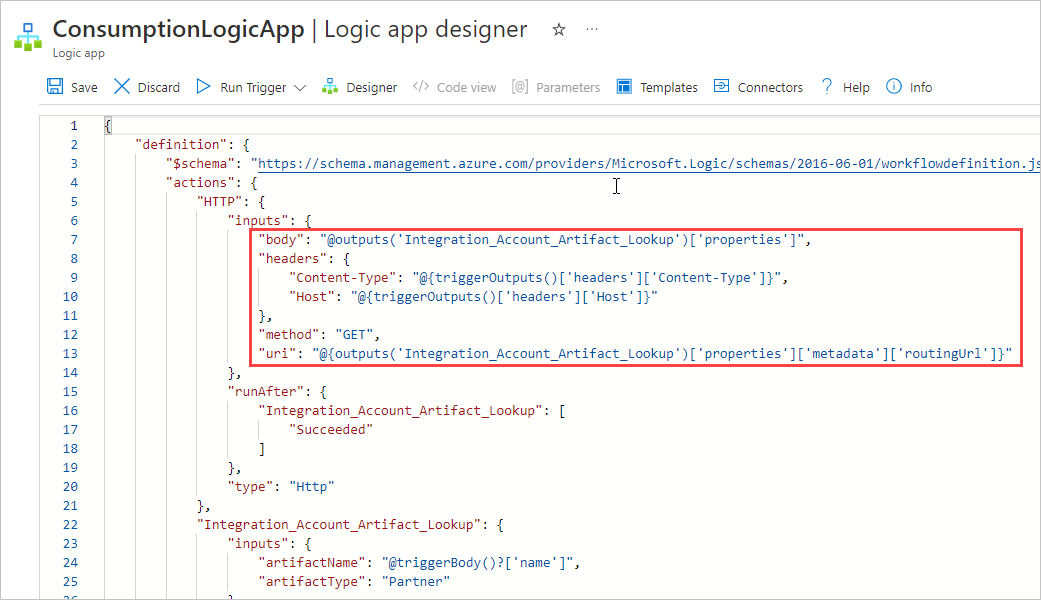
On the code view toolbar, select Designer.
Any expressions that you entered in the designer now appear resolved.
