Create switch actions that run workflow actions based on specific values in Azure Logic Apps
Applies to: Azure Logic Apps (Consumption)
To run specific actions based on the values of objects, expressions, or tokens, add a switch action. This structure evaluates the object, expression, or token, chooses the case that matches the result, and runs specific actions only for that case. When the switch action runs, only one case should match the result.
For example, suppose you want a logic app that takes different steps based on an option selected in email. In this example, the logic app checks a website's RSS feed for new content. When a new item appears in the RSS feed, the logic app sends email to an approver. Based on whether the approver selects "Approve" or "Reject", the logic app follows different steps.
Tip
Like all programming languages, switch actions support only equality operators. If you need other relational operators, such as "greater than", use a condition action. To ensure deterministic execution behavior, cases must contain a unique and static value instead of dynamic tokens or expressions.
Prerequisites
An Azure subscription. If you don't have a subscription, sign up for a free Azure account.
To follow the example in this article, create the example Consumption logic app workflow with an Outlook.com account or a work or school account.
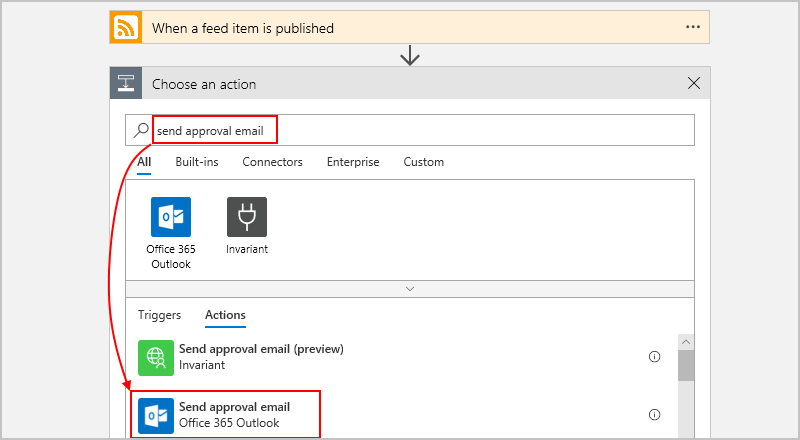
When you add the action to send email, find and select this action instead: Send an approval email
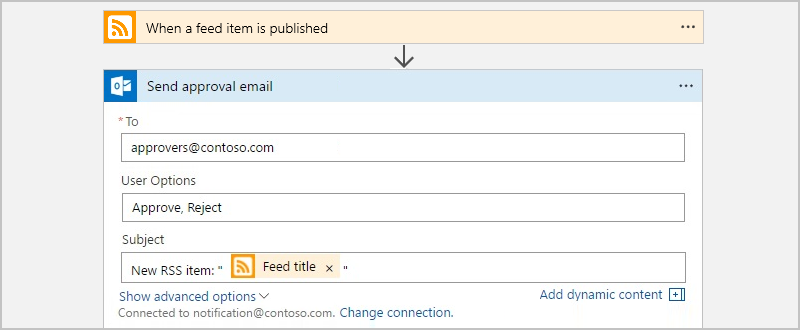
Provide the required fields, like the email address for the person who gets the approval email. Under User Options, enter "Approve, Reject".
Add a switch action
For this example, add a switch action at the end your sample workflow. After the last step, choose New step.
When you want to add a switch action between steps, move the pointer over the arrow where you want to add the switch action. Choose the plus sign (+) that appears, then choose Add an action.
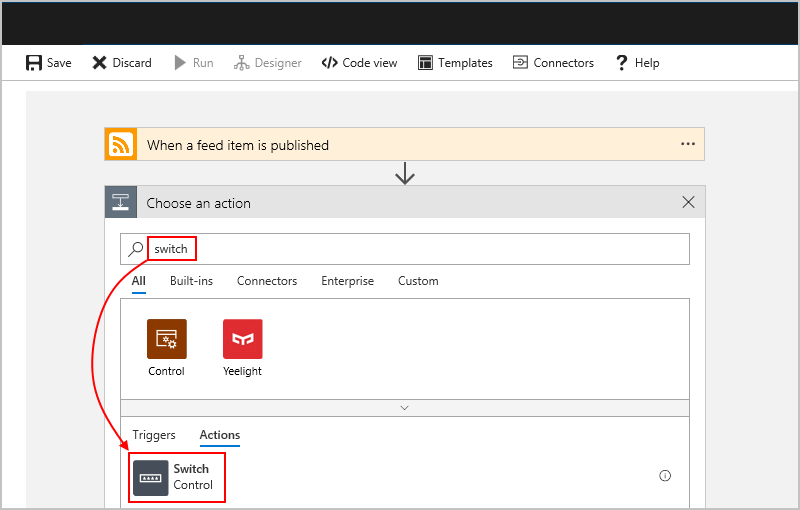
In the search box, enter "switch" as your filter. Select this action: Switch - Control
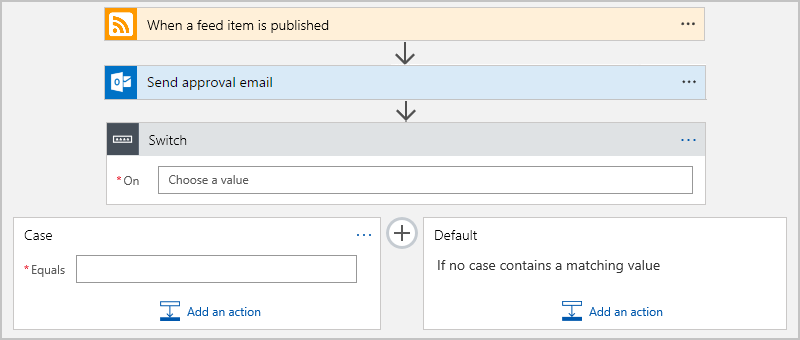
A switch action appears with one case and a default case. By default, a switch action requires at least one case plus the default case.
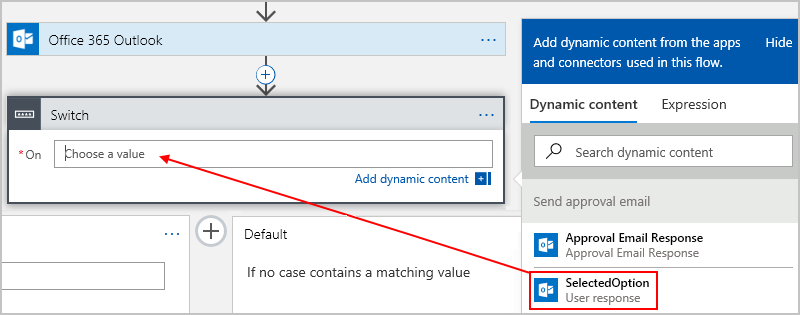
Click inside the On box so that the dynamic content list appears. From that list, select the SelectedOption field whose output determines the action to perform.
To handle the cases where the approver selects
ApproveorReject, add another case between Case and Default.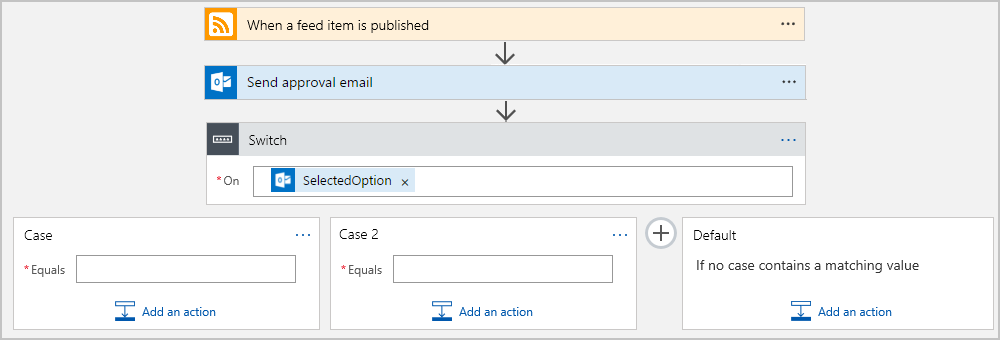
Add these actions to the corresponding cases:
Case # SelectedOption Action Case 1 Approve Add the Outlook Send an email action for sending details about the RSS item only when the approver selected Approve. Case 2 Reject Add the Outlook Send an email action for notifying other approvers that the RSS item was rejected. Default None No action necessary. In this example, the Default case is empty because SelectedOption has only two options. 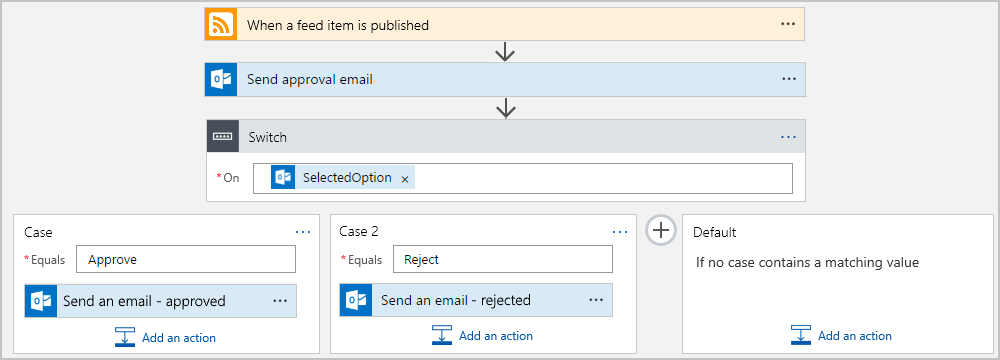
Save your logic app.
To manually test this example, choose Run until the logic app finds a new RSS item and sends an approval email. Select Approve to observe the results.
JSON definition
Now that you created a logic app using a switch action, let's look at the high-level code definition behind the switch action.
"Switch": {
   "type": "Switch",
   "expression": "@body('Send_approval_email')?['SelectedOption']",
   "cases": {
      "Case": {
         "actions": {
           "Send_an_email": {}
         },
         "case" : "Approve"
      },
      "Case_2": {
         "actions": {
           "Send_an_email_2": {}
         },
         "case": "Reject"
      }
   },
   "default": {
      "actions": {}
   },
   "runAfter": {
      "Send_approval_email": [
         "Succeeded"
      ]
   }
}
| Label | Description |
|---|---|
"Switch" |
The name of the switch action, which you can rename for readability |
"type": "Switch" |
Specifies that the action is a switch action |
"expression" |
In this example, specifies the approver's selected option that's evaluated against each case as declared later in the definition |
"cases" |
Defines any number of cases. For each case, "Case_*" is the default name for that case, which you can rename for readability |
"case" |
Specifies the case's value, which must be a constant and unique value that the switch action uses for comparison. If no cases match the switch expression result, the actions in the "default" section are run. |
Get support
- For questions, visit the Microsoft Q&A question page for Azure Logic Apps.
- To submit or vote on features or suggestions, visit the Azure Logic Apps user feedback site.