Tutorial: Create inbound NAT rule V2 using the Azure portal
Inbound NAT rules allow you to connect to virtual machines (VMs) in an Azure virtual network by using an Azure Load Balancer public IP address and port number.
For more information about Azure Load Balancer rules, see Manage rules for Azure Load Balancer using the Azure portal.
In this tutorial, you learn how to:
- Create a virtual network and virtual machines
- Create a standard SKU public load balancer with frontend IP, health probe, backend configuration, and load-balancing rule
- Create a multiple VMs inbound NAT rule
- Create a NAT gateway for outbound internet access for the backend pool
- Install and configure a web server on the VMs to demonstrate the port forwarding and load-balancing rules
Prerequisites
- An Azure account with an active subscription. Create an account for free.
Create virtual network and virtual machines
A virtual network and subnet is required for the resources in the tutorial. In this section, you create a virtual network and virtual machines for the later steps.
Sign in to the Azure portal.
In the search box at the top of the portal, enter Virtual machine. Select Virtual machines in the search results.
In Virtual machines, select + Create > + Virtual machine.
In Create a virtual machine, enter or select the following values in the Basics tab:
Setting Value Project details Subscription Select your subscription. Resource group Select Create new.
Enter TutorialLBPF-rg.
Select OK.Instance details Virtual machine name Enter myVM1. Region Enter (US) West US 2. Availability options Select Availability zone. Availability zone Enter 1. Security type Select Standard. Image Select Ubuntu Server 20.04 LTS - Gen2. Azure Spot instance Leave the default of unchecked. Size Select a VM size. Administrator account Authentication type Select SSH public key. Username Enter azureuser. SSH public key source Select Generate new key pair. Key pair name Enter myKey. Inbound port rules Public inbound ports Select None. Select the Networking tab, or select Next: Disks, then Next: Networking.
In the Networking tab, enter or select the following information.
Setting Value Network interface Virtual network Select Create new.
Enter myVNet in Name.
In Address space, under Address range, enter 10.1.0.0/16.
In Subnets, under Subnet name, enter myBackendSubnet.
In Address range, enter 10.1.0.0/24.
Select OK.Subnet Select myBackendSubnet. Public IP Select None. NIC network security group Select Advanced. Configure network security group Select Create new.
Enter myNSG in Name.
Select + Add an inbound rule under Inbound rules.
In Service, select HTTP.
Enter 100 in Priority.
Enter myNSGRule for Name.
Select Add.
Select OK.Select the Review + create tab, or select the Review + create button at the bottom of the page.
Select Create.
At the Generate new key pair prompt, select Download private key and create resource. Your key file is downloaded as myKey.pem. Ensure you know where the .pem file was downloaded, you need the path to the key file in later steps.
Follow the steps 1 through 8 to create another VM with the following values and all the other settings the same as myVM1:
Setting VM 2 Basics Instance details Virtual machine name myVM2 Availability zone 2 Administrator account Authentication type SSH public key SSH public key source Select Use existing key stored in Azure. Stored Keys Select myKey. Inbound port rules Public inbound ports Select None. Networking Network interface Public IP Select None. NIC network security group Select Advanced. Configure network security group Select the existing myNSG
Create a load balancer
You create a load balancer in this section. The frontend IP, backend pool, load-balancing, and inbound NAT rules are configured as part of the creation.
In the search box at the top of the portal, enter Load balancer. Select Load balancers in the search results.
In the Load balancer page, select Create.
In the Basics tab of the Create load balancer page, enter, or select the following information:
Setting Value Project details Subscription Select your subscription. Resource group Select TutorialLBPF-rg. Instance details Name Enter myLoadBalancer Region Select West US 2. SKU Leave the default Standard. Type Select Public. Tier Leave the default Regional. Select Next: Frontend IP configuration at the bottom of the page.
In Frontend IP configuration, select + Add a frontend IP.
Enter myFrontend in Name.
Select IPv4 or IPv6 for the IP version.
Note
IPv6 isn't currently supported with Routing Preference or Cross-region load-balancing (Global Tier).
Select IP address for the IP type.
Note
For more information on IP prefixes, see Azure Public IP address prefix.
Select Create new in Public IP address.
In Add a public IP address, enter myPublicIP for Name.
Select Zone-redundant in Availability zone.
Note
In regions with Availability Zones, you have the option to select no-zone (default option), a specific zone, or zone-redundant. The choice will depend on your specific domain failure requirements. In regions without Availability Zones, this field won't appear.
For more information on availability zones, see Availability zones overview.Leave the default of Microsoft Network for Routing preference.
Select OK.
Select Add.
Select Next: Backend pools at the bottom of the page.
In the Backend pools tab, select + Add a backend pool.
Enter or select the following information in Add backend pool.
Setting Value Name Enter myBackendPool. Virtual network Select myVNet (TutorialLBPF-rg). Backend Pool Configuration Select NIC. IP version Select IPv4. Select + Add in Virtual machines.
Select the checkboxes next to myVM1 and myVM2 in Add virtual machines to backend pool.
Select Add.
Select Add.
Select the Next: Inbound rules button at the bottom of the page.
In Load balancing rule in the Inbound rules tab, select + Add a load balancing rule.
In Add load balancing rule, enter or select the following information.
Setting Value Name Enter myHTTPRule IP Version Select IPv4 or IPv6 depending on your requirements. Frontend IP address Select myFrontend. Backend pool Select myBackendPool. Protocol Select TCP. Port Enter 80. Backend port Enter 80. Health probe Select Create new.
In Name, enter myHealthProbe.
Select TCP in Protocol.
Leave the rest of the defaults, and select OK.Session persistence Select None. Idle timeout (minutes) Enter or select 15. TCP reset Select Enabled. Floating IP Select Disabled. Outbound source network address translation (SNAT) Leave the default of (Recommended) Use outbound rules to provide backend pool members access to the internet. For more information about load-balancing rules, see Load-balancing rules.
Select Add.
Select the blue Review + create button at the bottom of the page.
Select Create.
Create a multiple VMs inbound NAT rule
In this section, you create a multiple instance inbound NAT rule to the backend pool of the load balancer.
In the search box at the top of the portal, enter Load balancer. Select Load balancers in the search results.
Select myLoadBalancer.
In myLoadBalancer, select Inbound NAT rules in settings.
Select + Add in Inbound NAT rules.
Enter or select the following information in Add inbound NAT rule.
Setting Value Name Enter myNATRule-SSH. Type Select Backend pool. Target backend pool Select myBackendPool. Frontend IP address Select myFrontend. Frontend port range start Enter 221. Maximum number of machines in backend pool Enter 500. Backend port Enter 22. Protocol Select TCP. Leave the rest at the default and select Add.
Note
To view the port mappings to the backend pool virtual machines, see View port mappings.
Create a NAT gateway
In this section, you create a NAT gateway for outbound internet access for resources in the virtual network.
For more information about outbound connections and Azure Virtual Network NAT, see Using Source Network Address Translation (SNAT) for outbound connections and What is Virtual Network NAT?.
In the search box at the top of the portal, enter NAT gateway. Select NAT gateways in the search results.
In NAT gateways, select + Create.
In Create network address translation (NAT) gateway, enter or select the following information:
Setting Value Project details Subscription Select your subscription. Resource group Select TutorialLBPF-rg. Instance details NAT gateway name Enter myNATgateway. Region Select West US 2. Availability zone Select None. Idle timeout (minutes) Enter 15. Select the Outbound IP tab or select the Next: Outbound IP button at the bottom of the page.
In Outbound IP, select Create a new public IP address next to Public IP addresses.
Enter myNATGatewayIP in Name in Add a public IP address.
Select OK.
Select the Subnet tab or select the Next: Subnet button at the bottom of the page.
In Virtual network in the Subnet tab, select myVNet.
Select myBackendSubnet under Subnet name.
Select the blue Review + create button at the bottom of the page, or select the Review + create tab.
Select Create.
Install web server
In this section, you'll SSH to the virtual machines through the inbound NAT rules and install a web server.
In the search box at the top of the portal, enter Load balancer. Select Load balancers in the search results.
Select myLoadBalancer.
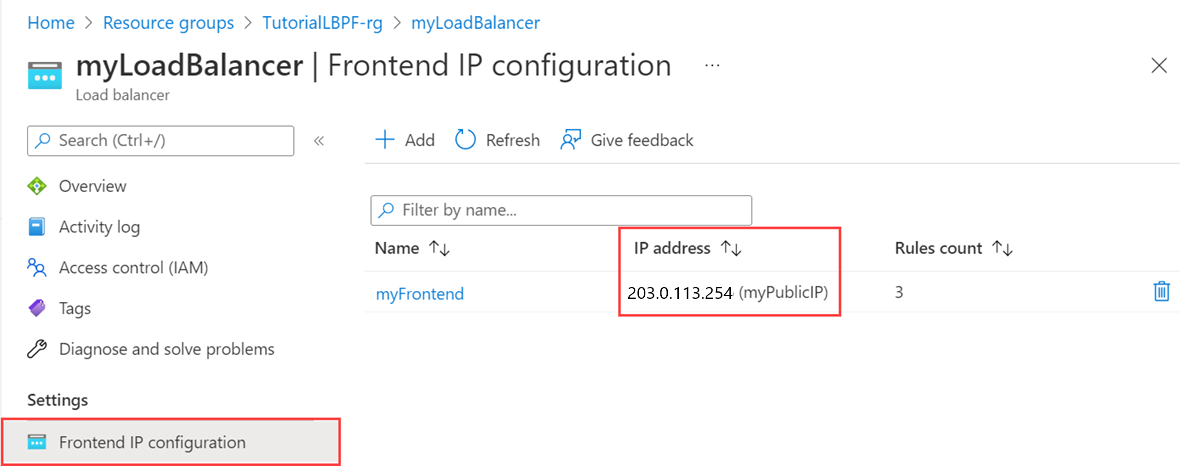
Select Fronted IP configuration in Settings.
In the Frontend IP configuration, make note of the IP address for myFrontend. In this example, it's 20.99.165.176.

If you're using a Mac or Linux computer, open a Bash prompt. If you're using a Windows computer, open a PowerShell prompt.
At your prompt, open an SSH connection to myVM1. Replace the IP address with the address you retrieved in the previous step and port 221 you used for the myVM1 inbound NAT rule. Replace the path to the .pem with the path to where the key file was downloaded.
ssh -i .\Downloads\myKey.pem azureuser@20.99.165.176 -p 221Tip
The SSH key you created can be used the next time your create a VM in Azure. Just select the Use a key stored in Azure for SSH public key source the next time you create a VM. You already have the private key on your computer, so you won't need to download anything.
From your SSH session, update your package sources and then install the latest NGINX package.
sudo apt-get -y update
sudo apt-get -y install nginx
Enter
Exitto leave the SSH sessionAt your prompt, open an SSH connection to myVM2. Replace the IP address with the address you retrieved in the previous step and port 222 you used for the myVM2 inbound NAT rule. Replace the path to the .pem with the path to where the key file was downloaded.
ssh -i .\Downloads\myKey.pem azureuser@20.99.165.176 -p 222From your SSH session, update your package sources and then install the latest NGINX package.
sudo apt-get -y update
sudo apt-get -y install nginx
Enter
Exitto leave the SSH session.
Test the web server
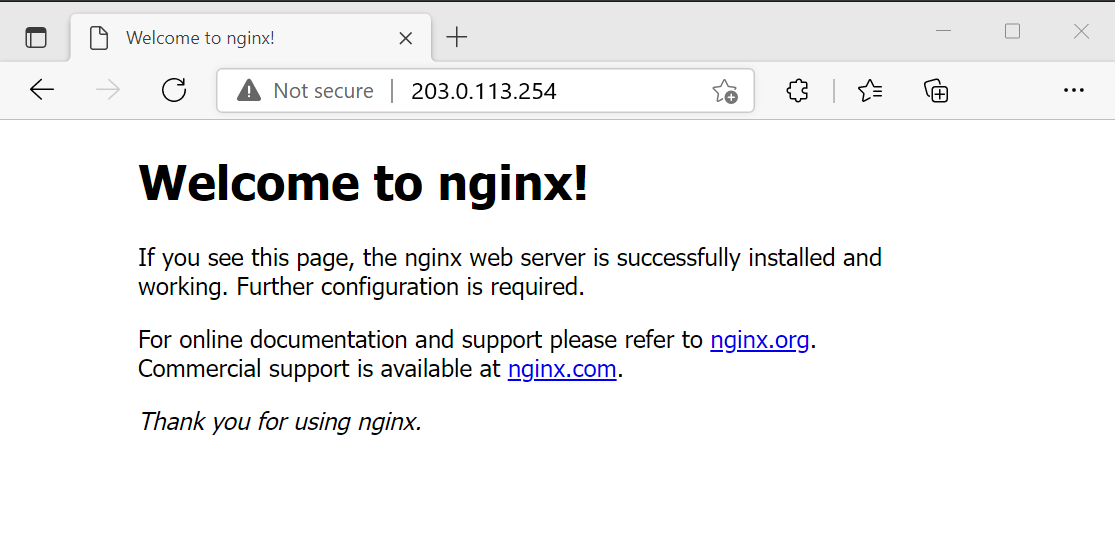
You open your web browser in this section and enter the IP address for the load balancer you retrieved in the previous step.
Open your web browser.
In the address bar, enter the IP address for the load balancer. In this example, it's 20.99.165.176.
The default NGINX website is displayed.

Clean up resources
If you're not going to continue to use this application, delete the virtual machines and load balancer with the following steps:
In the search box at the top of the portal, enter Resource group. Select Resource groups in the search results.
Select TutorialLBPF-rg in Resource groups.
Select Delete resource group.
Enter TutorialLBPF-rg in TYPE THE RESOURCE GROUP NAME:. Select Delete.
Next steps
Advance to the next article to learn how to create a cross-region load balancer: