Register a client application in Microsoft Entra ID
In this article, you'll learn how to register a client application in Microsoft Entra ID in order to access Azure Health Data Services. You can find more information on Register an application with the Microsoft identity platform.
Register a new application
- In the Azure portal, select Microsoft Entra ID.
- Select App registrations.
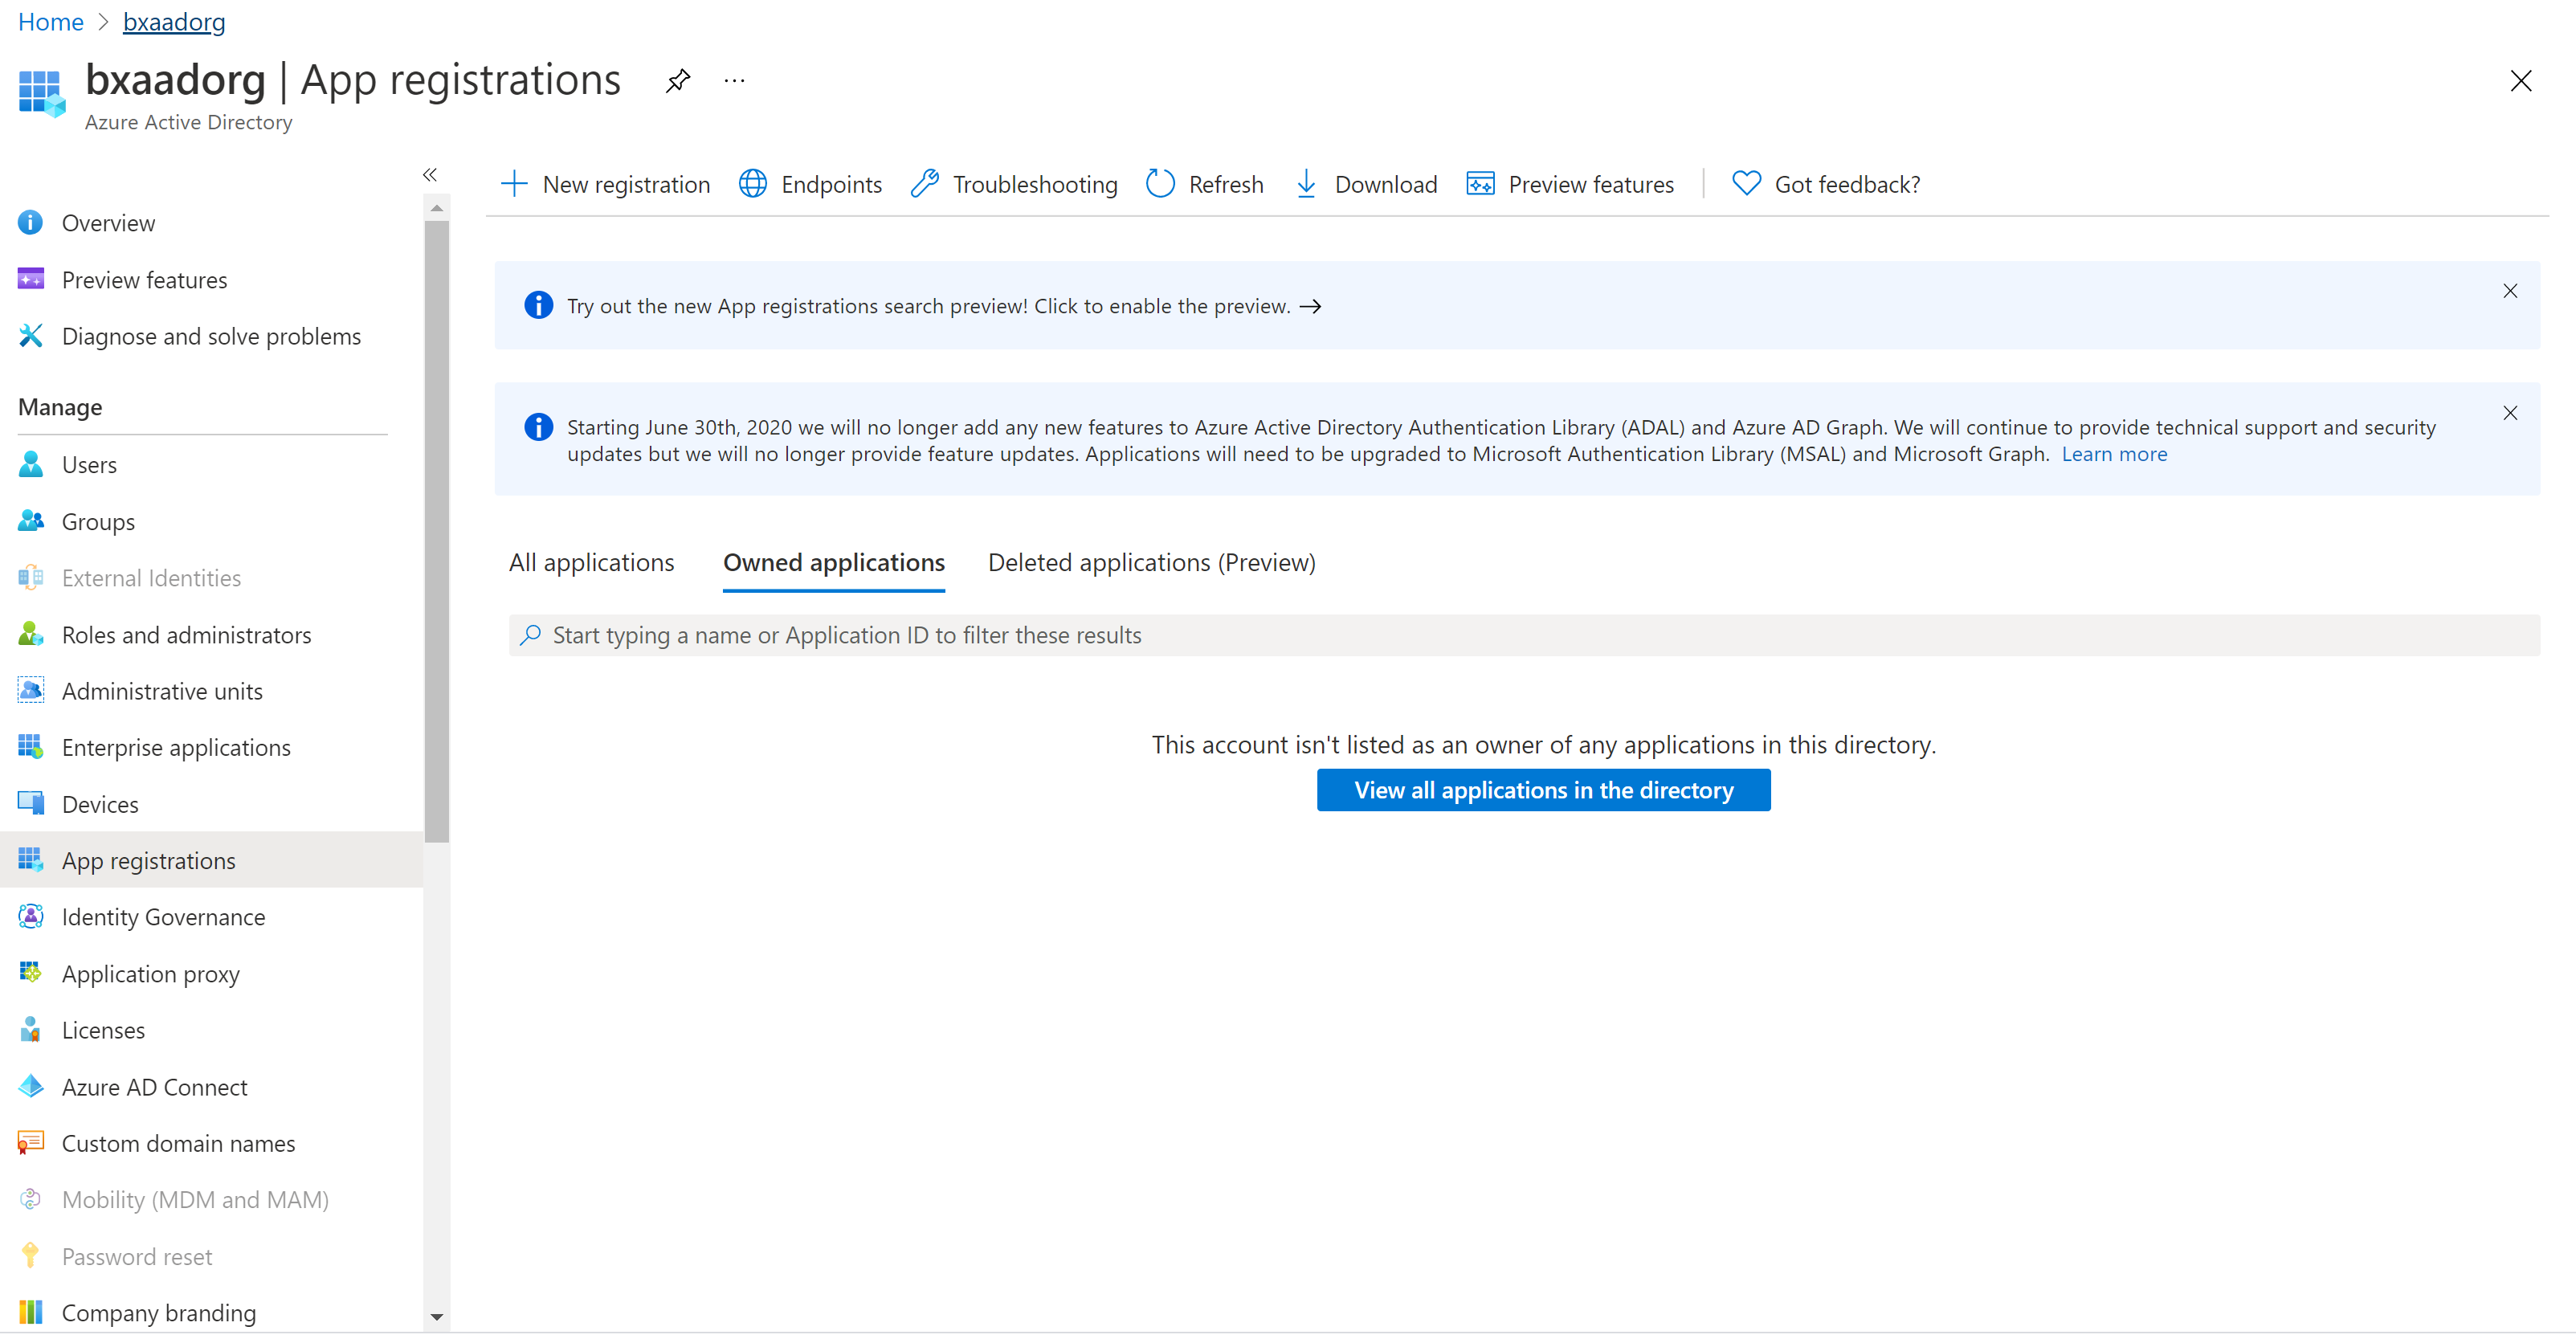
- Select New registration.
- For Supported account types, select Accounts in this organization directory only. Leave the other options as is.
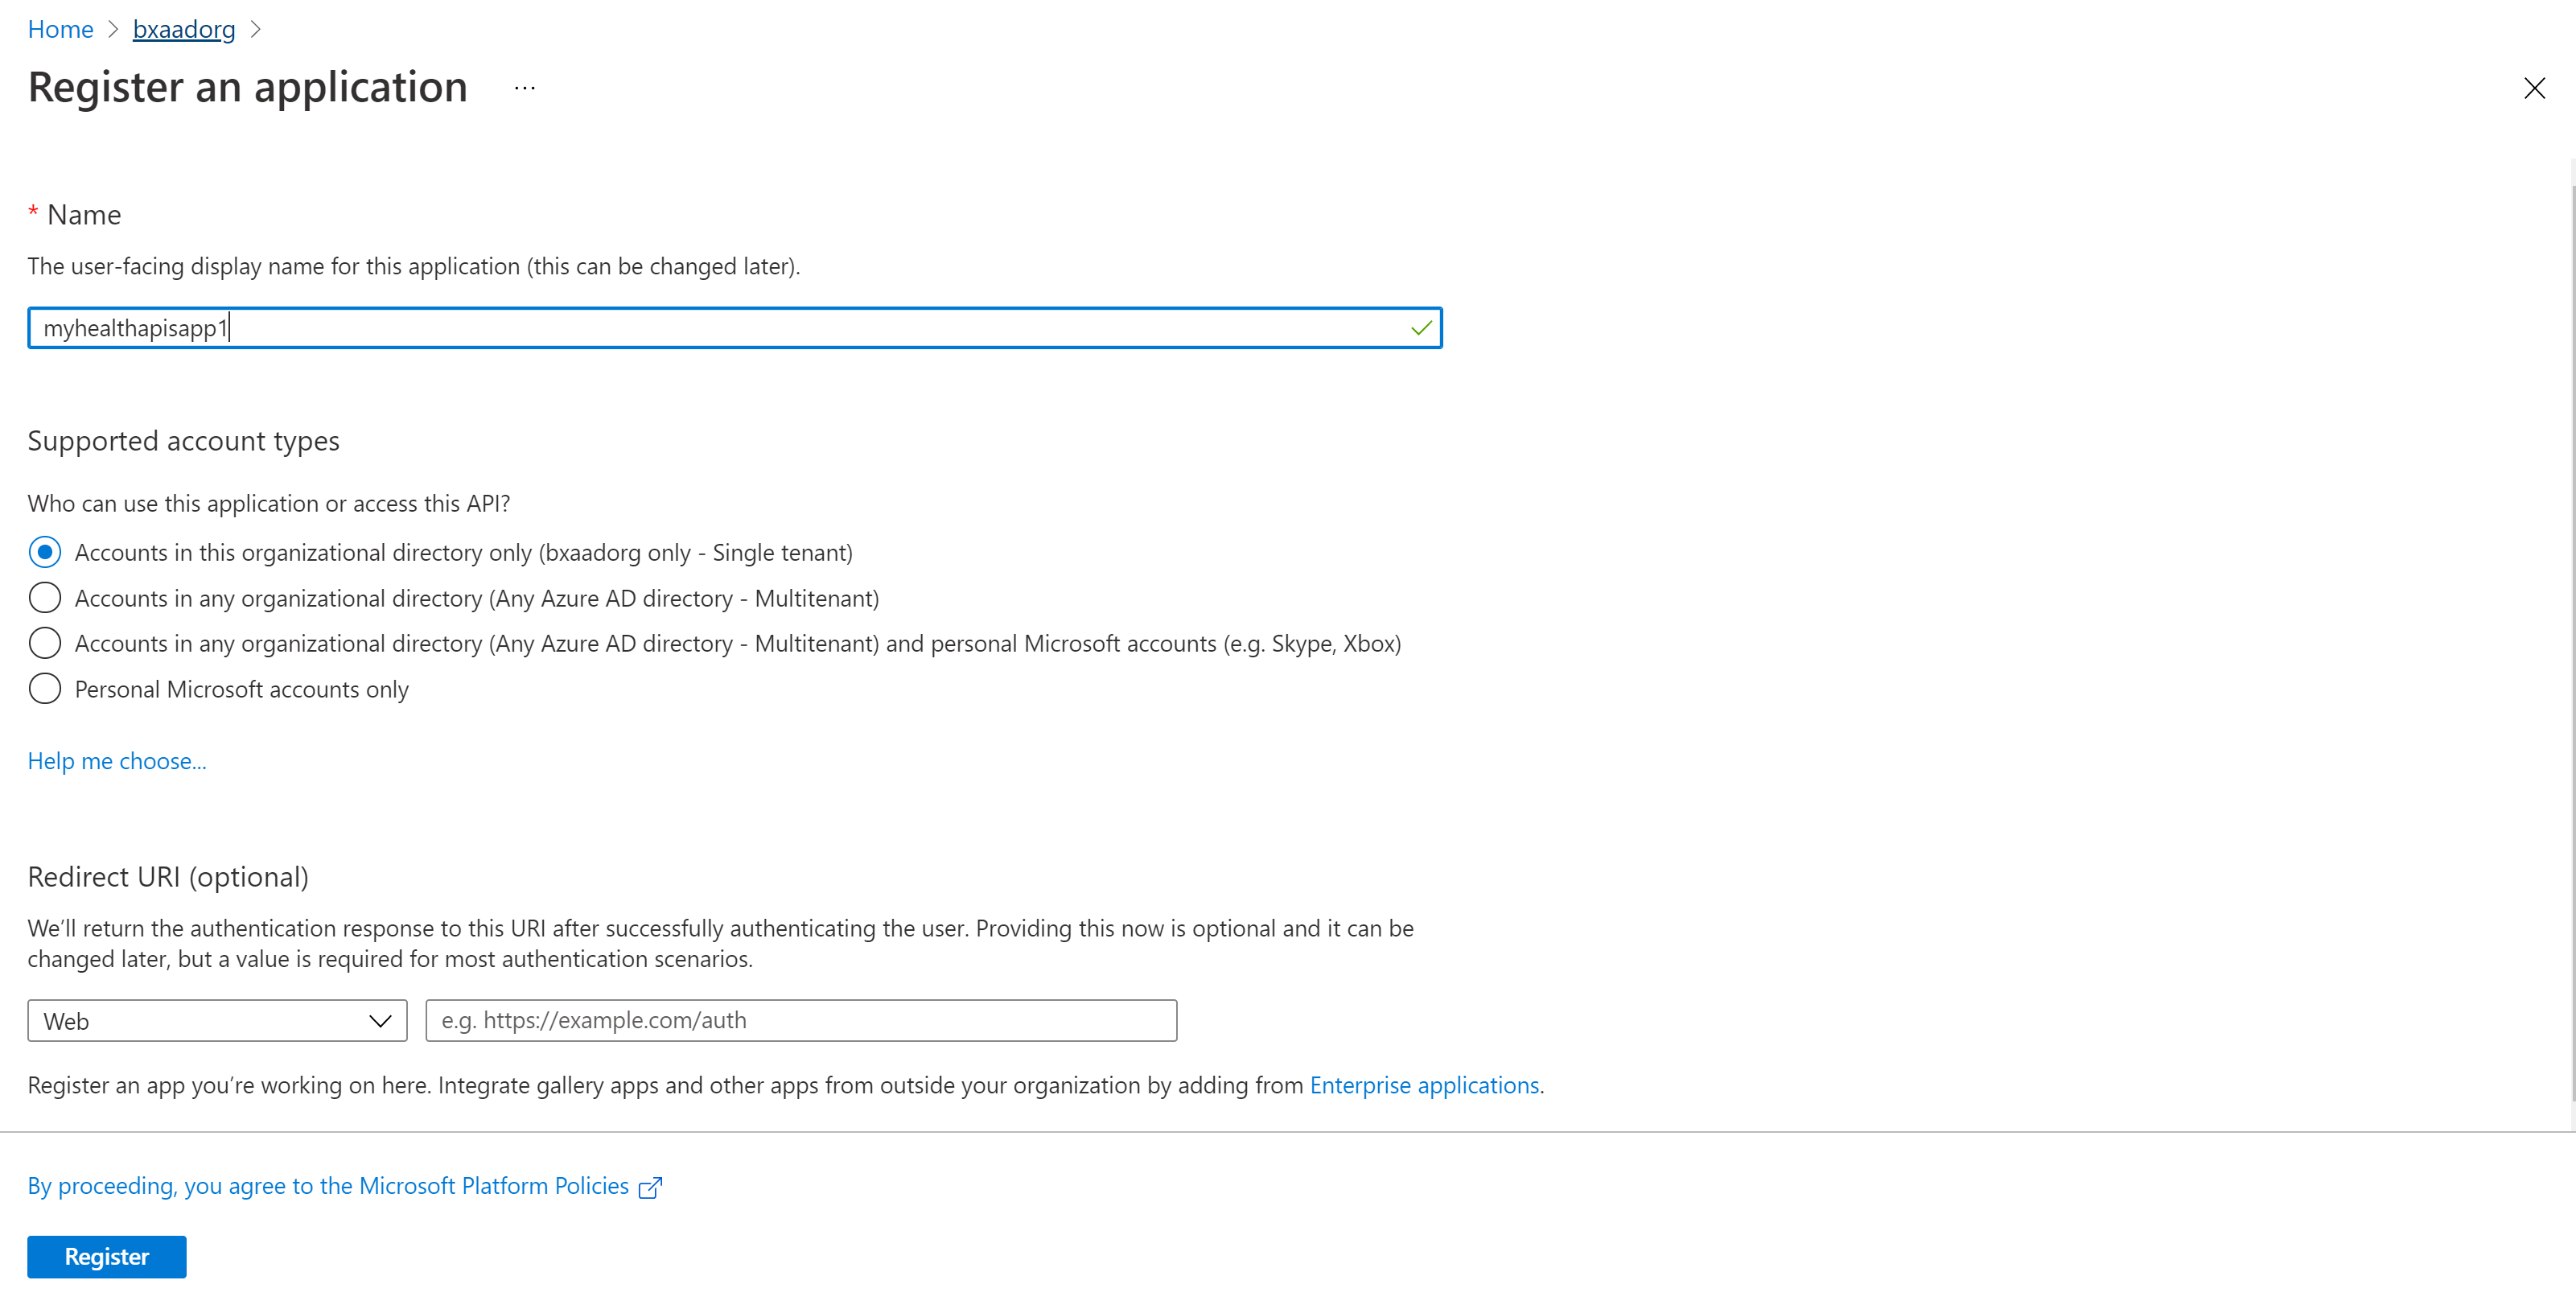
- Select Register.
Application ID (client ID)
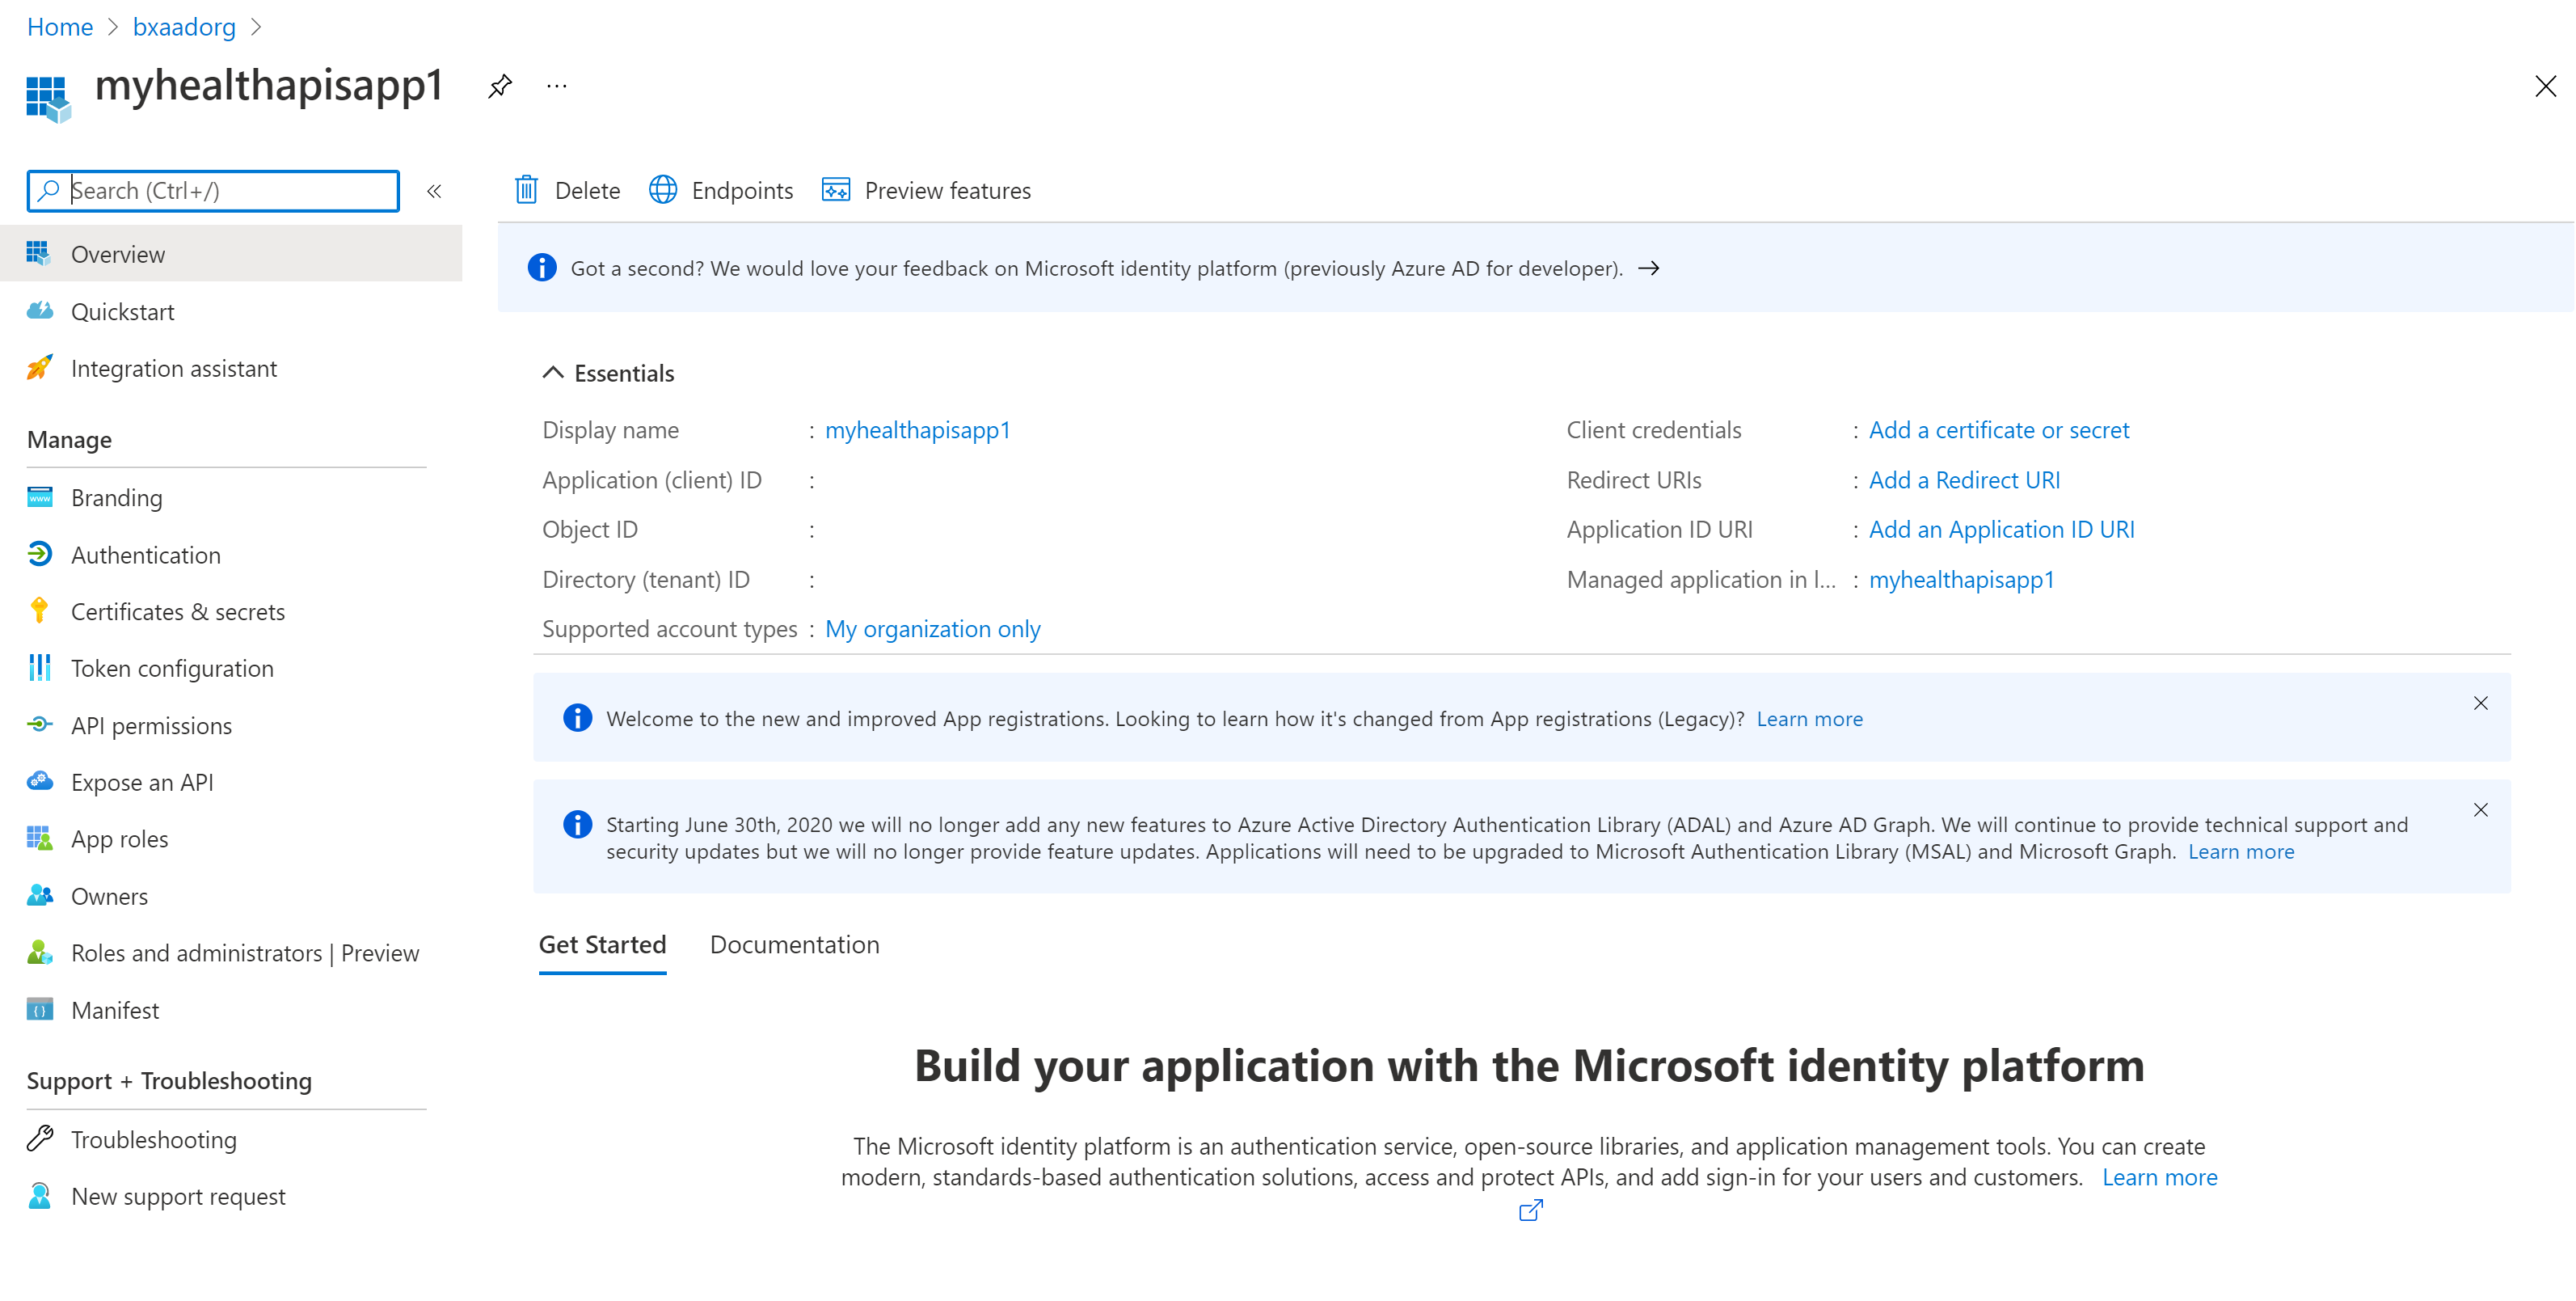
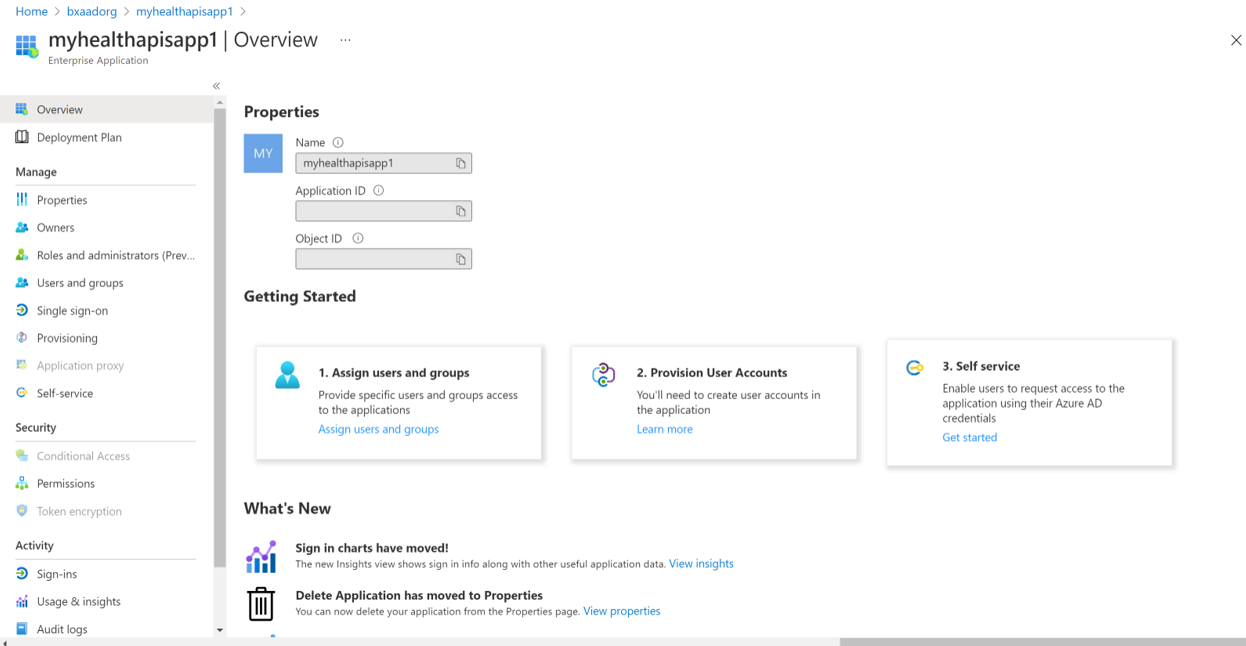
After registering a new application, you can find the application (client) ID and Directory (tenant) ID from the overview menu option. Make a note of the values for use later.
Authentication setting: confidential vs. public
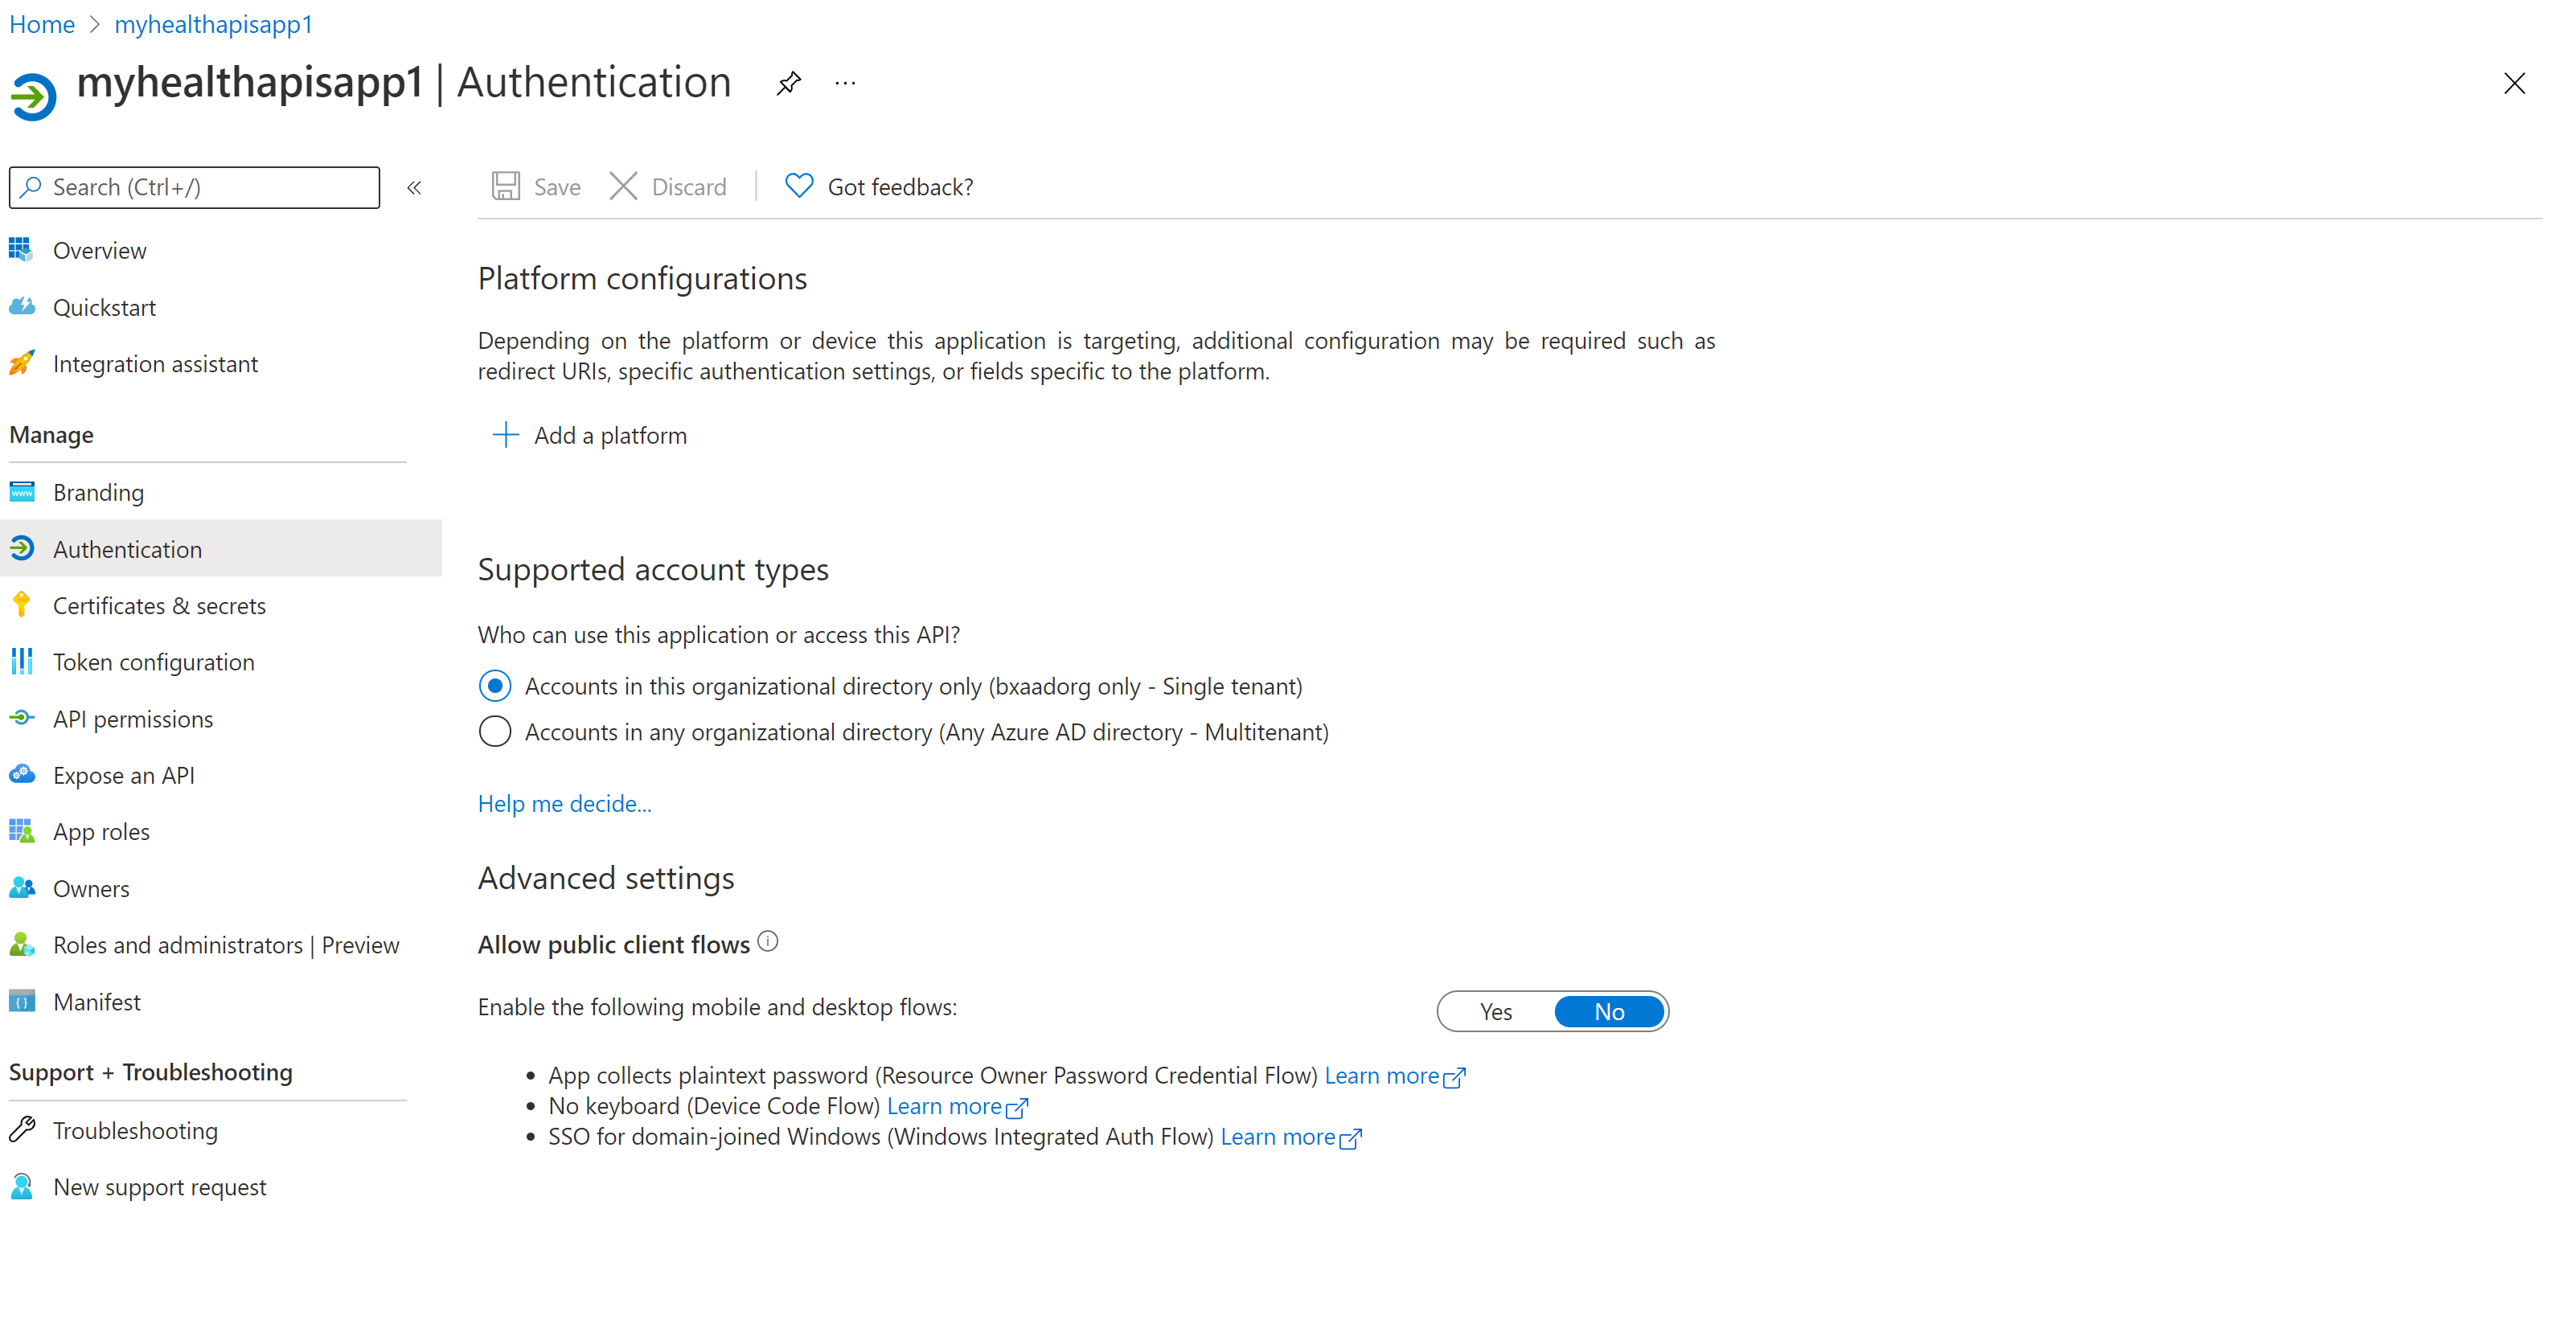
Select Authentication to review the settings. The default value for Allow public client flows is "No".
If you keep this default value, the application registration is a confidential client application and a certificate or secret is required.
If you change the default value to "Yes" for the "Allow public client flows" option in the advanced setting, the application registration is a public client application and a certificate or secret isn't required. The "Yes" value is useful when you want to use the client application in your mobile app or a JavaScript app where you don't want to store any secrets.
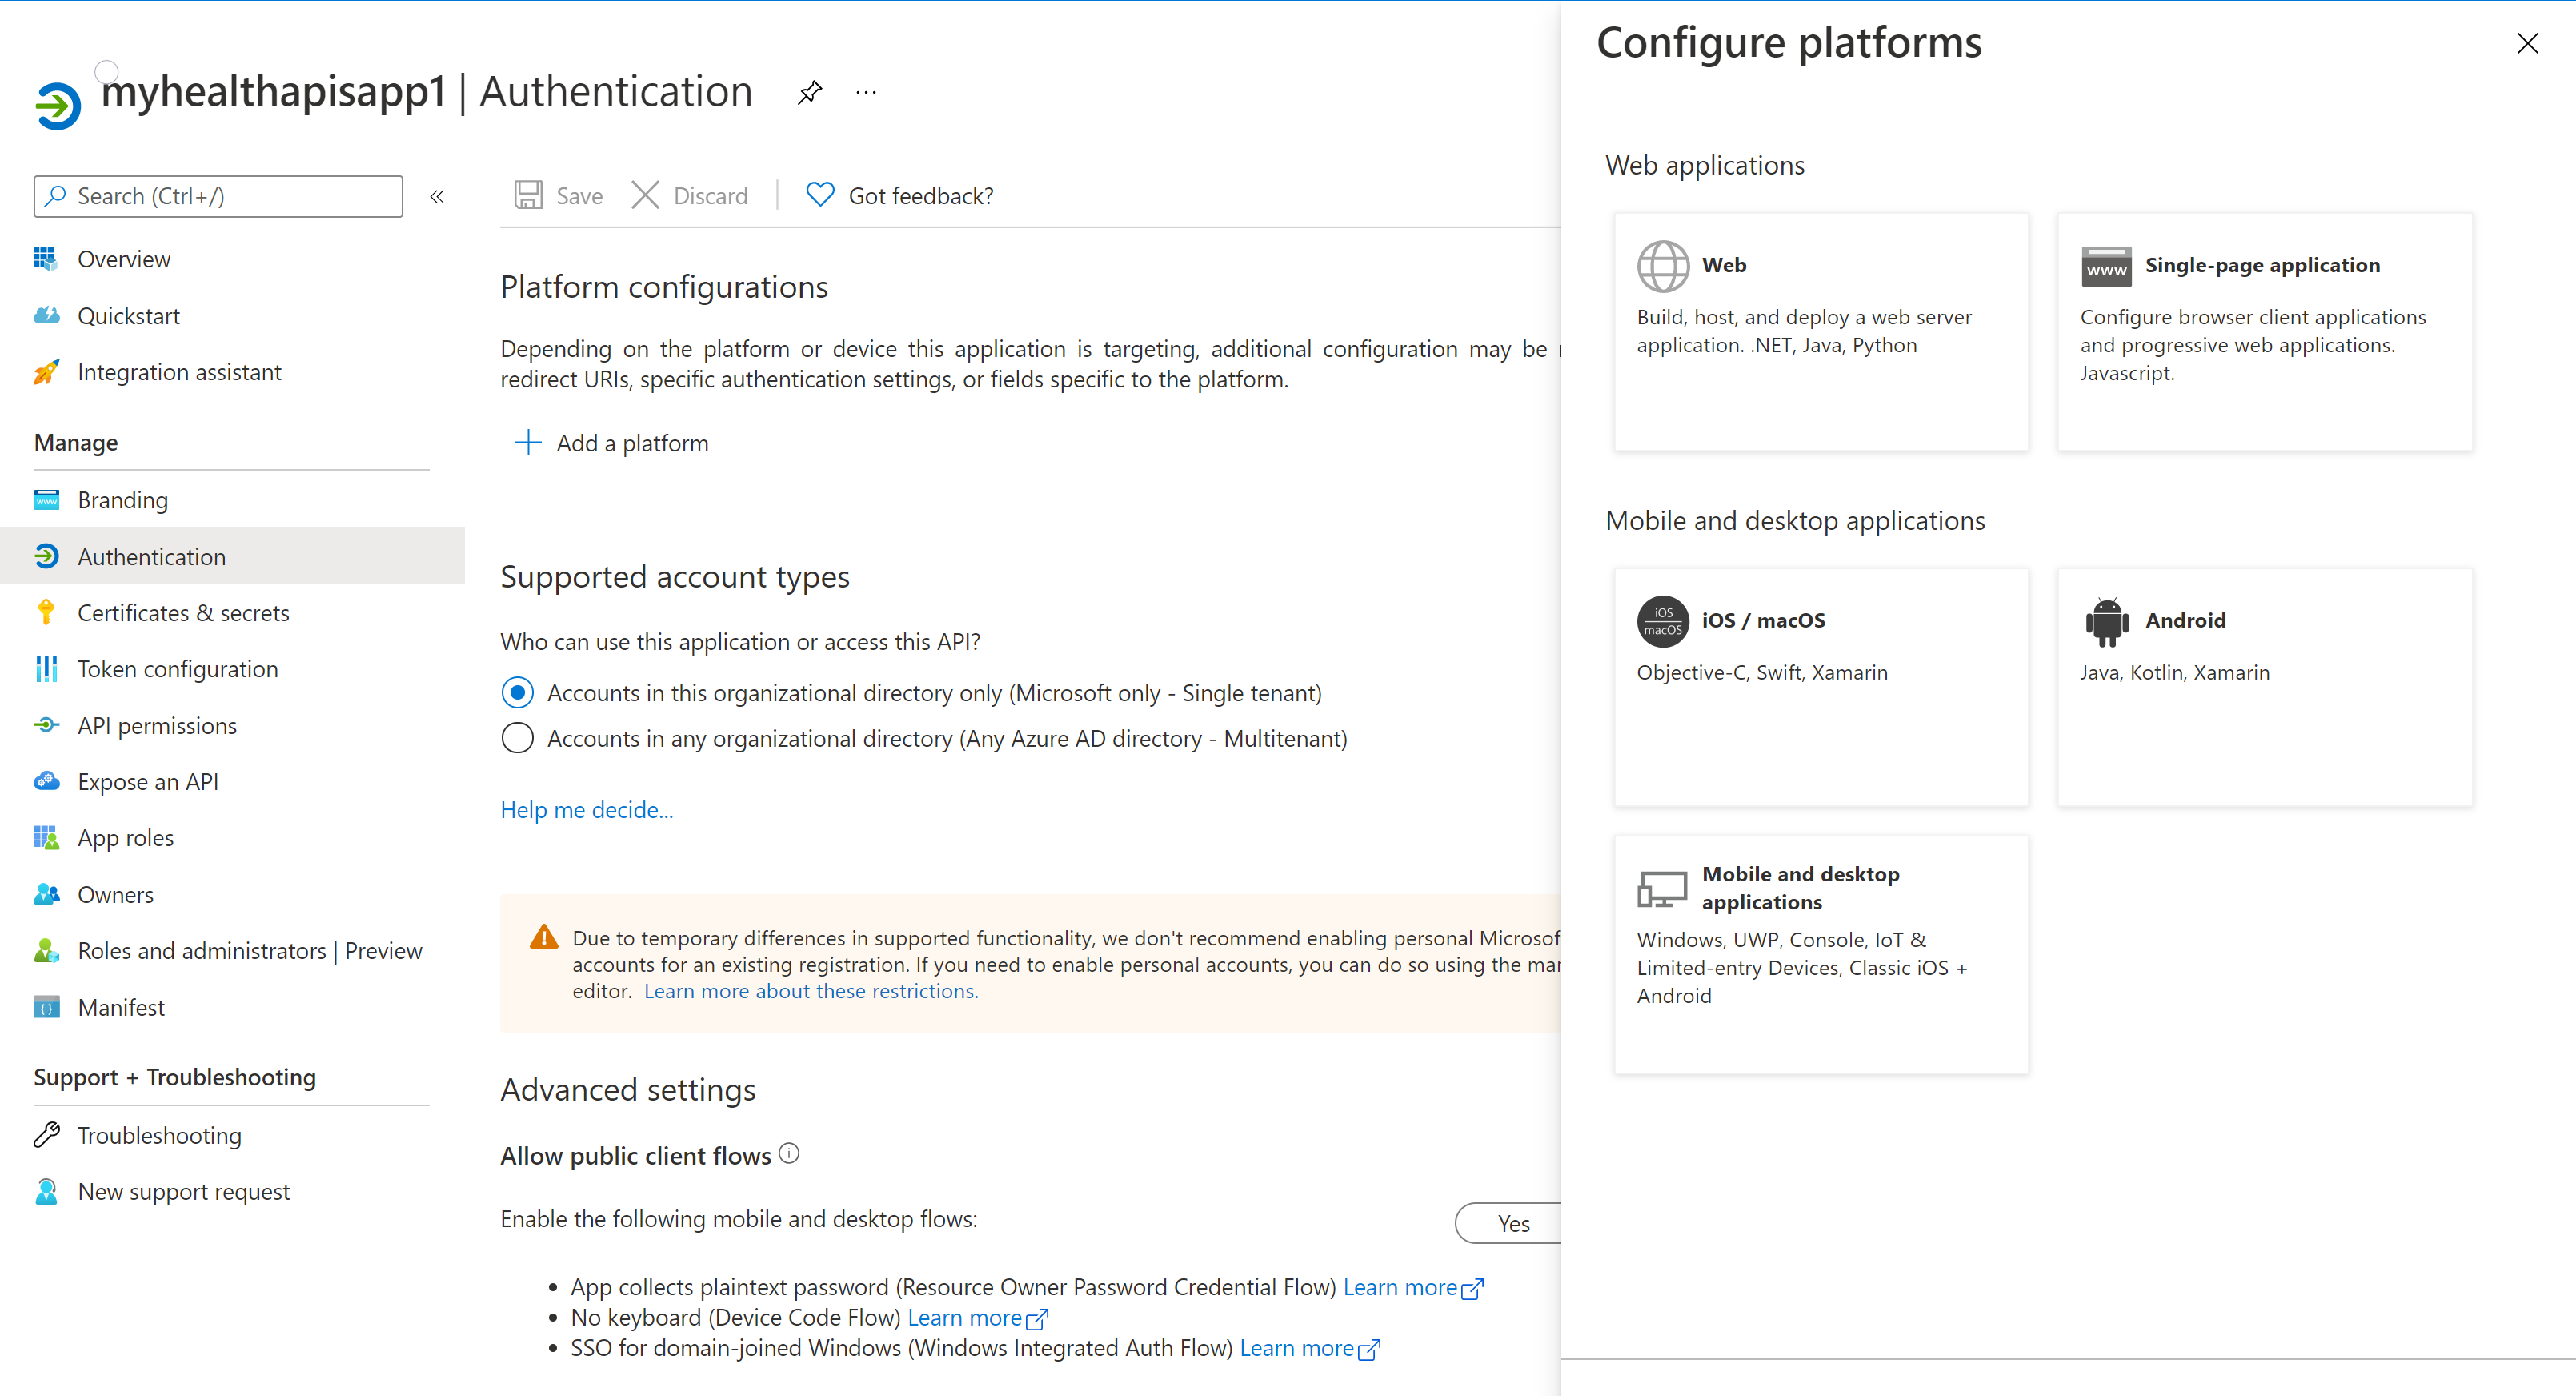
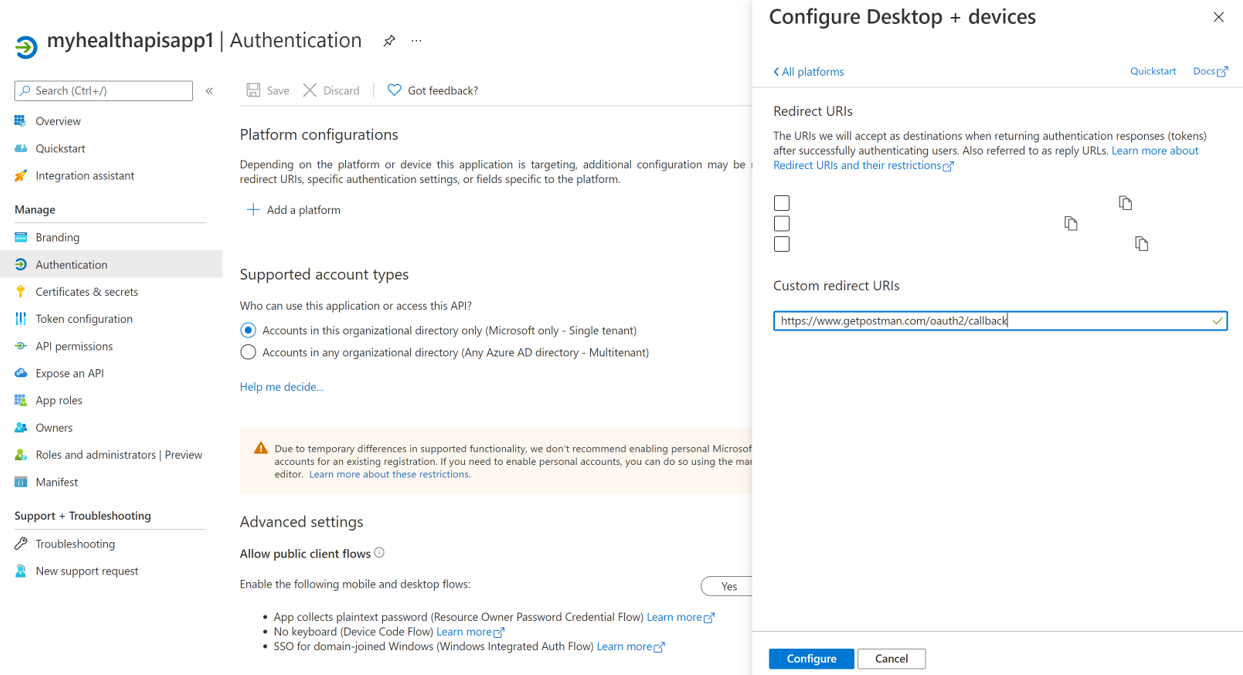
For tools that require a redirect URL, select Add a platform to configure the platform.
For Postman, select Mobile and desktop applications. Enter "https://www.getpostman.com/oauth2/callback" in the Custom redirect URIs section. Select the Configure button to save the setting.
Certificates & secrets
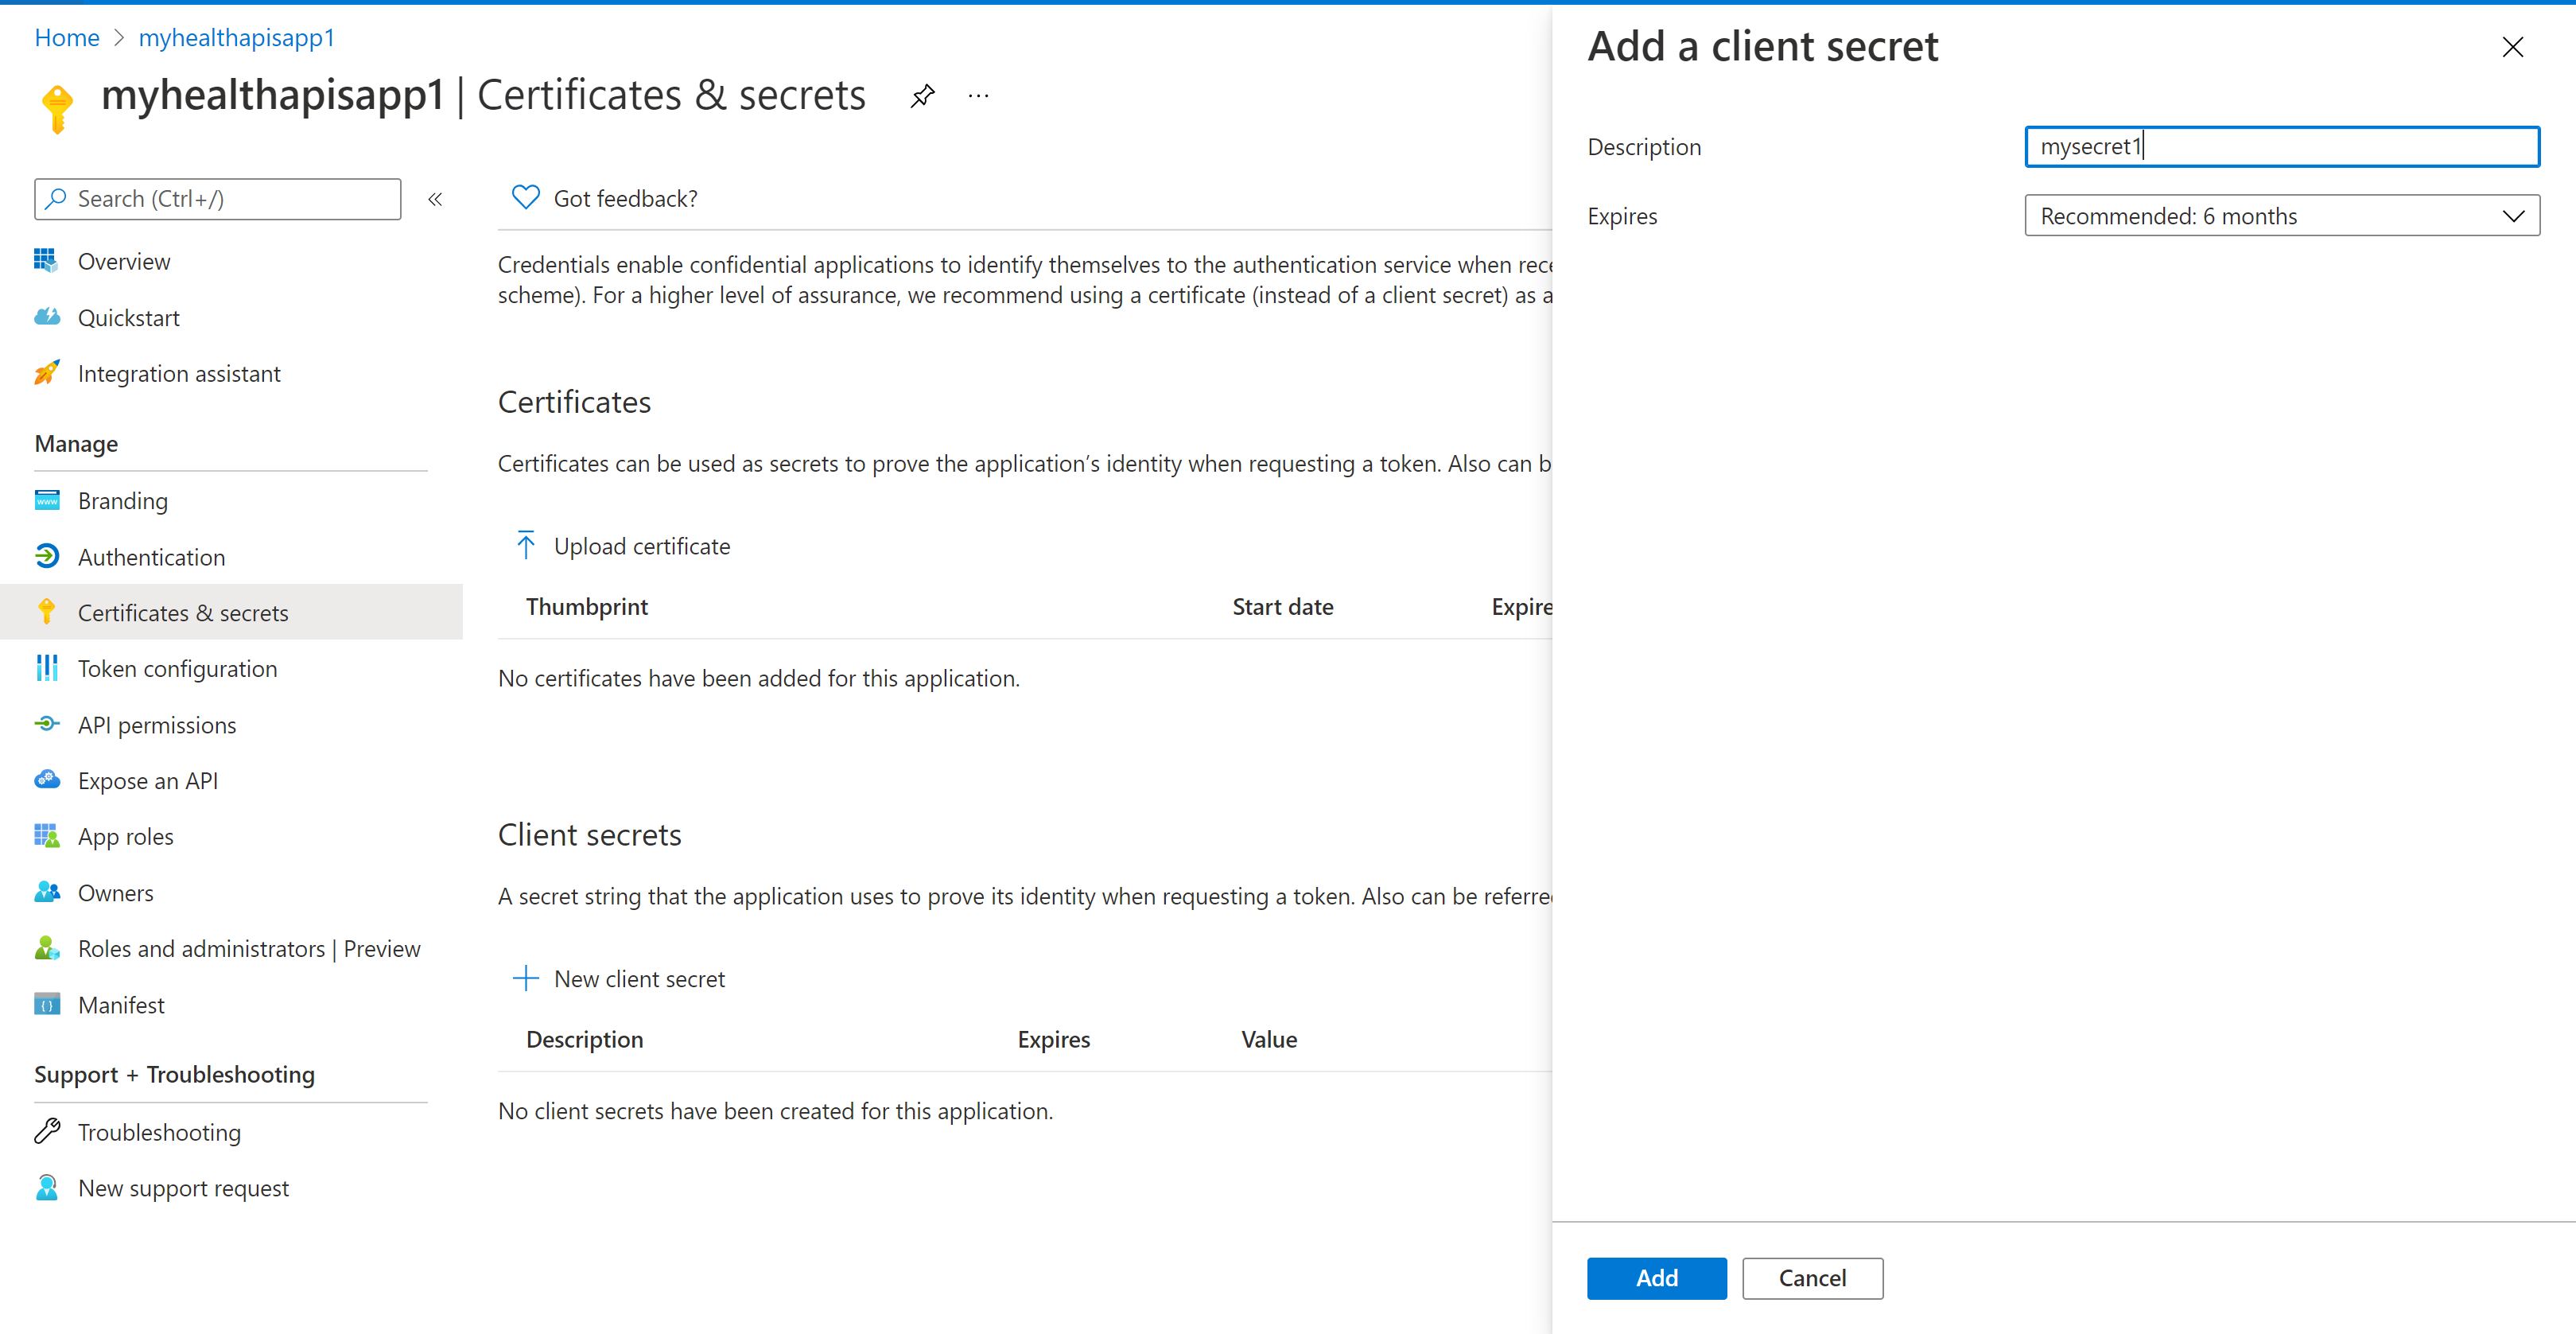
Select Certificates & Secrets and select New Client Secret. Select Recommended 6 months in the Expires field. This new secret will be valid for six months. You can also choose different values such as:
- 03 months
- 12 months
- 24 months
- Custom start date and end date.
Note
It is important that you save the secret value, not the secret ID.
Optionally, you can upload a certificate (public key) and use the Certificate ID, a GUID value associated with the certificate. For testing purposes, you can create a self-signed certificate using tools such as the PowerShell command line, New-SelfSignedCertificate, and then export the certificate from the certificate store.
API permissions
The following steps are required for the DICOM service, but optional for the FHIR service. In addition, user access permissions or role assignments for the Azure Health Data Services are managed through RBAC. For more details, visit Configure Azure RBAC for Azure Health Data Services.
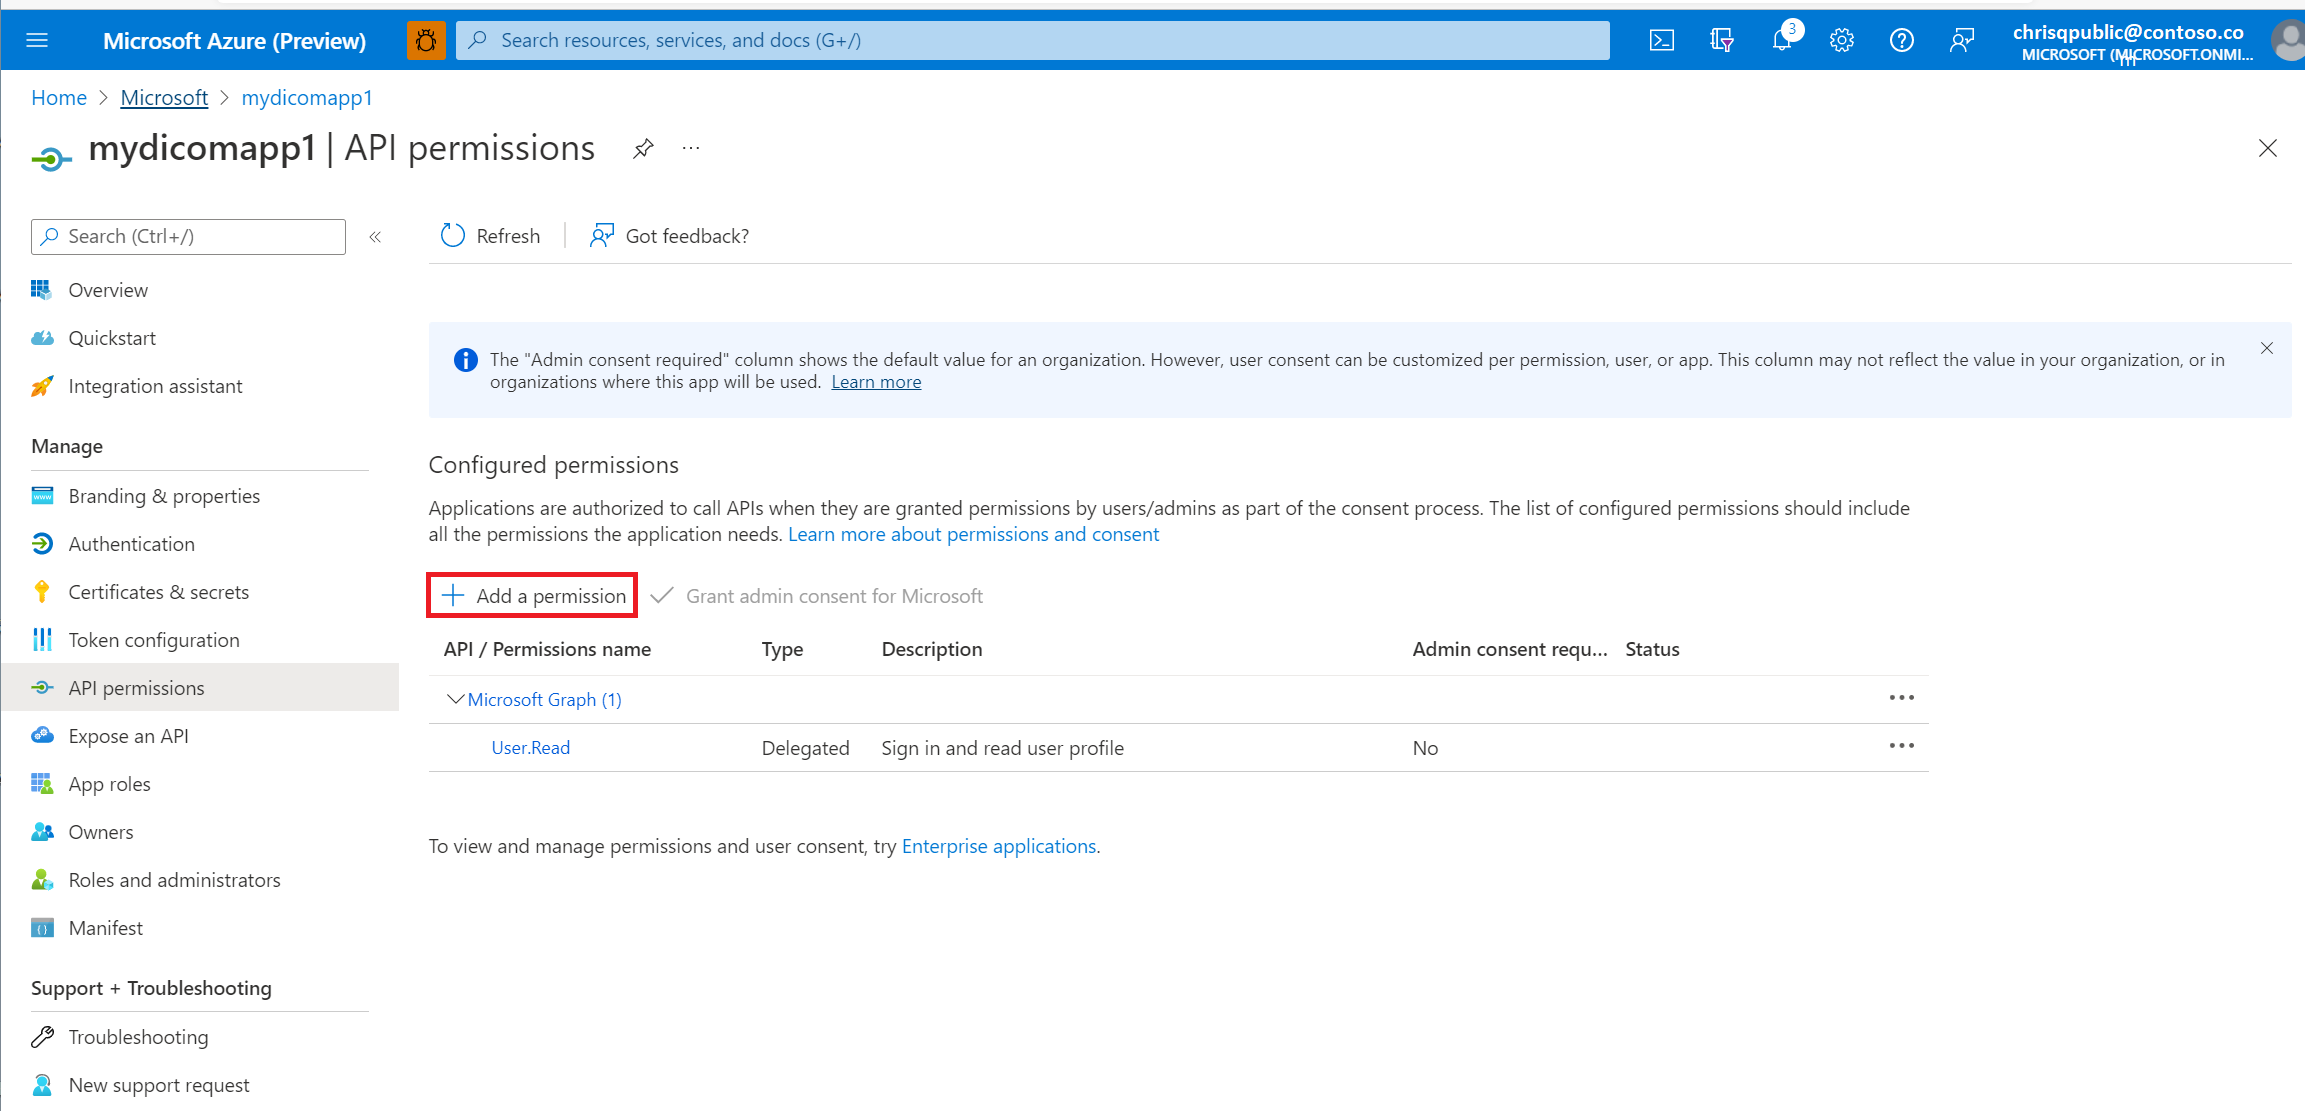
Select the API permissions blade.
Select Add a permission.
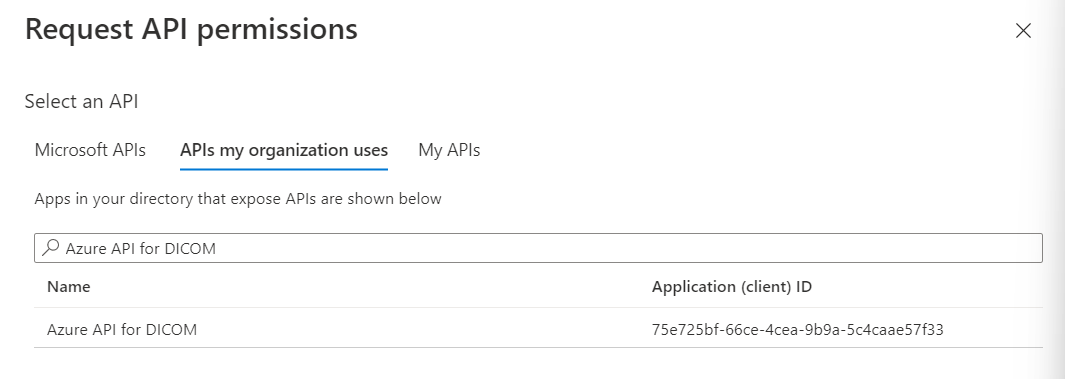
If you're using Azure Health Data Services, you'll add a permission to the DICOM service by searching for Azure API for DICOM under APIs my organization uses.
The search result for Azure API for DICOM will only return if you've already deployed the DICOM service in the workspace.
If you're referencing a different resource application, select your DICOM API Resource Application Registration that you created previously under APIs my organization.
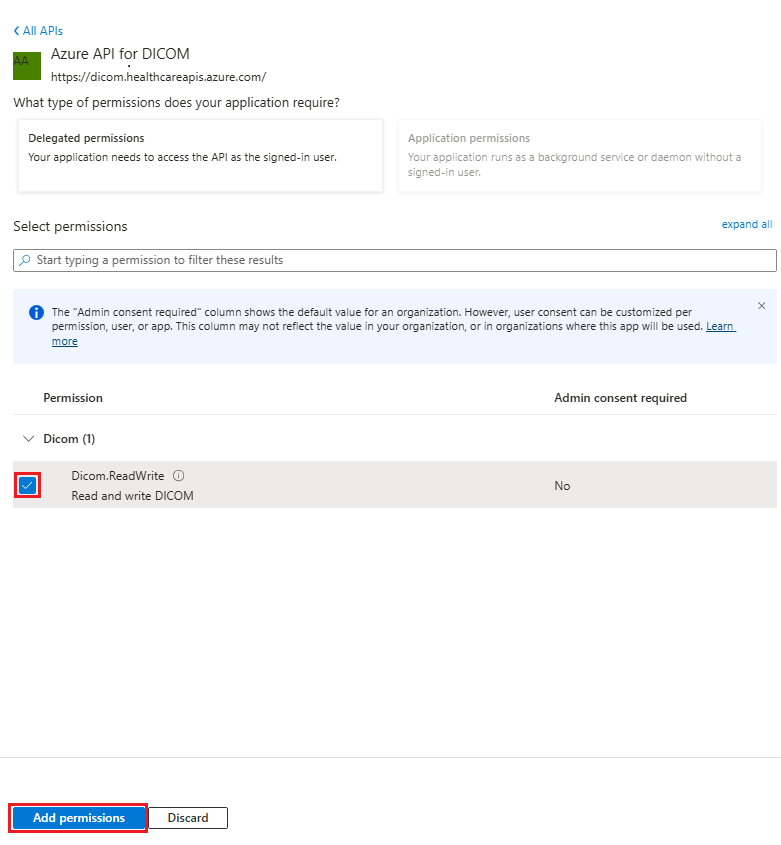
Select scopes (permissions) that the confidential client application will ask for on behalf of a user. Select Dicom.ReadWrite, and then select Add permissions.
Note
Use grant_type of client_credentials when trying to obtain an access token for the FHIR service using tools such as Postman or REST Client. For more details, visit Access using Postman and Accessing Azure Health Data Services using the REST Client Extension in Visual Studio Code.
Use grant_type of client_credentials or authentication_code when trying to obtain an access token for the DICOM service. For more details, visit Using DICOM with cURL.
Your application registration is now complete.
Next steps
In this article, you learned how to register a client application in the Microsoft Entra ID. Additionally, you learned how to add a secret and API permissions to Azure Health Data Services. For more information about Azure Health Data Services, see
