Upgrade from Azure Front Door Standard to Premium
Upgrade your Azure Front Door Standard to Premium for advanced capabilities and increased quota limits without any downtime. For a detailed comparison, see Tier comparison.
This guide explains how to upgrade your Azure Front Door Standard profile. After upgrading, you'll be billed for the Azure Front Door Premium monthly base fee at an hourly rate.
Important
Downgrading from Premium to Standard isn't supported.
Prerequisite
Ensure you have an Azure Front Door Standard profile in your subscription.
Upgrade tier
Navigate to the Azure Front Door Standard profile you want to upgrade and select Configuration under Settings.
Select Upgrade to start the upgrade process. If no WAF policies are associated with your profile, confirm to proceed.
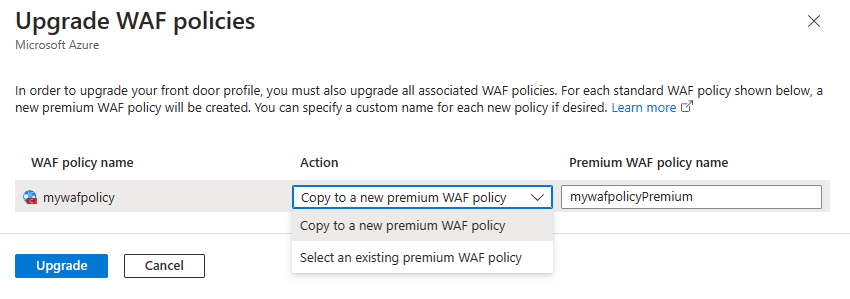
If WAF policies are associated, you're directed to the Upgrade WAF policies page. Choose to copy the WAF policies or use an existing premium WAF policy. You can rename the new WAF policy copy.

Note
Enable managed WAF rules manually for the new premium WAF policy copies after upgrading.
Select Upgrade after setting up WAF policies. Confirm by selecting Yes.
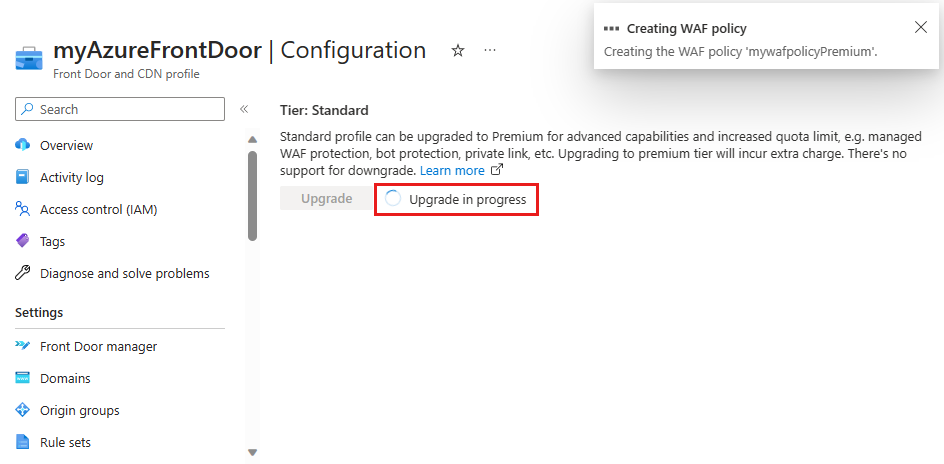
The upgrade process creates a new premium WAF policy and associates it with the Azure Front Door Premium profile. The process can take a few minutes.

Once the upgrade is complete, Tier: Premium is displayed on the Configuration page.
Note
Billing for Azure Front Door Premium is at an hourly rate.
Next steps
- Learn more about Managed rule for Azure Front Door WAF policy.
- Enable Private Link to origin resources in Azure Front Door.