Deploy pull request Artifacts with classic release pipelines
Azure DevOps Services | Azure DevOps Server 2022 - Azure DevOps Server 2019
Pull requests provide an effective way to review code changes before it is merged into the codebase. However, these changes can introduce issues that can be tricky to find without building and deploying your application to a specific environment. Pull request triggers enable you to set up a set of criteria that must be met before deploying your code. In this article, you will learn how to set up pull request triggers with Azure Repos and GitHub to deploy your build artifact.
Prerequisites
- Source code hosted on Azure Repos or GitHub. Use the pipelines-dotnet-core sample app and create your repository if you don't have one already.
- A working build pipeline for your repository.
- A Classic release pipeline. Set up a Classic release pipeline if you don't have one already.
Pull request deployment
With pull request triggers, anytime you raise a new pull request for the designated branch, a release is triggered automatically to start the deployment to the designated environments. The deployment status will then be displayed on the pull request page. Pull request triggers can help you maintain better code quality, release with higher confidence, and discover any issues early on in the development cycle.
Setting up pull request deployments is a two step process, first we must set up a pull request trigger and then set up branch policies (Azure Repos) or status checks (GitHub) for our release pipelines.
Create a pull request trigger
A pull request trigger creates a release every time a new build Artifact is available.
Navigate to your Azure DevOps project, select Pipelines > Releases and then select your release pipeline.
Select the Continuous deployment trigger icon in the Artifacts section.
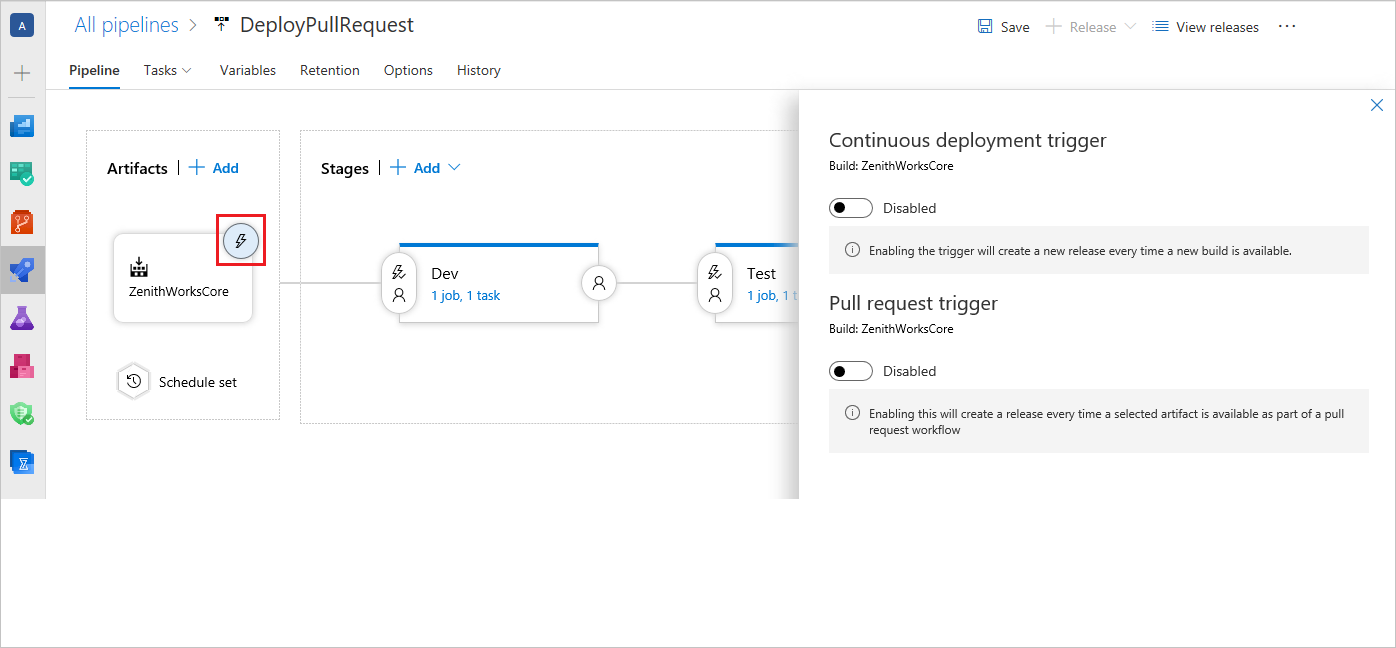
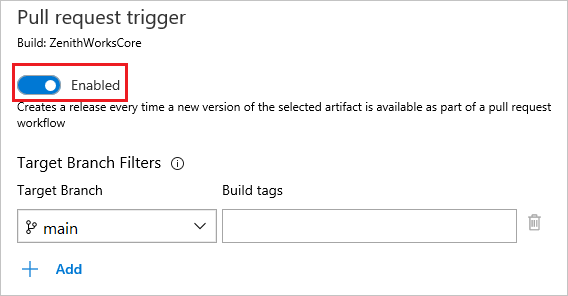
Select the toggle button to enable the Pull request trigger.
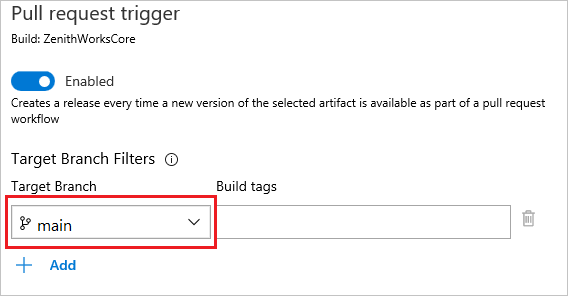
Select your Target Branch from the dropdown menu.
To deploy your application to a specific stage you need to explicitly opt in that stage. The Stages section shows the stages that are enabled for pull request deployments.

To opt-in a stage for pull request deployment, select the Pre-deployment conditions icon for your specific stage, and then select Triggers > After release. Finally select the Pull request deployment toggle button to enable it.

Important
Enabling automatic pull request deployments for production stages is not recommended.
Set up branch policies for Azure Repos
You can use branch policies to implement a list of criteria that must be met for a pull request to be merged.
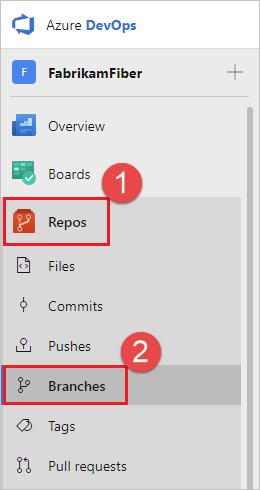
Navigate to your project, and then select Repos > Branches to access the list of branches for your repository.
Select the context menu for your appropriate branch
..., then select Branch policies.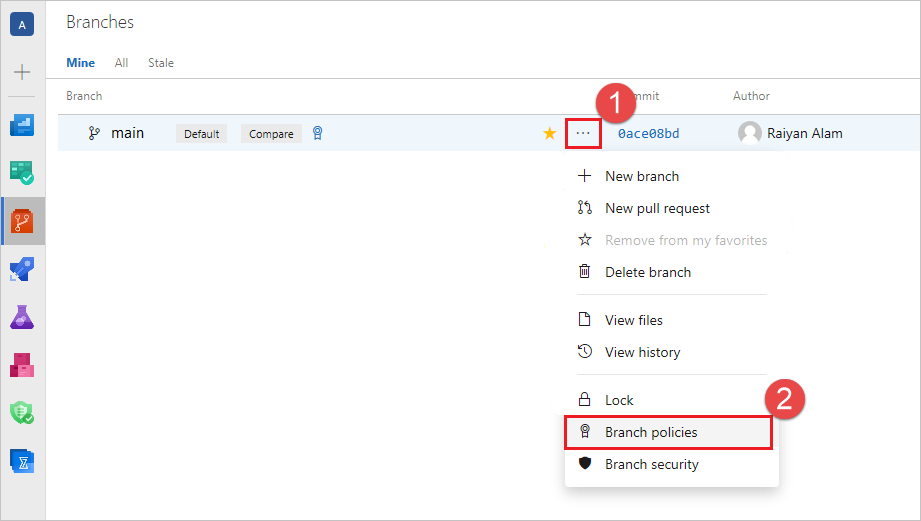
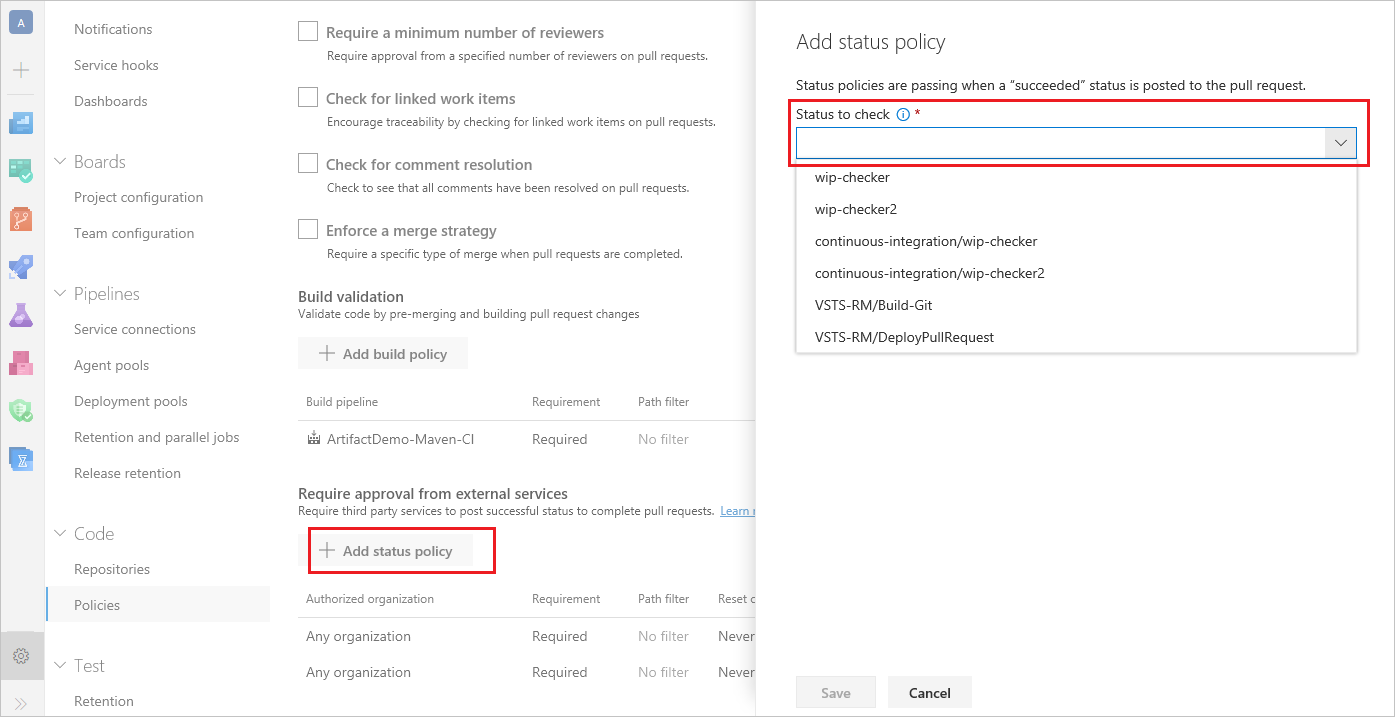
Select Add status policy, then select a Status to check from the dropdown menu. Select the status corresponding to your release definition and then select Save.
Note
The release definition should have run at least once with the pull request trigger enabled in order to get the list of statuses. See Configure a branch policy for an external service for more details.
With the new status policy added, users won't be able to merge any changes to the target branch without a "succeeded" status is posted to the pull request.

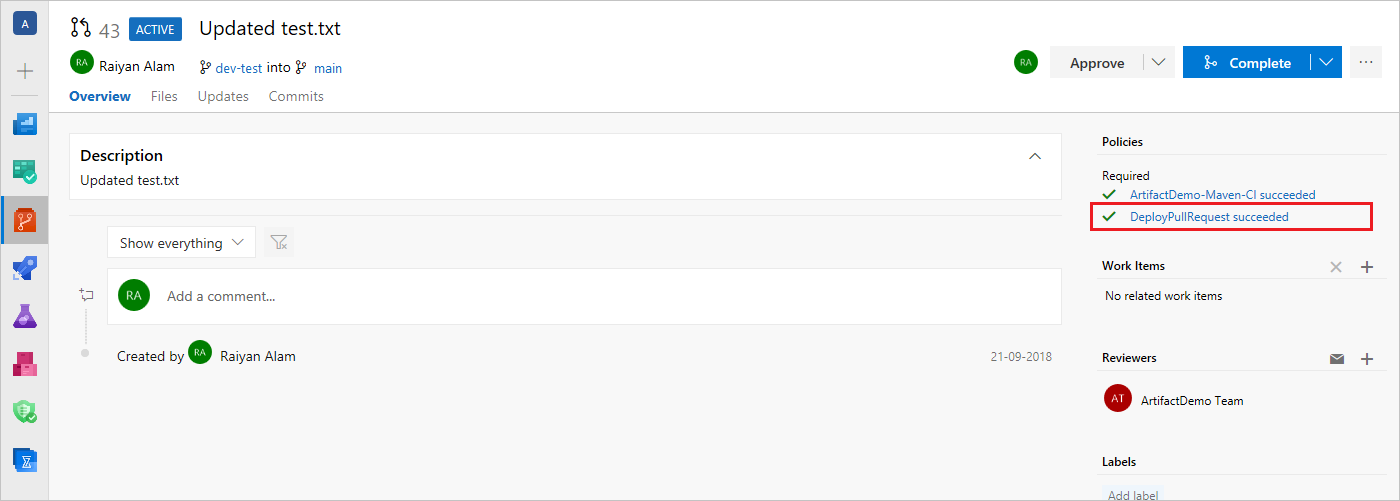
You can view the status of your policies from the pull request Overview page. Depending on your policy settings, you can view the posted release status under the Required, Optional, or Status sections. The release status gets updated every time the pipeline is triggered.
Set up status checks for GitHub repositories
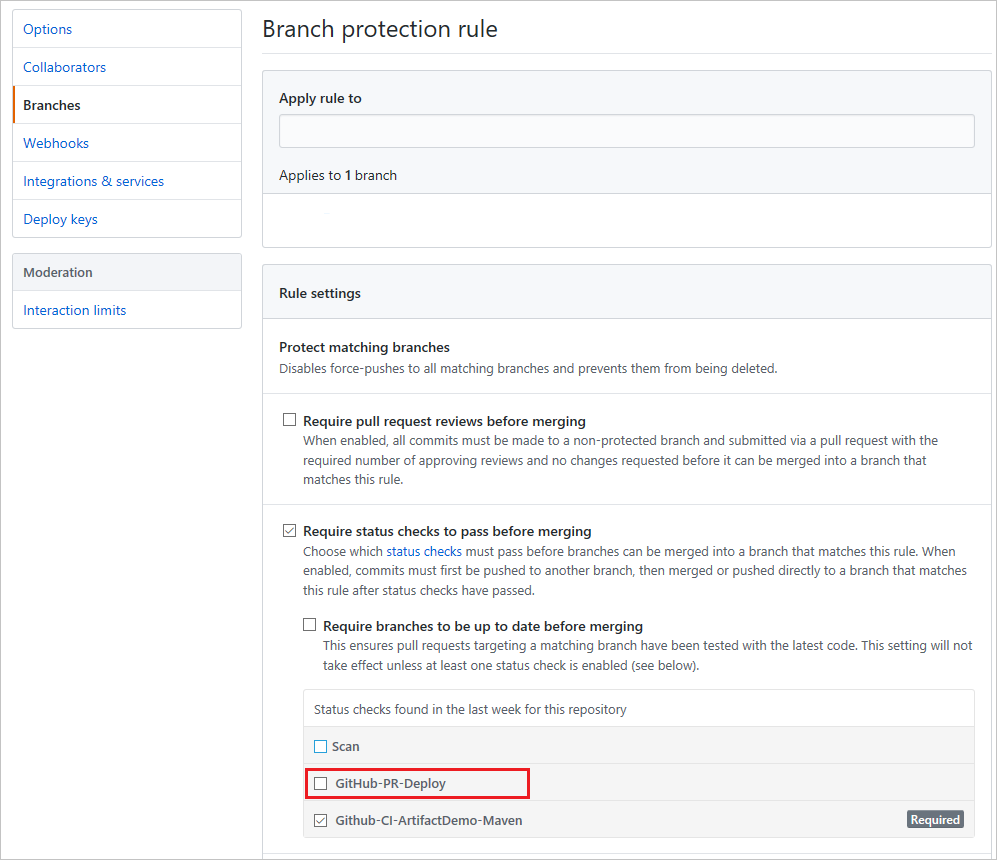
Enabling status checks for a GitHub repository allow an administrator to choose which criteria must be met before a pull request is merged into the target branch.
Note
The status checks will be posted on your pull request only after your release pipeline has run at least once with the pull request deployment condition Enabled. See Branch protection rules for more details.
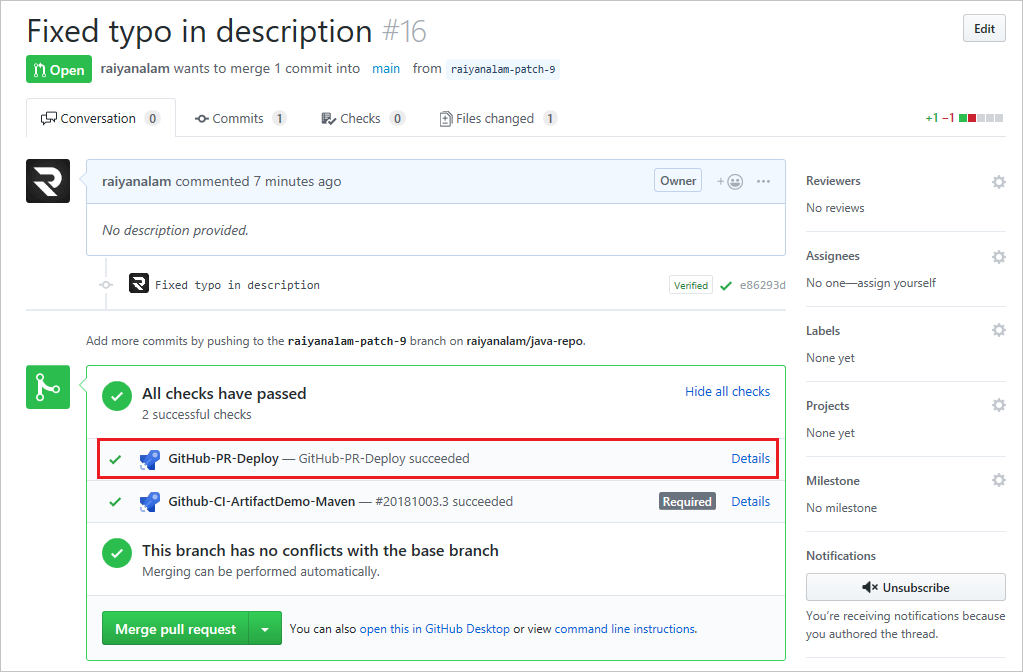
You can view your status checks in your pull request under the Conversation tab.
