Create a Hello World web app for Azure App Service using IntelliJ
This article demonstrates the steps that are required to create a basic Hello World web app and publish your web app to Azure App Service by using the Azure Toolkit for IntelliJ.
Note
If you prefer using Eclipse, check out our similar tutorial for Eclipse.
If you don't have an Azure subscription, create a free account before you begin.
Don't forget to clean up the resources after you complete this tutorial. In that case, running this guide will not exceed your free account quota.
Prerequisites
- A supported Java Development Kit (JDK). For more information about the JDKs available for use when developing on Azure, see Java support on Azure and Azure Stack.
- IntelliJ IDEA, Ultimate or Community Edition.
- The Azure Toolkit for IntelliJ. For more information, see Install the Azure Toolkit for IntelliJ.
Install and sign-in
The following steps walk you through the Azure sign-in process in your IntelliJ development environment.
If you haven't installed the plugin, see Azure Toolkit for IntelliJ.
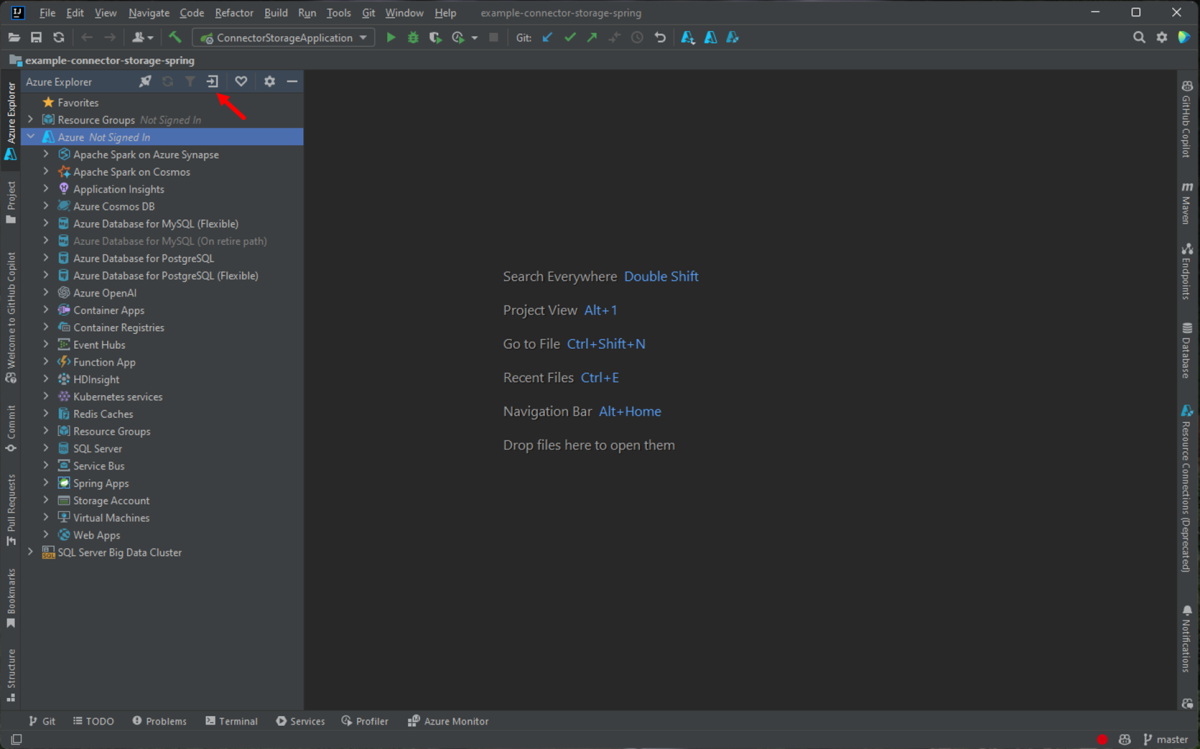
To sign in to your Azure account, navigate to the left-hand Azure Explorer sidebar, and then click the Azure Sign In icon. Alternatively, you can navigate to Tools, expand Azure, and then click Azure Sign in.

In the Azure Sign In window, select OAuth 2.0, and then click Sign in. For other sign-in options, see Sign-in instructions for the Azure Toolkit for IntelliJ.
In the browser, sign in with your account and then go back to IntelliJ. In the Select Subscriptions dialog box, click on the subscription that you want to use, then click Select.
Create a new web app project
Click File, expand New, and then click Project.
In the New Project dialog box, select Maven, and make sure the Create from Archetype option is checked. From the list, select maven-archetype-webapp, and then click Next.

Expand the Artifact Coordinates dropdown to view all input fields. Specify the following information for your new web app, and then click Next:
- Name: The name of your web app. This value will be used to automatically fill in the web app's ArtifactId field.
- GroupId: The name of the artifact group, usually a company domain, such as com.microsoft.azure.
- Version: We'll keep the default version 1.0-SNAPSHOT.
Customize any Maven settings or accept the defaults, and then click Finish.
To find the generated code, navigate to your project on the left-hand Project tab, then open the file src/main/webapp/index.jsp. You will see code similar to the following example.
<html>
 <body>
   <h2>Hello World!</h2>
 </body>
</html>
Deploy web app to Azure
Under the Project Explorer view, right-click your project, expand Azure, then click Deploy to Azure Web Apps.
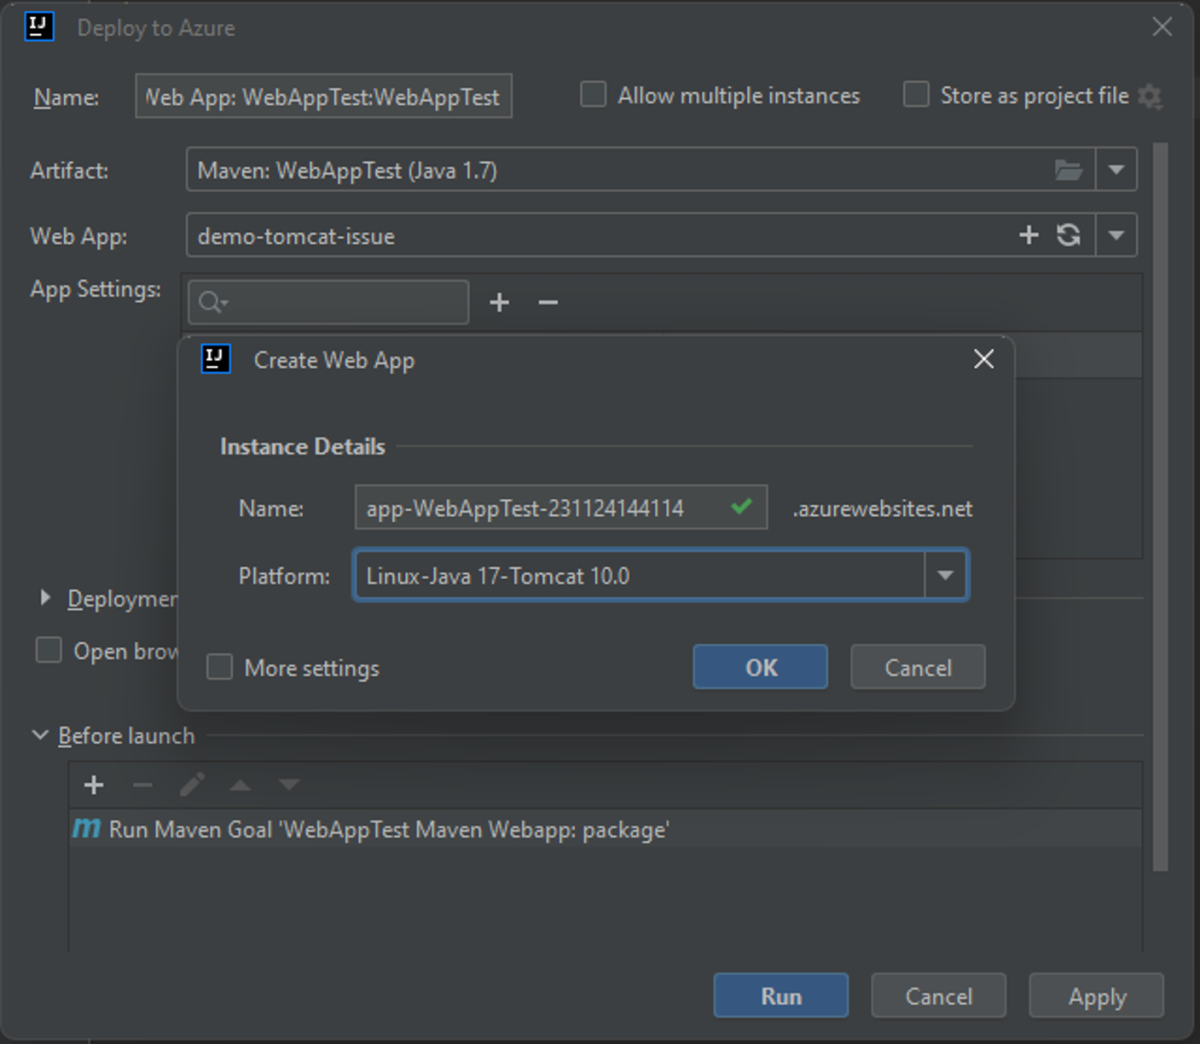
In the Deploy to Azure dialog box, you can deploy the application to an existing Tomcat webapp or you can create a new one.
a. Click + to create a new webapp. Otherwise, choose WebApp from the WebApp dropdown if there are existing webapps in your subscription.

b. In the pop-up Create WebApp dialog box, specify the following information and click OK:
- Name: The WebApp's domain name. This value should be unique across Azure.
- Platform: Select Linux-Java 8-TOMCAT 9.0 or as appropriate.
c. To deploy to an existing webapp, choose the web app from WebApp drop down, and then click Run.
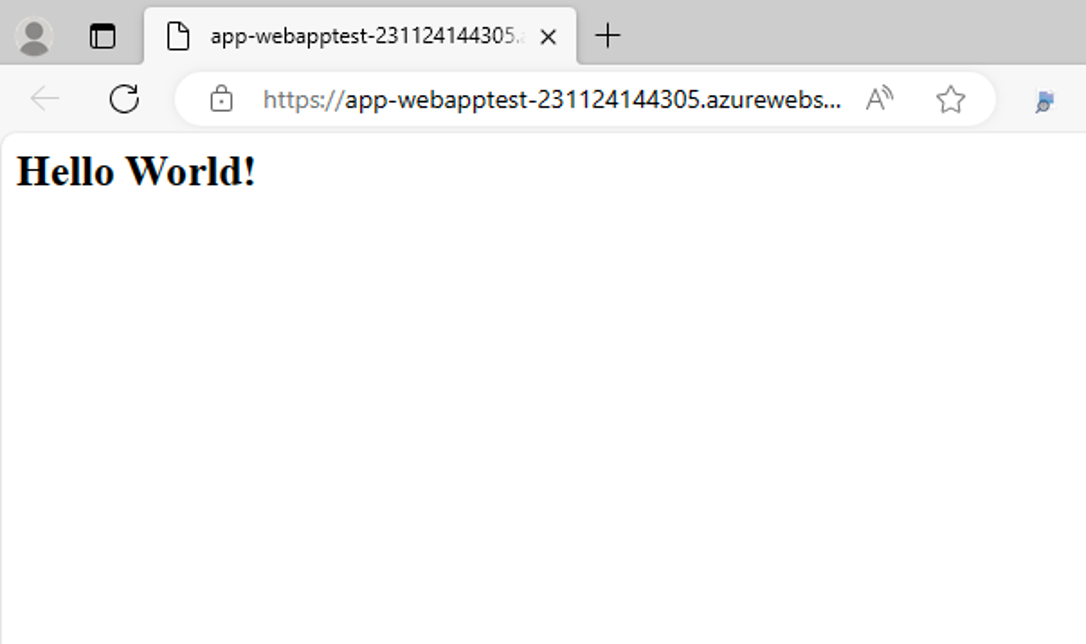
The toolkit will display a status message when it has successfully deployed your web app, along with the URL of your deployed web app if succeed.
You can browse to your web app using the link provided in the status message.

Manage deploy configurations
Tip
After you have published your web app, you can run the deployment by clicking the green arrow icon on the toolbar.
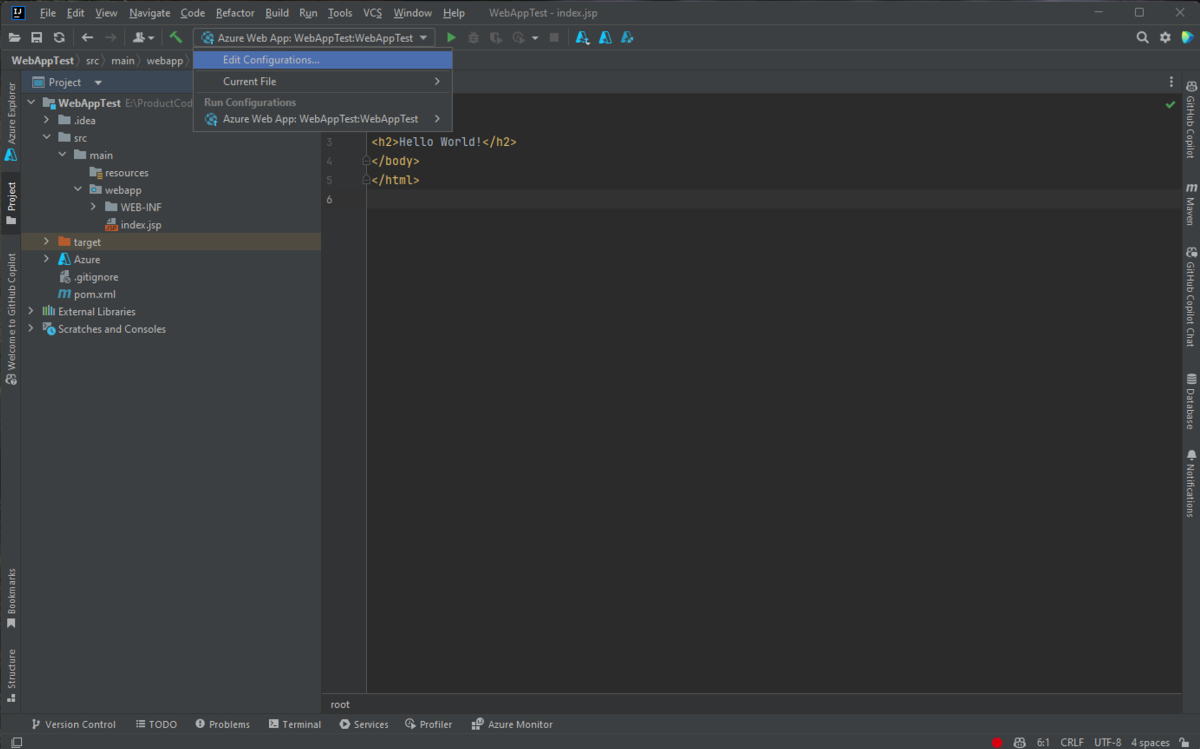
Before running your WebApp's deployment, you can modify the default settings by clicking the drop-down menu for your web app and selecting Edit Configurations.

On the Run/Debug Configurations dialog box, you can modify any of the default settings. Click OK to save the settings.
Clean up resources
To delete your web app, navigate to the left-hand Azure Explorer sidebar and locate the Web Apps item.
Note
If the Web Apps menu item does not expand, manually refresh the list by clicking the Refresh icon on the Azure Explorer toolbar, or by right-clicking the Web Apps menu item and selecting Refresh.
Right-click the web app you'd like to delete and click Delete.
To delete your app service plan or resource group, visit the Azure portal and manually delete the resources under your subscription.
Next steps
To report bugs or request new features, create issues on our GitHub repository, or ask questions on Stack Overflow with tag azure-java-tools.
For more information about using Java with Azure, see the following links:
For more information about creating Azure Web Apps, see App Service overview.