Vulnerability scanning in Microsoft Defender for Cloud uses integrated Microsoft Defender Vulnerability Management, to scan machines for software inventory and vulnerabilities, and provide findings and insights in Defender for Cloud. If you're currently using a different vulnerability assessment solution, you can move to Defender Vulnerability Management using the instructions in this article.
Move to scanning with Defender Vulnerability Management
Prerequisites
- Review supported machines
- Make sure you have a Defender for Servers plan enabled.
- The plan must have Defender for Endpoint integration enabled.
- You need Owner (resource group level) permissions to deploy.
- You need Security Reader permissions to view vulnerability findings.
Transition with Azure policy for Azure VMs
Follow these steps:
Sign in to the Azure portal.
Navigate to Policy > Definitions.
Search for
Setup subscriptions to transition to an alternative vulnerability assessment solution.Select Assign.
Select a scope and enter an assignment name.
Select Review + create.
Review the information you entered and select Create.
This policy ensures that all virtual machines (VM) within a selected subscription are safeguarded with the built-in Defender Vulnerability Management solution.
Once you complete the transition to the Defender Vulnerability Management solution, you need to Remove the old vulnerability assessment solution
Transition in the Azure portal
In the Azure portal, you have the ability to change the vulnerability assessment solution to the built-in Defender Vulnerability Management solution.
Sign in to the Azure portal.
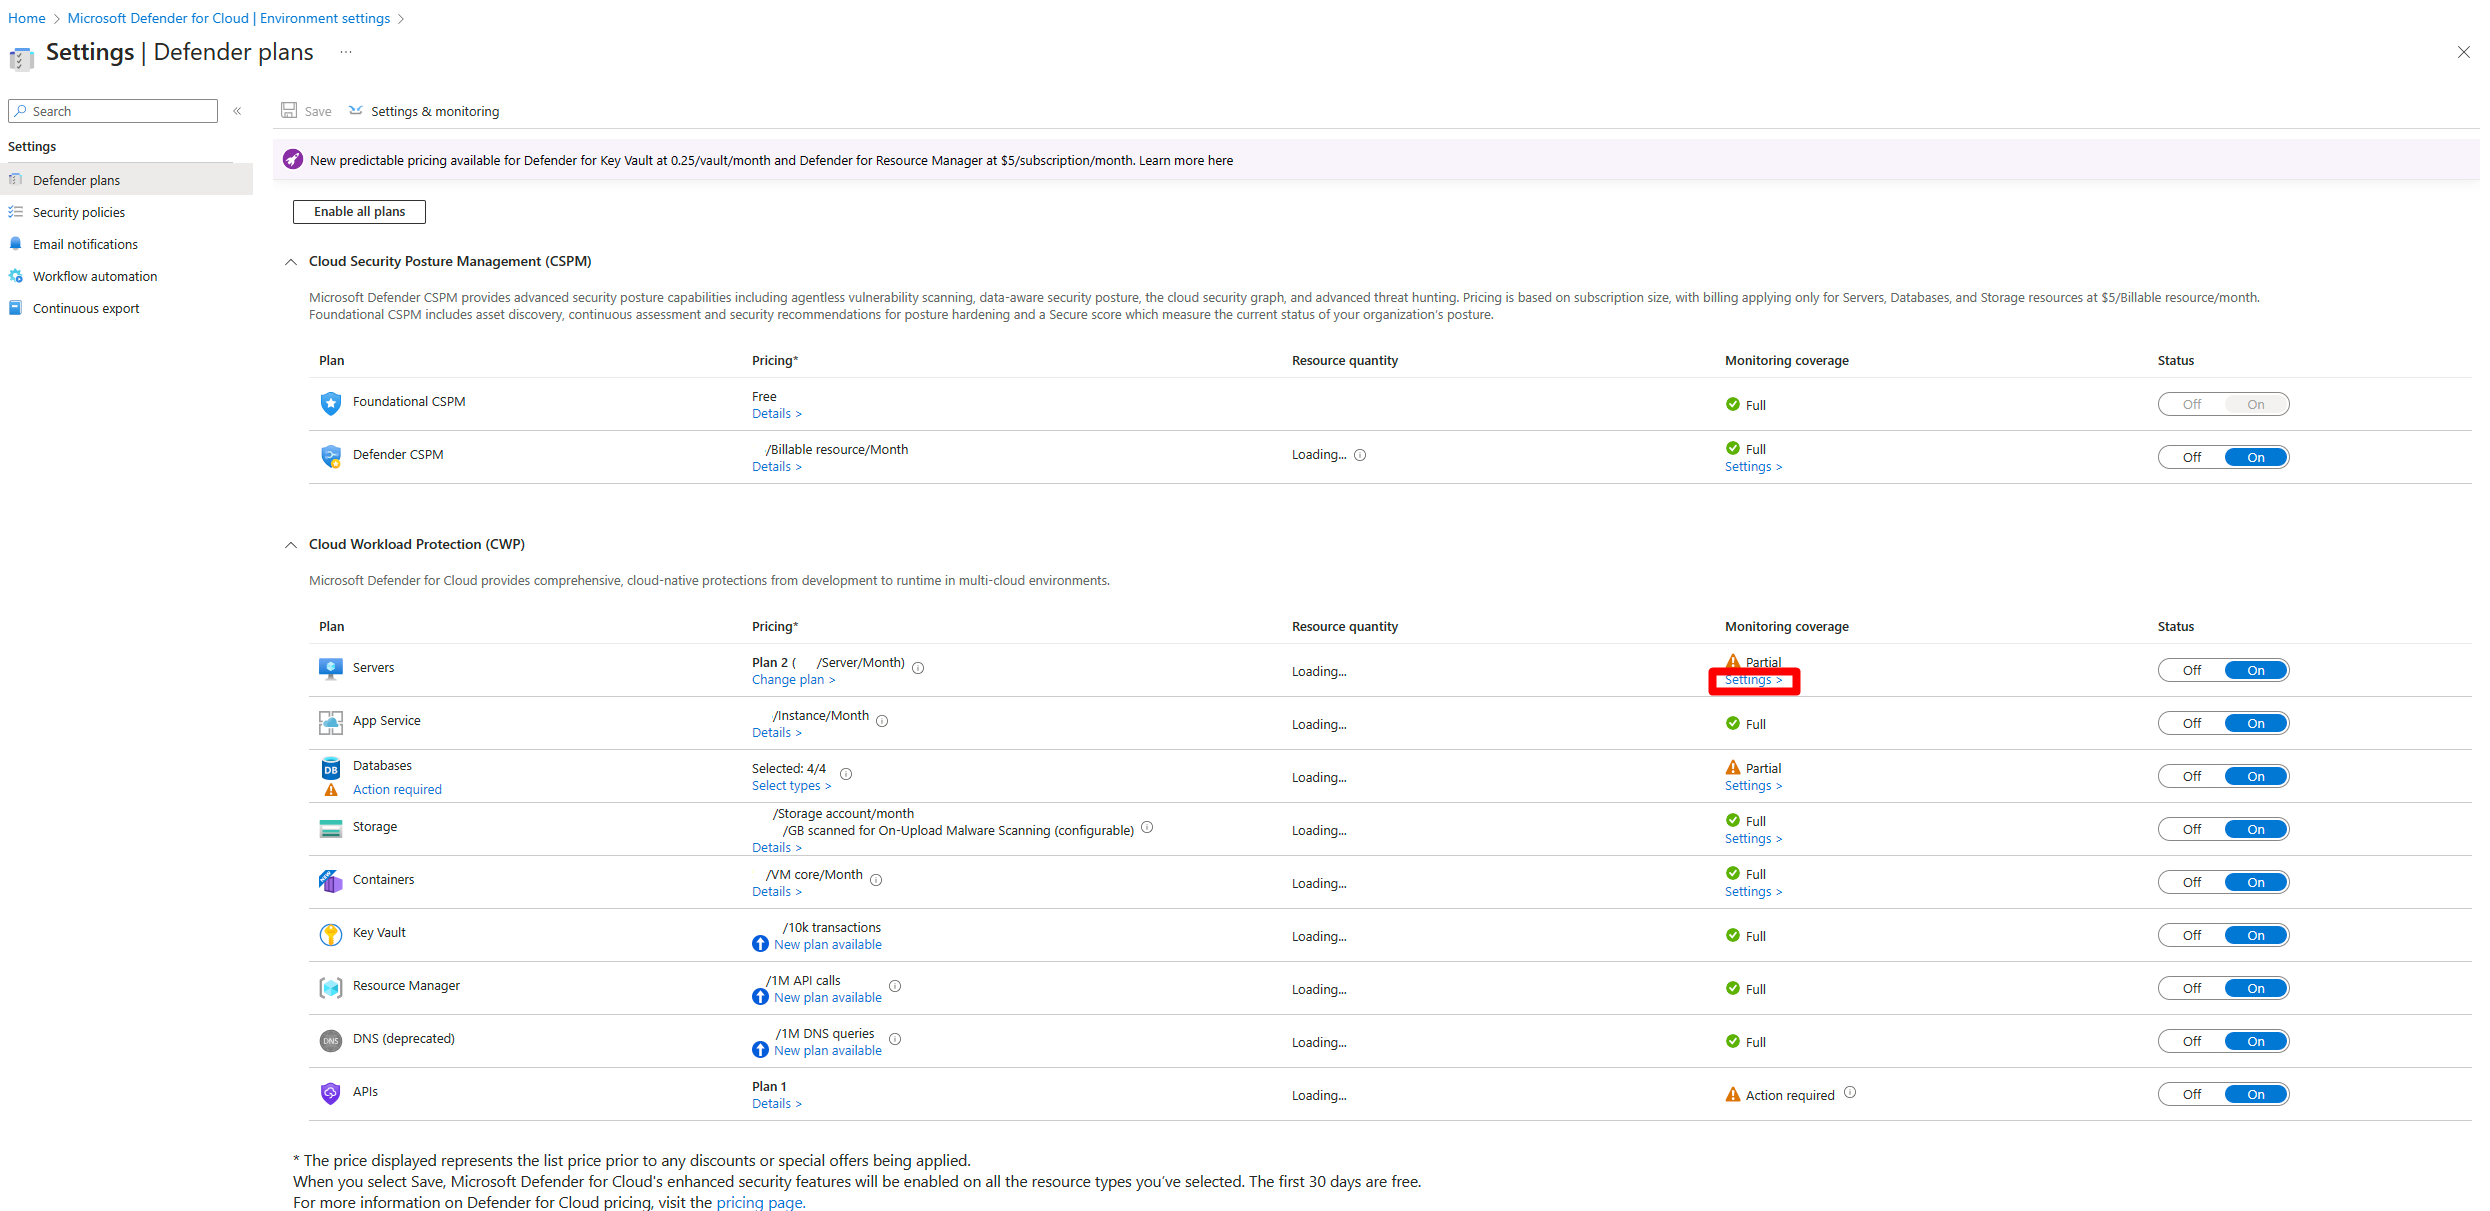
Navigate to Microsoft Defender for Cloud > Environment settings
Select the relevant subscription.
Locate the Defender for Servers plan and select Settings.
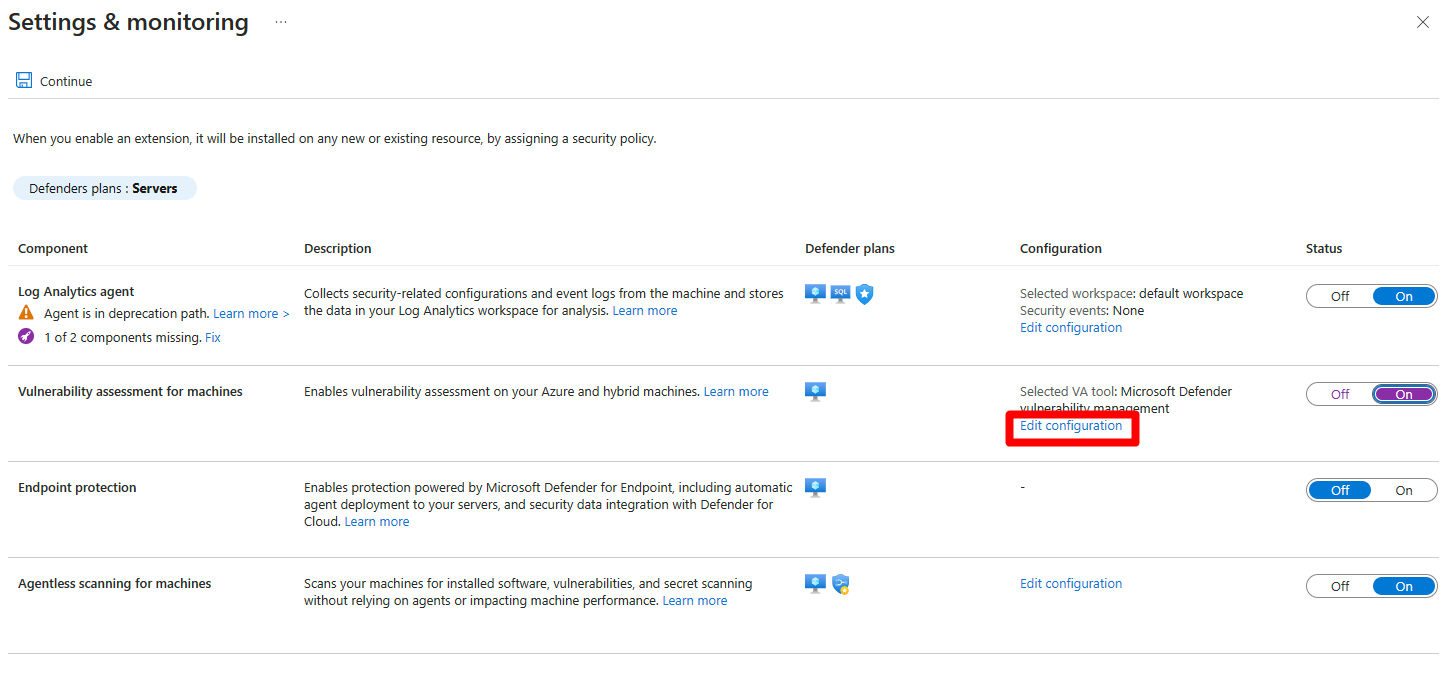
Toggle
Vulnerability assessment for machinesto On.If
Vulnerability assessment for machineswas already set to on, select Edit configurationSelect Microsoft Defender Vulnerability Management.
Select Apply.
Ensure that
Endpoint protectionorAgentless scanning for machinesare toggled to On.Select Continue.
Select Save.
Once you complete the transition to the Defender Vulnerability Management solution, you need to Remove the old vulnerability assessment solution
Transition with REST API
REST API for Azure VMs
Using this REST API, you can easily migrate your subscription, at scale, from any vulnerability assessment solution to the Defender Vulnerability Management solution.
PUT https://management.azure.com/subscriptions/{subscriptionId}/providers/Microsoft.Security/serverVulnerabilityAssessmentsSettings/AzureServersSetting?api-version=2022-01-01-preview
{
  "kind": "AzureServersSetting",
  "properties": {
    "selectedProvider": "MdeTvm"
  }
}
Once you complete the transition to the Defender Vulnerability Management solution, you need to remove the old vulnerability assessment solution.
REST API for multicloud VMs
Using this REST API, you can easily migrate your subscription, at scale, from any vulnerability assessment solution to the Defender Vulnerability Management solution.
PUT https://management.azure.com/subscriptions/{subscriptionId}/resourcegroups/{resourceGroupName}/providers/Microsoft.Security/securityconnectors/{connectorName}?api-version=2022-08-01-preview
{
"properties": {
"hierarchyIdentifier": "{GcpProjectNumber}",
"environmentName": "GCP",
"offerings": [
{
"offeringType": "CspmMonitorGcp",
"nativeCloudConnection": {
"workloadIdentityProviderId": "{cspm}",
"serviceAccountEmailAddress": "{emailAddressRemainsAsIs}"
}
},
{
"offeringType": "DefenderCspmGcp"
},
{
"offeringType": "DefenderForServersGcp",
"defenderForServers": {
"workloadIdentityProviderId": "{defender-for-servers}",
"serviceAccountEmailAddress": "{emailAddressRemainsAsIs}"
},
"arcAutoProvisioning": {
"enabled": true,
"configuration": {}
},
"mdeAutoProvisioning": {
"enabled": true,
"configuration": {}
},
"vaAutoProvisioning": {
"enabled": true,
"configuration": {
"type": "TVM"
}
},
"subPlan": "{P1/P2}"
}
],
"environmentData": {
"environmentType": "GcpProject",
"projectDetails": {
"projectId": "{GcpProjectId}",
"projectNumber": "{GcpProjectNumber}",
"workloadIdentityPoolId": "{identityPoolIdRemainsTheSame}"
}
}
},
"location": "{connectorRegion}"
}
Remove the old vulnerability assessment solution
After migrating to the built-in Defender Vulnerability Management solution in Defender for Cloud, offboard each VM from their old vulnerability assessment solution. To delete the VM extension, you can use the Remove-AzVMExtension PowerShell cmdlet or a REST API Delete request.


