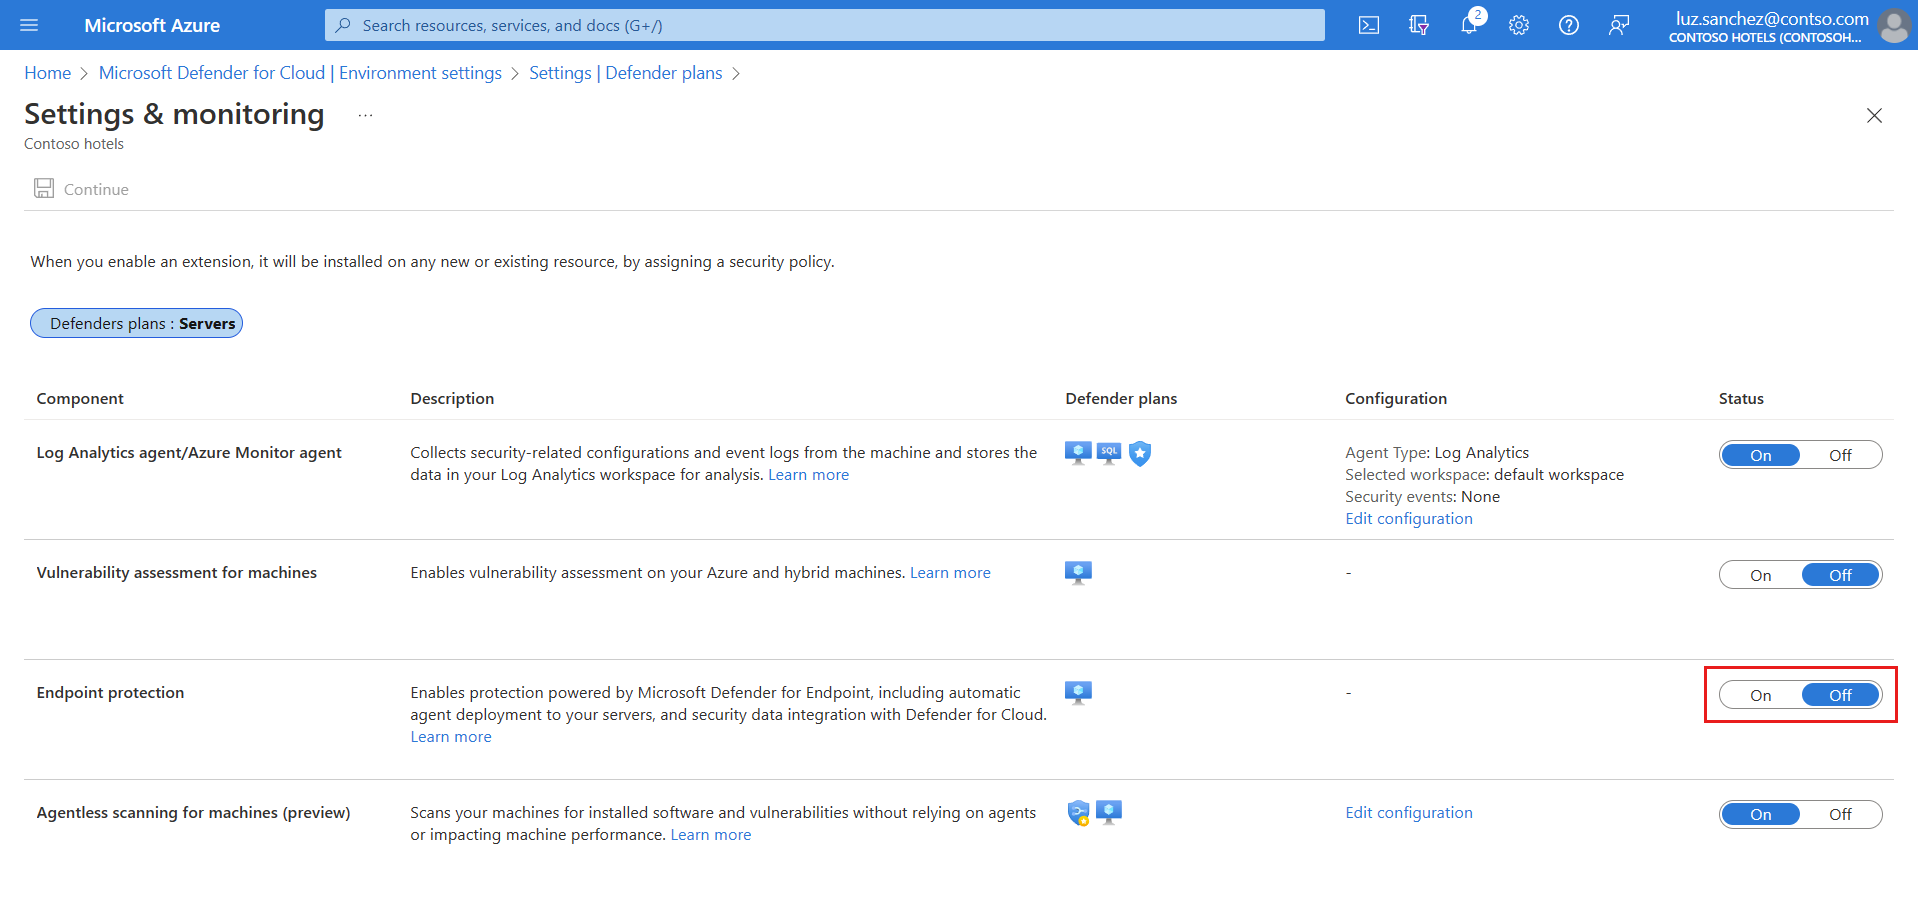
Enable Defender for Endpoint integration
Microsoft Defender for Cloud integrates natively with Microsoft Defender for Endpoint to provide Defender for Endpoint and Microsoft Defender Vulnerability Management capabilities in Defender for Cloud.
- When you turn on the Defender for Servers plan in Defender for Cloud, Defender for Endpoint integration is turned on by default.
- Integration automatically deploys the Defender for Endpoint agent on machines.
This article describes how to enable Defender for Endpoint integration manually as needed.
Prerequisites
| Requirement | Details |
|---|---|
| Windows support | Verify that Windows machines are supported by Defender for Endpoint. |
| Linux support | For Linux servers, you must have Python installed. Python 3 is recommended for all distros, but is required for RHEL 8.x and Ubuntu 20.04 or higher. Automatic deployment of the Defender for Endpoint sensor on Linux machines might not work as expected if machines run services that use fanotify. Manually install the Defender for Endpoint sensor on these machines. |
| Azure VMs | Check that VMs can connect to the Defender for Endpoint service. If machines don't have direct access, proxy settings or firewall rules need to allow access to Defender for Endpoint URLs. Review proxy settings for Windows and Linux machines. |
| On-premises VMs | We recommend that you onboard on-premises machines as Azure Arc-enabled VMs. If you onboard on-premises VMs directly, Defender Server Plan 1 features are available, but most Defender for Servers Plan 2 functionality doesn't work. |
| Azure tenant | If you've moved your subscription between Azure tenants, some manual preparatory steps are also required. Contact Microsoft support for details. |
| Windows Server 2016, 2012 R2 | Unlike later versions of Windows Server, which come with the Defender for Endpoint sensor preinstalled, Defender for Cloud installs the sensor on machines running Windows Server 2016/2012 R2 using the unified Defender for Endpoint solution. After you enable a Defender for Servers plan with the integration, you can't roll it back. Even if you disable the plan and then reenable it, integration will be reenabled. |
Enable on a subscription
Defender for Endpoint integration is enabled by default when you enable a Defender for Servers plan. If you turn off the Defender for Endpoint integration on a subscription, you can turn it on again manually as needed using these instructions.
In Defender for Cloud, select Environment settings and select the subscription containing the machines on which you want to deploy the Defender for Endpoint integration.
In Settings and monitoring > Endpoint protection, toggle the Status column settings to On.
Select Continue and Save to save your settings.
The Defender for Endpoint sensor is deployed to all of Windows and Linux machines in the selected subscription.
Onboarding might take up to an hour. On Linux machines Defender for Cloud detects any previous Defender for Endpoint installations, and reconfigures them to integrate with Defender for Cloud.
Verify installation on Linux machines
Verify Defender for Endpoint sensor installation on a Linux machine as follows:
Run the following shell command on each machine:
mdatp health. If Microsoft Defender for Endpoint is installed, you'll see its health status:healthy : truelicensed: trueAdditionally, in the Azure portal, you can check that Linux machines have a new Azure extension called
MDE.Linux.
Enable Defender for Endpoint unified solution on Windows Server 2016/2012 R2
If Defender for Servers is already enabled and Defender for Endpoint integration is on in a subscription, you can manually turn on integration of the unified solution for machines running Windows Server 2016 or Windows Server 2012 R2 in the subscription.
In Defender for Cloud, select Environment settings and select the subscription with the Windows machines that you want to receive Defender for Endpoint.
In the Monitoring coverage column of the Defender for Servers plan, select Settings.
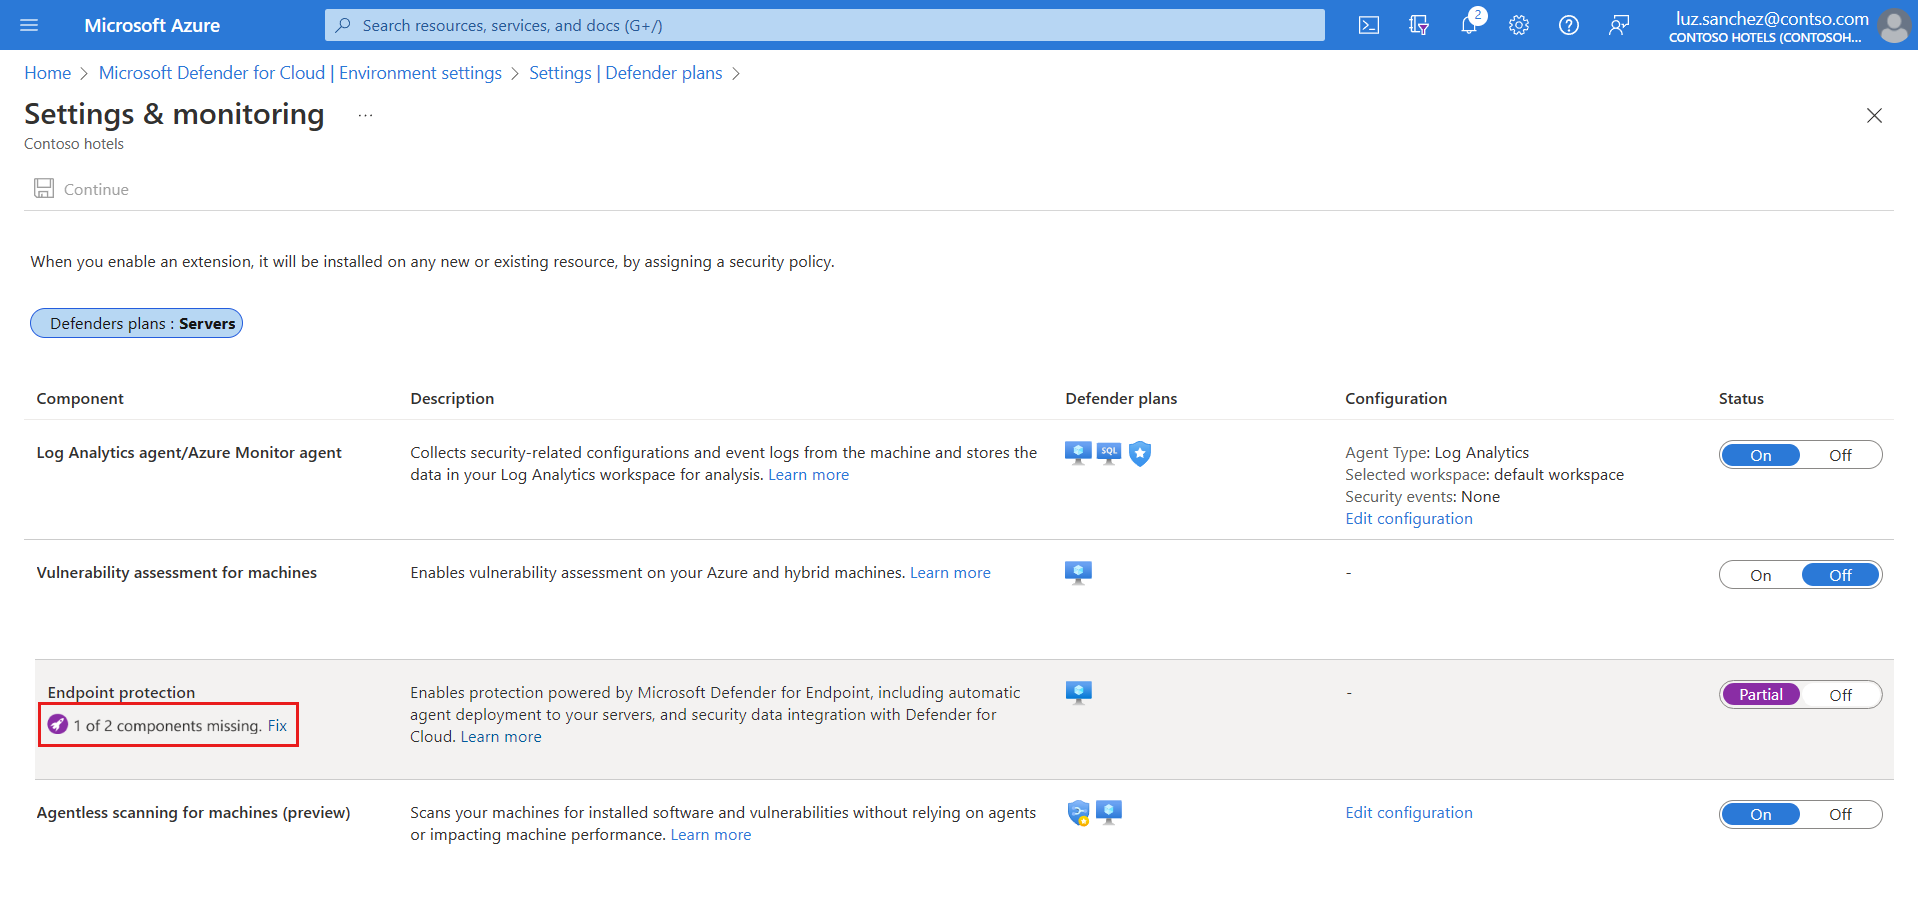
The status of the Endpoint protections component is Partial, meaning that not all parts of the component are enabled.
Select Fix to see the components that aren't enabled.
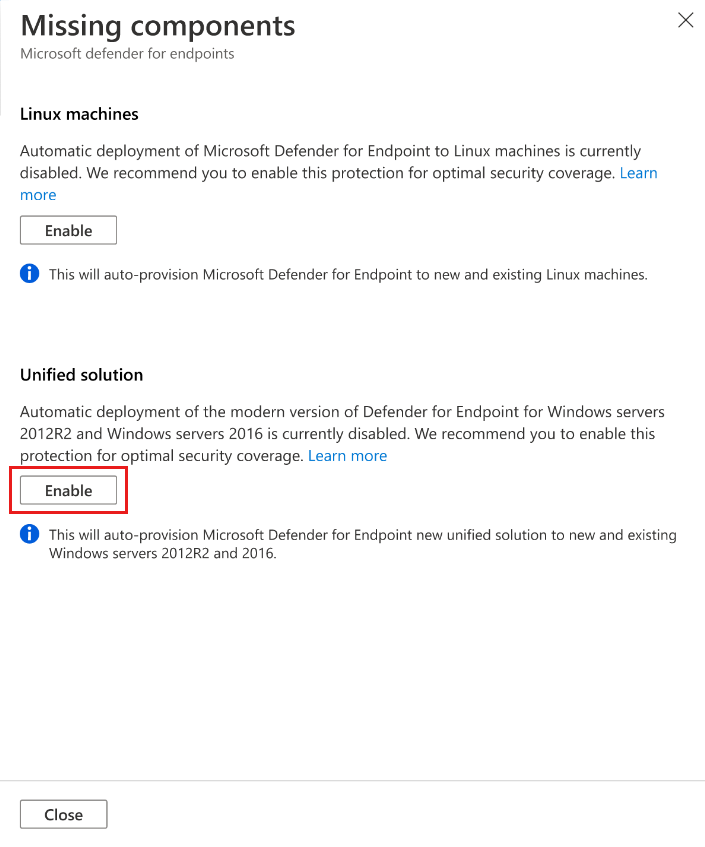
In Missing components > Unified solution, select Enable to automatically install the Defender for Endpoint agent on Windows Server 2012 R2 and 2016 machines connected to Microsoft Defender for Cloud.
To save the changes, select Save at the top of the page. In the Settings and monitoring page, select Continue.
Defender for Cloud onboards existing and new machines to Defender for Endpoint.
Onboarding might take up to 12 hours. For new machines created after the integration has been enabled, onboarding takes up to an hour.
Enable on Linux machines (plan/integration enabled)
If Defender for Servers is already enabled and Defender for Endpoint integration is on in the subscription, you can manually turn on the integration for Linux machines in a subscription.
In Defender for Cloud, select Environment settings and select the subscription with the Linux machines that you want to receive Defender for Endpoint.
In the Monitoring coverage column of the Defender for Server plan, select Settings.
The status of the Endpoint protections component is Partial, meaning that not all parts of the component are enabled.
Select Fix to see the components that aren't enabled.

In Missing components > Linux machines, select Enable.
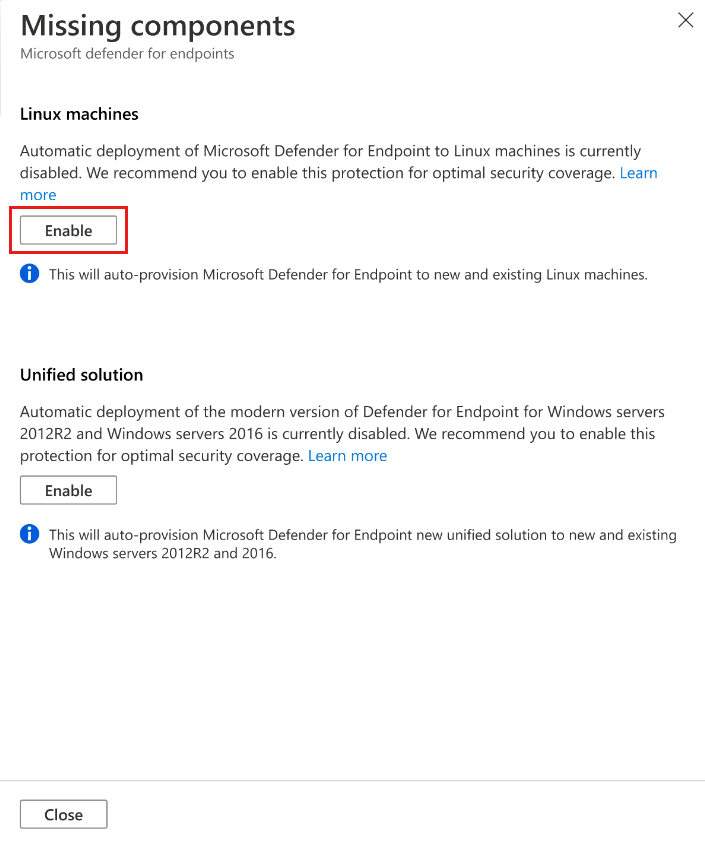
To save the changes, select Save at the top of the page. In the Settings and monitoring page, select Continue.
- Defender for Cloud onboards Linux machines to Defender for Endpoint.
- Defender for Cloud detects any previous Defender for Endpoint installations on Linux machines, and reconfigures them to integrate with Defender for Cloud.
- Onboarding might take up to 12 hours. For new machines created after the integration has been enabled, onboarding takes up to an hour.
To verify Defender for Endpoint sensor installation on a Linux machine, run the following shell command on each machine.
mdatp healthIf Microsoft Defender for Endpoint is installed, you'll see its health status:
healthy : truelicensed: trueIn the Azure portal, you can check that Linux machines have a new Azure extension called
MDE.Linux.
Note
Enabling Defender for Endpoint integration on Linux machines is a one-time action. If you disable the plan and re-enabled it, integration remains enabled.
Enable integration on Linux in multiple subscriptions
In Defender for Cloud, open the Workload protections dashboard.
in the dashboard, review the insights panel to see which subscriptions and resources don't have Defender for Endpoint enabled for Linux machines.
- The insights panel displays information about subscriptions that have integration enabled for Windows machines, but not for Linux machines.
- Subscriptions that don't have Linux machines show no affected resources.
In the insight panel, select the subscriptions on which to enable Defender for Endpoint integration for Linux machines.
Select Enable to turn on endpoint protection for Linux machines. Defender for Cloud:
- Automatically onboards Linux machines to Defender for Endpoint in the selected subscriptions.
- Detects any previous installations of Defender for Endpoint, and reconfigures them to integrate with Defender for Cloud.
Use the Defender for Servers deployment status workbook. Among other things in this workbook, you can verify installation and deployment status of Defender for Endpoint on a Linux machine.
Manage automatic updates for Linux
In Windows, Defender for Endpoint version updates are provided via continuous knowledge base updates. In Linux you need to update the Defender for Endpoint package.
When you use Defender for Servers with the
MDE.Linuxextension, automatic updates for Microsoft Defender for Endpoint are enabled by default.If you want to manage version updates manually, you can disable automatic updates on your machines. To do this, add the following tag for machines onboarded with the
MDE.Linuxextension.- Tag name: 'ExcludeMdeAutoUpdate'
- Tag value: 'true'
= This configuration is supported for Azure VMs and Azure Arc machines, where the MDE.Linux extension initiates auto-update.
Enable integration with PowerShell on multiple subscriptions
To enable endpoint protection on Linux machines and Windows machines running Windows Server 2016/2012 R2 in multiple subscriptions, use our PowerShell script from the Defender for Cloud GitHub repository.
Enable integration at scale
You can enable the Defender for Endpoint integration at scale through the supplied REST API version 2022-05-01. For full details, see the API documentation.
Here's an example request body for the PUT request to enable the Defender for Endpoint integration:
URI: https://management.azure.com/subscriptions/<subscriptionId>/providers/Microsoft.Security/settings/WDATP?api-version=2022-05-01
{
    "name": "WDATP",
    "type": "Microsoft.Security/settings",
    "kind": "DataExportSettings",
    "properties": {
        "enabled": true
    }
}
Track Defender for Endpoint deployment status
You can use the Defender for Endpoint deployment status workbook to track the Defender for Endpoint deployment status on your Azure VMs and Azure Arc-enabled VMs. The interactive workbook provides an overview of machines in your environment showing their Microsoft Defender for Endpoint extension deployment status.
Access the Defender portal
Make sure you have the right permissions for portal access.
Check whether you have a proxy or firewall that is blocking anonymous traffic.
- The Defender for Endpoint sensor connects from the system context, so anonymous traffic must be permitted.
- To ensure unhindered access to the Defender for Endpoint portal, enable access to service URLs in the proxy server.
Open the Microsoft Defender Portal. Learn about Microsoft Defender for Endpoint in Microsoft Defender XDR.
Send a test alert from Defender for Endpoint
To generate a benign test alert from Defender for Endpoint, select the tab for the relevant operating system of your endpoint:
Test on Windows
For endpoints running Windows:
Create a folder 'C:\test-MDATP-test'.
Use Remote Desktop to access your machine.
Open a command-line window.
At the prompt, copy and run the following command. The command prompt window will close automatically.
powershell.exe -NoExit -ExecutionPolicy Bypass -WindowStyle Hidden (New-Object System.Net.WebClient).DownloadFile('http://127.0.0.1/1.exe', 'C:\\test-MDATP-test\\invoice.exe'); Start-Process 'C:\\test-MDATP-test\\invoice.exe'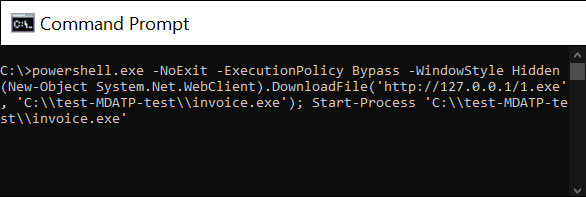
If the command is successful, you'll see a new alert on the workload protection dashboard and the Microsoft Defender for Endpoint portal. This alert might take a few minutes to appear.
To review the alert in Defender for Cloud, go to Security alerts > Suspicious PowerShell CommandLine.
From the investigation window, select the link to go to the Microsoft Defender for Endpoint portal.
Tip
The alert is triggered with Informational severity.
Test on Linux
For endpoints running Linux:
Download the test alert tool from: https://aka.ms/LinuxDIY
Extract the contents of the zip file and execute this shell script:
./mde_linux_edr_diyIf the command is successful, you'll see a new alert on the workload protection dashboard and the Microsoft Defender for Endpoint portal. This alert might take a few minutes to appear.
To review the alert in Defender for Cloud, go to Security alerts > Enumeration of files with sensitive data.
From the investigation window, select the link to go to the Microsoft Defender for Endpoint portal.
Tip
The alert is triggered with Low severity.
Remove Defender for Endpoint from a machine
To remove the Defender for Endpoint solution from your machines:
- To disable the integration, in Defender for Cloud > Environment settings, select the subscription with the relevant machines.
- In the Defender plans page, select Settings & Monitoring.
- In the status of the Endpoint protection component, select Off to disable the integration with Microsoft Defender for Endpoint for the subscription.
- Select Continue and Save to save your settings.
- Remove the MDE.Windows/MDE.Linux extension from the machine.
- Offboard the device from the Microsoft Defender for Endpoint service.
