Create a ticket in Defender for Cloud
The integration between Defender for Cloud with ServiceNow's IT Service Management (ITSM) module, allows Defender for Cloud customers to create tickets in Defender for Cloud that connect to a ServiceNow account. ServiceNow tickets are then linked directly to recommendations in Defender for Cloud. When a ticket is connected to a recommendation, the two platforms can facilitate efficient incident management and resolution.
Prerequisites
Have an application registry in ServiceNow.
Enable Defender Cloud Security Posture Management (CSPM) on your Azure subscription.
The following roles are required:
- To create an assignment: Admin permissions to ServiceNow.
Create a new ticket based on a recommendation to ServiceNow
Security admins can create and assign tickets directly from the Defender for Cloud portal.
Sign in to the Azure portal.
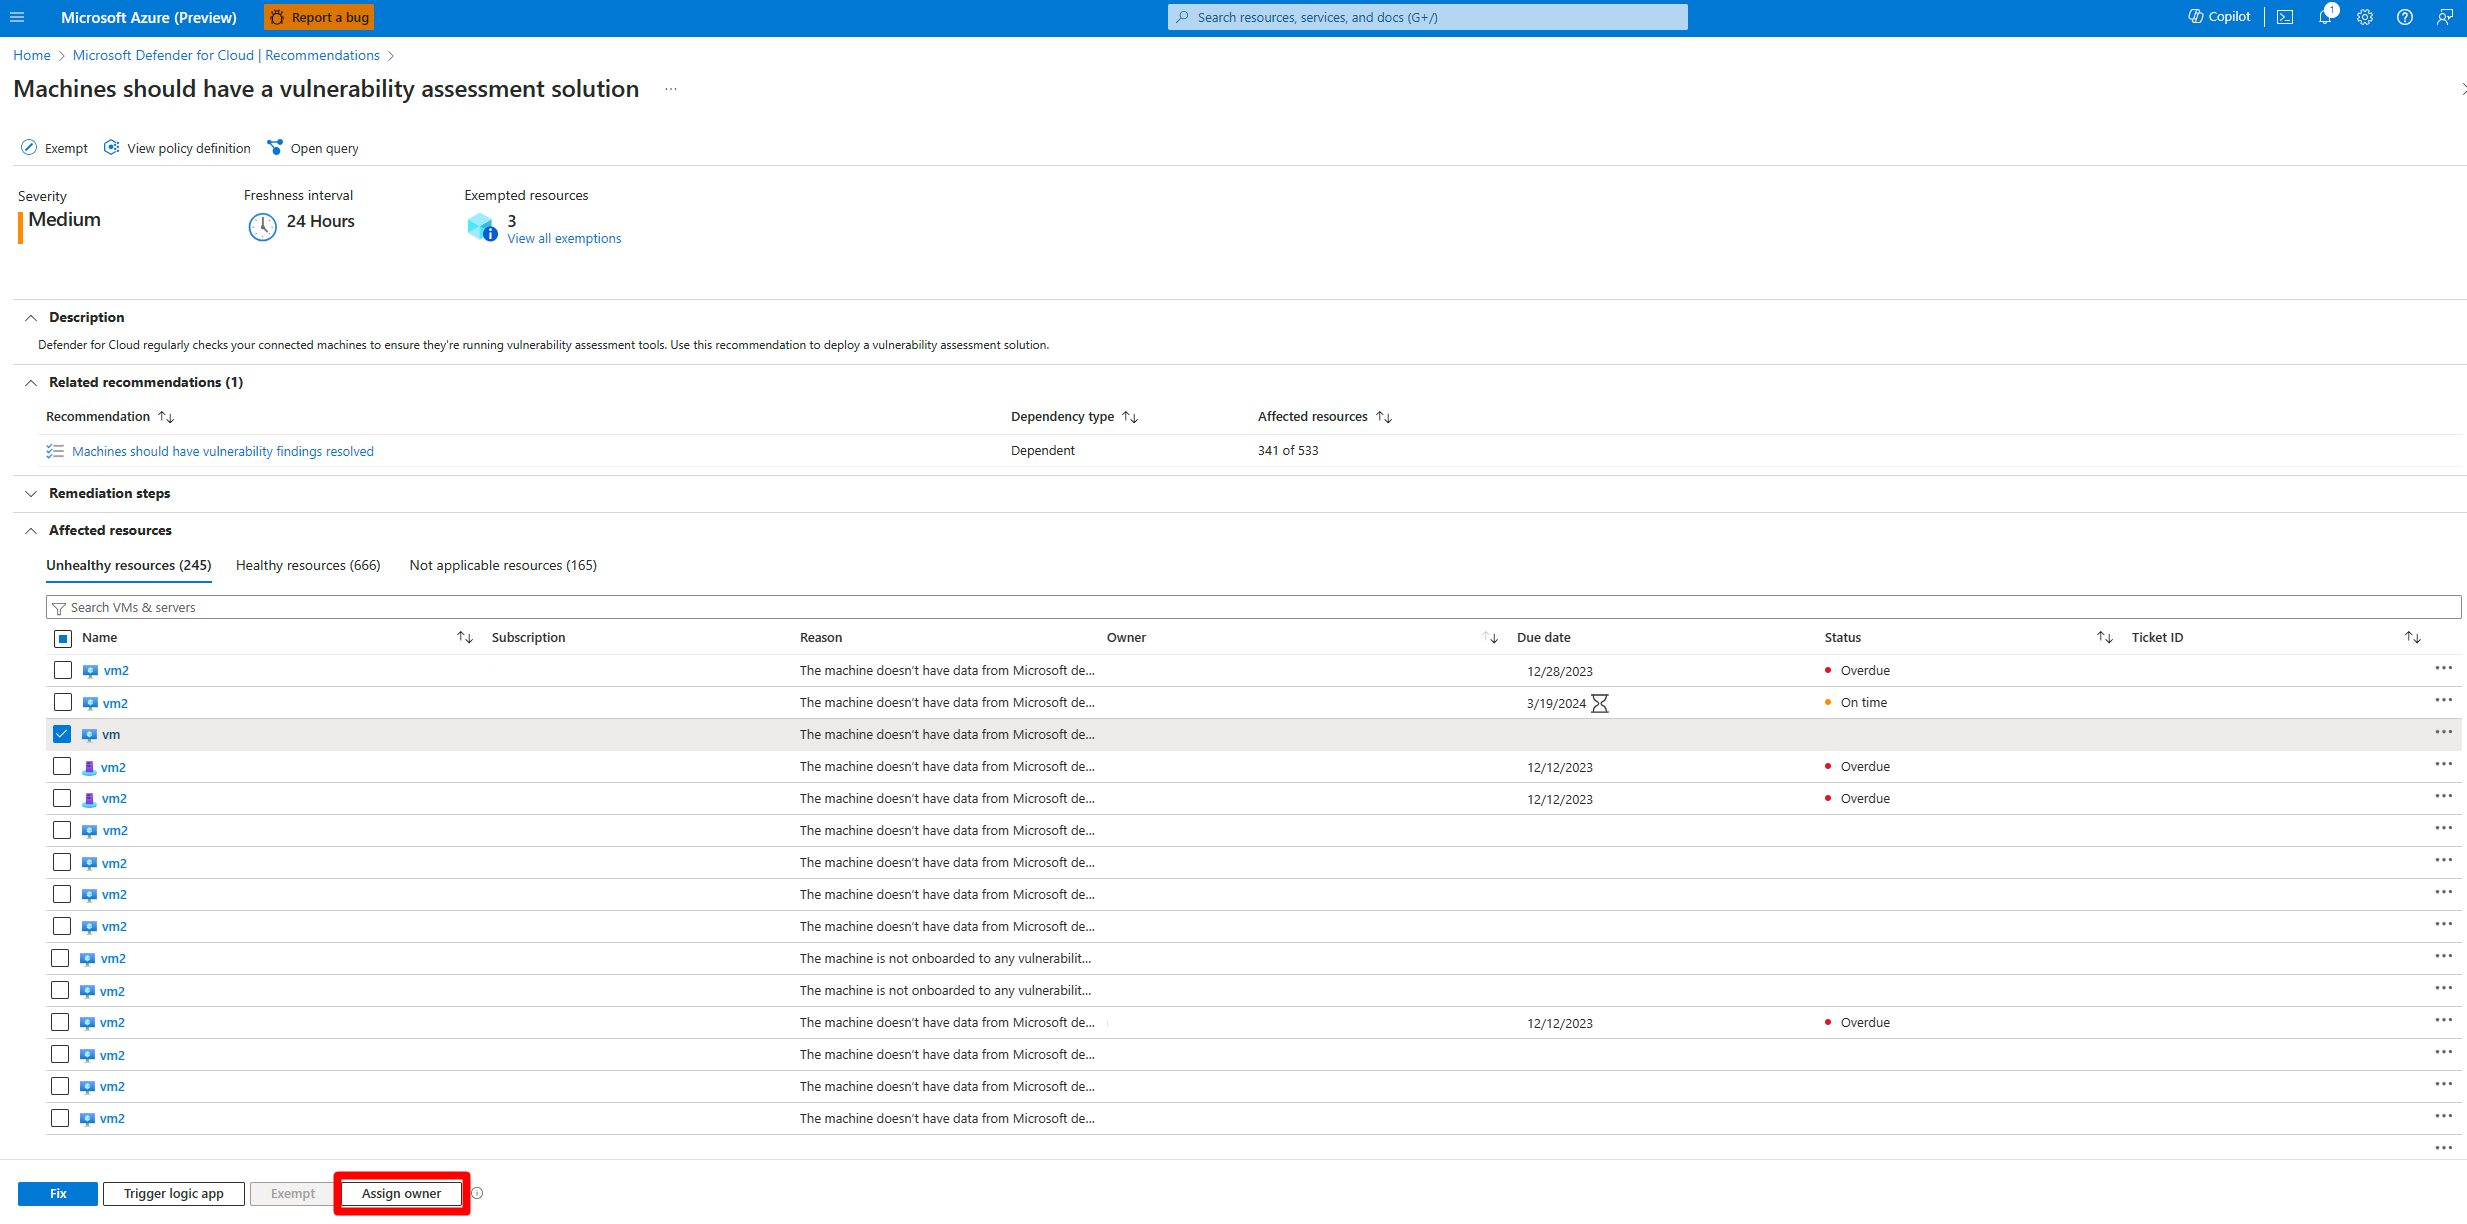
Navigate to Microsoft Defender for Cloud > Recommendations.
Select a recommendation you want to create a ServiceNow ticket for, and assign an owner to.
Select View recommendation for all resources.
Expand the Affected resources section.
Select the resource from the unhealthy resources and select Assign owner.
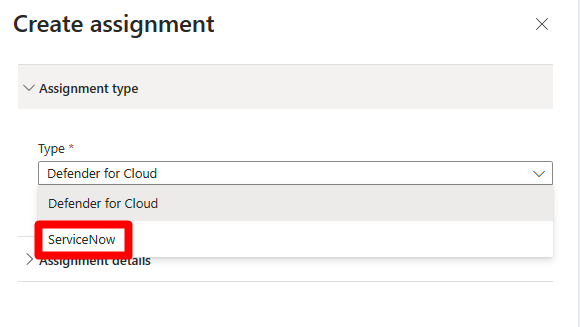
In the Type field, select ServiceNow

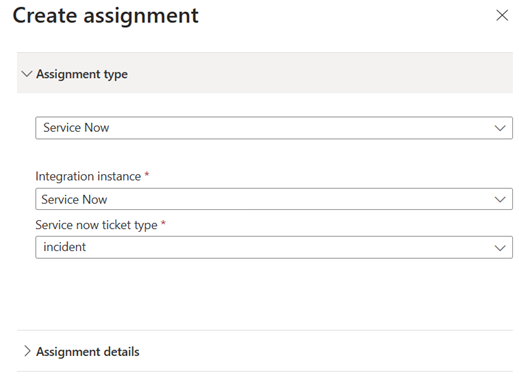
Select the integration instance.
Select the ticket type.
Note
In ServiceNow, there are several types of tickets that can be used to manage and track different types of incidents, requests, and tasks. Only incident, change request, and problem are supported with this integration.

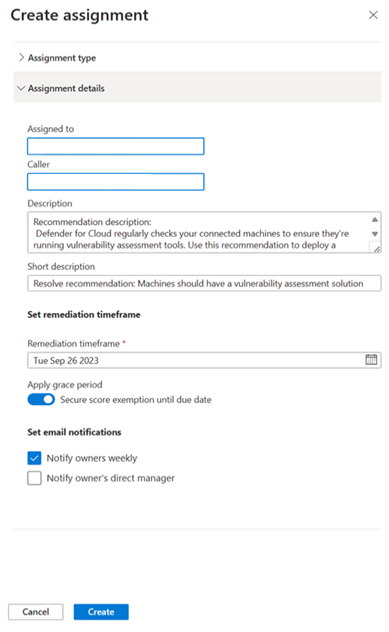
Expand the assignment details section.
Complete the following fields:
Assigned to: Choose the owner whom you would like to assign the affected recommendation to.
Caller: Represents the user defining the assignment.
Description and Short Description: Enter a description, and short description.
Remediation timeframe: Select the remediation timeframe.
Apply Grace Period: (Optional) apply a grace period.
Set Email Notifications: (Optional) You can send a reminder to the owners or the owner’s direct manager.

Select Create.
After the assignment is created, the Ticket ID assigned to this affected resource will appear next to the resource in the recommendation. The Ticket ID represents the ticket created in the ServiceNow portal. You can select the Ticket ID to navigate to the newly created incident in the ServiceNow portal.
Note
When the integration is deleted, all of the assignments will be deleted. Deletion can take up to 24 hrs.
