Integrate Defender for Cloud CLI with CI/CD pipelines
Defender for Cloud Command Line Interface (CLI) is an application you can use in continuous integration and continuous deployment (CI/CD) pipelines. It runs static analysis tools and connects code to cloud services. You can use Defender for Cloud CLI in any build process to scan images for security vulnerabilities with built-in security scanners. It sends the scan results to the Defender for Cloud portal. The Cloud Security Explorer can then access the container image and its vulnerabilities.
Prerequisites
An Azure Subscription with Defender for Cloud onboarded. If you don't already have an Azure account, create one for free.
One of the following CI/CD pipeline tools: Jenkins, BitBucket Pipelines, Google Cloud Build, Bamboo, CircleCI, Travis CI, TeamCity, Oracle DevOps services, AWS CodeBuild
The Defender CSPM enabled.
Security Admin Permission to create the client ID and secret.
Setup
In the following sections, we explain how to retrieve the Client ID and Secrets, update the CI/CD pipeline script, and add environment variables to the CI/CD pipeline.
Retrieve the API Token
To allow security data from the Defender for Cloud CLI to be passed to the Defender for Cloud backend, the security admin in Defender for Cloud must first generate an API key from Defender for Cloud for authentication.
When tokens are generated, the security admin selects a subscription scope to be associated with the token. The data being "pushed" into Defender for Cloud from this token is scoped to the subscription the token is associated with. These API tokens are immutable and can only be generated/deleted.
From there, the security admin must securely pass the token to developers to be added to the CI/CD pipeline.
Sign in to the Azure portal.
Go to Microsoft Defender for Cloud > Management > Environment Settings > Integrations.
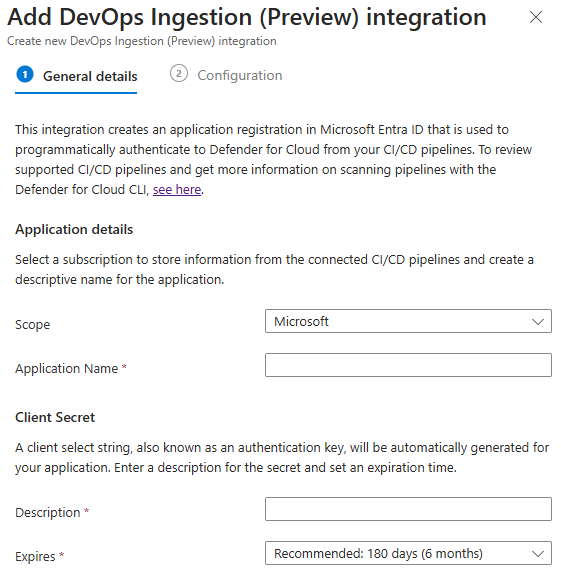
Select Add integration and then select DevOps Ingestion.
Enter a descriptive name for the token, the selected tenant store the token information. The client secret is generated when you enter a description for the secret and the expiration date.
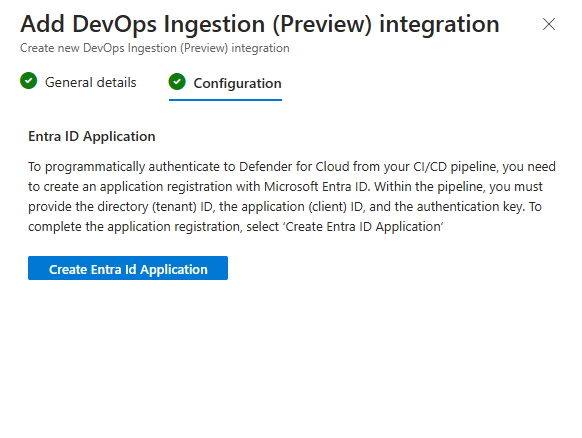
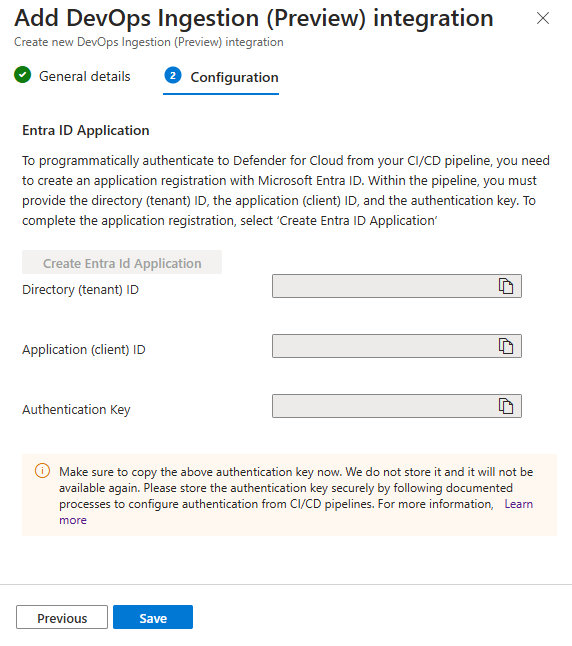
Enable the token in the Configuration and create the tokens.
Copy each token. They can't be edited or retrieved after you select OK.
In the Integrations table, the new Ingestion is displayed.
Update the CI/CD pipeline script
Each CI/CD pipeline tool has different syntax. This code is an example of a Bitbucket pipeline:
image: atlassian/default-image:3

pipelines:
  default:
    - parallel:
      - step:
          name: 'MSDO trivy test'
          script:
            - curl -L -o ./msdo_linux.zip https://www.nuget.org/api/v2/package/Microsoft.Security.DevOps.Cli.linux-x64/
            - unzip ./msdo_linux.zip
            - chmod +x tools/guardian
            - chmod +x tools/Microsoft.Guardian.Cli
            - ls -lah .
            - tools/guardian init --force
            - tools/guardian run -t trivy --export-file ./ubuntu-test.sarif --publish-file-folder-path ./ubuntu-test.sarif
Pipeline variables
After securely receiving the tokens, the developer must configure an environment variable for the key. The environment variable is passed to the CLI through the shell script that the developer can receive from curl or manually copying the shell script into their repo.
| Name | Value |
|---|---|
| GDN_MDC_CLI_CLIENT_ID | <Client id> |
| GDN_MDC_CLI_CLIENT_SECRET | <Client Secret> |
| GDN_MDC_CLI_TENANT_ID | <Tenant id> |
| GDN_PIPELINENAME | bitbucket, jenkins, gcp, bamboo, circle, travis, teamcity, oci, aws |
Review results in Cloud Security Explorer
After running the pipeline successfully, navigate again to Microsoft Defender for Cloud.
In the Defender for Cloud menu, select Cloud Security Explorer.
Select Select resource types dropdown, select DevOps, and then select Done.
Select the + icon to add a new search criteria.
Choose the Select condition dropdown. Then select Data, and then select Pushes.
Choose the Select resource types dropdown. Then select Containers, then Container Images and then select Done.
Select the scope selected during the creation of the integration in Environment settings.
Select Search.
See the results of pipeline to images mapping.
Correlate with monitored containers
In Cloud Security Explorer, enter the following query: CI/CD Pipeline -> Pipeline + Container Images -> Contained in + Container registers (group).
Review the Resource names to see the container mapping.


