Load data into Azure Synapse Analytics using Azure Data Factory or a Synapse pipeline
APPLIES TO:  Azure Data Factory
  Azure Synapse Analytics
Tip
Try out Data Factory in Microsoft Fabric, an all-in-one analytics solution for enterprises. Microsoft Fabric covers everything from data movement to data science, real-time analytics, business intelligence, and reporting. Learn how to start a new trial for free!
Azure Synapse Analytics is a cloud-based, scale-out database that's capable of processing massive volumes of data, both relational and non-relational. Azure Synapse Analytics is built on the massively parallel processing (MPP) architecture that's optimized for enterprise data warehouse workloads. It offers cloud elasticity with the flexibility to scale storage and compute independently.
Getting started with Azure Synapse Analytics is now easier than ever. Azure Data Factory and its equivalent pipelines feature within Azure Synapse itself provide a fully managed cloud-based data integration service. You can use the service to populate an Azure Synapse Analytics with data from your existing system and save time when building your analytics solutions.
Azure Data Factory and Synapse pipelines offer the following benefits for loading data into Azure Synapse Analytics:
- Easy to set up: An intuitive 5-step wizard with no scripting required.
- Rich data store support: Built-in support for a rich set of on-premises and cloud-based data stores. For a detailed list, see the table of Supported data stores.
- Secure and compliant: Data is transferred over HTTPS or ExpressRoute. The global service presence ensures that your data never leaves the geographical boundary.
- Unparalleled performance by using PolyBase: Polybase is the most efficient way to move data into Azure Synapse Analytics. Use the staging blob feature to achieve high load speeds from all types of data stores, including Azure Blob storage and Data Lake Store. (Polybase supports Azure Blob storage and Azure Data Lake Store by default.) For details, see Copy activity performance.
This article shows you how to use the Copy Data tool to load data from Azure SQL Database into Azure Synapse Analytics. You can follow similar steps to copy data from other types of data stores.
Note
For more information, see Copy data to or from Azure Synapse Analytics.
Prerequisites
- Azure subscription: If you don't have an Azure subscription, create a free account before you begin.
- Azure Synapse Analytics: The data warehouse holds the data that's copied over from the SQL database. If you don't have an Azure Synapse Analytics, see the instructions in Create an Azure Synapse Analytics.
- Azure SQL Database: This tutorial copies data from the Adventure Works LT sample dataset in Azure SQL Database. You can create this sample database in SQL Database by following the instructions in Create a sample database in Azure SQL Database.
- Azure storage account: Azure Storage is used as the staging blob in the bulk copy operation. If you don't have an Azure storage account, see the instructions in Create a storage account.
Create a data factory
If you have not created your data factory yet, follow the steps in Quickstart: Create a data factory by using the Azure portal and Azure Data Factory Studio to create one. After creating it, browse to the data factory in the Azure portal.

Select Open on the Open Azure Data Factory Studio tile to launch the Data Integration application in a separate tab.
Load data into Azure Synapse Analytics
In the home page of Azure Data Factory or Azure Synapse workspace, select the Ingest tile to launch the Copy Data tool. Then choose the Built-in copy task.
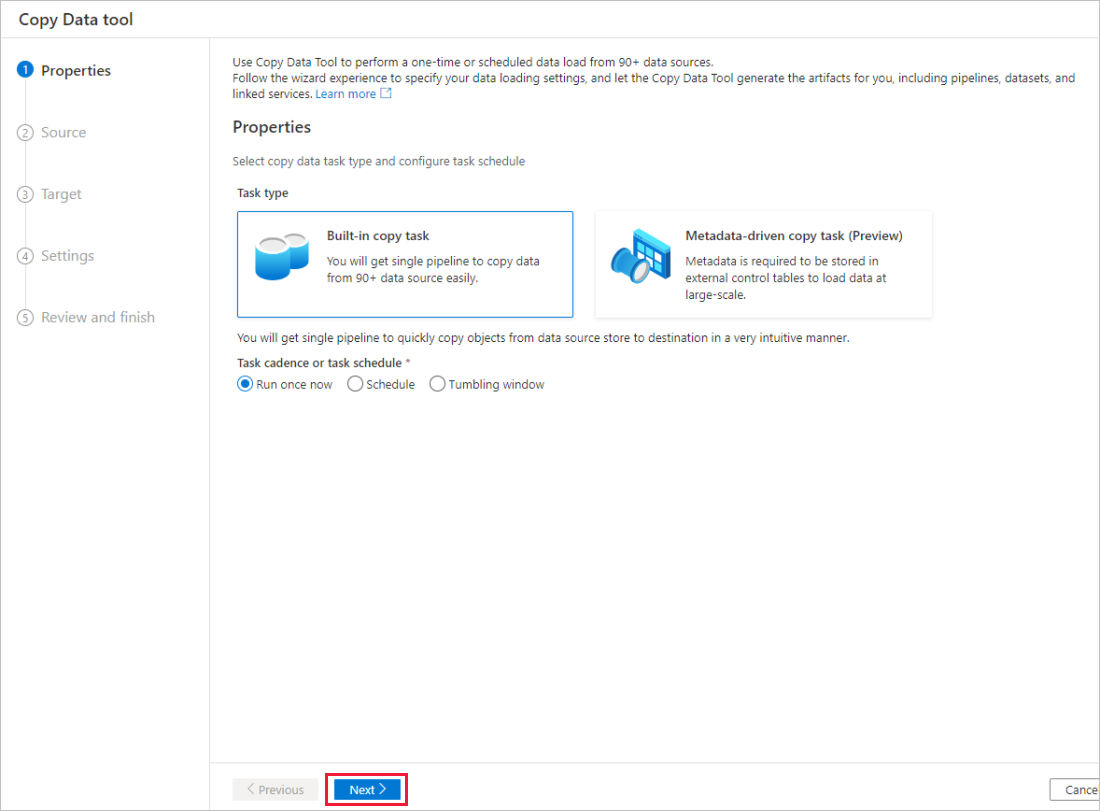
In the Properties page, choose Built-in copy task under Task type, then select Next.
In the Source data store page, complete the following steps:
Tip
In this tutorial, you use SQL authentication as the authentication type for your source data store, but you can choose other supported authentication methods:Service Principal and Managed Identity if needed. Refer to corresponding sections in this article for details. To store secrets for data stores securely, it's also recommended to use an Azure Key Vault. Refer to this article for detailed illustrations.
Select + New connection.
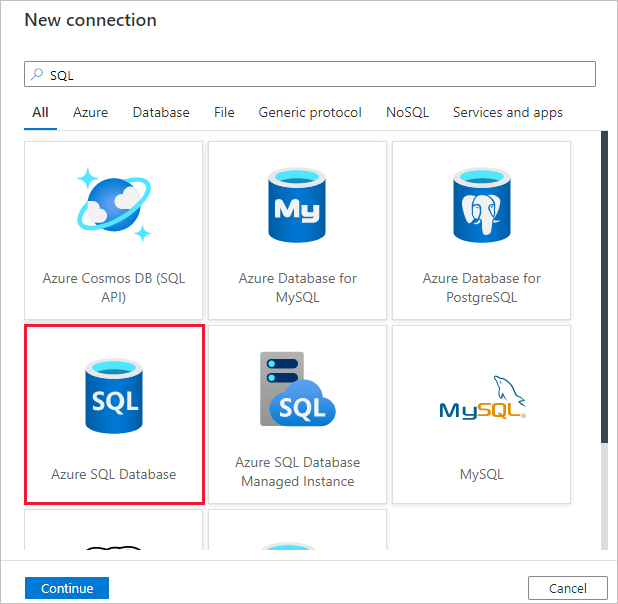
Select Azure SQL Database from the gallery, and select Continue. You can type "SQL" in the search box to filter the connectors.
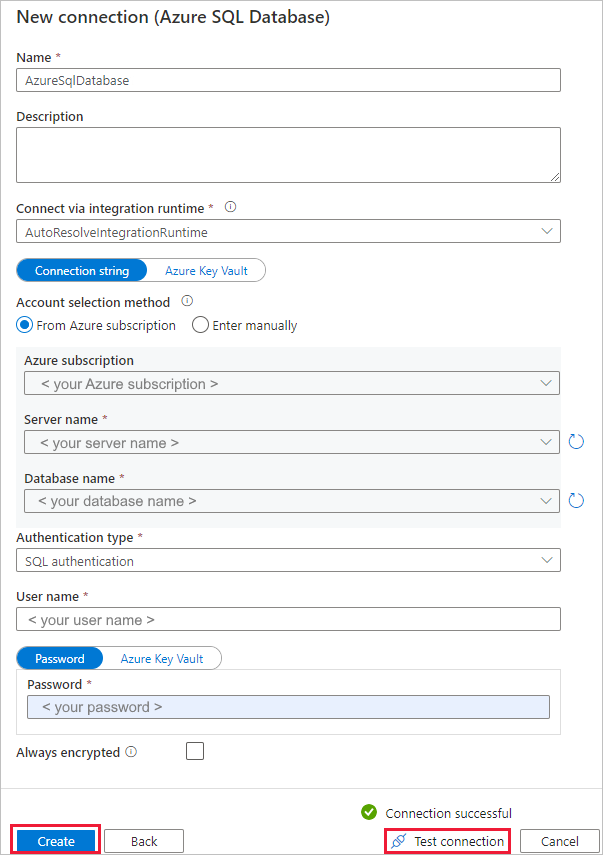
In the New connection (Azure SQL Database) page, select your server name and DB name from the dropdown list, and specify the username and password. Select Test connection to validate the settings, then select Create.
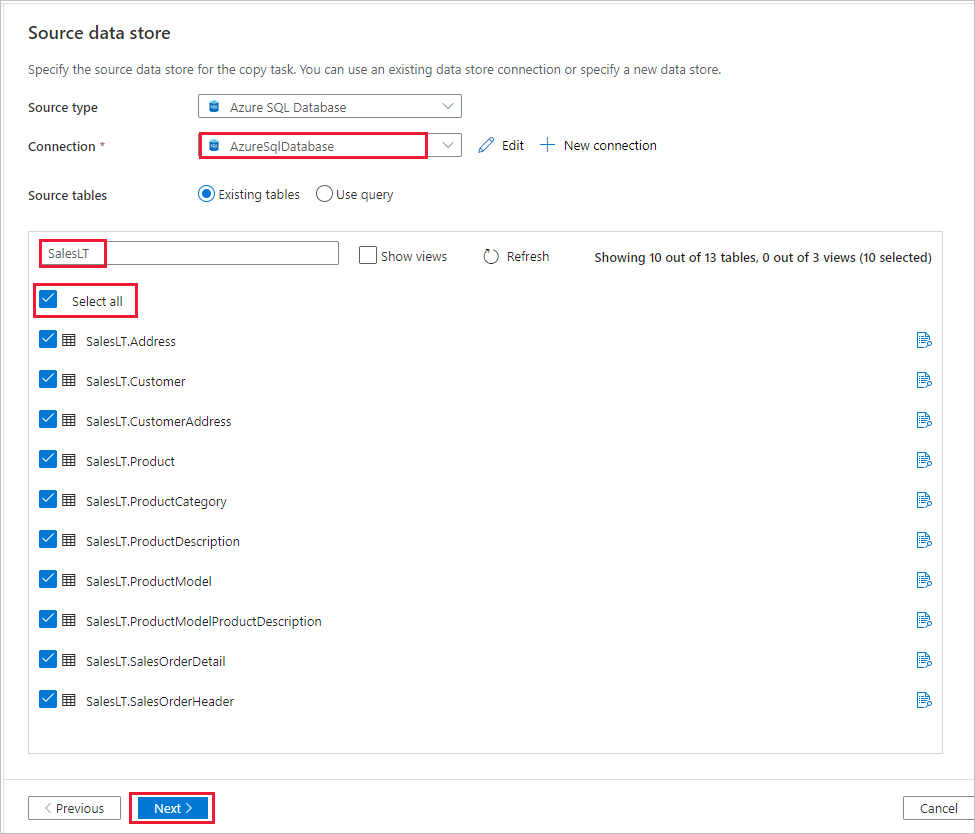
In the Source data store page, select the newly created connection as source in the Connection section.
In the Source tables section, enter SalesLT to filter the tables. Choose the (Select all) box to use all of the tables for the copy, and then select Next.
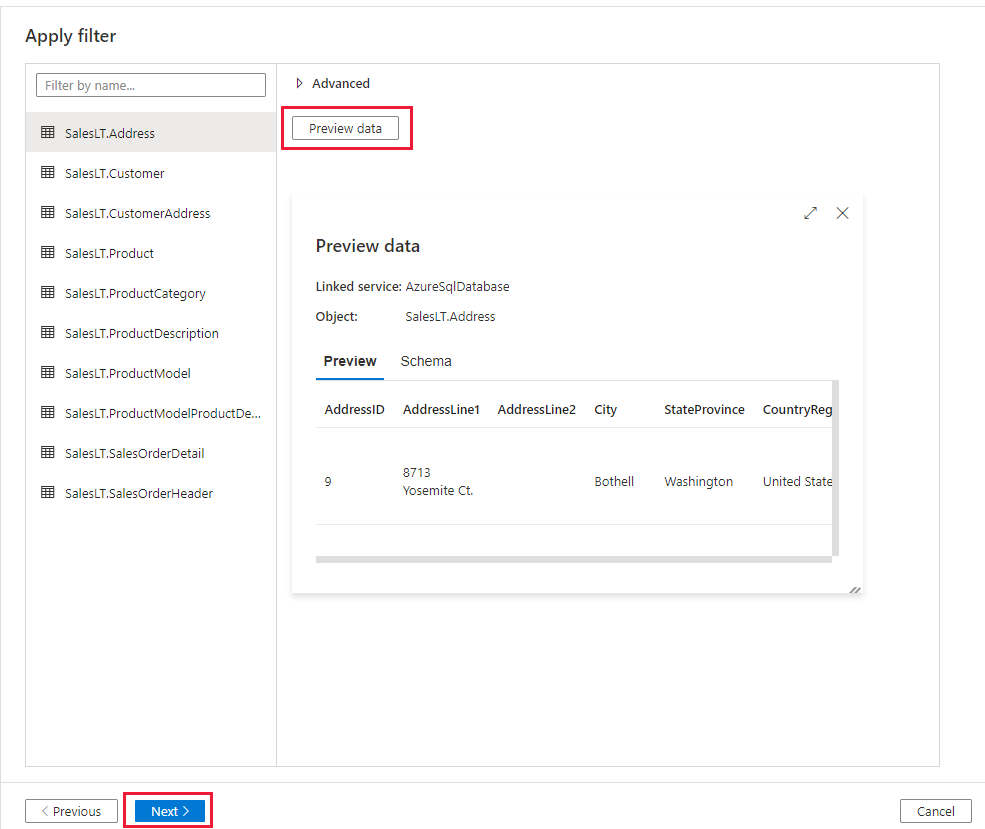
In the Apply filter page, specify your settings or select Next. You can preview data and view the schema of the input data by selecting Preview data button on this page.
In the Destination data store page, complete the following steps:
Tip
In this tutorial, you use SQL authentication as the authentication type for your destination data store, but you can choose other supported authentication methods:Service Principal and Managed Identity if needed. Refer to corresponding sections in this article for details. To store secrets for data stores securely, it's also recommended to use an Azure Key Vault. Refer to this article for detailed illustrations.
Select + New connection to add a connection.
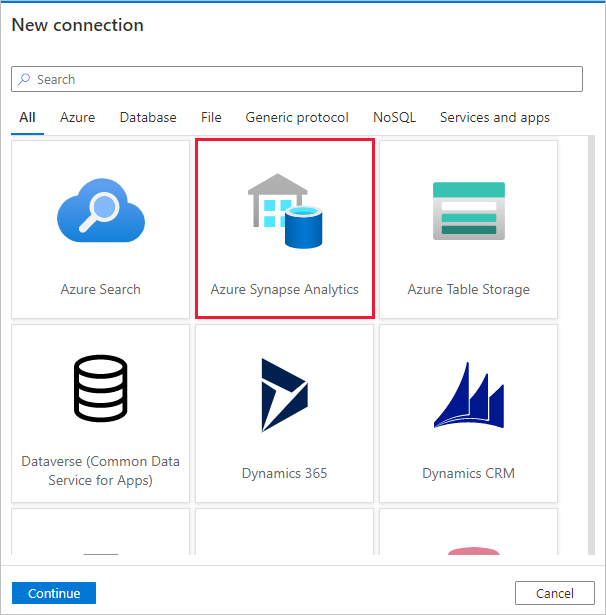
Select Azure Synapse Analytics from the gallery, and select Continue.
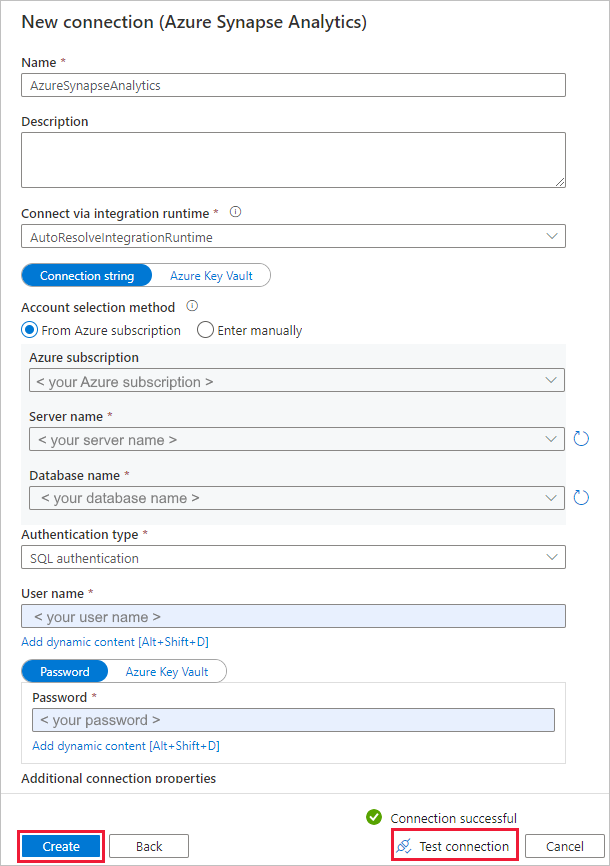
In the New connection (Azure Synapse Analytics) page, select your server name and DB name from the dropdown list, and specify the username and password. Select Test connection to validate the settings, then select Create.
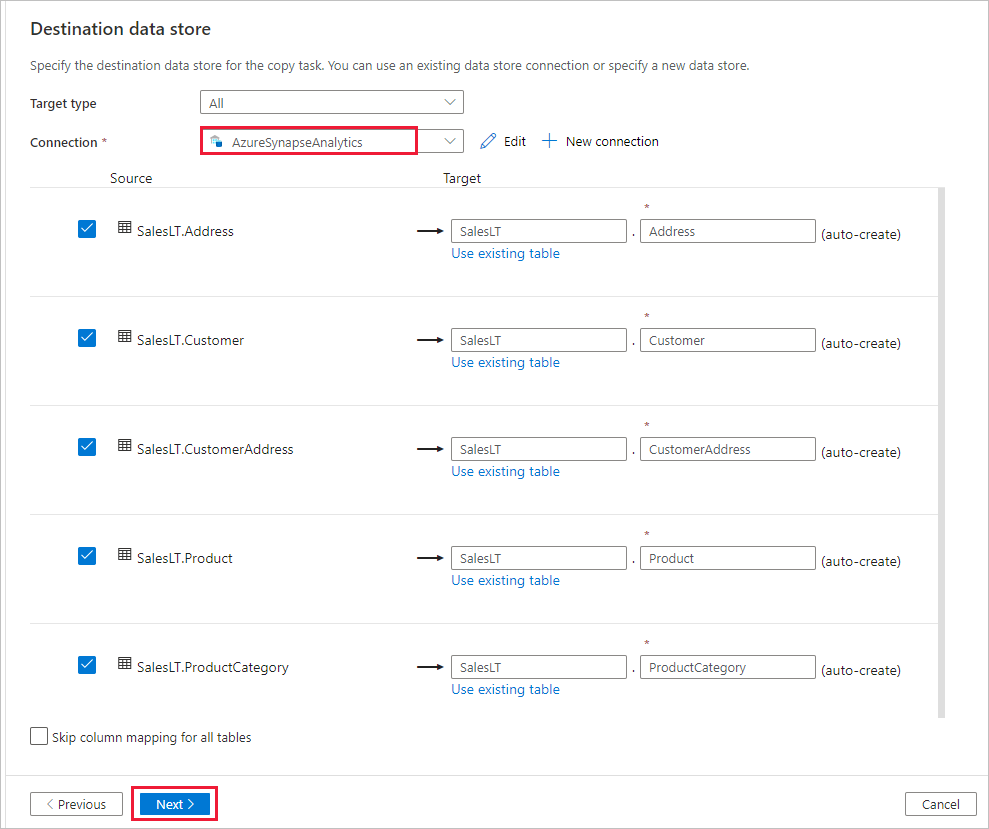
In the Destination data store page, select the newly created connection as sink in the Connection section.
In the Table mapping section, review the content and select Next. An intelligent table mapping displays. The source tables are mapped to the destination tables based on the table names. If a source table doesn't exist in the destination, the service creates a destination table with the same name by default. You can also map a source table to an existing destination table.
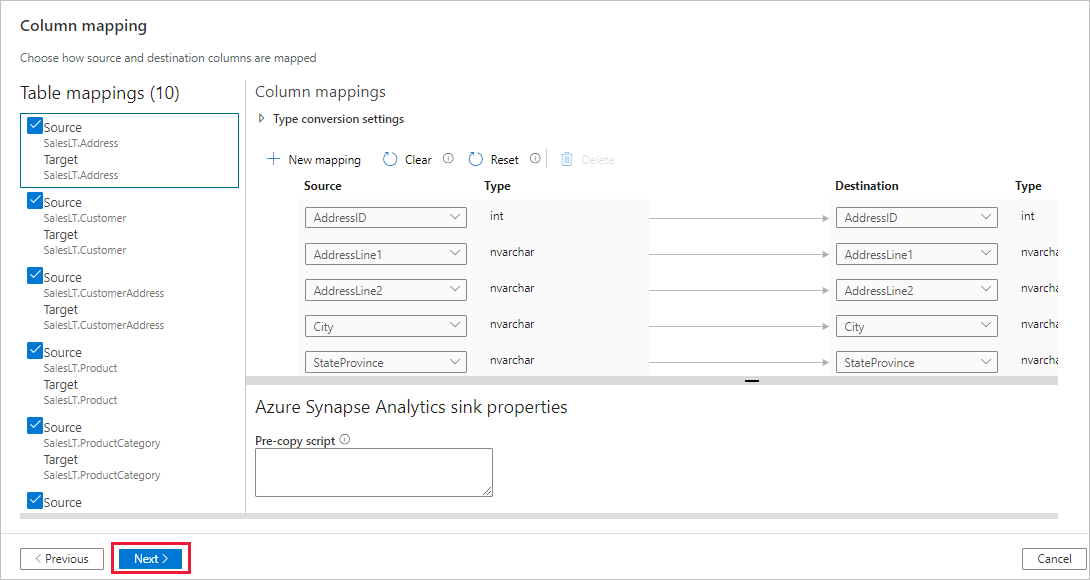
In the Column mapping page, review the content, and select Next. The intelligent table mapping is based on the column name. If you let the service automatically create the tables, data type conversion can occur when there are incompatibilities between the source and destination stores. If there's an unsupported data type conversion between the source and destination column, you see an error message next to the corresponding table.
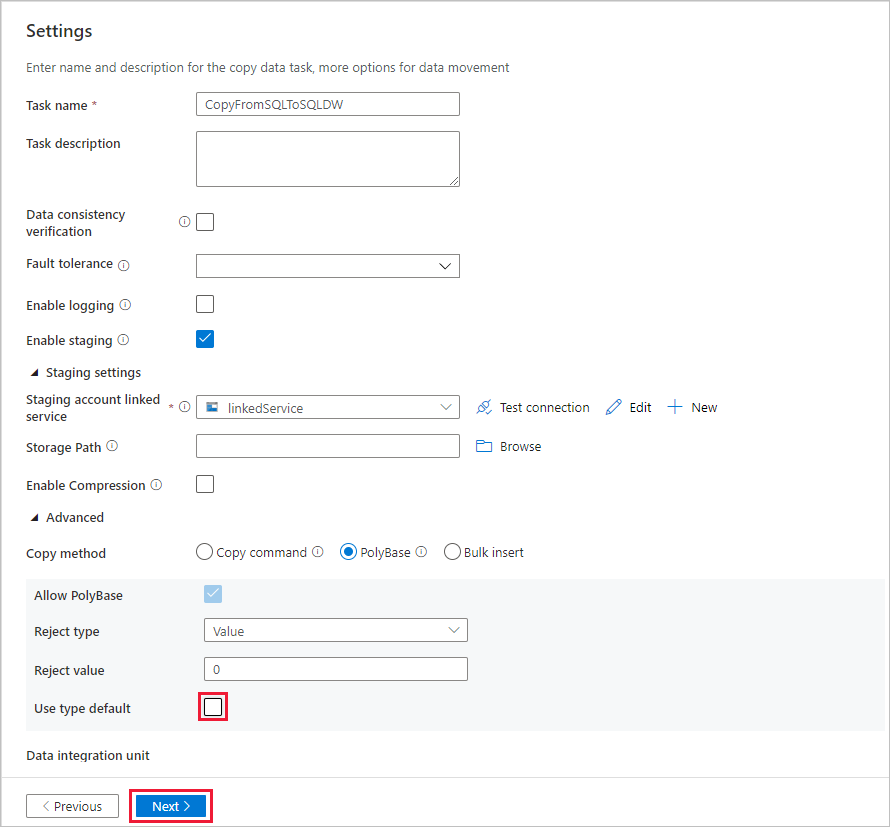
In the Settings page, complete the following steps:
Specify CopyFromSQLToSQLDW for the Task name field.
In Staging settings section, select + New to new a staging storage. The storage is used for staging the data before it loads into Azure Synapse Analytics by using PolyBase. After the copy is complete, the interim data in Azure Blob Storage is automatically cleaned up.
In the New linked service page, select your storage account, and select Create to deploy the linked service.
Deselect the Use type default option, and then select Next.
In the Summary page, review the settings, and select Next.
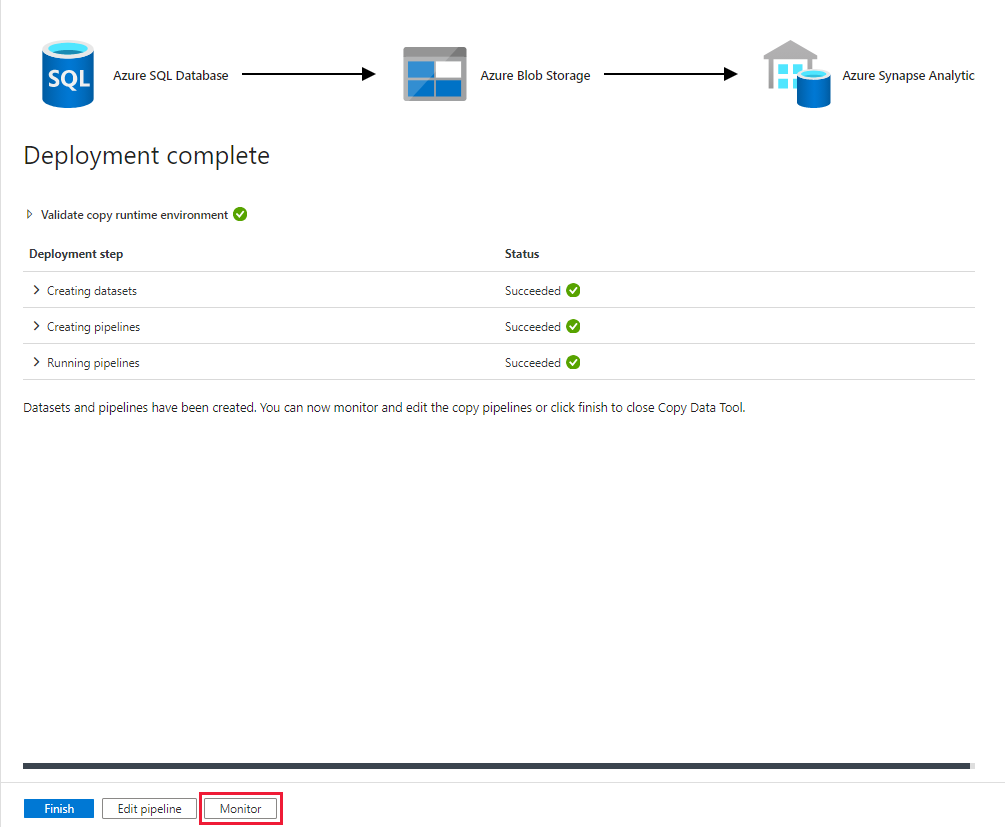
On the Deployment page, select Monitor to monitor the pipeline (task).
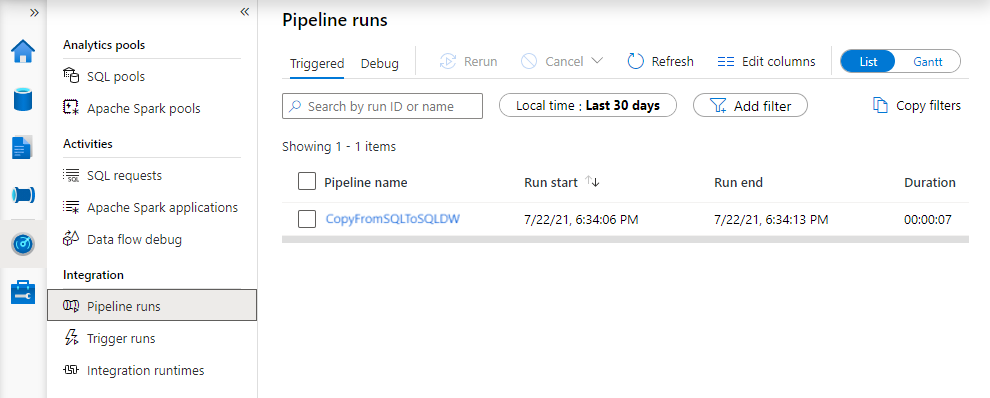
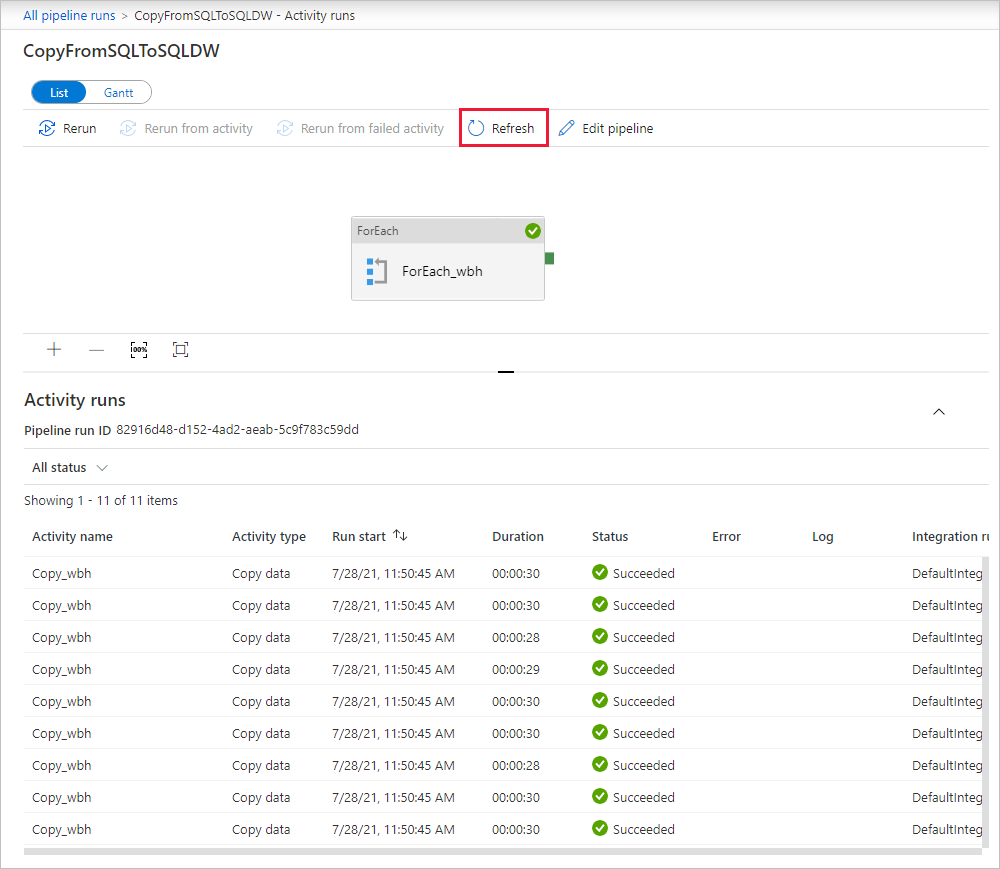
Notice that the Monitor tab on the left is automatically selected. When the pipeline run completes successfully, select the CopyFromSQLToSQLDW link under the Pipeline name column to view activity run details or to rerun the pipeline.
To switch back to the pipeline runs view, select the All pipeline runs link at the top. Select Refresh to refresh the list.
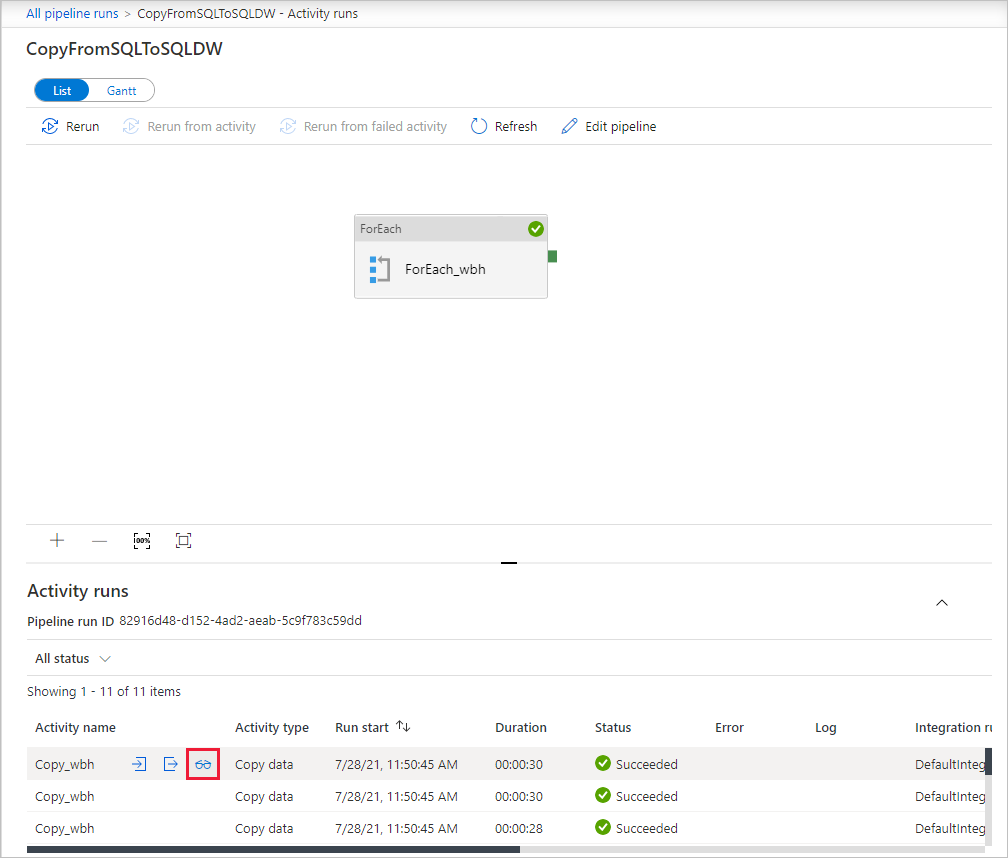
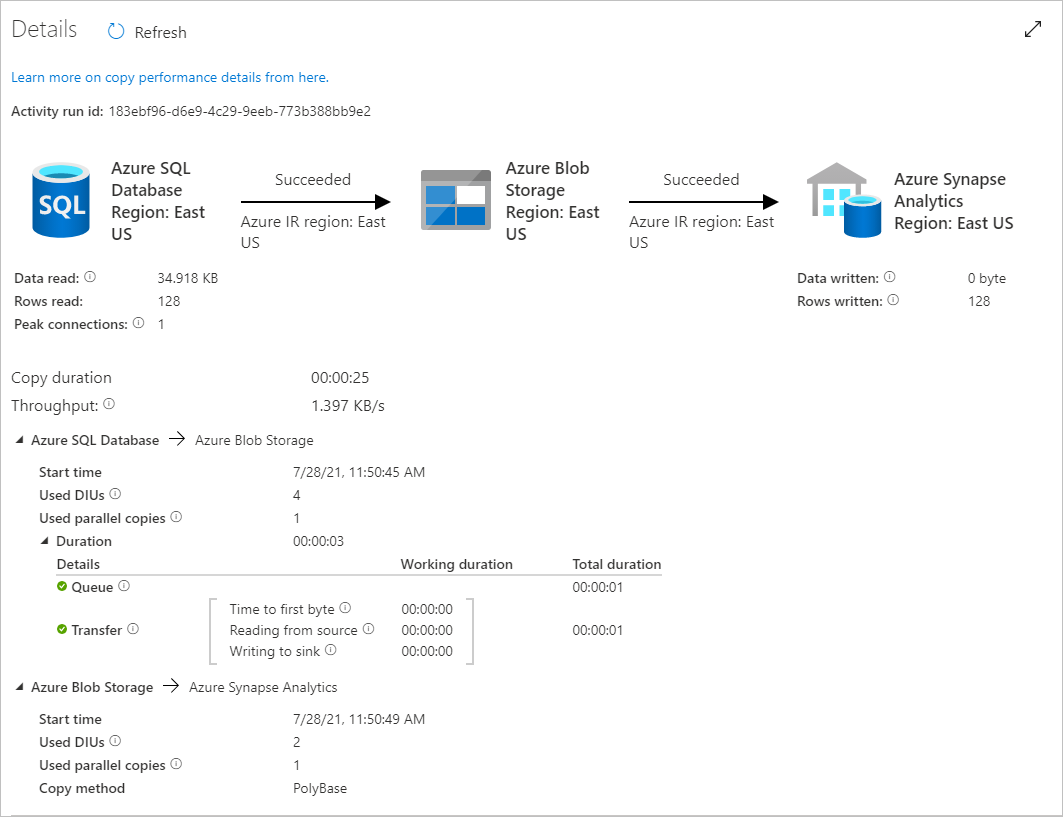
To monitor the execution details for each copy activity, select the Details link (eyeglasses icon) under Activity name in the activity runs view. You can monitor details like the volume of data copied from the source to the sink, data throughput, execution steps with corresponding duration, and used configurations.
Related content
Advance to the following article to learn about Azure Synapse Analytics support:

