Quickstart: Create an Azure Cosmos DB for MongoDB vCore cluster by using the Azure portal
APPLIES TO:
MongoDB vCore
In this quickstart, you create a new Azure Cosmos DB for MongoDB vCore cluster. This cluster contains all of your MongoDB resources: databases, collections, and documents. The cluster provides a unique endpoint for various tools and SDKs to connect to Azure Cosmos DB and perform everyday operations.
Prerequisites
- An Azure account with an active subscription. Create an account for free.
Create a cluster
Create a MongoDB cluster by using Azure Cosmos DB for MongoDB vCore.
Tip
For this guide, we recommend using the resource group name msdocs-cosmos-quickstart-rg.
Sign in to the Azure portal.
From the Azure portal menu or the Home page, select Create a resource.
On the New page, search for and select Azure Cosmos DB.
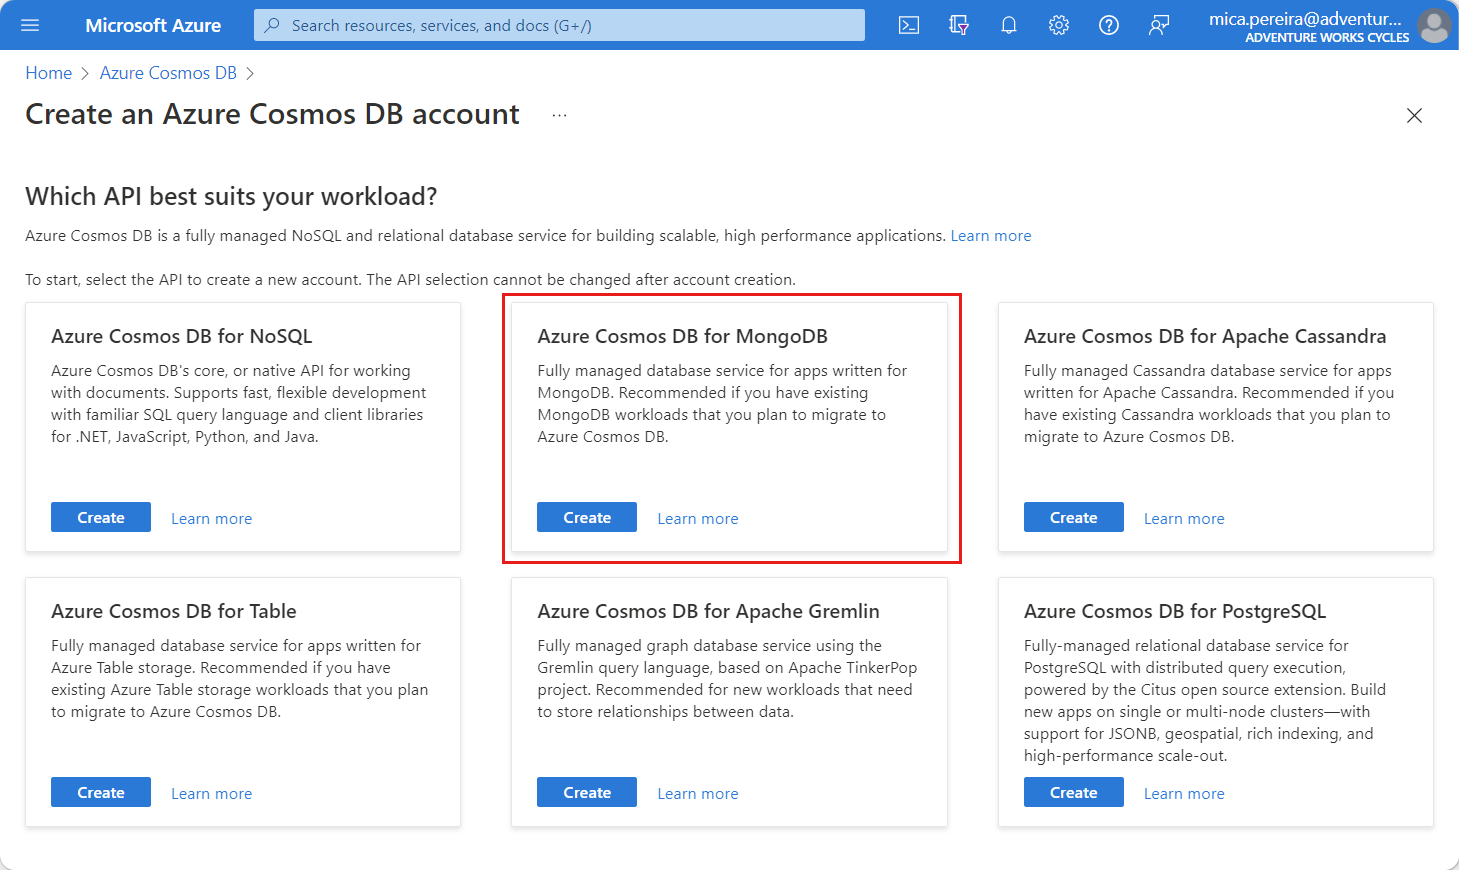
On the Which API best suits your workload? page, select the Create option within the Azure Cosmos DB for MongoDB section.
On the Which type of resource? page, select the Create option within the vCore cluster section. For more information, see API for MongoDB vCore overview.
On the Create Azure Cosmos DB for MongoDB cluster page, select the Configure option within the Cluster tier section.

On the Scale page, leave the options set to their default values:
Setting Value Shard count Single shard Cluster tier M30 Tier, 2 vCores, 8-GiB RAM Storage per shard 128 GiB Select the High availability option if this cluster will be used for production workloads. If not, in the high availability (HA) acknowledgment section, select I understand. Finally, select Save to persist your changes to the cluster tier.
Back on the cluster page, enter the following information:
Setting Value Description Subscription Subscription name Select the Azure subscription that you wish to use for this Azure Cosmos DB for MongoDB cluster. Resource group Resource group name Select a resource group, or select Create new, then enter a unique name for the new resource group. Cluster name A unique name Enter a name to identify your Azure Cosmos DB for MongoDB cluster. The name is used as part of a fully qualified domain name (FQDN) with a suffix of mongocluster.cosmos.azure.com, so the name must be globally unique. The name can only contain lowercase letters, numbers, and the hyphen (-) character. The name must also be between 3 and 40 characters in length. Location The region closest to your users Select a geographic location to host your Azure Cosmos DB for MongoDB cluster. Use the location that is closest to your users to give them the fastest access to the data. MongoDB version Version of MongoDB to run in your cluster This controls the mongo version your application uses. Admin username Provide a username to access the cluster This user is created on the cluster as a user administrator. Password Use a unique password to pair with the username Password must be at least eight characters and at most 128 characters. 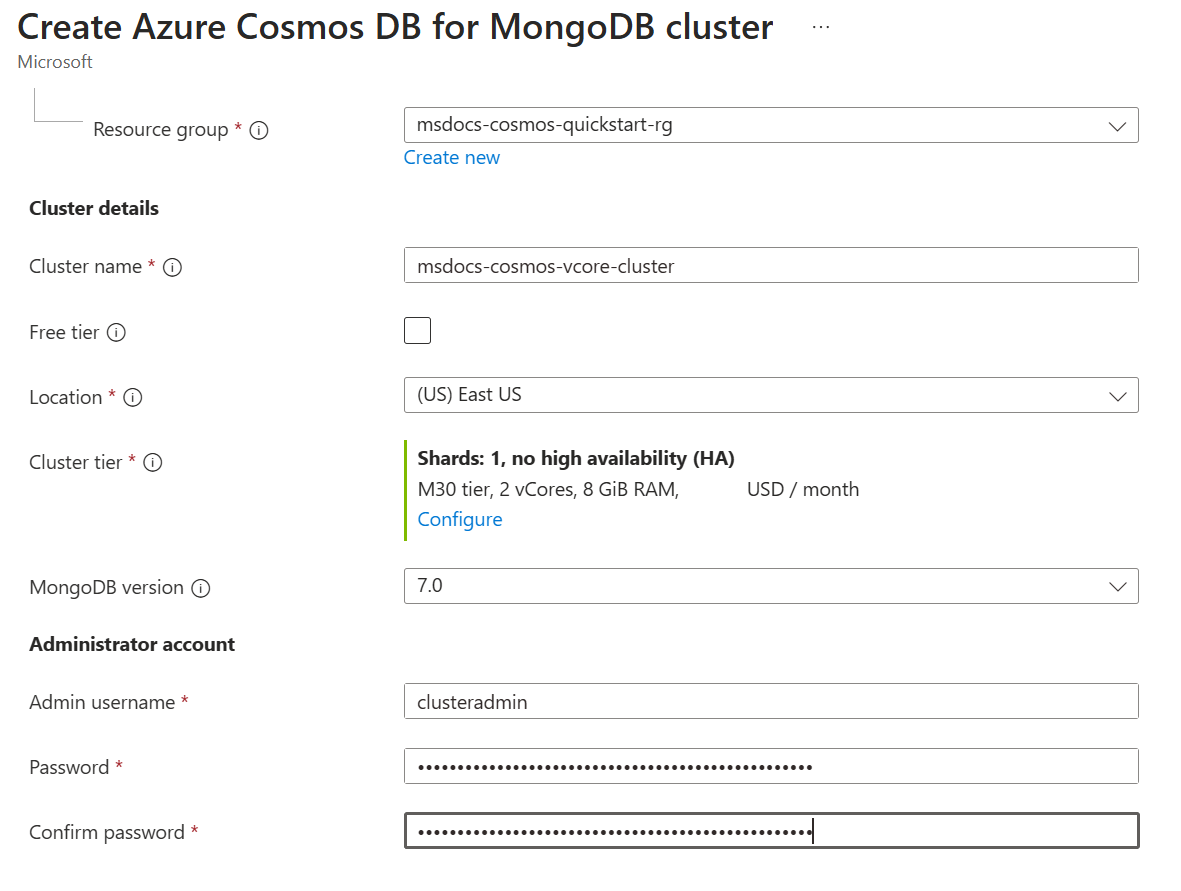
Select Next: Global distribution.
Select Next: Networking.
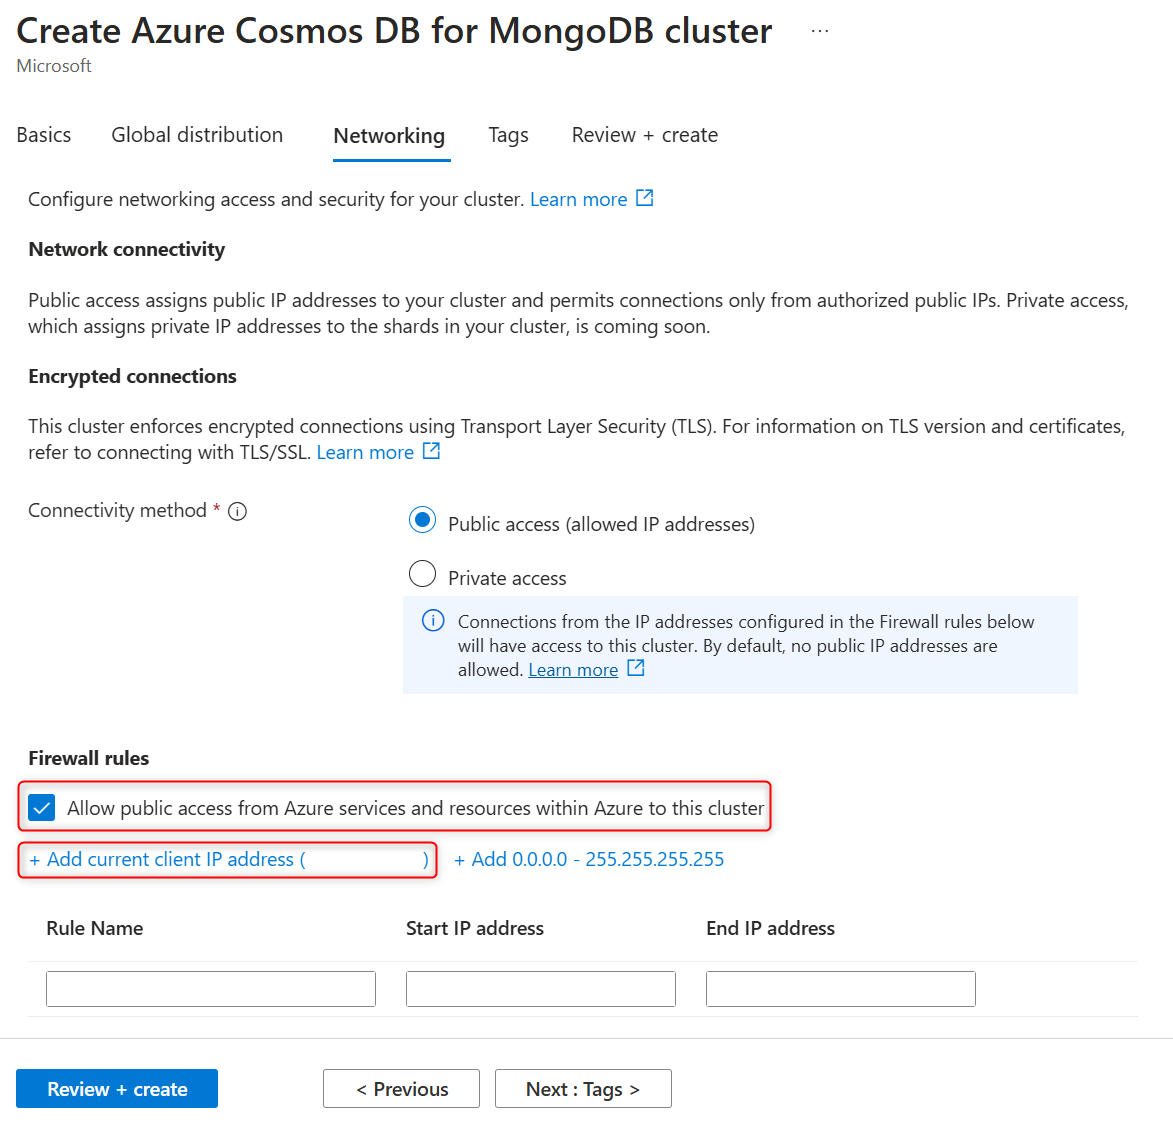
In the Firewall rules section on the Networking tab, select Allow public access from Azure services and resources within Azure to this cluster. Additionally, add a firewall rule to give your client device or applications access to the cluster.
Note
In many corporate environments, developer machine IP addresses are hidden due to a VPN or other corporate network settings. In these cases, it's recommended to start with allowing access to all IP addresses by adding the 0.0.0.0 - 255.255.255.255 firewall rule for connection testing initially before refining the allow-list.
Select Review + create.
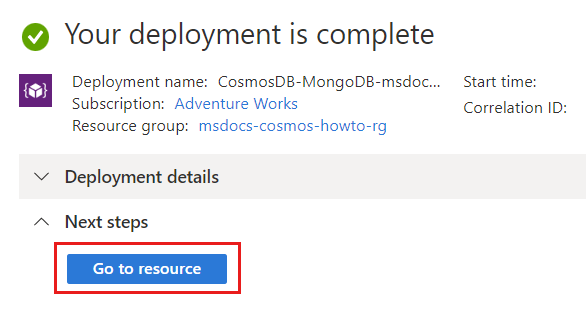
Review the settings you provide, and then select Create. It takes a few minutes to create the cluster. Wait for the portal page to display Your deployment is complete before moving on.
Select Go to resource to go to the Azure Cosmos DB for MongoDB cluster page.
Get cluster credentials
Get the connection string you need to connect to this cluster using your application code.
From the Azure Cosmos DB for MongoDB vCore cluster page, select the Connection strings navigation menu option.
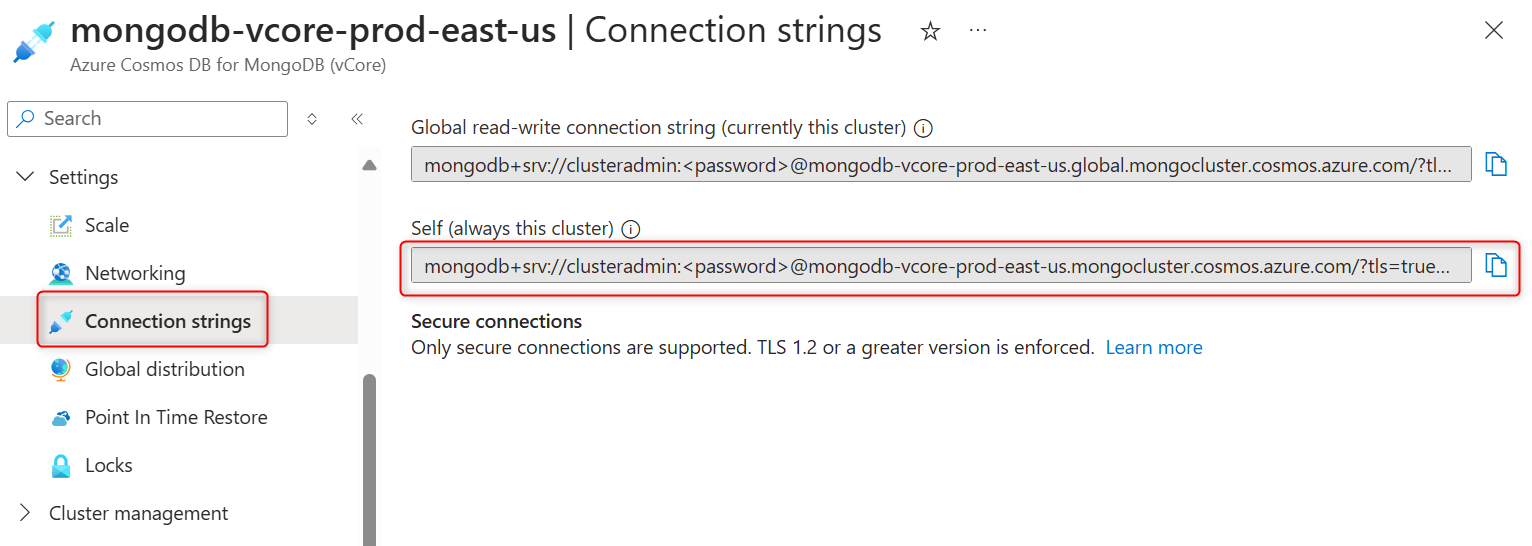
Copy or record the value from the Connection string field.
Important
The connection string in the portal does not include the password value. You must replace the
<password>placeholder with the credentials you entered when you created the cluster or enter password interactively.
Clean up resources
When you're done with Azure Cosmos DB for MongoDB vCore cluster, you can delete the Azure resources you created so you don't incur more charges.
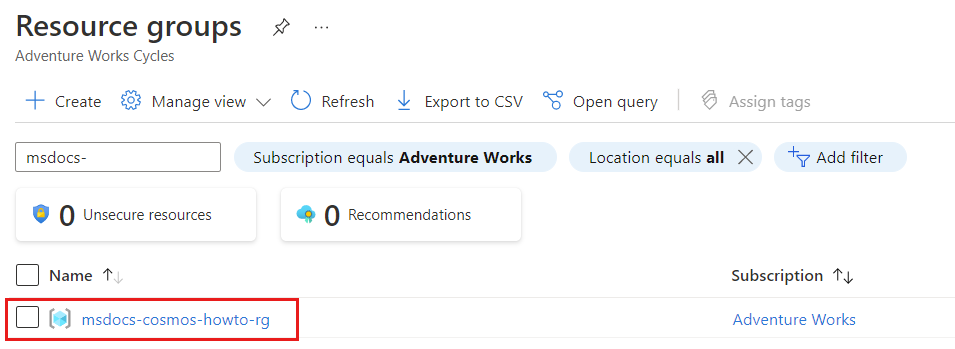
In the Azure portal search bar, search for and select Resource groups.
In the list, select the resource group you used for this quickstart.
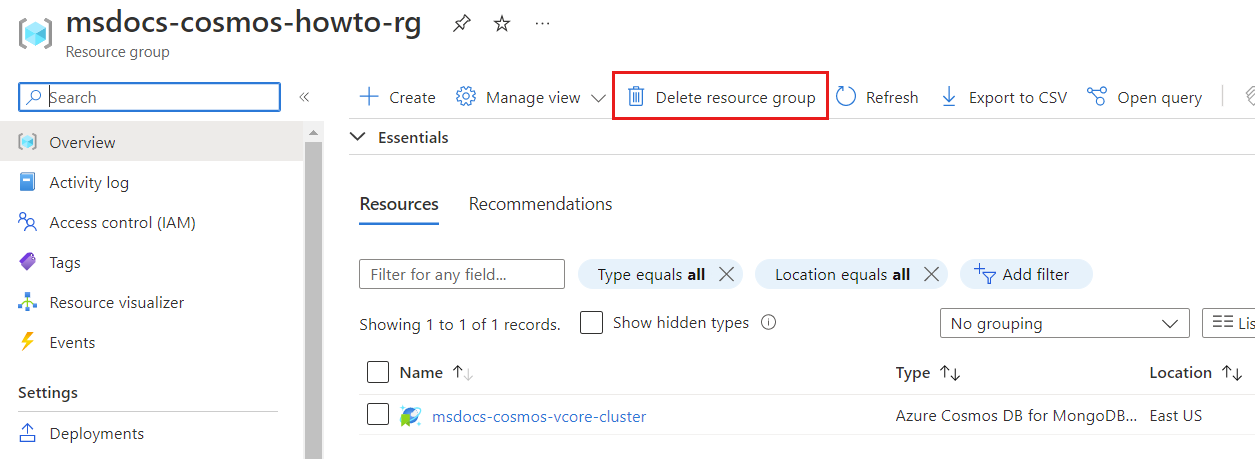
On the resource group page, select Delete resource group.
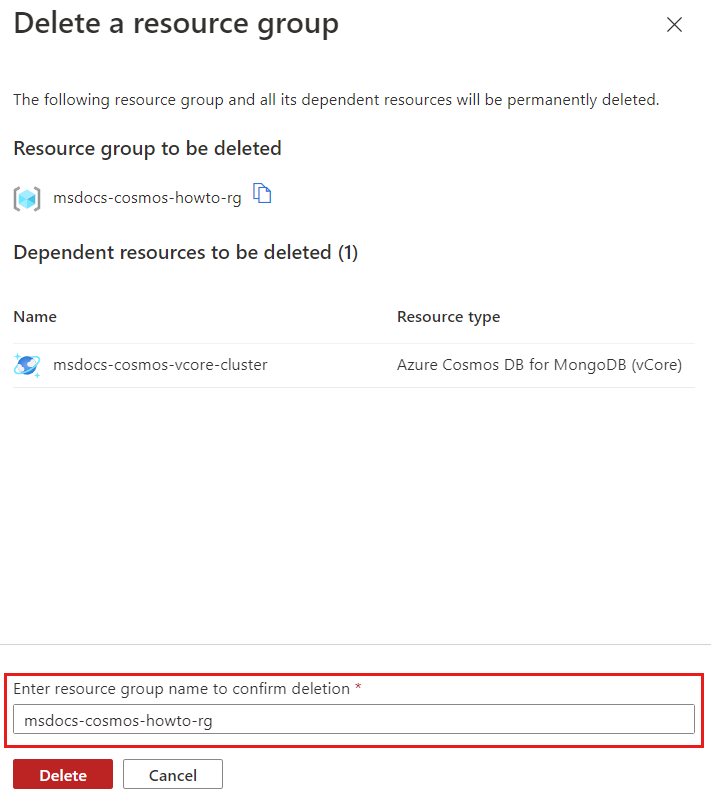
In the deletion confirmation dialog, enter the name of the resource group to confirm that you intend to delete it. Finally, select Delete to permanently delete the resource group.
Next step
In this guide, you learned how to create an Azure Cosmos DB for MongoDB vCore cluster. You can now migrate data to your cluster.
